> ## Documentation Index
> Fetch the complete documentation index at: https://docs.truu.ai/llms.txt
> Use this file to discover all available pages before exploring further.
# Add Users to TOTAL via Azure AD
1. Sign in to the [Entra Portal](https://entra.microsoft.com/#home)
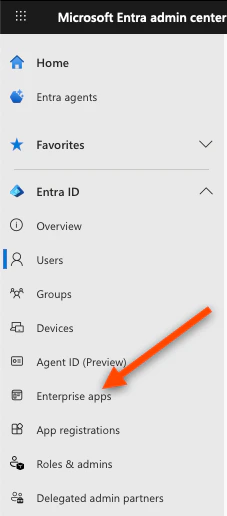
2. In the left sidebar, click **Enterprise applications**
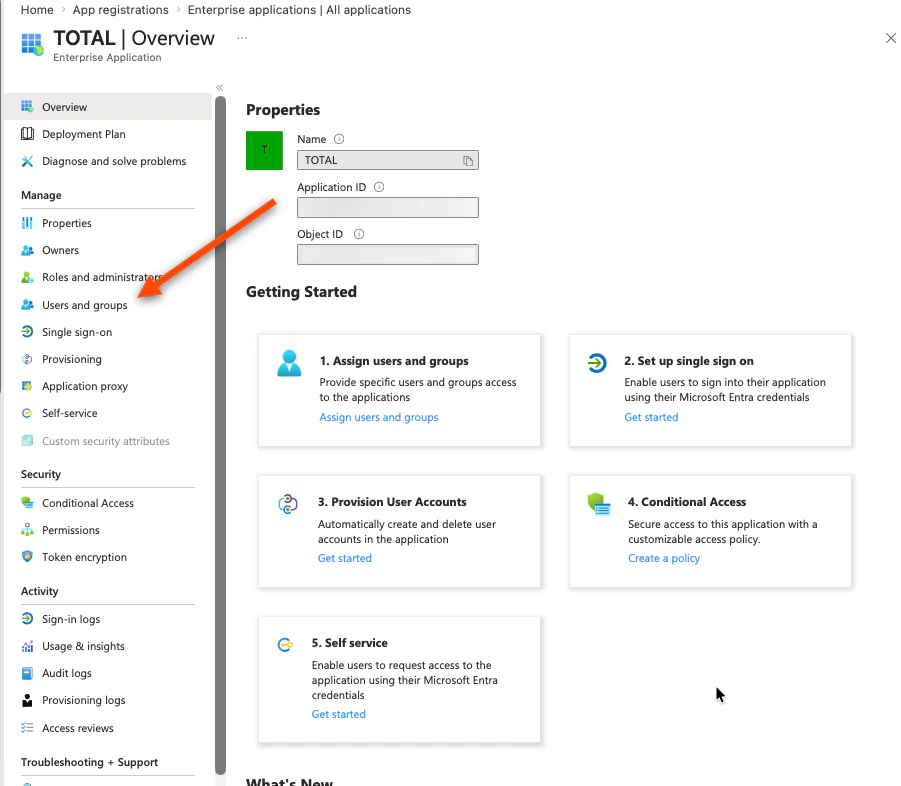
 3. Select your **TOTAL** application, then select **Users and Groups**
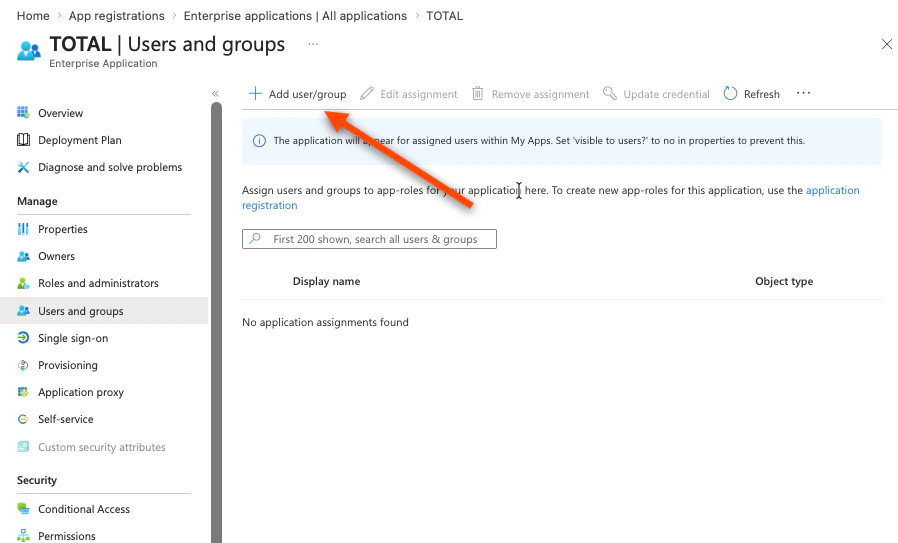
 4. Click **Add user/group**
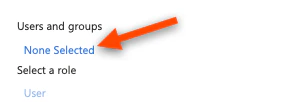
 5. Under "Users and Groups", click **None Selected**
 6. Search for and select any combination of:
* Individual users you want to provision
* Existing groups whose members should be provisioned
* A new group — if you need one, create it first:
* Microsoft Entra ID → Groups → New group
6. Search for and select any combination of:
* Individual users you want to provision
* Existing groups whose members should be provisioned
* A new group — if you need one, create it first:
* Microsoft Entra ID → Groups → New group
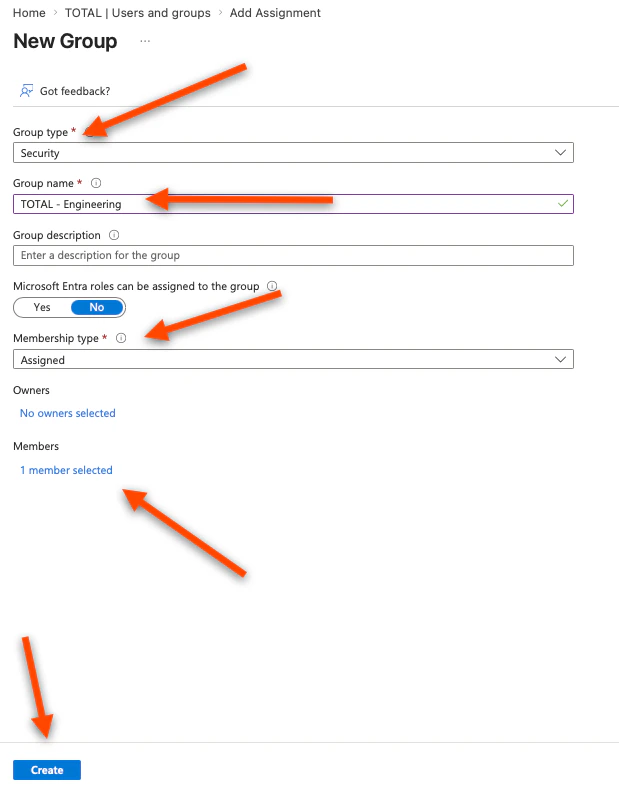
 * Set "Group type" to **Security**
* Enter a *Group name* (e.g. TOTAL - Engineering)
* Set "Membership type" to **Assigned** (or Dynamic for rule-based)
* Click **Add members**, select users, click **Select**, then **Create**
* Set "Group type" to **Security**
* Enter a *Group name* (e.g. TOTAL - Engineering)
* Set "Membership type" to **Assigned** (or Dynamic for rule-based)
* Click **Add members**, select users, click **Select**, then **Create**
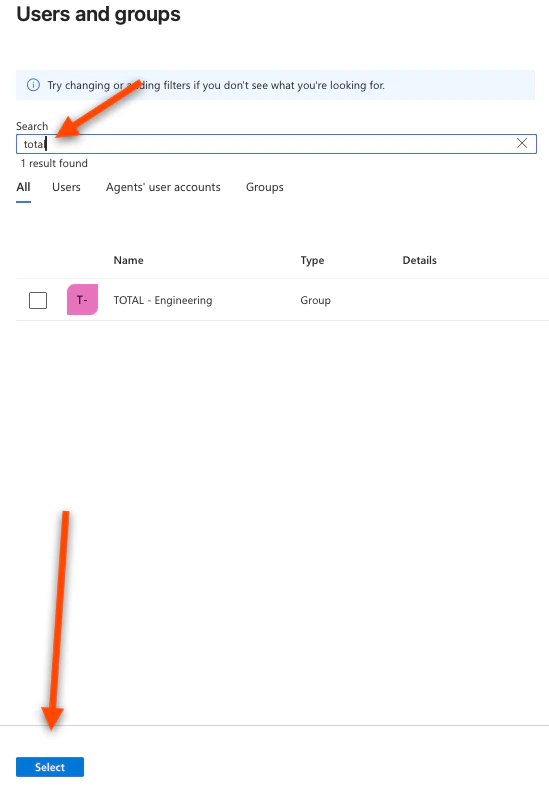
 * Return to Enterprise applications → TOTAL → Users and groups → Add user/group and search for the new group
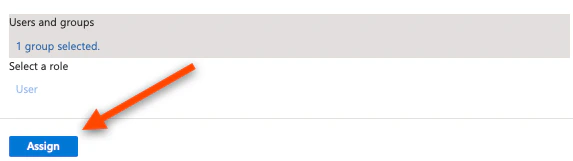
7. Click **Select**, then click **Assign**
* Return to Enterprise applications → TOTAL → Users and groups → Add user/group and search for the new group
7. Click **Select**, then click **Assign**
 8. Trigger provisioning — either:
* Wait for the next automatic cycle (\~40 minutes), or
* Provision on demand: Enterprise applications → TOTAL → Provisioning → Provision on demand, search for the user or group, and run it
### Key points:
* Adding a user to an already-assigned group automatically provisions them — no need to re-assign the group
* Removing a user from all assigned groups/users will deprovision them on the next sync
* Admins are not part of the monitored group by default. If you want admins to be monitored, you must also add them to the monitored group.
8. Trigger provisioning — either:
* Wait for the next automatic cycle (\~40 minutes), or
* Provision on demand: Enterprise applications → TOTAL → Provisioning → Provision on demand, search for the user or group, and run it
### Key points:
* Adding a user to an already-assigned group automatically provisions them — no need to re-assign the group
* Removing a user from all assigned groups/users will deprovision them on the next sync
* Admins are not part of the monitored group by default. If you want admins to be monitored, you must also add them to the monitored group.