> ## Documentation Index
> Fetch the complete documentation index at: https://docs.truu.ai/llms.txt
> Use this file to discover all available pages before exploring further.
# ADE/DEP JAMF Setup
> This article provides step by step instructions to configure your environment to deploy the Mac Authenticator using Apple’s Automated Device Enrollment (“ADE”) process. TruU fully supports ADE using Apple Business Manager and Jamf as the MDM.
# **Mac Authenticator Automated Device Enrollment Guide**
Overview
* Apple Business Manager setup
* Create MDM Server
* Apple Configurator setup
* Jamf Pro setup
* Create MDM Server
* Create Configuration Profiles
* Create PreStage Enrollment
## Apple Business Manager setup
1. Sign In Apple Business Manager [Apple Business Manager](https://business.apple.com/)
2. Go to Preferences to add new MDM Server
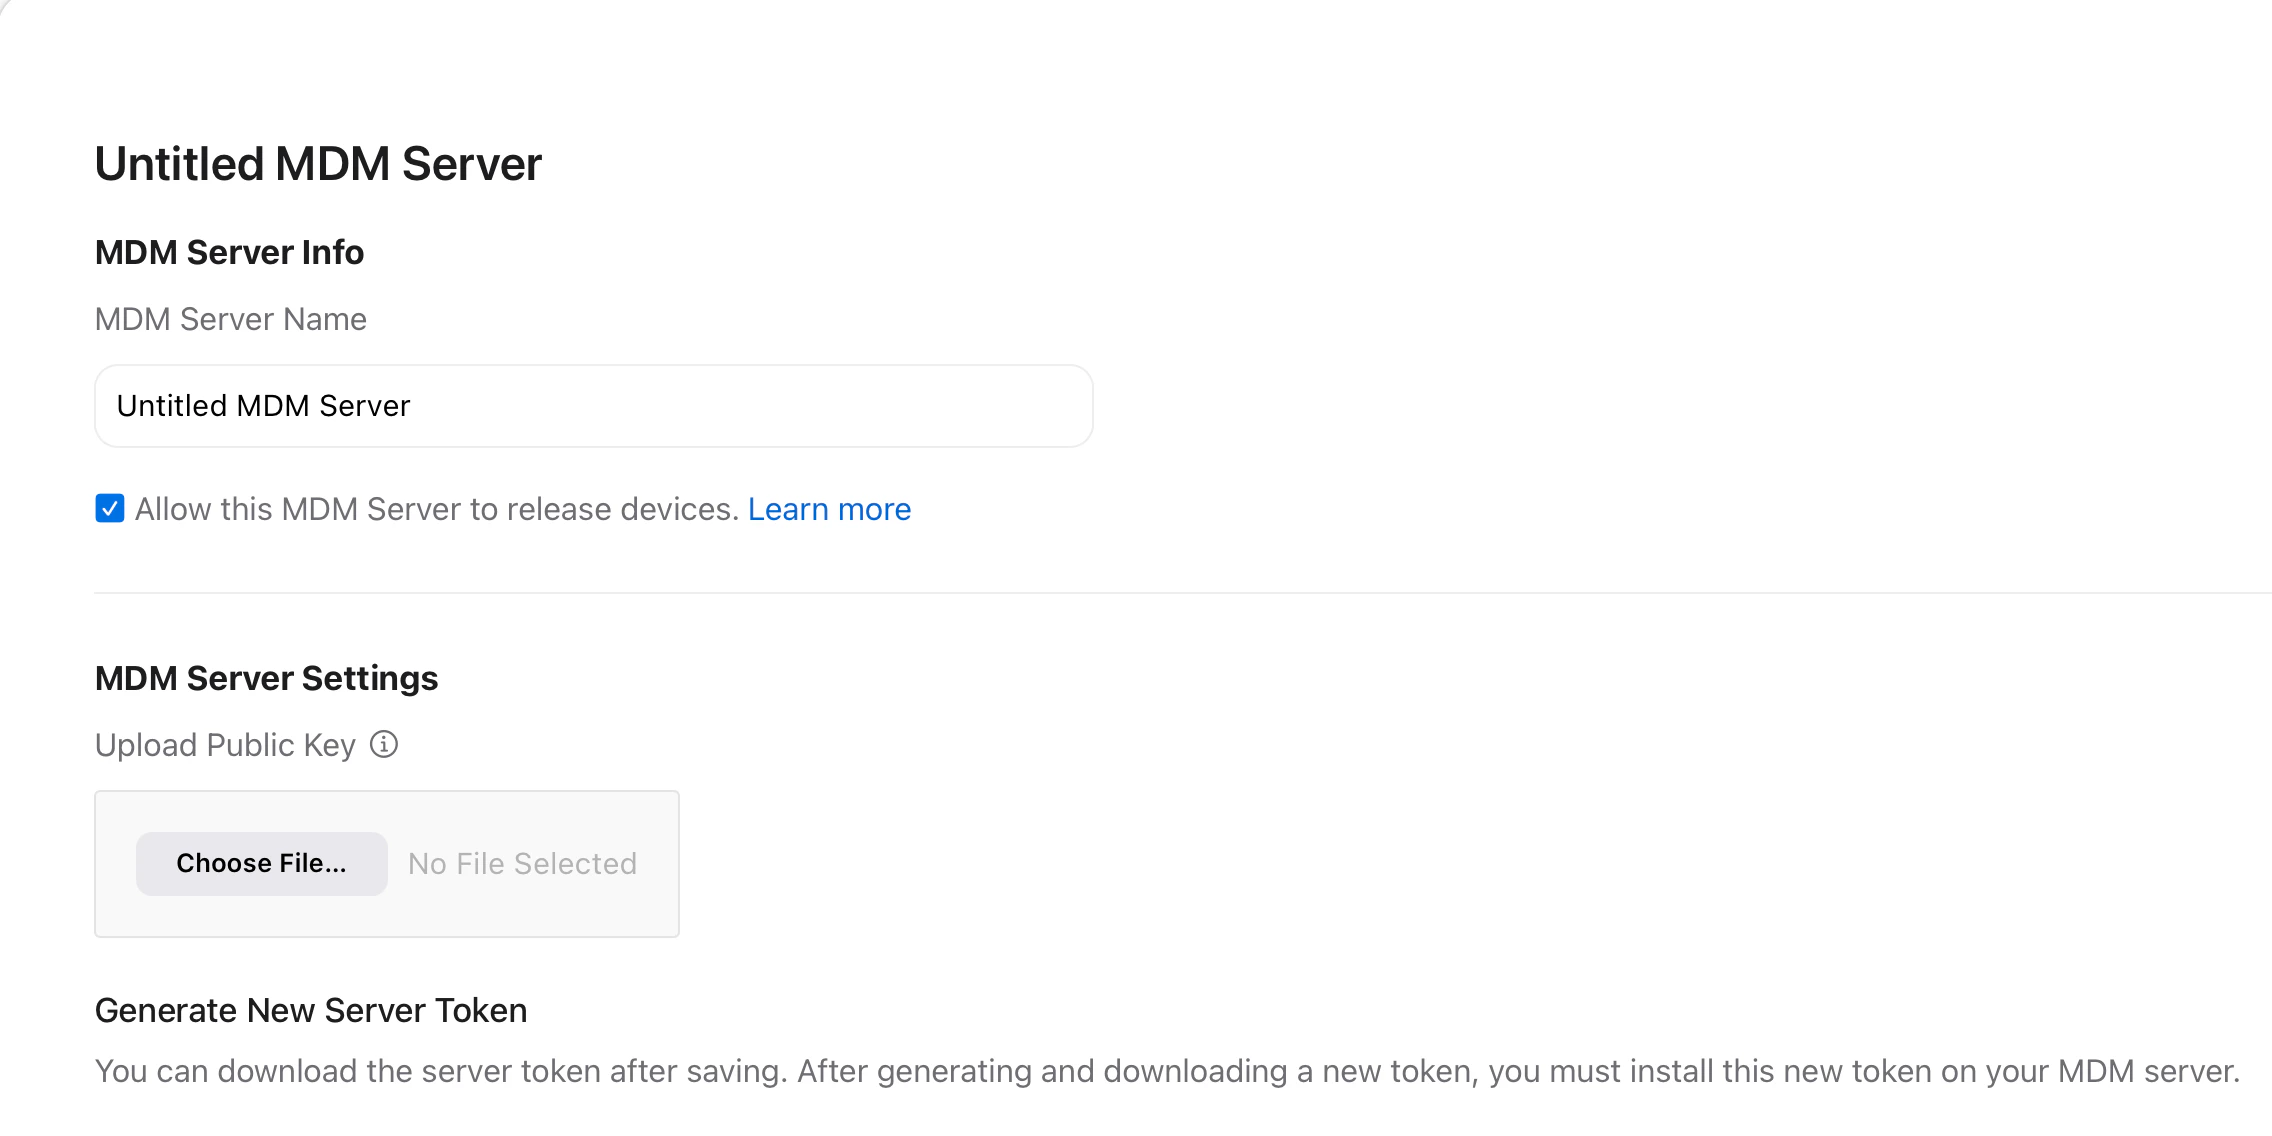
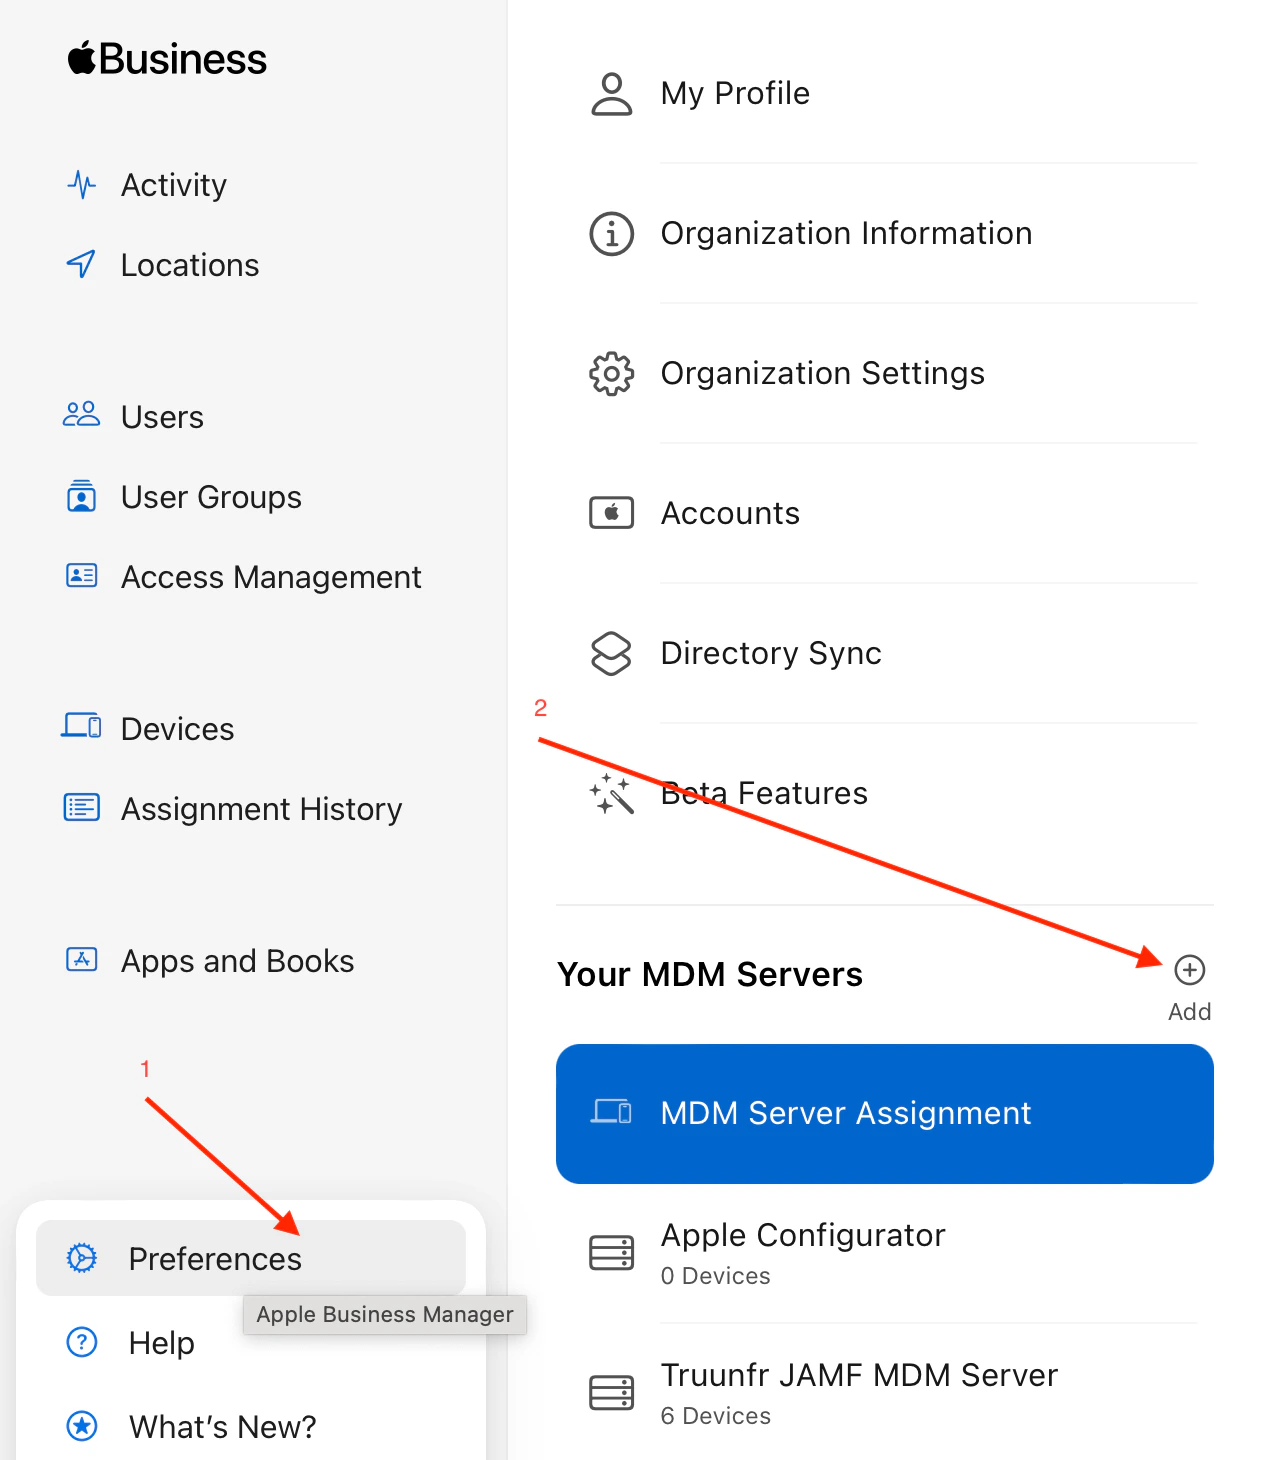 3. Setup MDM Server
* Provide a name for the MDM Server
* Check the box to “Allow this MDM Server to release devices.”
3. Setup MDM Server
* Provide a name for the MDM Server
* Check the box to “Allow this MDM Server to release devices.”
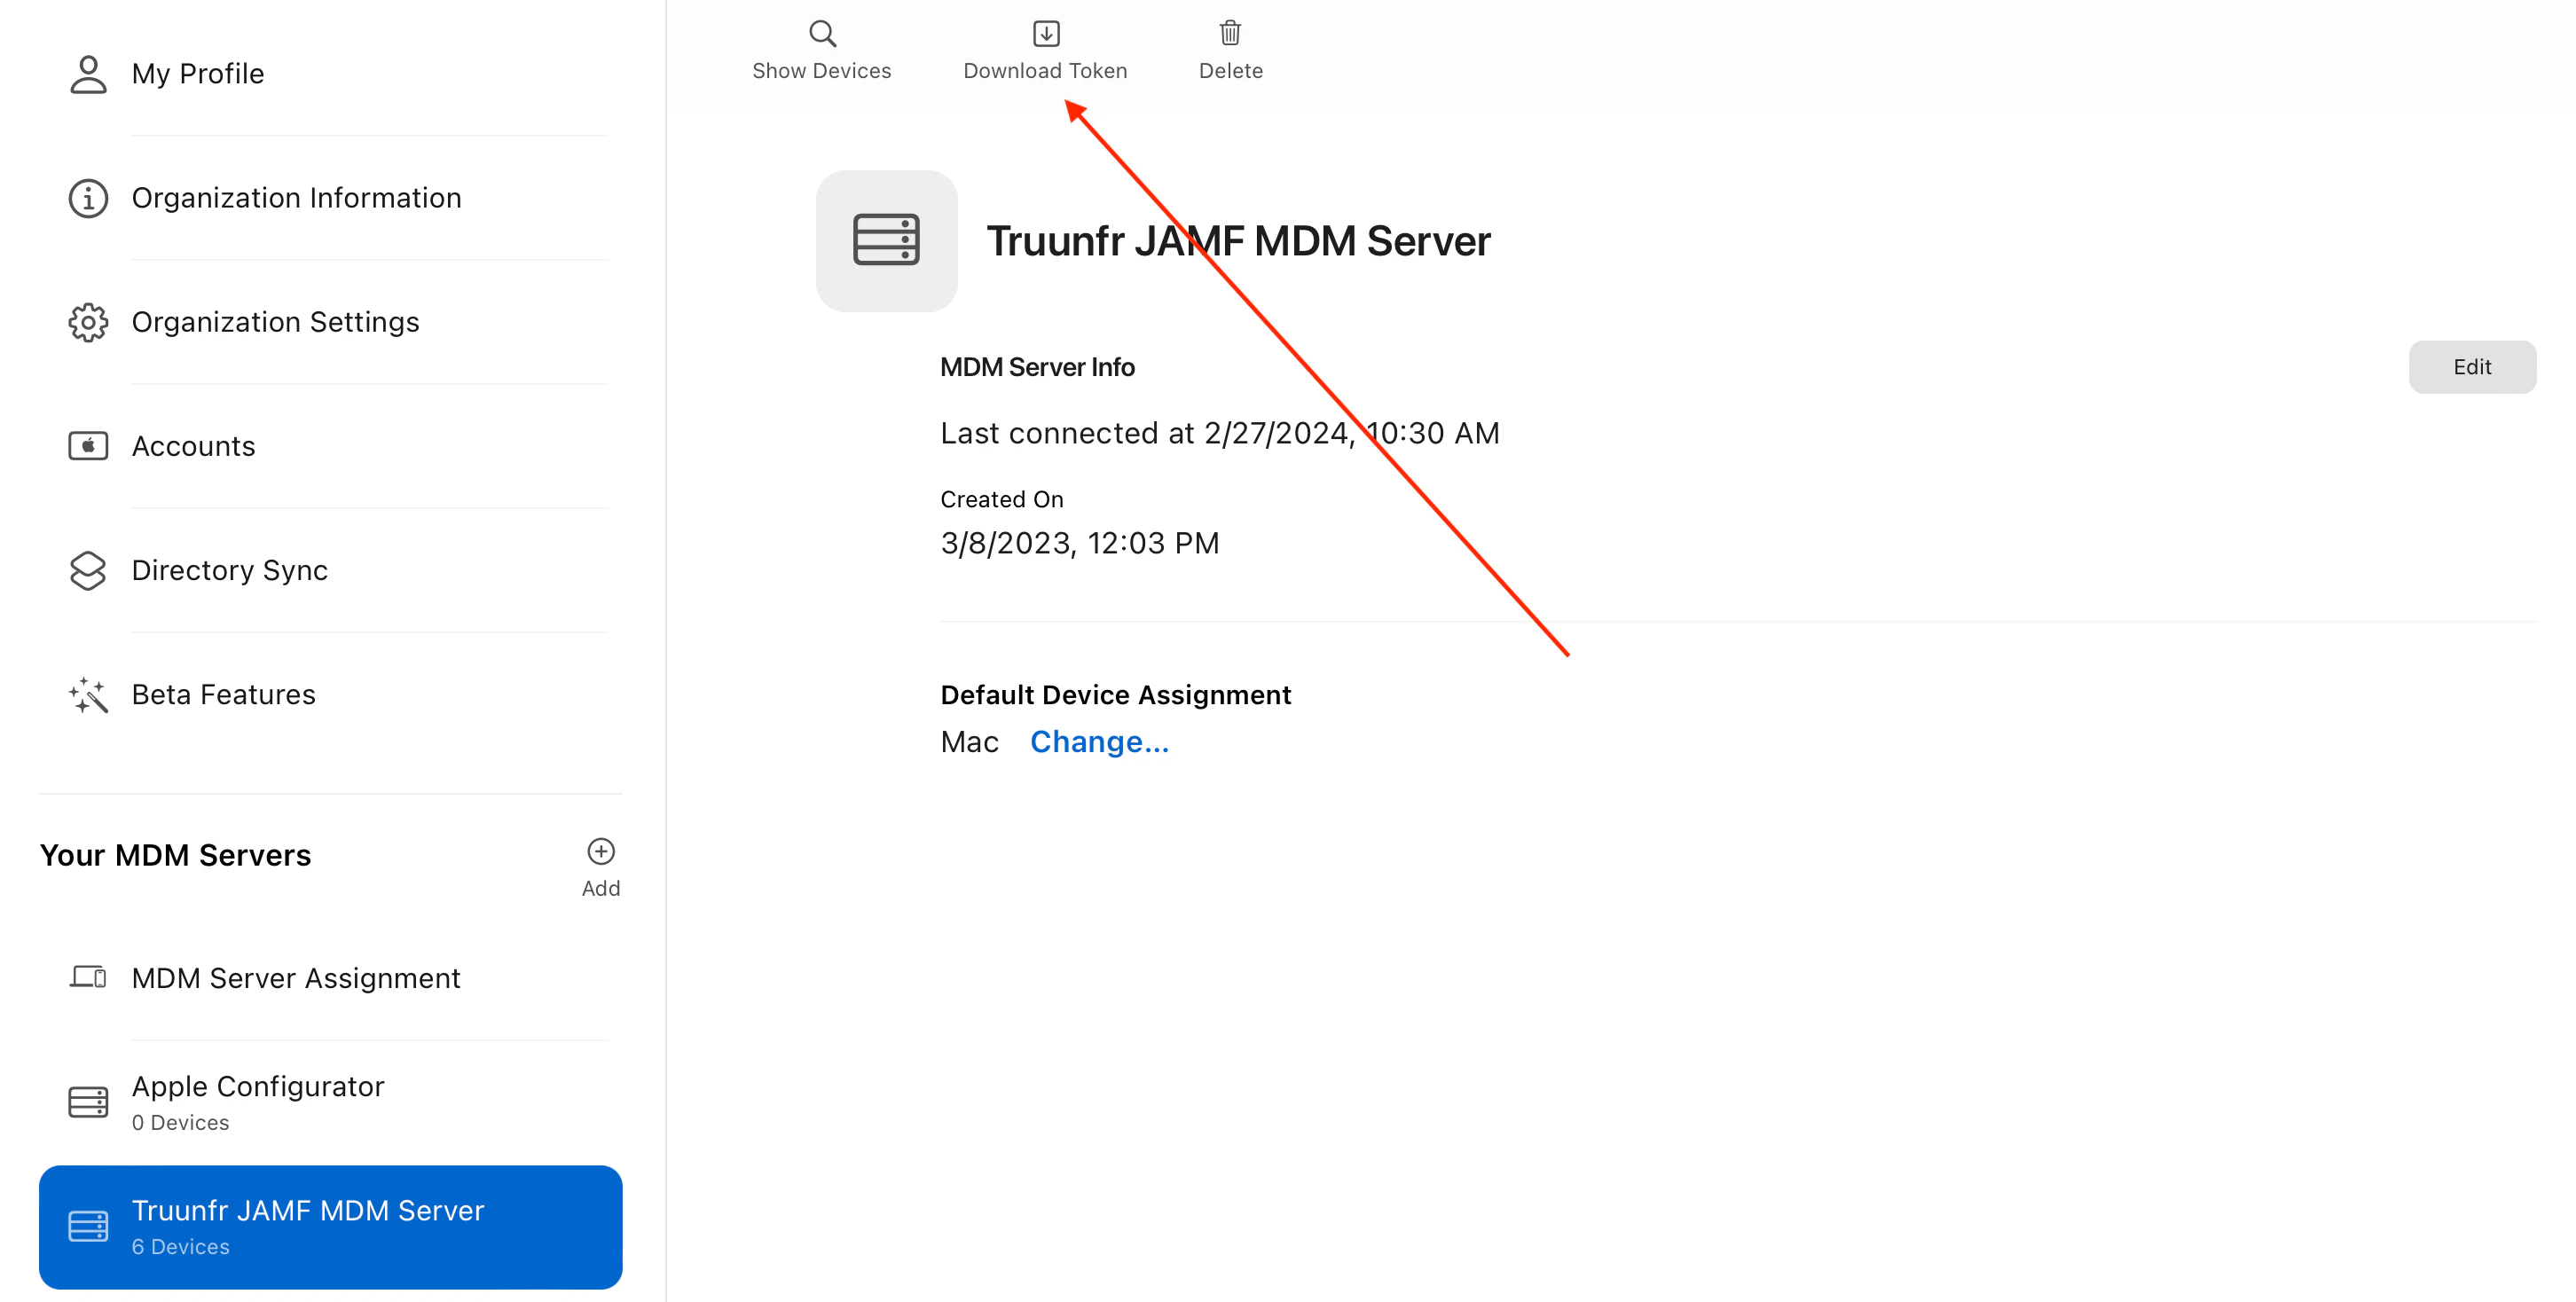
 4. Download token for newly created MDM Server (This token needs to be set on the MDM, e.g., Jamf)
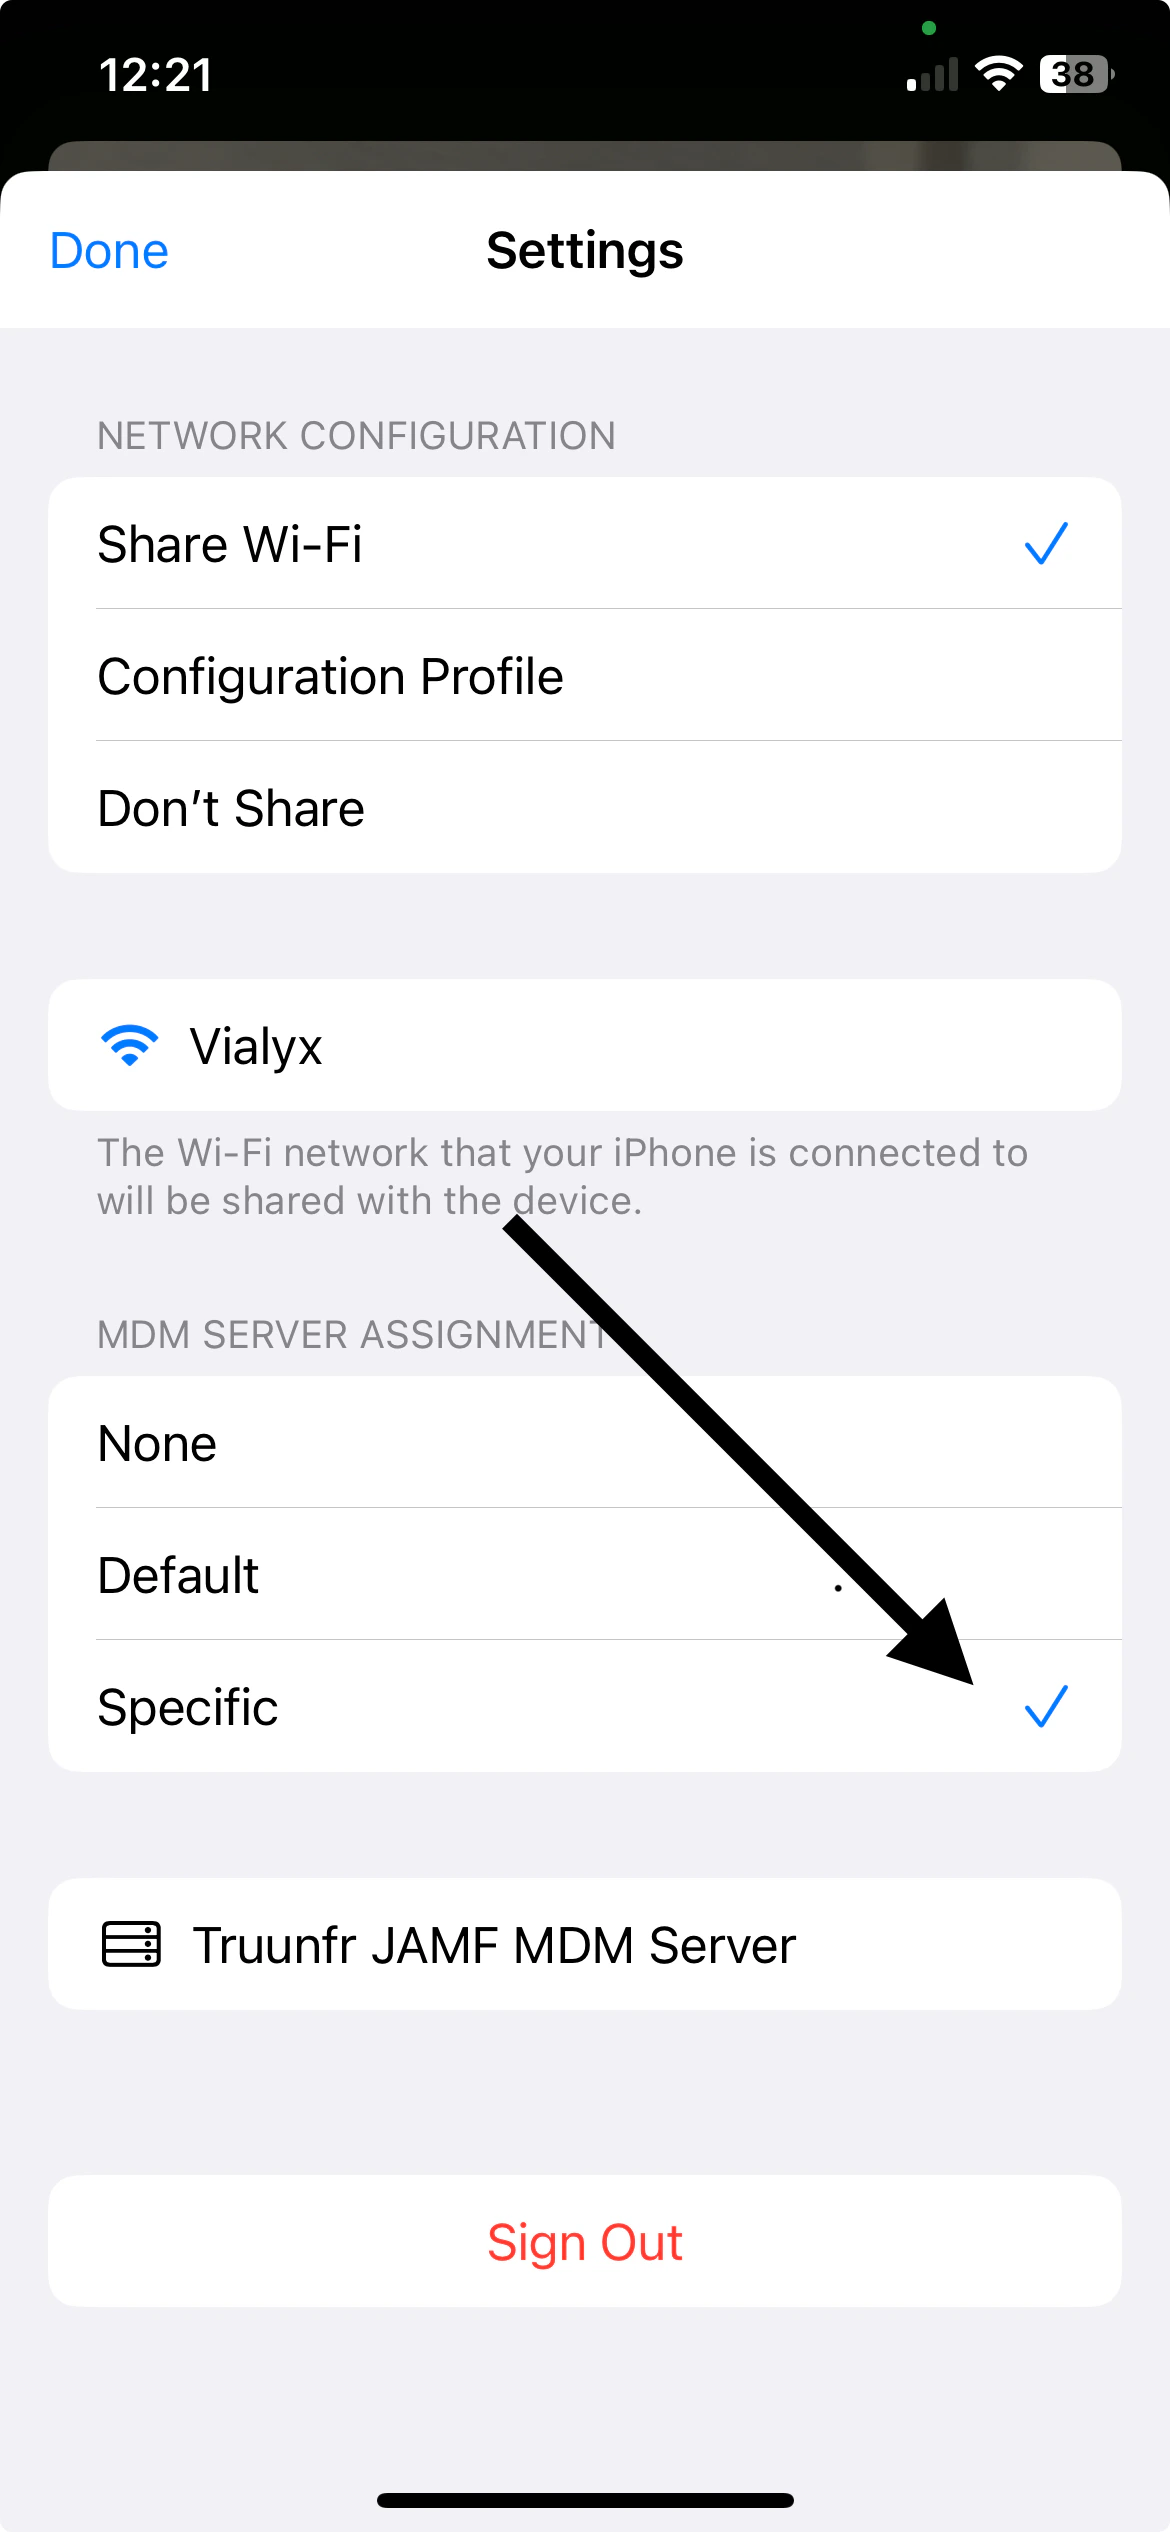
 5. Go to App Store and download Apple Configurator iOS app (this is required for the Admin to configure provisioning through the MDM).
* Sign in using Apple Business Manager account
* Pick newly created MDM Server as default assigned for provisioned machines
5. Go to App Store and download Apple Configurator iOS app (this is required for the Admin to configure provisioning through the MDM).
* Sign in using Apple Business Manager account
* Pick newly created MDM Server as default assigned for provisioned machines
 ## **JAMF Pro Setup**
**Step 1:** Sign into your Jamf Pro account [https://DOMAIN.](https://truunfr.jamfcloud.com/)[jamfcloud.com](//jamfcloud.com)
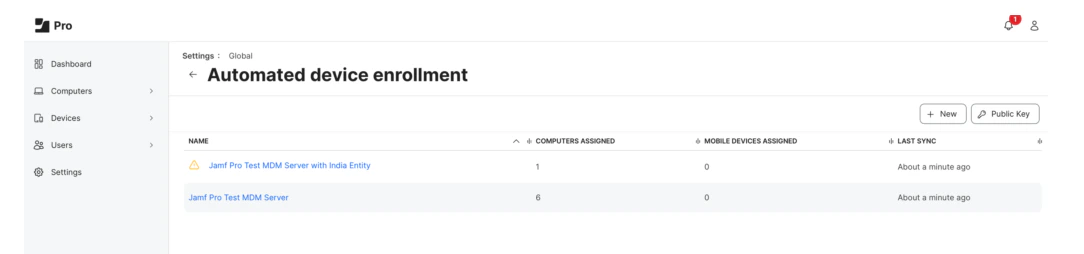
**Step 2:** Go to "Settings", then navigate to the "Automated device enrollment" to create a new MDM server integration
## **JAMF Pro Setup**
**Step 1:** Sign into your Jamf Pro account [https://DOMAIN.](https://truunfr.jamfcloud.com/)[jamfcloud.com](//jamfcloud.com)
**Step 2:** Go to "Settings", then navigate to the "Automated device enrollment" to create a new MDM server integration
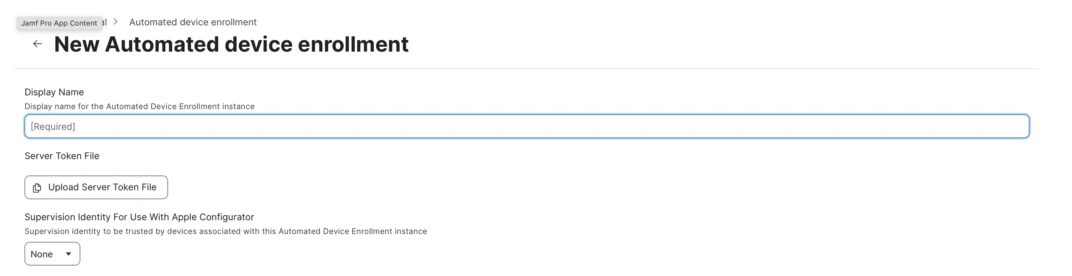
 **Step 3:** Setup new instance of MDM server (Choose server token file obtained from Apple Business Manager as described in step 4 in the Apple Business Manager section)
 **Step 4:** Setup Configuration Profiles
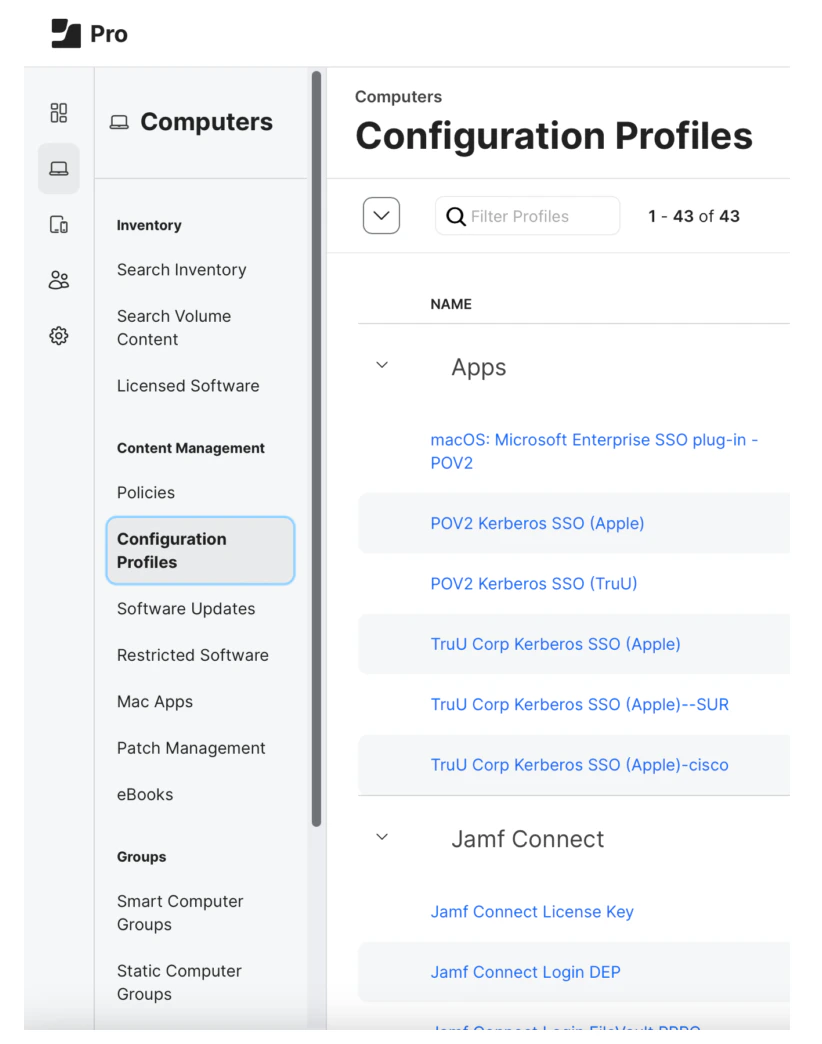
**4-a:** Go to "Computers", then navigate to "Configuration Profiles"
**Step 4:** Setup Configuration Profiles
**4-a:** Go to "Computers", then navigate to "Configuration Profiles"
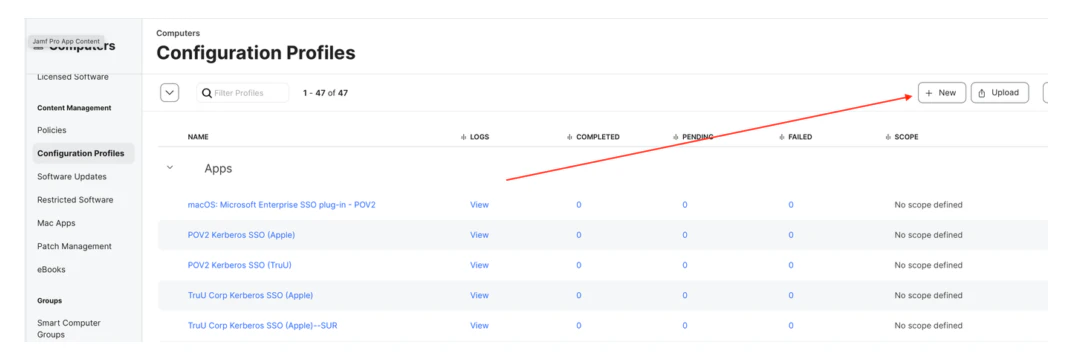
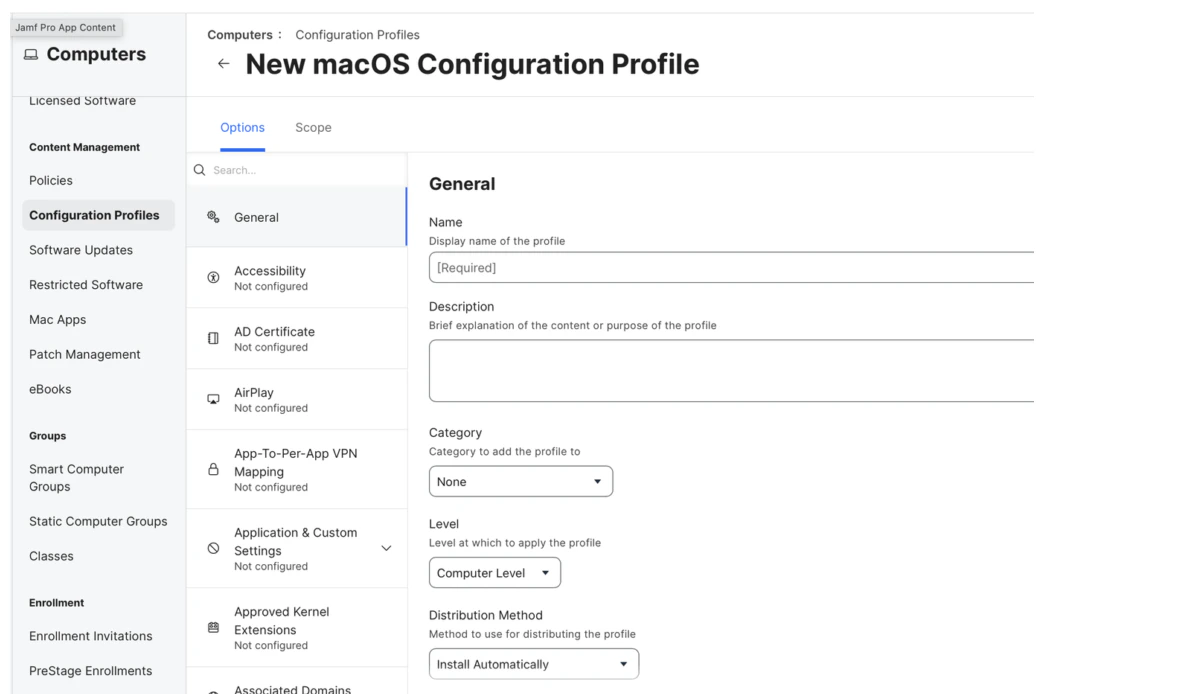
 **4-b:** Create "Account Provisioning Profile"
**4-b-i:** Click the **+ New** button to create new profile
**4-b:** Create "Account Provisioning Profile"
**4-b-i:** Click the **+ New** button to create new profile
 **4-b-ii:** Provide a *name* for the new configuration profile
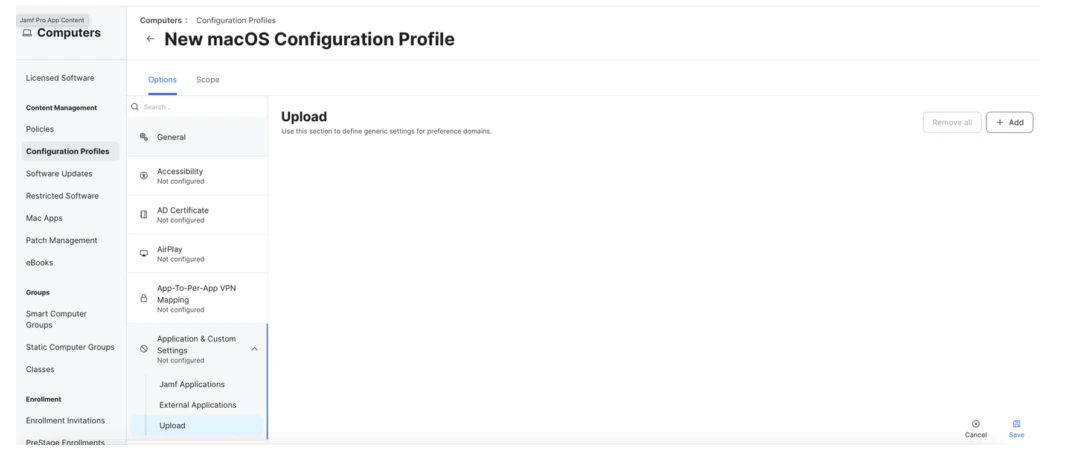
 **4-b-iii:** Open "Application & Custom Settings” and click **Upload**
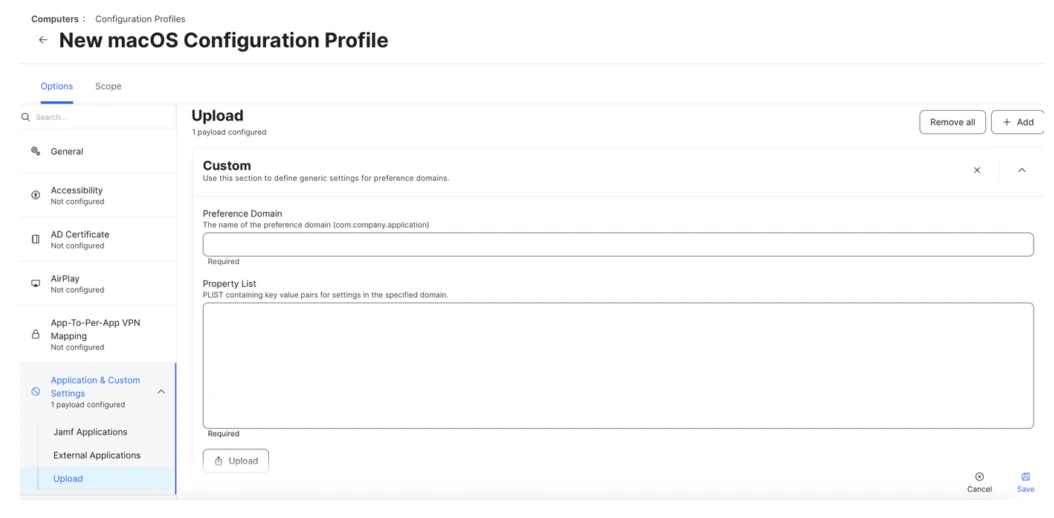
 **4-b-iv:** Define Property List (PLIST) for the Configuration Profile
 **NOTE: Make sure that your downloaded PLIST have the following values**
```
enableGetStartedNotification
runPostEnrollmentAfterReboot
```
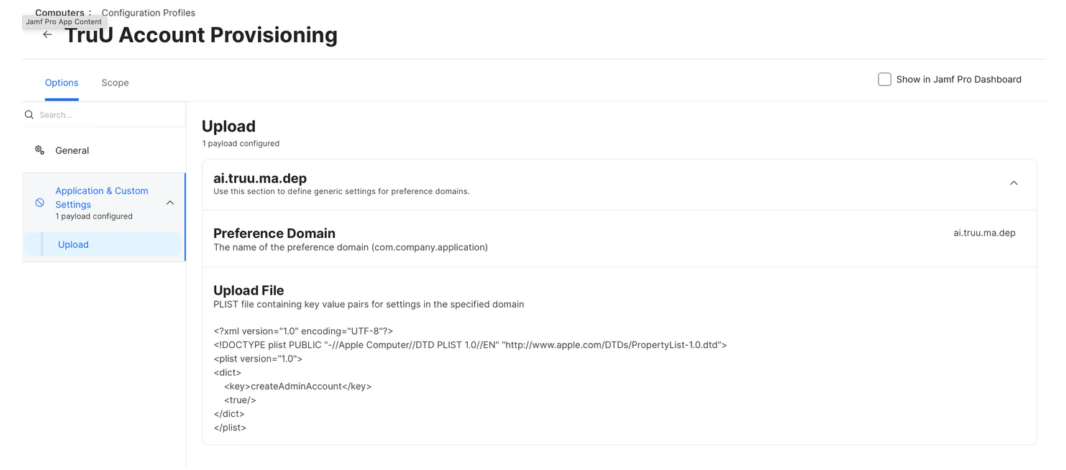
* Create Preference Domain for ai.truu.ma.dep with the following PLIST:
```bash bash theme={null}
createAdminAccount
```
* You will see the following in your profile:
**NOTE: Make sure that your downloaded PLIST have the following values**
```
enableGetStartedNotification
runPostEnrollmentAfterReboot
```
* Create Preference Domain for ai.truu.ma.dep with the following PLIST:
```bash bash theme={null}
createAdminAccount
```
* You will see the following in your profile:
 **4-c:** Create Application Provisioning Profile
**4-c-i:** Follow steps i – iii for part b above to add the Application Provisioning Profile
**4-c-ii:** Enter *ai.truu.ma.configuration* as the Preference Domain
**4-c-iii:** To create the PLIST, you will need to convert your "application.config" file to a PLIST by replacing the “CHANGE IT” variables with the the values from your config file
```bash bash theme={null}
allowPasswordSync
canUnenroll
enableAdminAccess
domain
c2
idsDomainLookup
https://global-stage.platform.truu.ai/api/v1/public/fqdn/{CHANGE IT}
oAuthClientId
{CHANGE IT}
oAuthClientSecret
{CHANGE IT}
oAuthScope
tenant-management-api-agent
ssoRedirectionURLs
{CHANGE IT}
authPluginSettings
enableLoginWindow
accountLockOverride
maxFailedLoginAttempts
10
minutesUntilFailedLoginReset
10
shouldLockScreenOnAccountLock
```
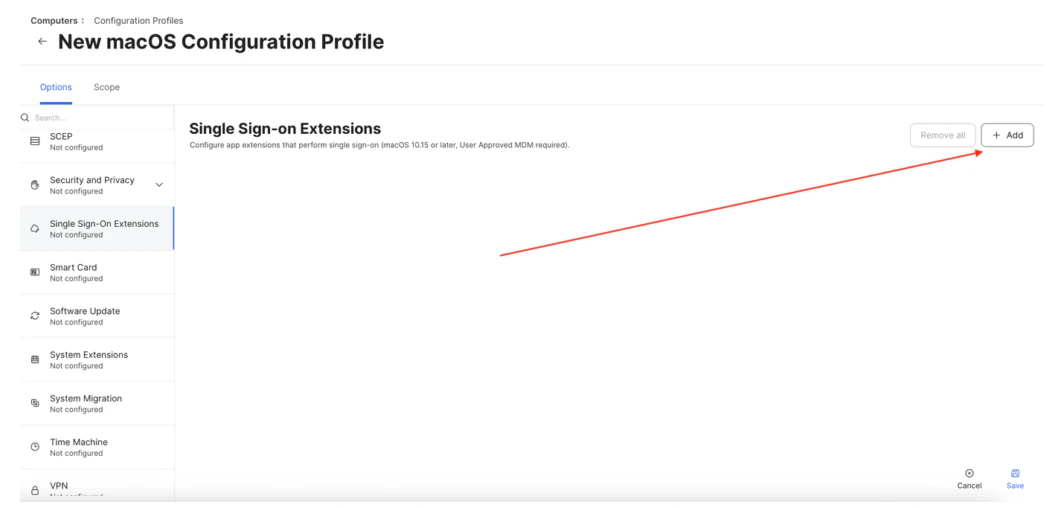
**4-d:** Create Configuration to Enable SSO
**4-d-i:** Scroll to “Single Sign-On Extensions” and click the **+ Add** button
**4-c:** Create Application Provisioning Profile
**4-c-i:** Follow steps i – iii for part b above to add the Application Provisioning Profile
**4-c-ii:** Enter *ai.truu.ma.configuration* as the Preference Domain
**4-c-iii:** To create the PLIST, you will need to convert your "application.config" file to a PLIST by replacing the “CHANGE IT” variables with the the values from your config file
```bash bash theme={null}
allowPasswordSync
canUnenroll
enableAdminAccess
domain
c2
idsDomainLookup
https://global-stage.platform.truu.ai/api/v1/public/fqdn/{CHANGE IT}
oAuthClientId
{CHANGE IT}
oAuthClientSecret
{CHANGE IT}
oAuthScope
tenant-management-api-agent
ssoRedirectionURLs
{CHANGE IT}
authPluginSettings
enableLoginWindow
accountLockOverride
maxFailedLoginAttempts
10
minutesUntilFailedLoginReset
10
shouldLockScreenOnAccountLock
```
**4-d:** Create Configuration to Enable SSO
**4-d-i:** Scroll to “Single Sign-On Extensions” and click the **+ Add** button
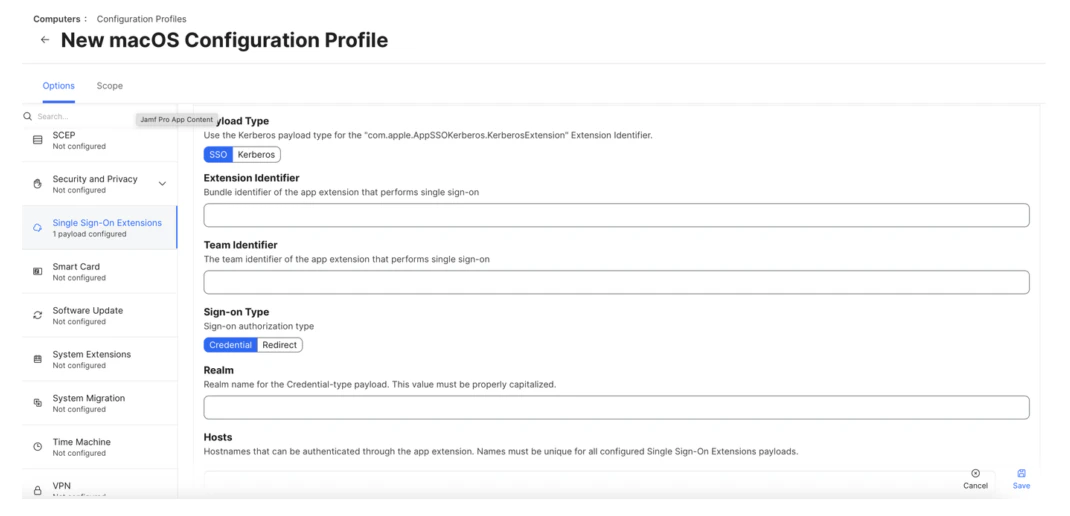
 **4-d-ii:** Enter the following:
* **Payload Type –** *SSO*
* **Extension Identifier –** *com.truu.LoginHost.SSO*
* **Team Identifier –** *VGJPA2G633*
* **Sign-on Type –** *Credential*
* **Realm** – *Company Kerberos Ream* (e.g. \{[domain.com](//domain.com) })
* **Hosts** – *Company resources domains* (e.g. \{[domain.com](//domain.com) })
**4-d-ii:** Enter the following:
* **Payload Type –** *SSO*
* **Extension Identifier –** *com.truu.LoginHost.SSO*
* **Team Identifier –** *VGJPA2G633*
* **Sign-on Type –** *Credential*
* **Realm** – *Company Kerberos Ream* (e.g. \{[domain.com](//domain.com) })
* **Hosts** – *Company resources domains* (e.g. \{[domain.com](//domain.com) })
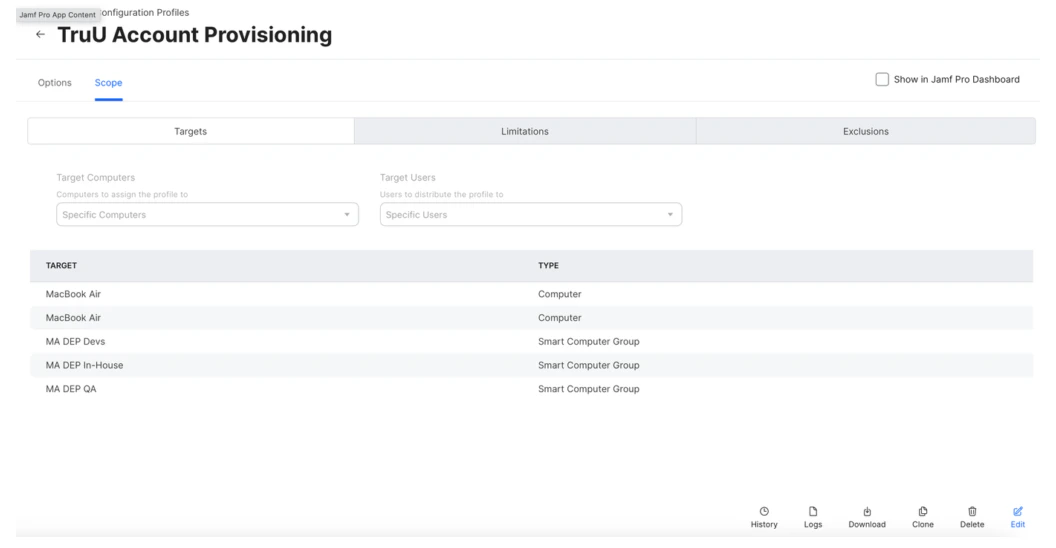
 **4-e:** Apply Scope for Provisioning Profiles (as needed)
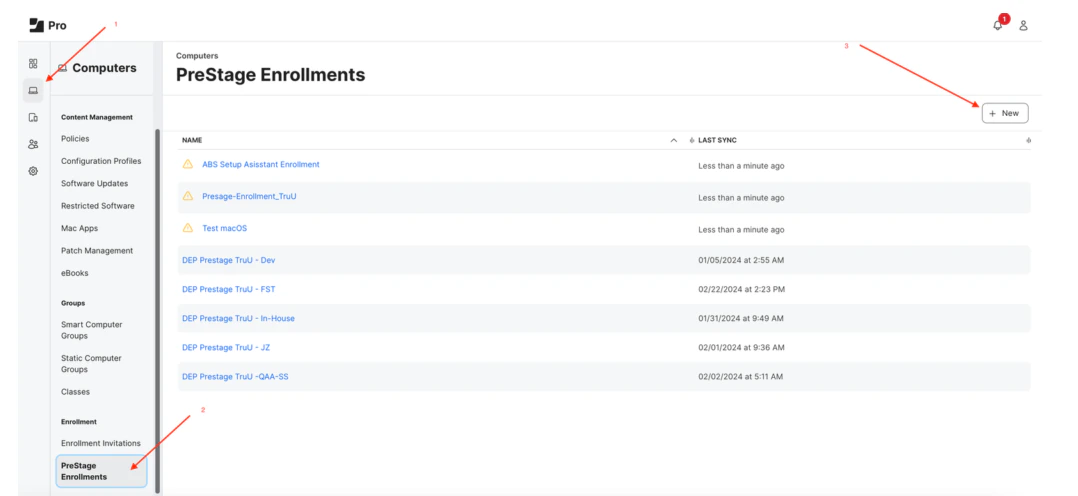
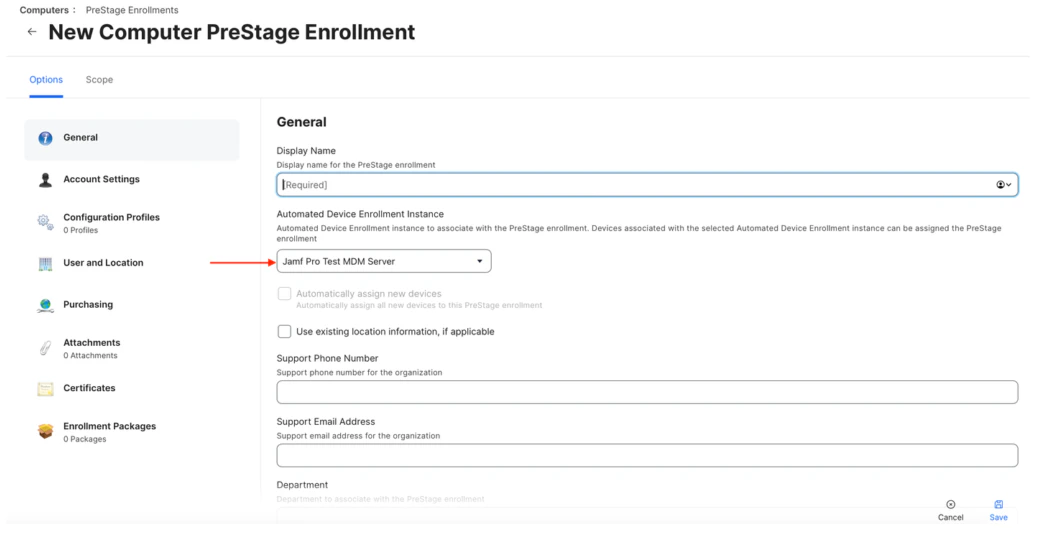
 **Step 5:** Configure PreStage Enrollments
**5-a:** Go to "Computers", then select "PreStage Enrollments"
**Step 5:** Configure PreStage Enrollments
**5-a:** Go to "Computers", then select "PreStage Enrollments"
 **5-b:** Setup new PreStage Enrollment
**5-c:** General settings (MDM server, Setup Assistant Options, etc.) Note: TruU agent is responsible for local account creation during enrollment process. Account creation from MDM setting should be skipped
**5-b:** Setup new PreStage Enrollment
**5-c:** General settings (MDM server, Setup Assistant Options, etc.) Note: TruU agent is responsible for local account creation during enrollment process. Account creation from MDM setting should be skipped
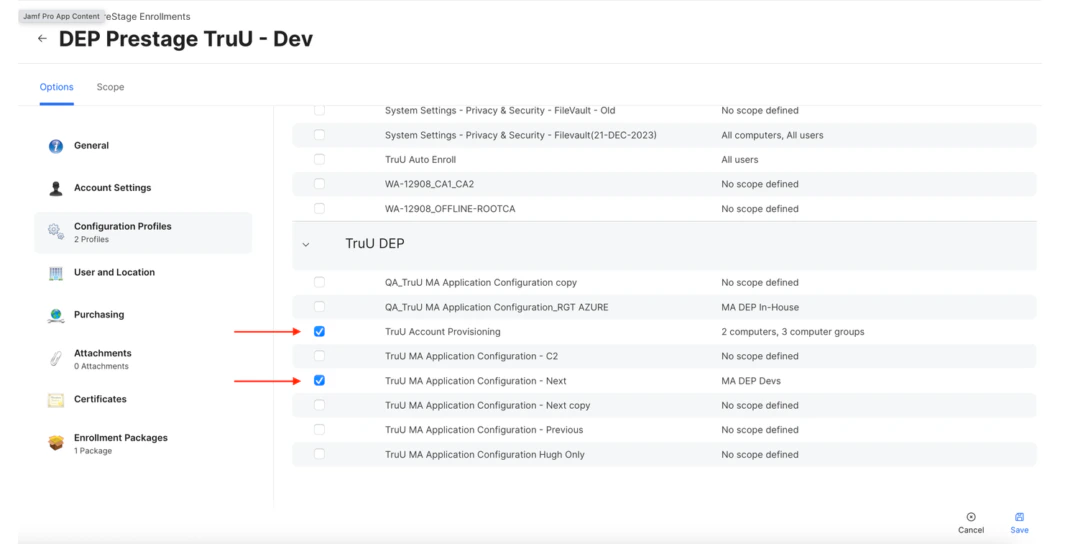
 **5-d:** Select the Configuration Profiles that were created above
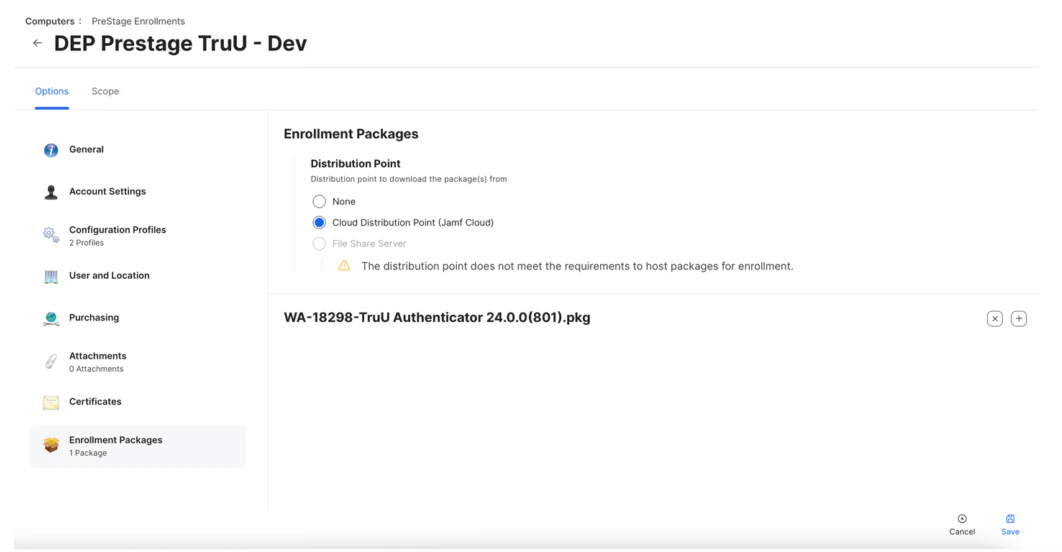
 **5-e:** Define the Distribution Point for the Enrollment Package
 You’re all set! Go back to iOS Apple Configuration Application and start provisioning for new machines
***
[Importing TruU Packages for JAMF Setup](/docs/importing-truu-packages-for-jamf-setup)
[ADE/DEP Intune Setup](/docs/adedep-intune-setup)
You’re all set! Go back to iOS Apple Configuration Application and start provisioning for new machines
***
[Importing TruU Packages for JAMF Setup](/docs/importing-truu-packages-for-jamf-setup)
[ADE/DEP Intune Setup](/docs/adedep-intune-setup)