> ## Documentation Index
> Fetch the complete documentation index at: https://docs.truu.ai/llms.txt
> Use this file to discover all available pages before exploring further.
# Enable TruU FIDO2 Login for Windows
> This is a step-by-step guide as to how one enables the TruU FIDO2 key login for Windows using Intune or GPO
**Enable TruU FIDO2 Key Login for Windows via Intune**
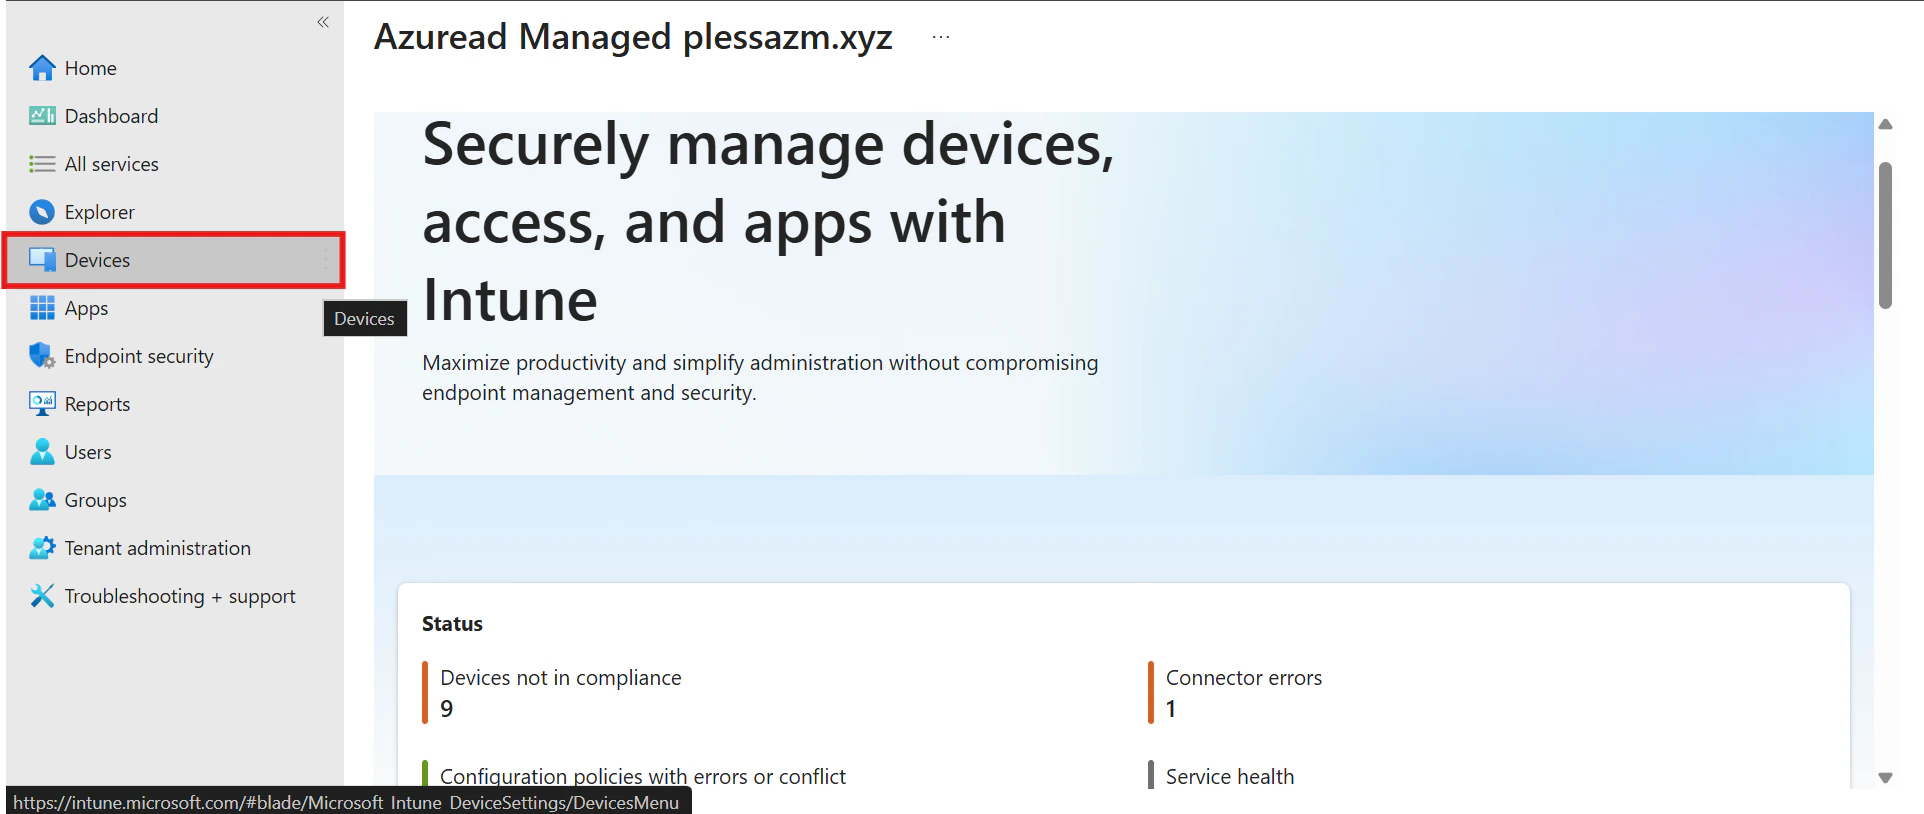
* **Open the Intune Admin Console** and navigate to the **Devices tab**.
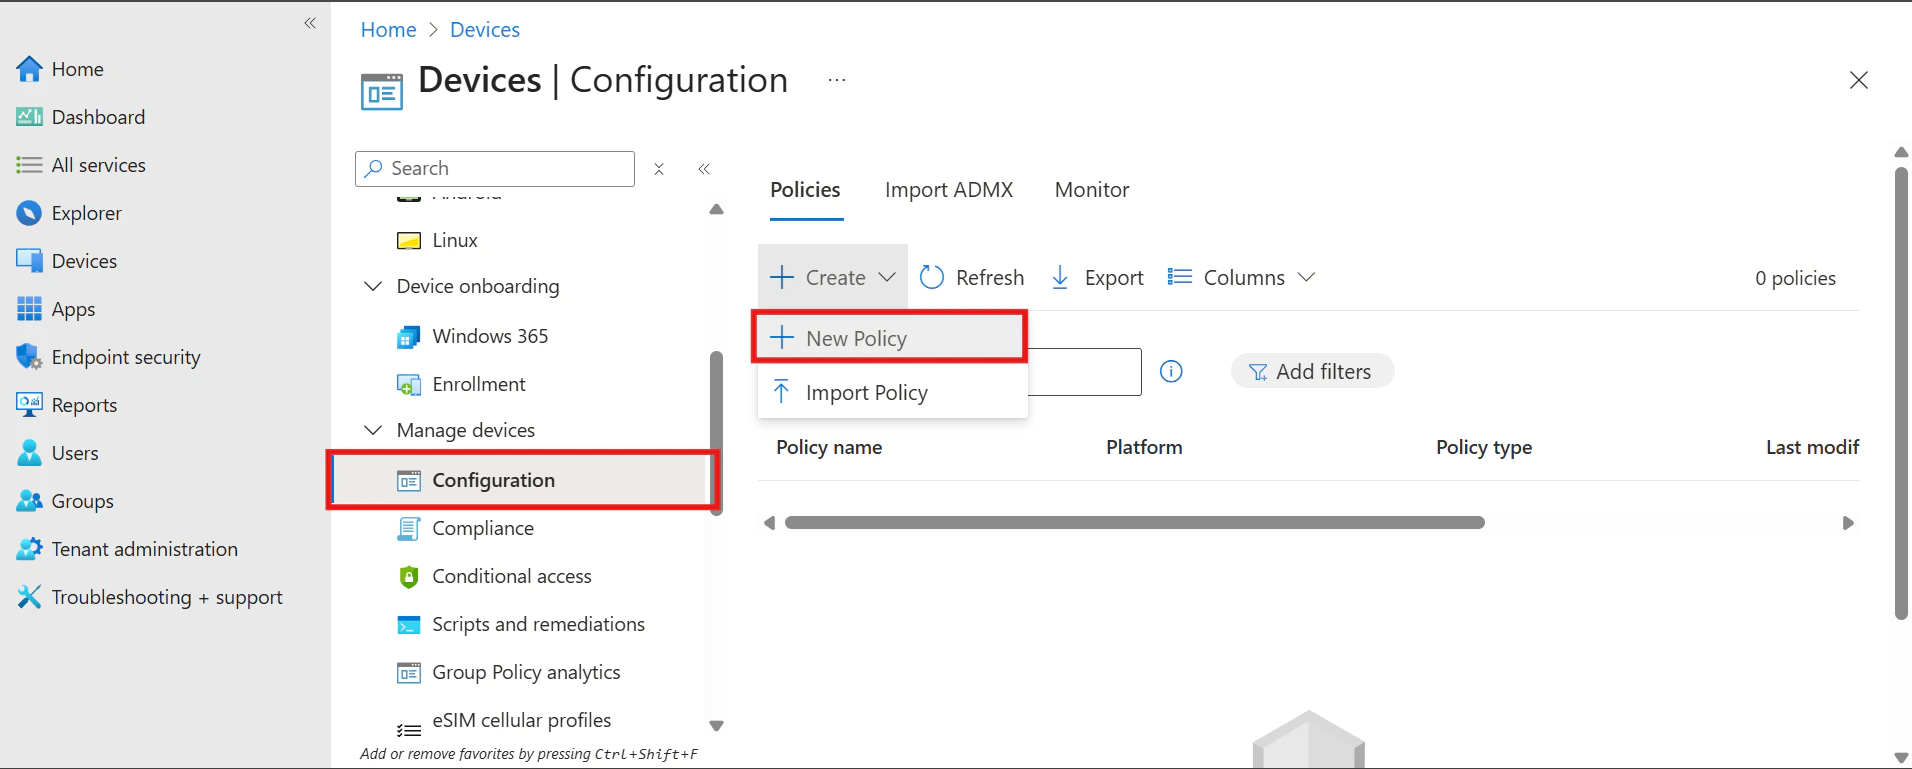
 * Under the **Manage Devices** section, choose **Configuration**, then click Create, followed by **New Policy**.
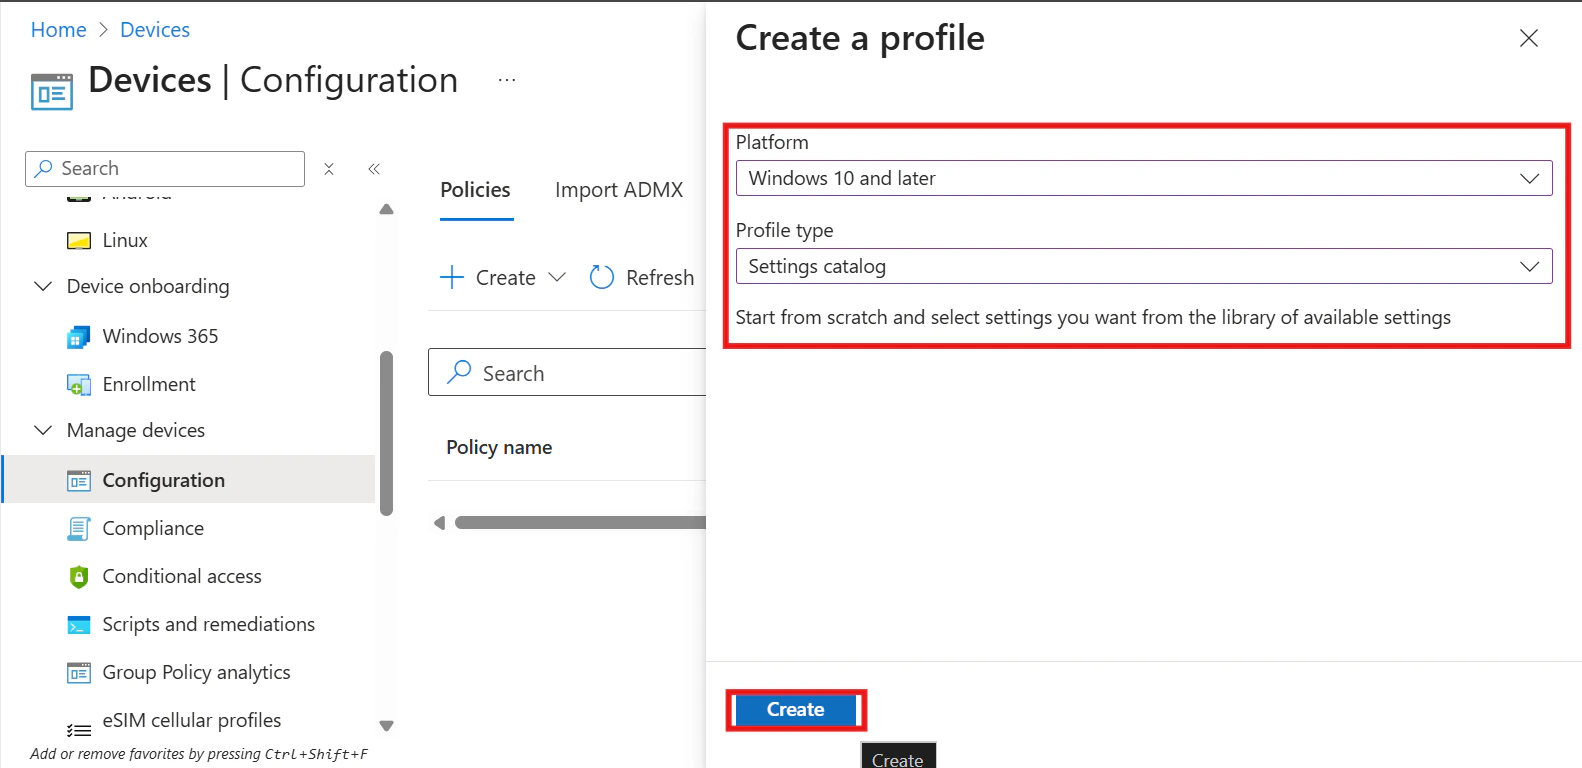
 * In the **Platform dropdown**, select **Windows 10 and later**. For the **Profile type**, select **Settings catalog** and then click **Create**.
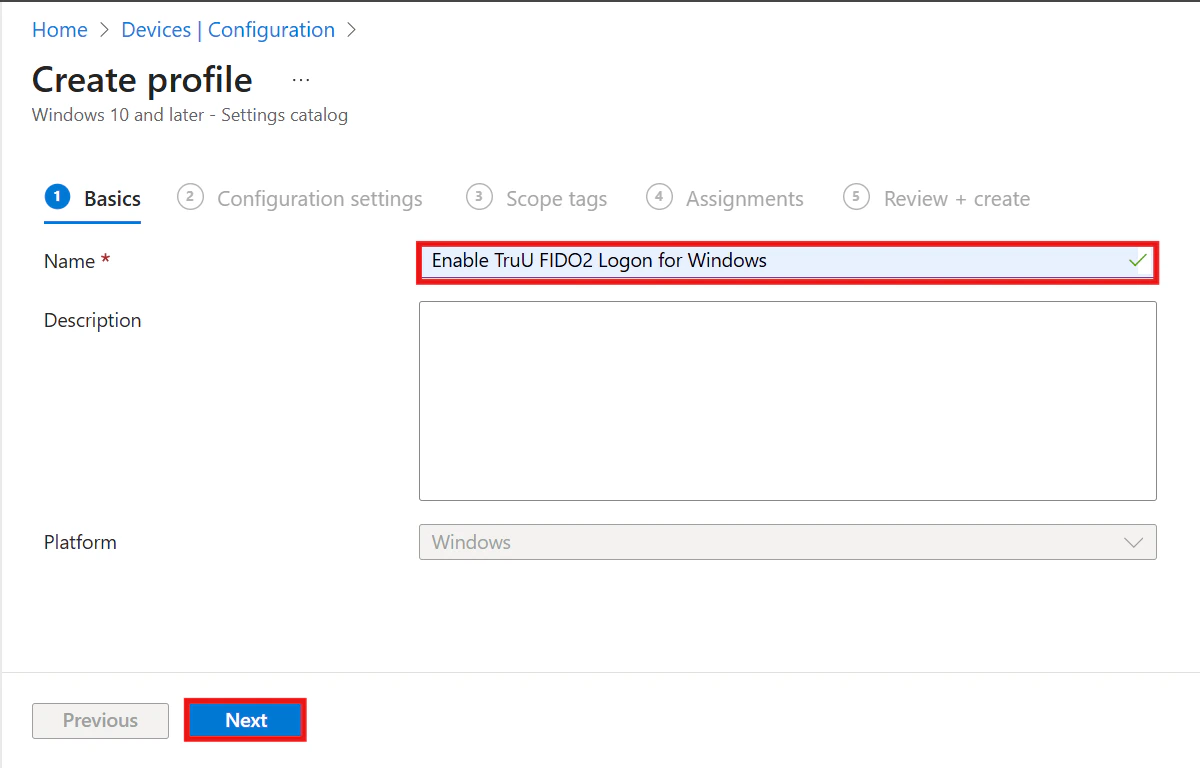
 * Enter a name for the policy, such as **Enable TruU FIDO2 Logon for Windows**, and click **Next**.
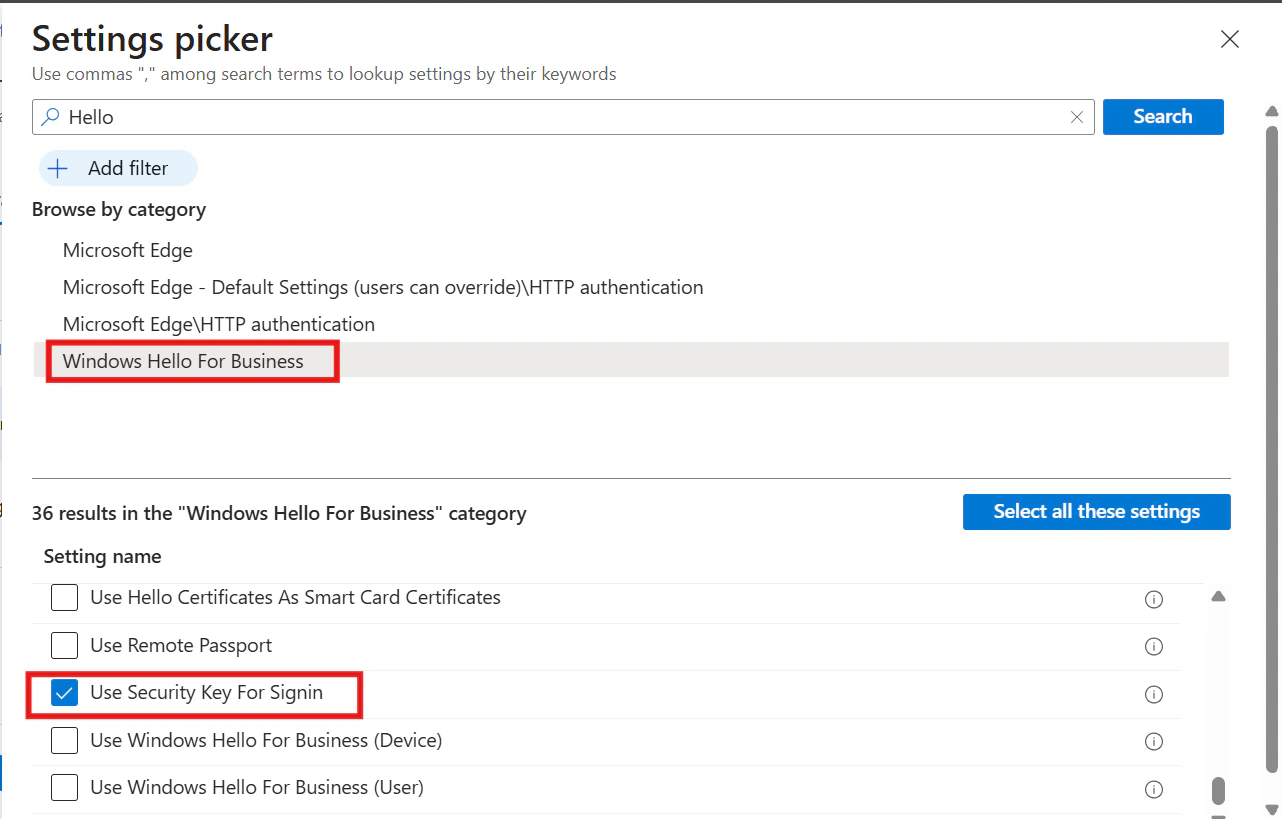
 * Click **Add Settings**. In the **Settings picker**, search for and select **Windows Hello for Business**. From the available options in that category, choose **Use Security Key for Sign-in**.
 * **Note**: Ensure the **Use Security Key for Sign-in setting** is set to **Enabled** and Click **Next**.
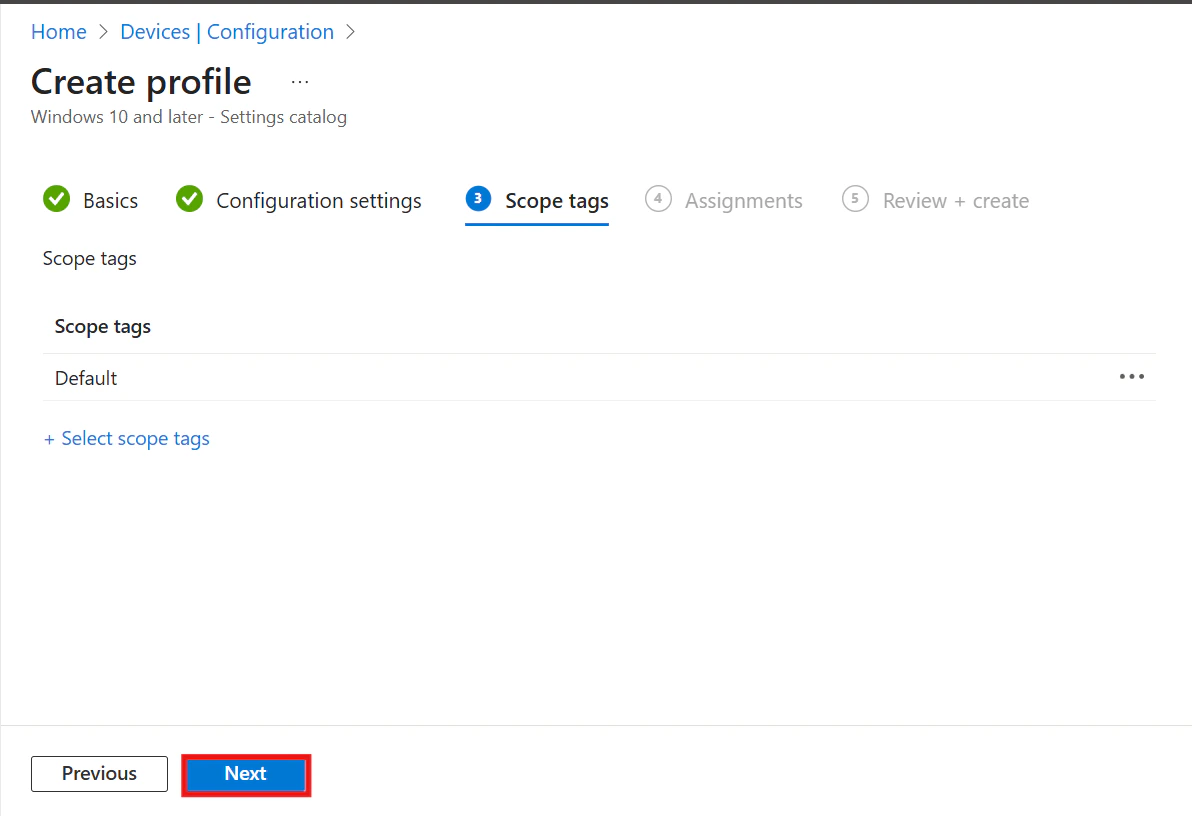
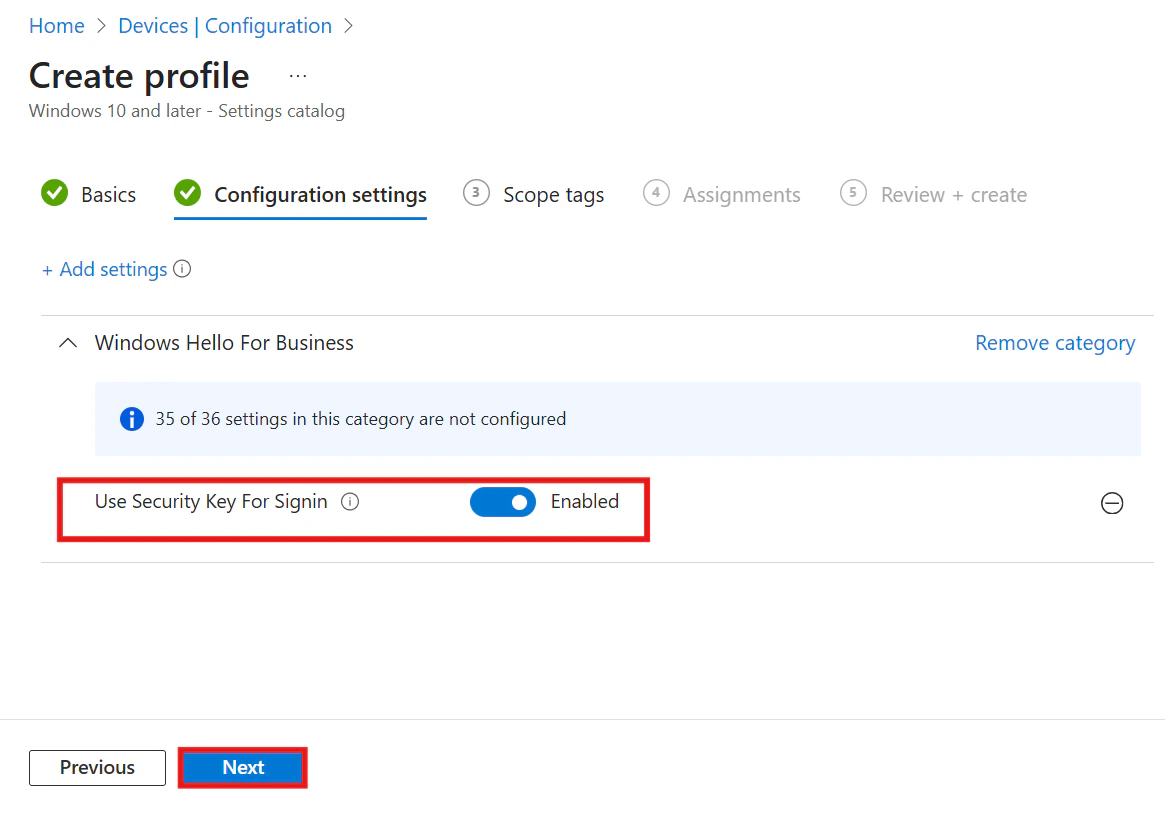 * Click **Next**.
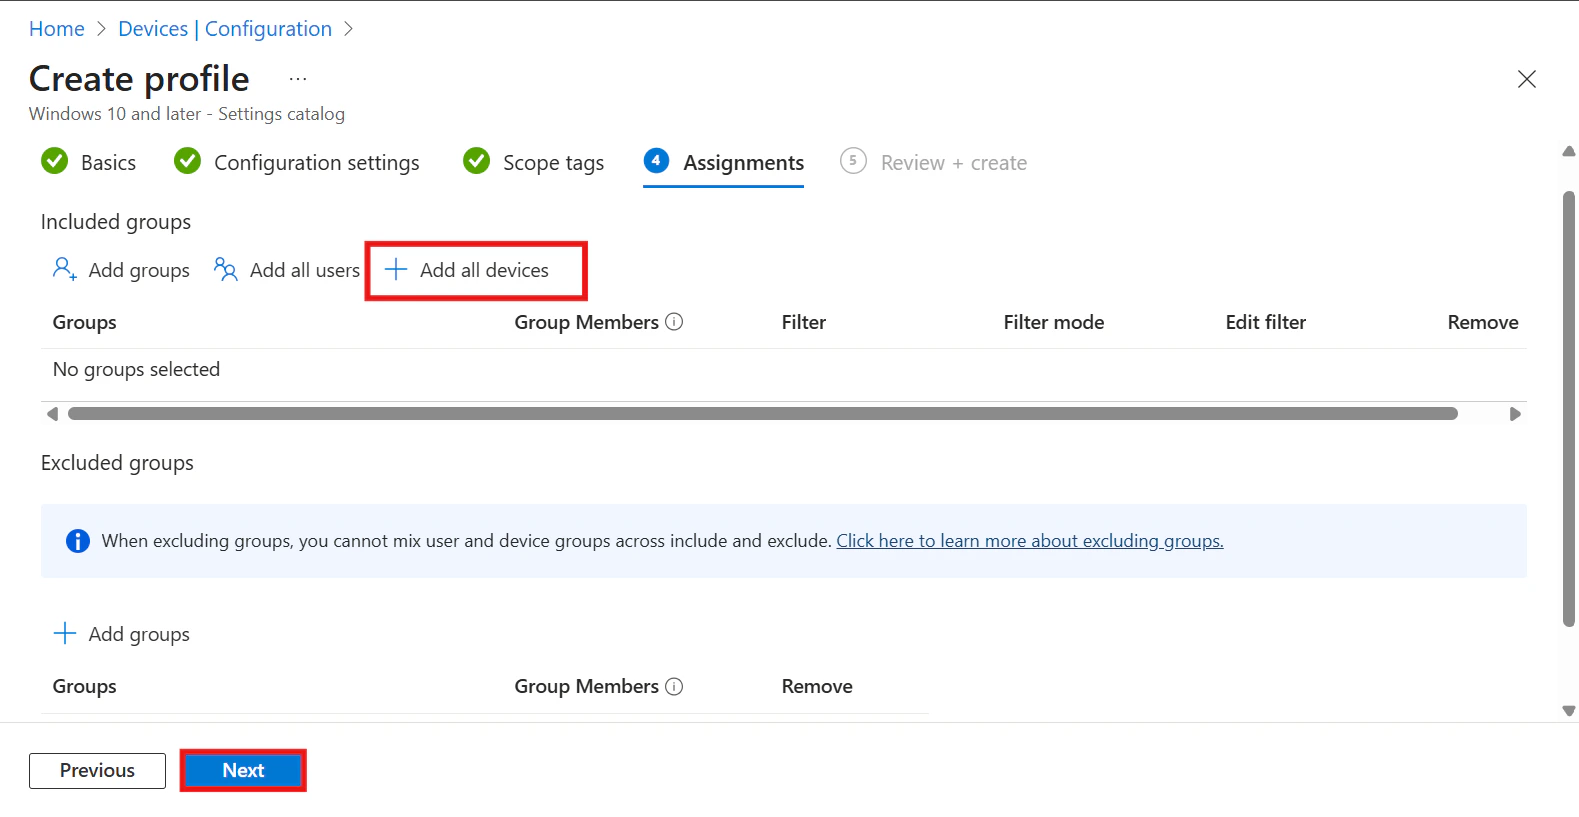
 * On the assignment screen, choose **Add all devices**, then click **Next**
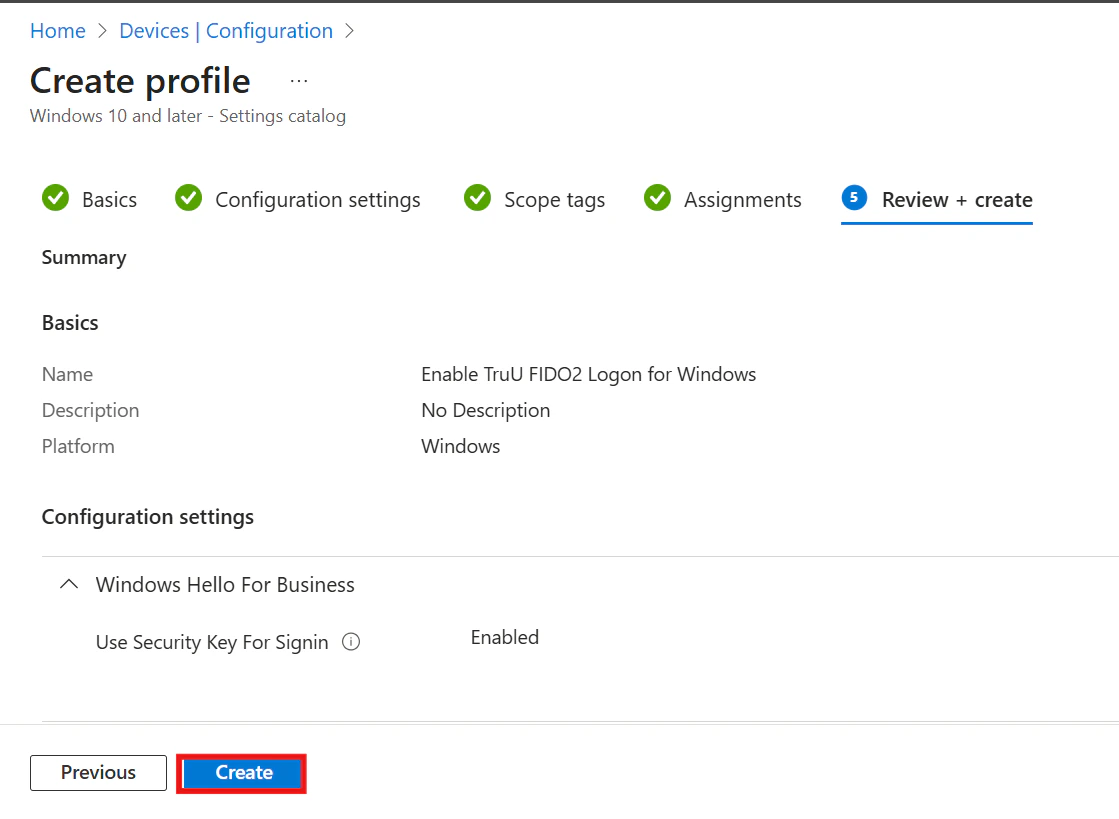
 * Finally, click **Create** to deploy the policy.
 **There are 2 options to enable security sign-in on the Windows machine**
**1. Enable security key sign-in with Group Policy**
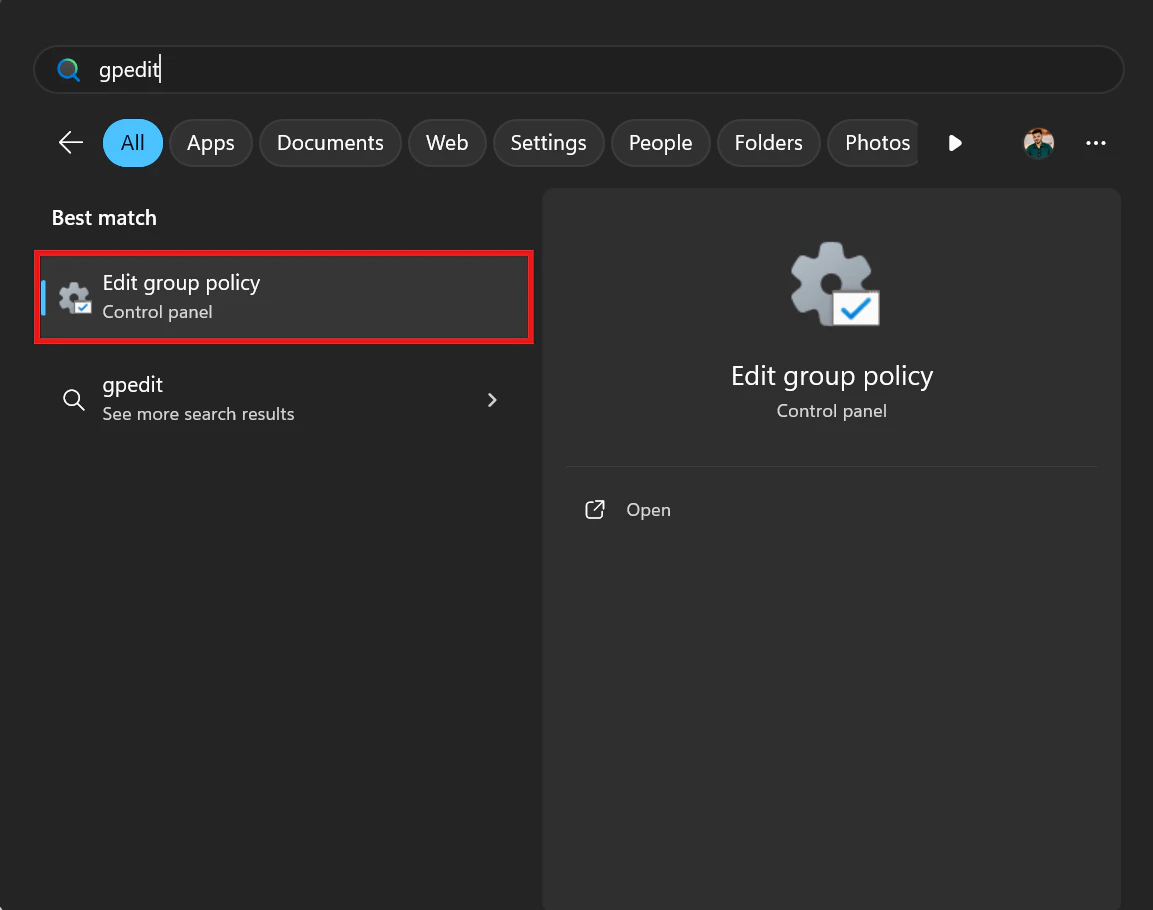
* Press the **Windows key** and type **gpedit**, then select **Run as Administrator**.
* When prompted, click **Yes** to allow the app to run in elevated mode.
**There are 2 options to enable security sign-in on the Windows machine**
**1. Enable security key sign-in with Group Policy**
* Press the **Windows key** and type **gpedit**, then select **Run as Administrator**.
* When prompted, click **Yes** to allow the app to run in elevated mode.
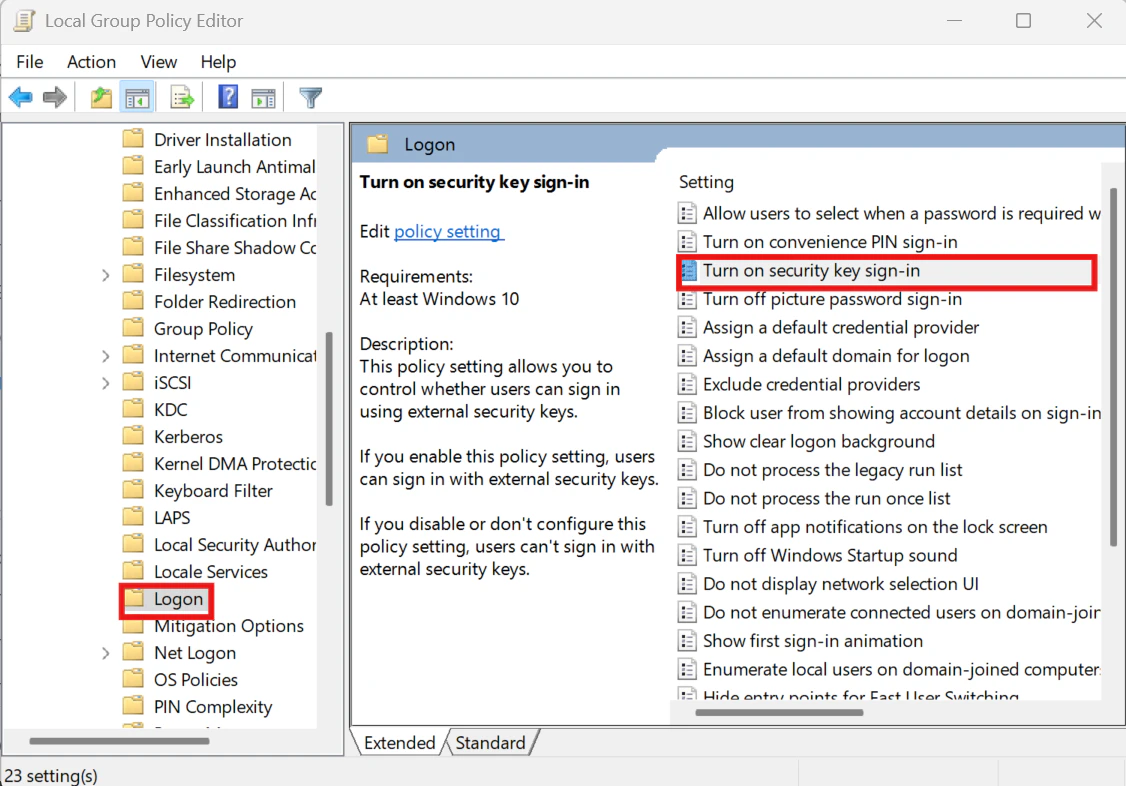
 * In the **Group Policy Editor**, navigate to: **Computer Configuration → Administrative Templates → System → Logon→Turn on security key sign-in**
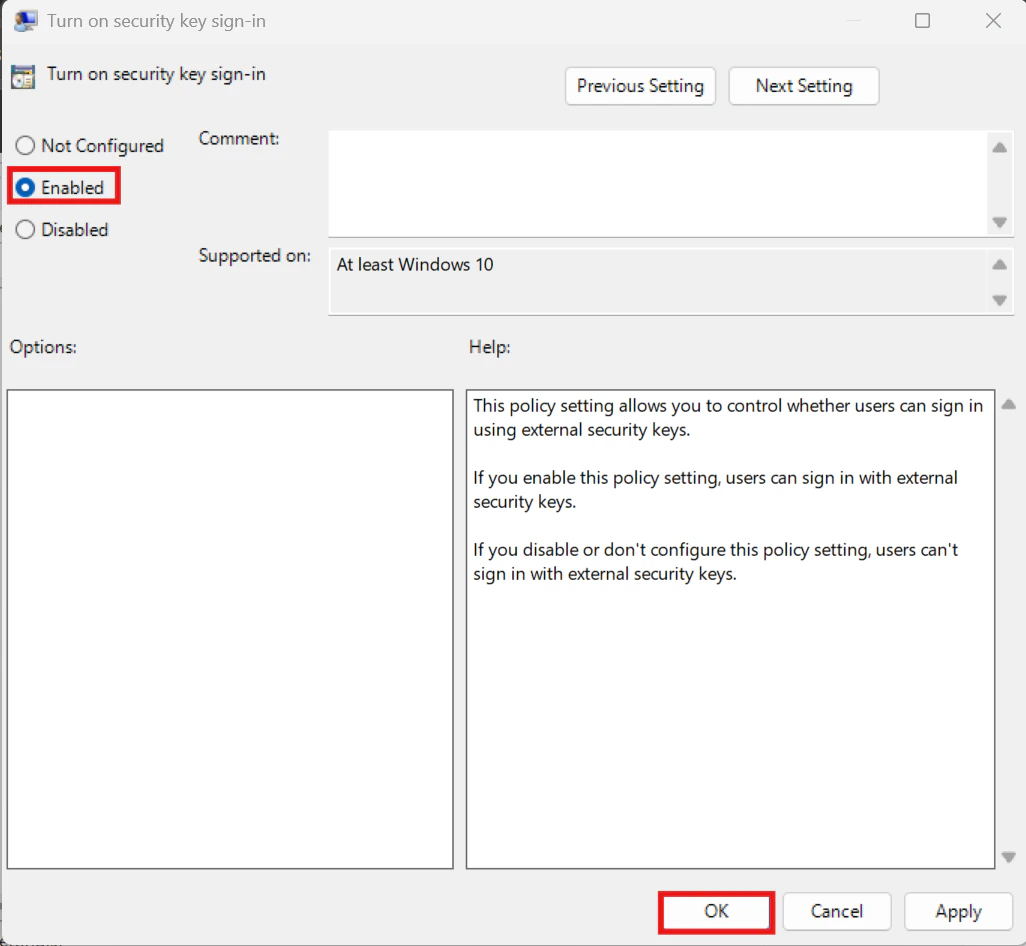
 * Double-click on **Turn on security key sign-in**\*\* and set the policy to **Enabled**, then click **OK**.
 * Close the Group Policy Editor and **restart your computer** for the changes to take effect.
**2. Enable security key sign-in by editing the registry using Command Prompt**
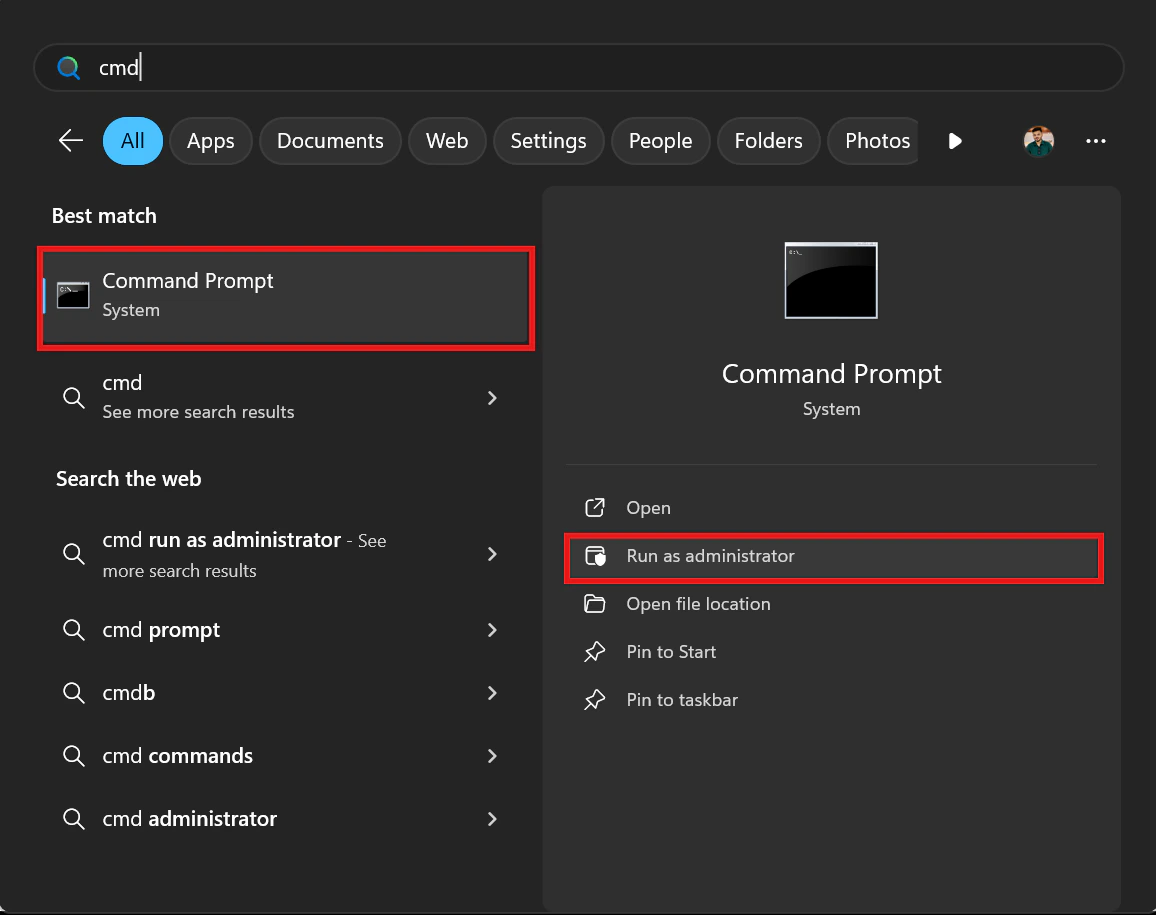
* Press the **Windows key** and type `cmd`and select **Run as administrator**
* When prompted, click **Yes** to allow the app to run in elevated mode.
* Close the Group Policy Editor and **restart your computer** for the changes to take effect.
**2. Enable security key sign-in by editing the registry using Command Prompt**
* Press the **Windows key** and type `cmd`and select **Run as administrator**
* When prompted, click **Yes** to allow the app to run in elevated mode.
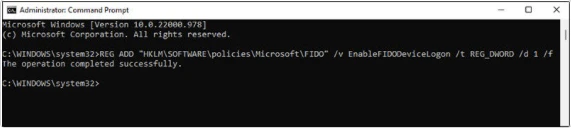
 * Enter the following input and press **Enter**
```
REG ADD "HKLM\\SOFTWARE\\policies\\Microsoft\\FIDO" /v EnableFIDODeviceLogon /t REG\_DWORD /d 1 /f
```
* Enter the following input and press **Enter**
```
REG ADD "HKLM\\SOFTWARE\\policies\\Microsoft\\FIDO" /v EnableFIDODeviceLogon /t REG\_DWORD /d 1 /f
```
 * Type *exit* to close the Command Prompt.
* Then restart your PC to finish applying the changes.
***
[MacOS: Known Locations Where Users Encounter Password Prompts vs. PIN](/docs/identifying-areas-where-users-encounter-password-prompts-vs-pin)
[MacOS Binding to AD: Consider the Alternatives](/docs/mac-binding-to-ad-consider-the-alternatives)
* Type *exit* to close the Command Prompt.
* Then restart your PC to finish applying the changes.
***
[MacOS: Known Locations Where Users Encounter Password Prompts vs. PIN](/docs/identifying-areas-where-users-encounter-password-prompts-vs-pin)
[MacOS Binding to AD: Consider the Alternatives](/docs/mac-binding-to-ad-consider-the-alternatives)