> ## Documentation Index
> Fetch the complete documentation index at: https://docs.truu.ai/llms.txt
> Use this file to discover all available pages before exploring further.
# Enroll Biometrics
> This guide provides a step-by-step tutorial on how to Enroll your Biometrics to your Windows device with TruU.
# **Enroll Fingerprint Biometrics**
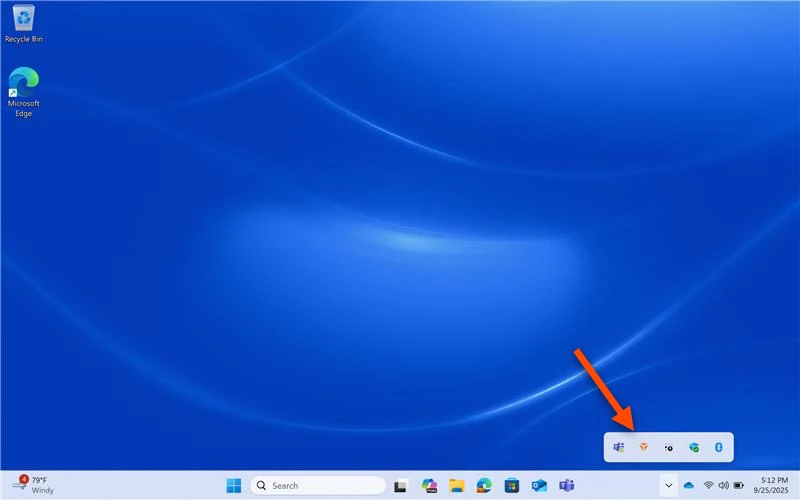
1. Navigate to the bottom right corner of the Home Screen, hover over the ^ arrow, and right click on the **TruU Logo**
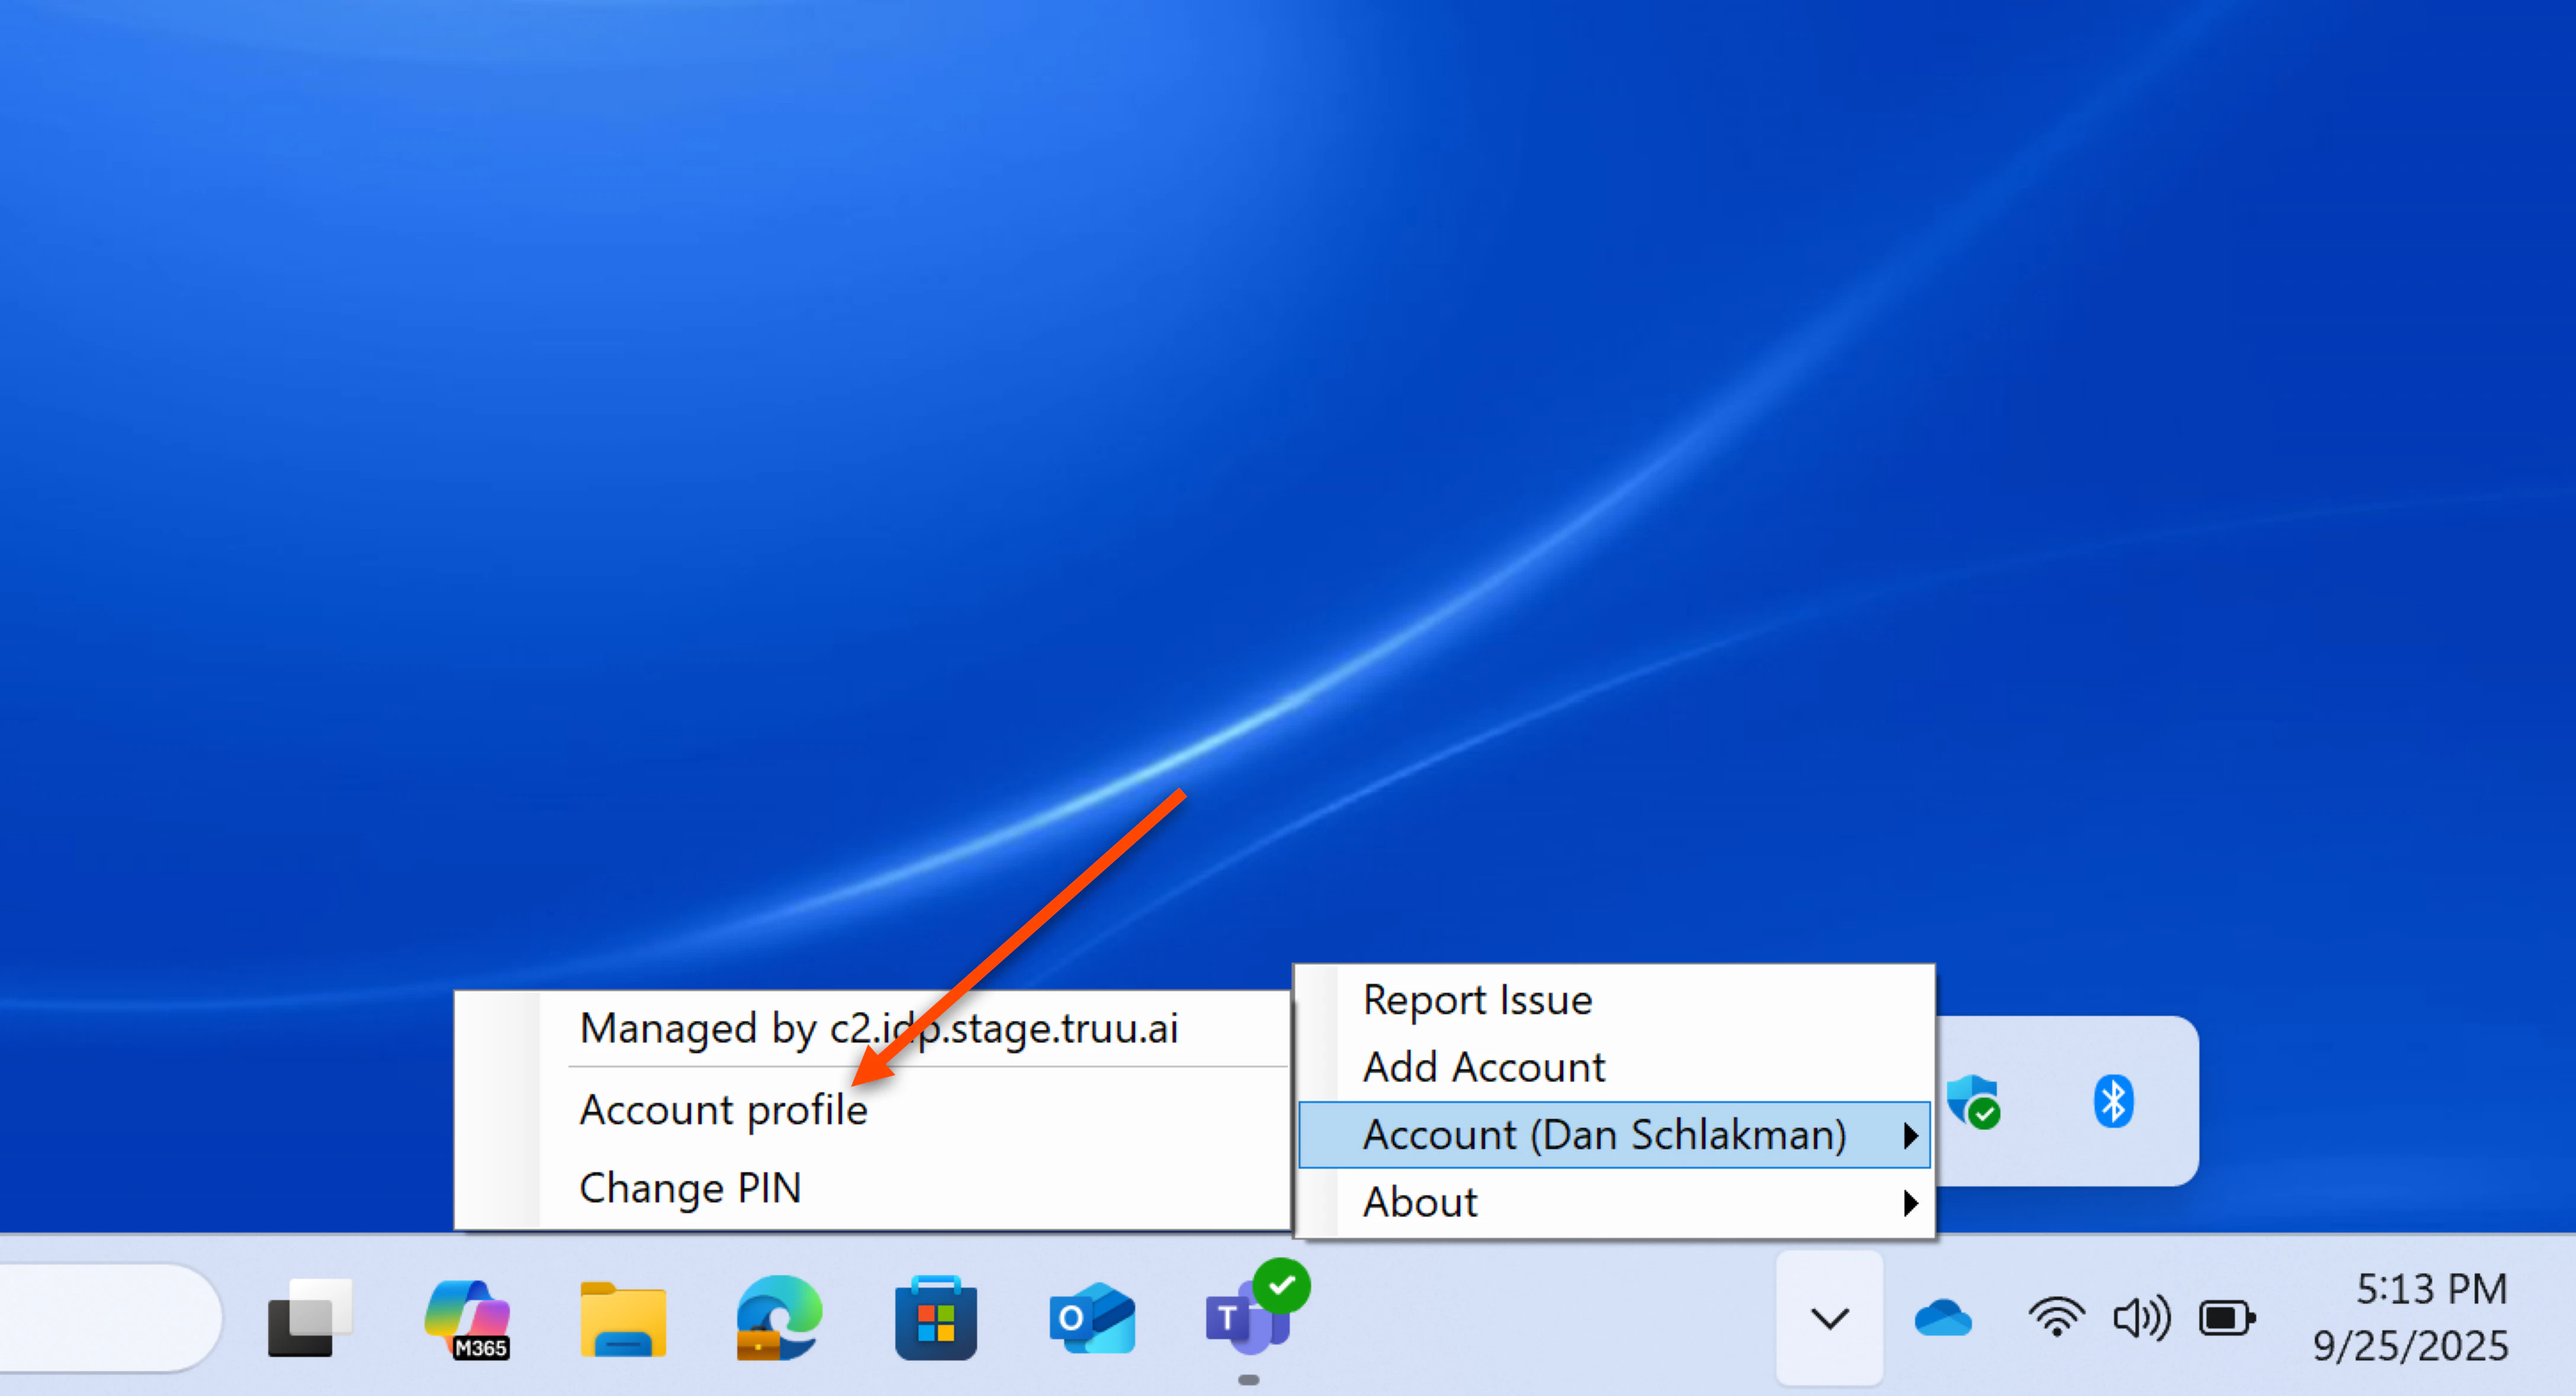
 2. Right click on your **Account**, then select **Account Profile**
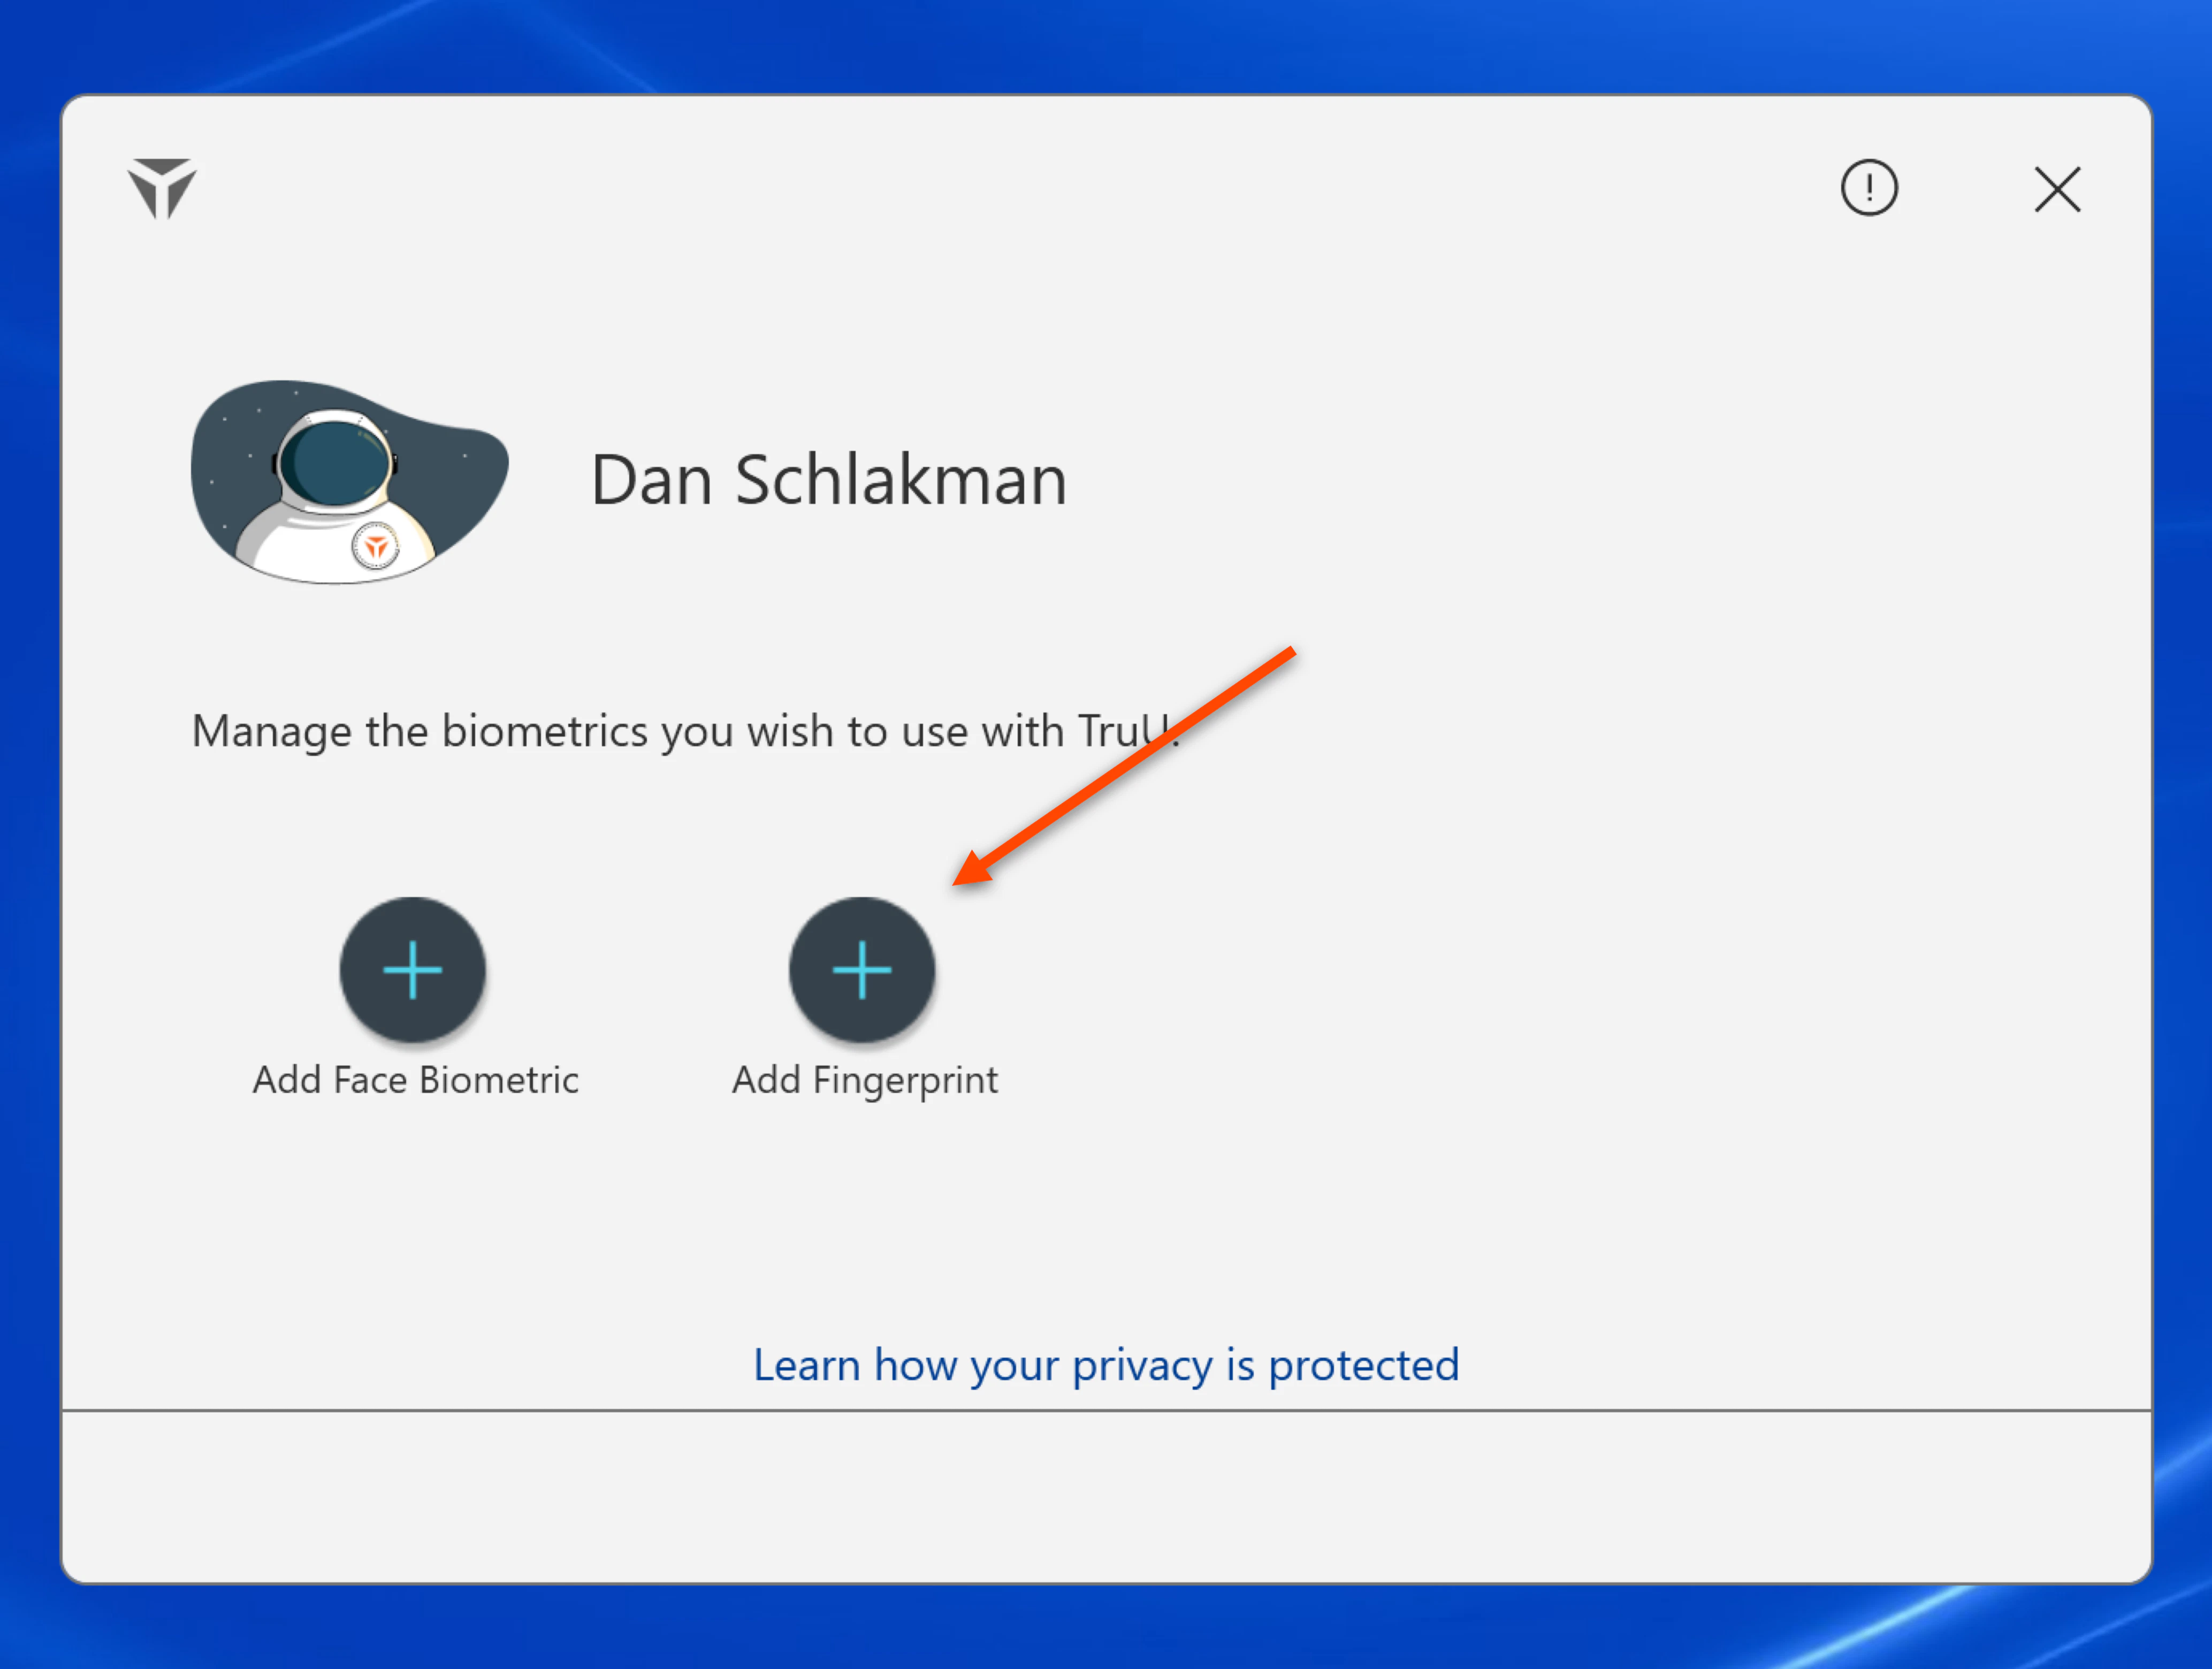
 3. Click on **Add Fingerprint**
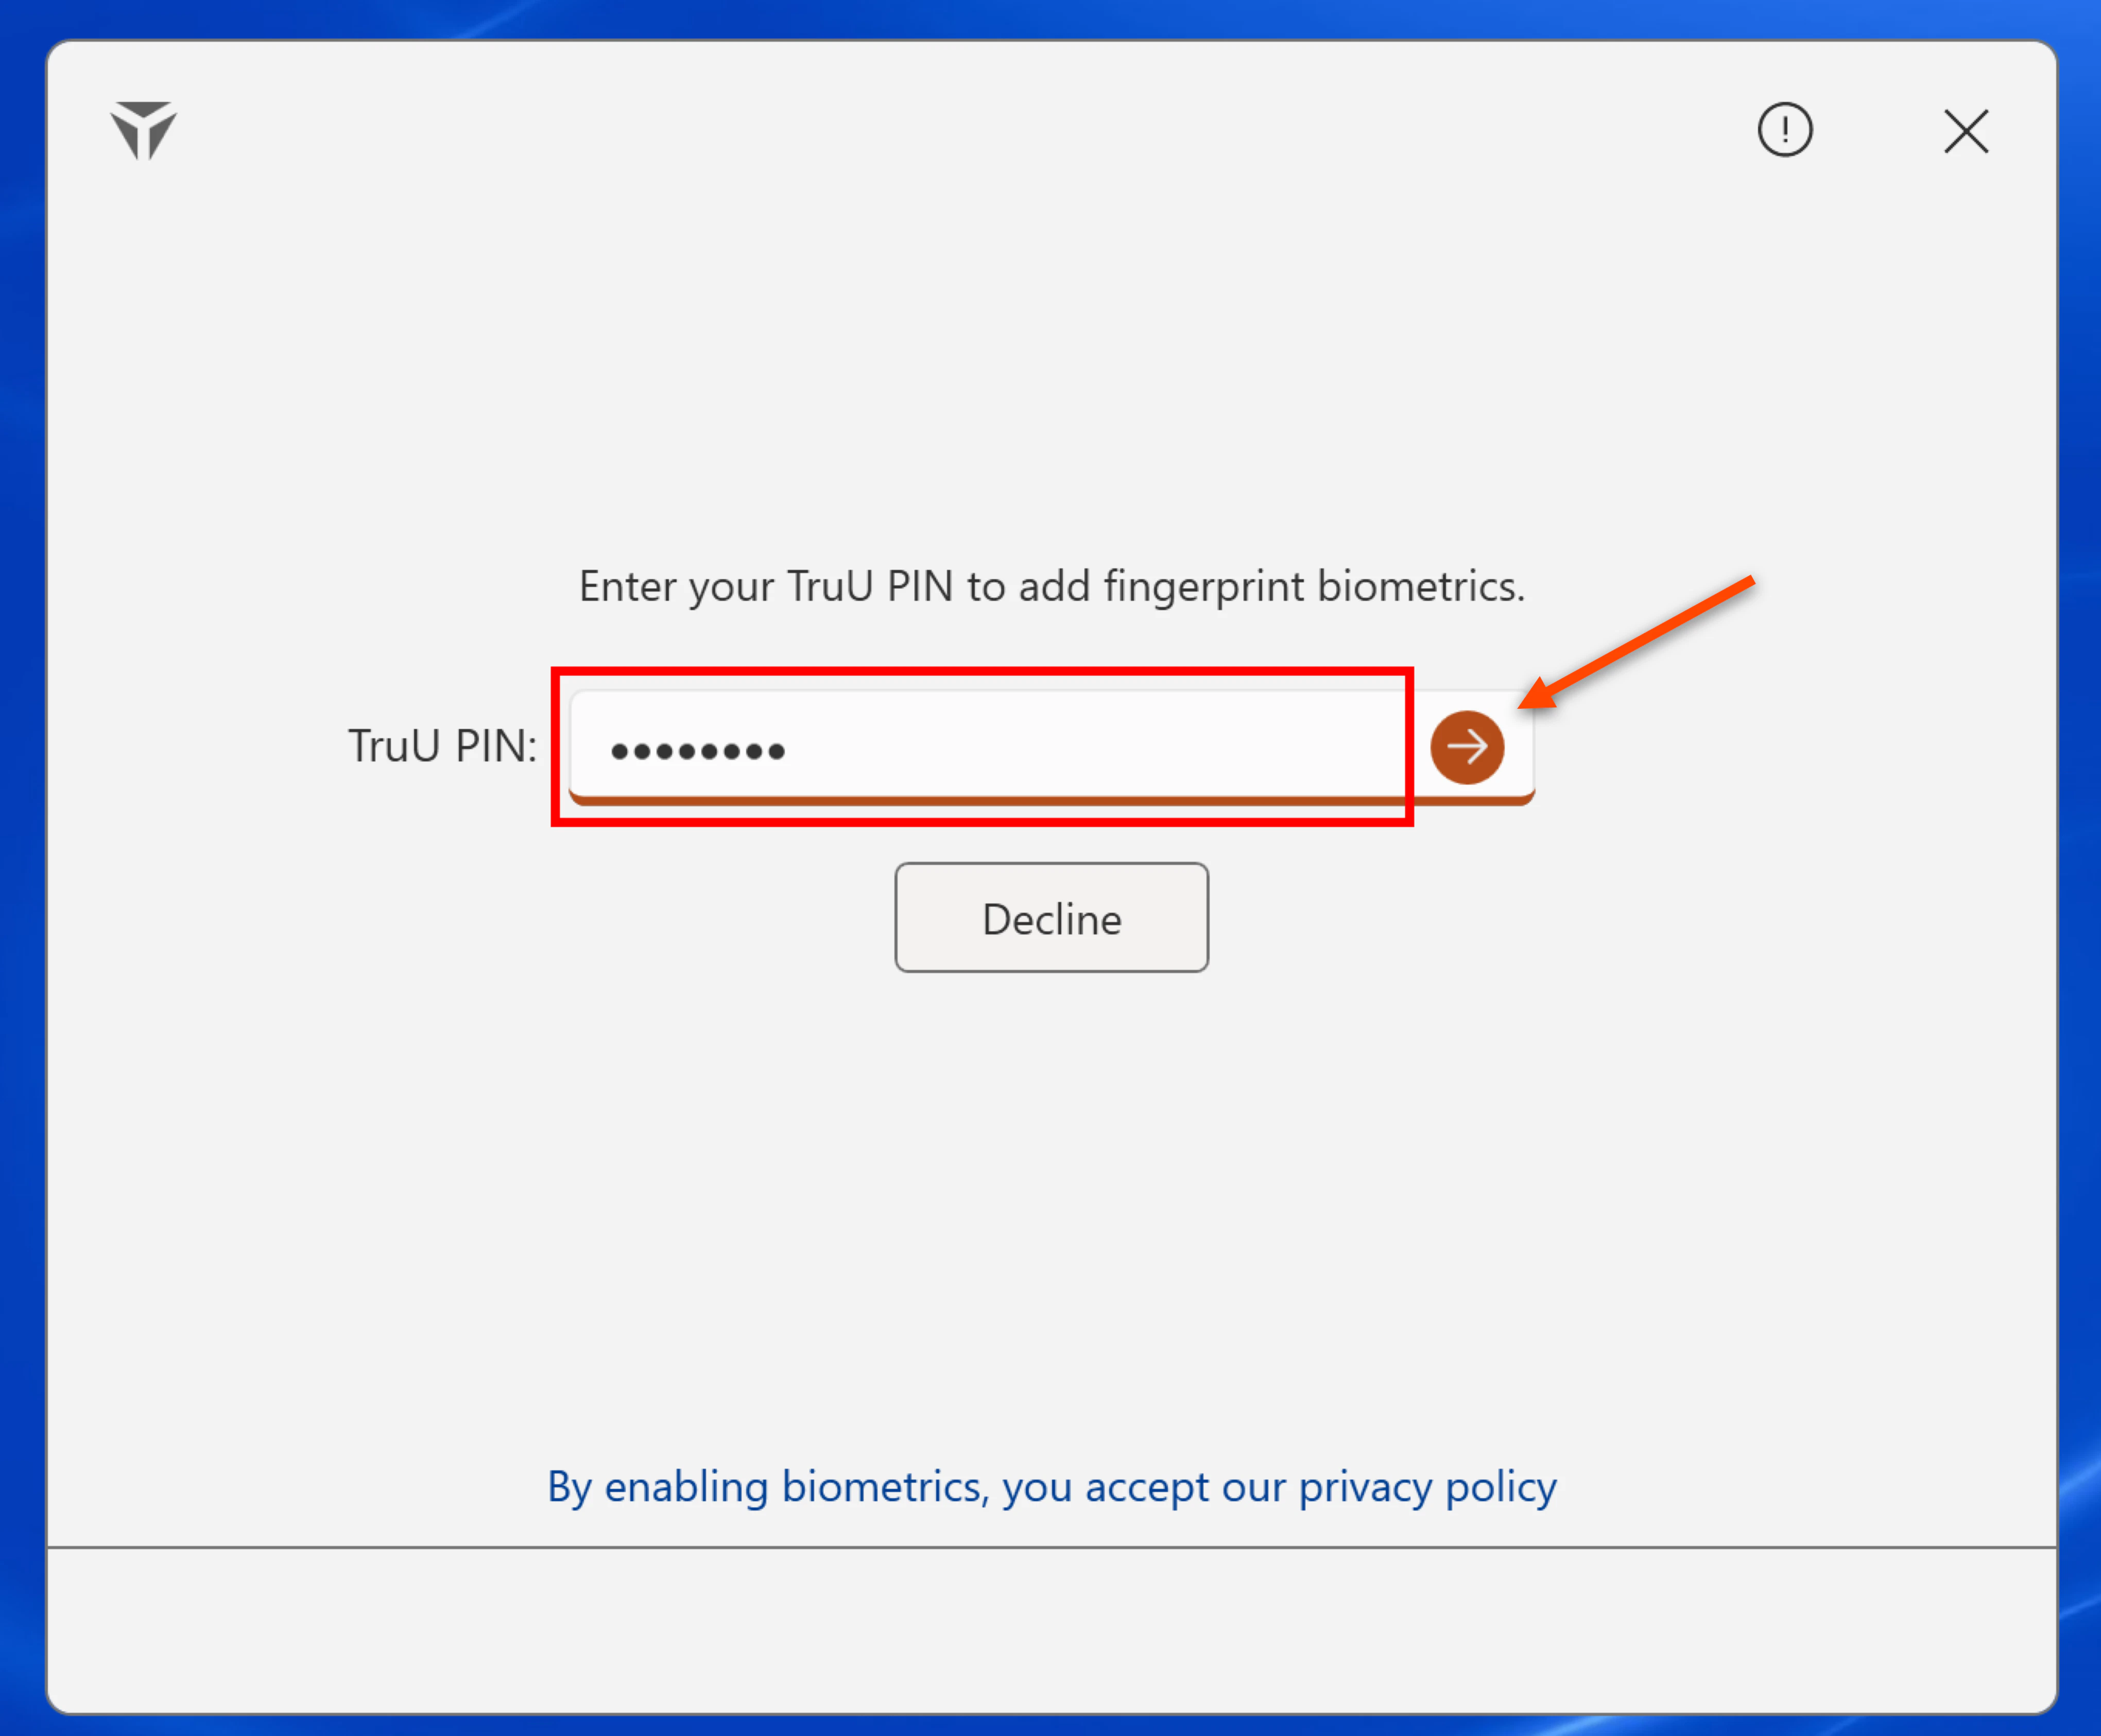
 4. Enter your *TruU PIN* to add fingerprint biometrics, then click the **arrow**
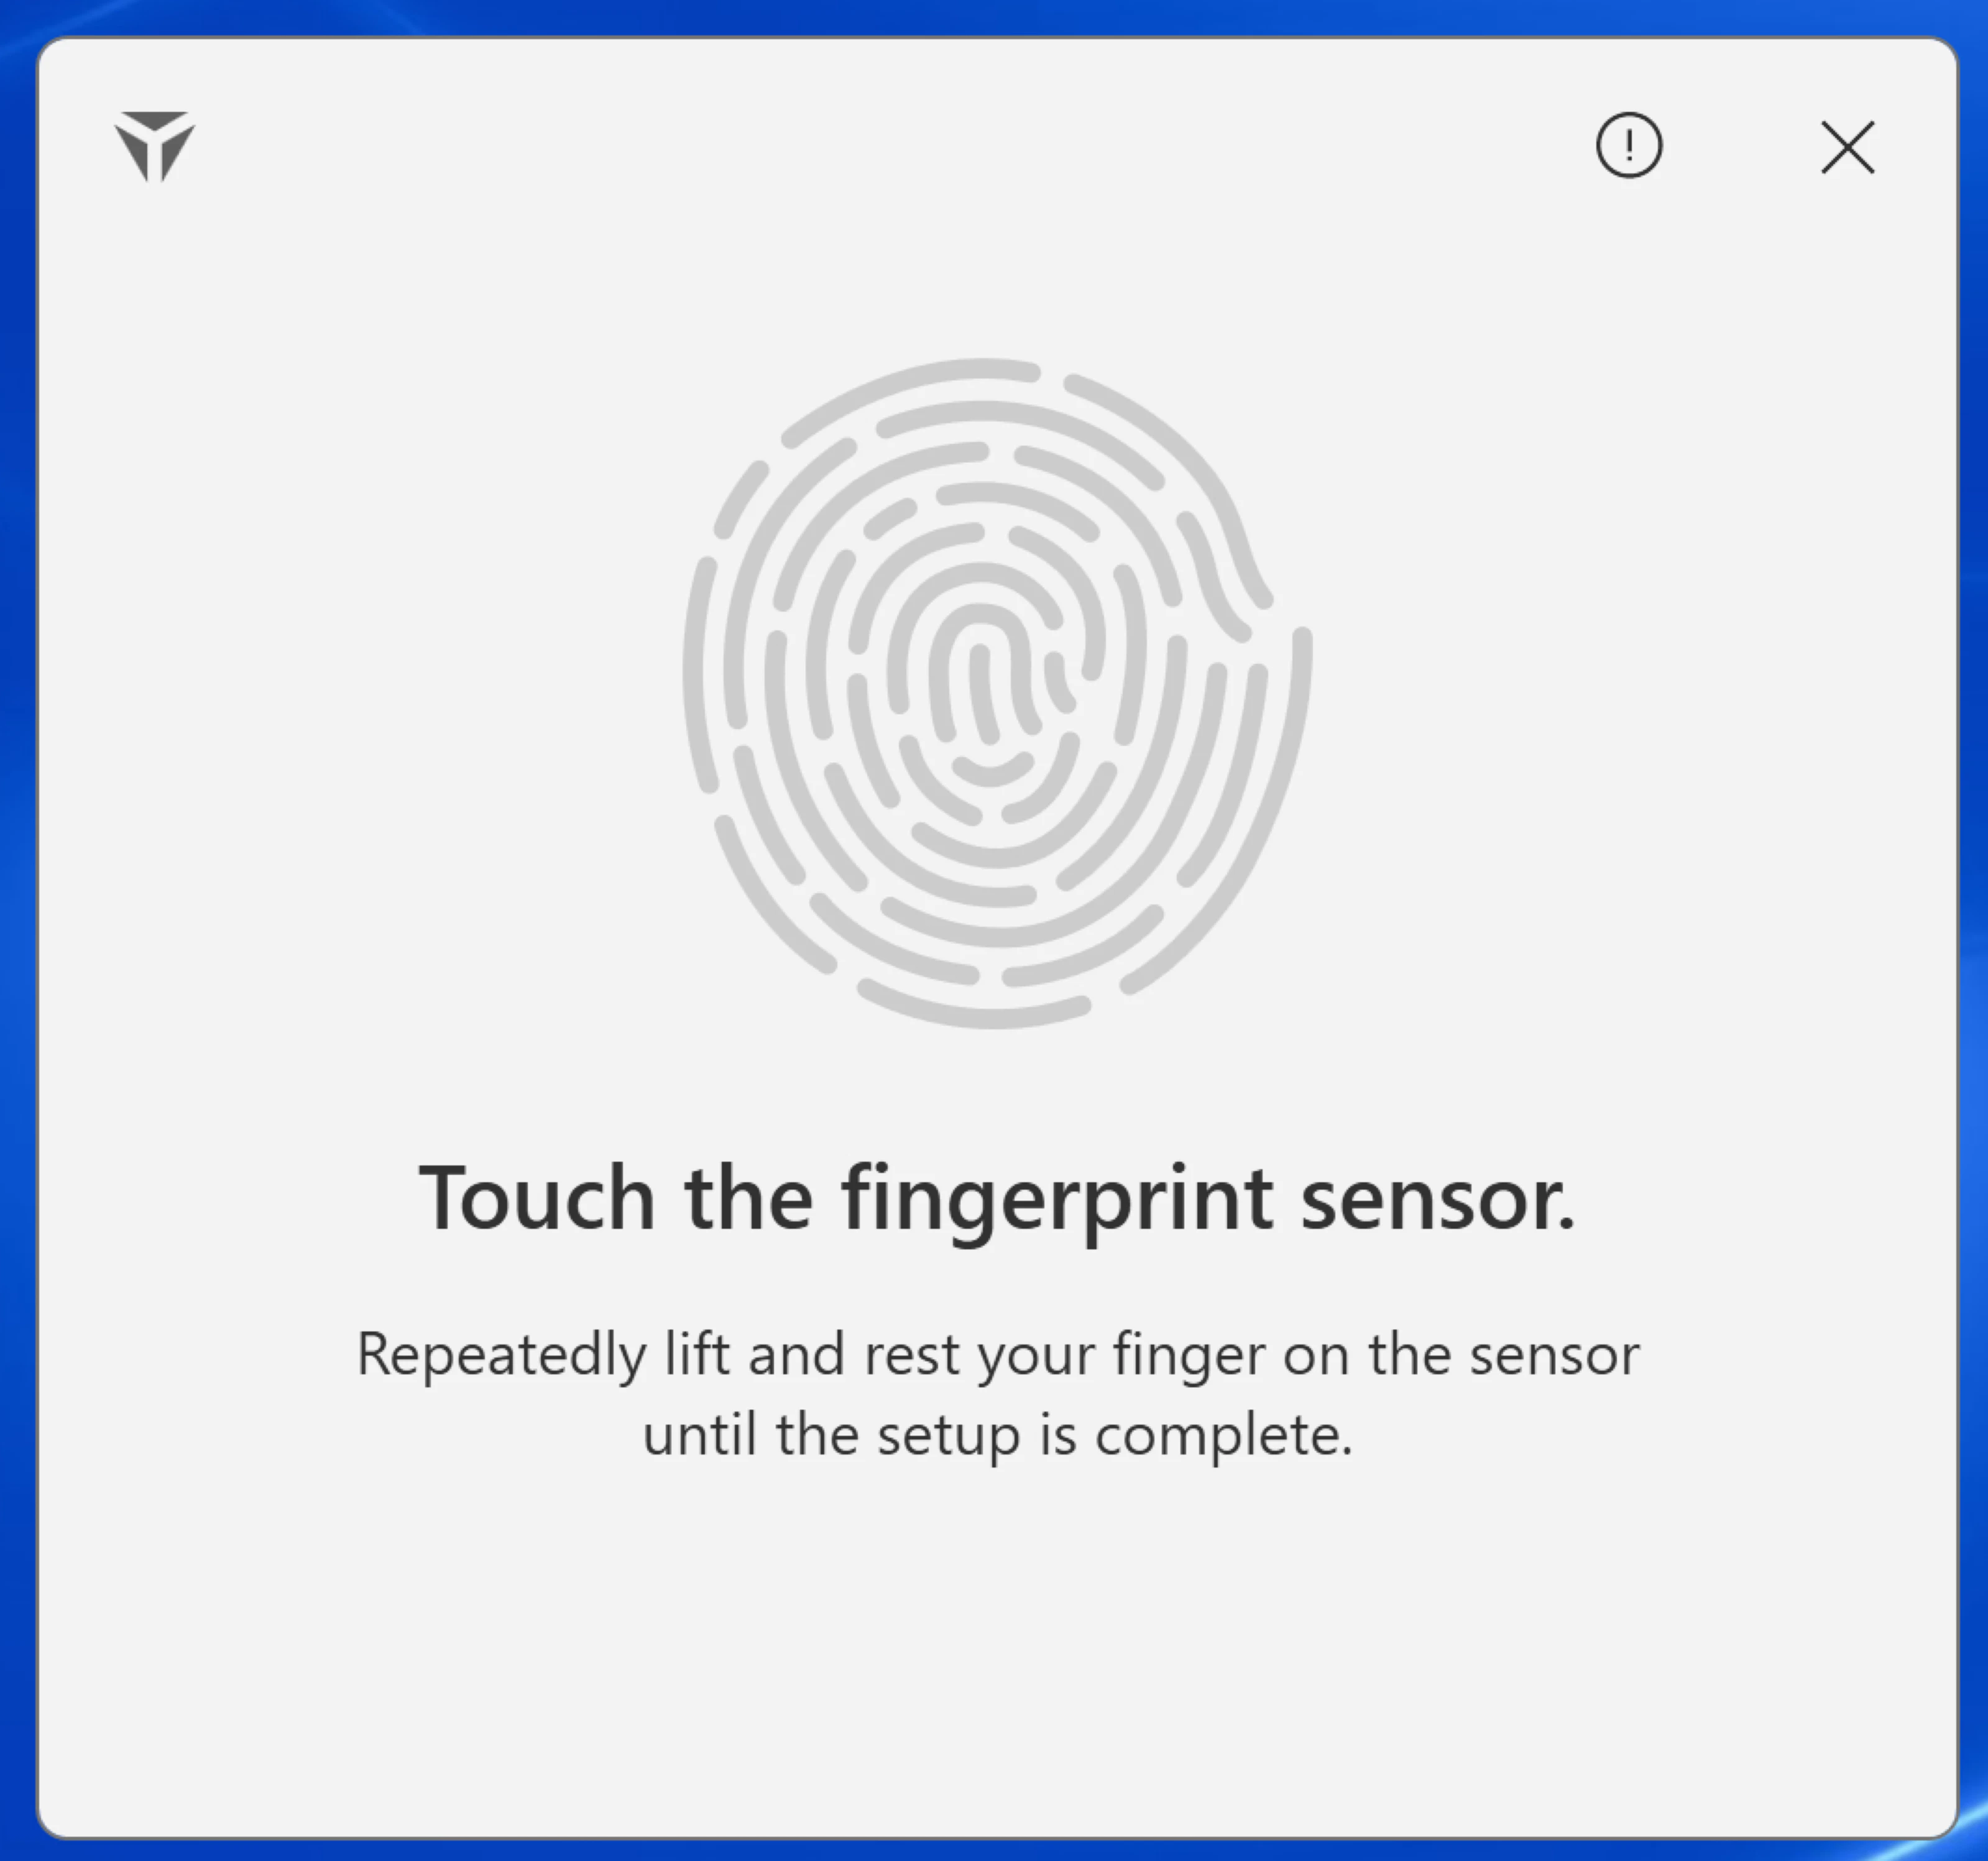
 5. Repeatedly place your finger on the sensor and follow the assistive prompts
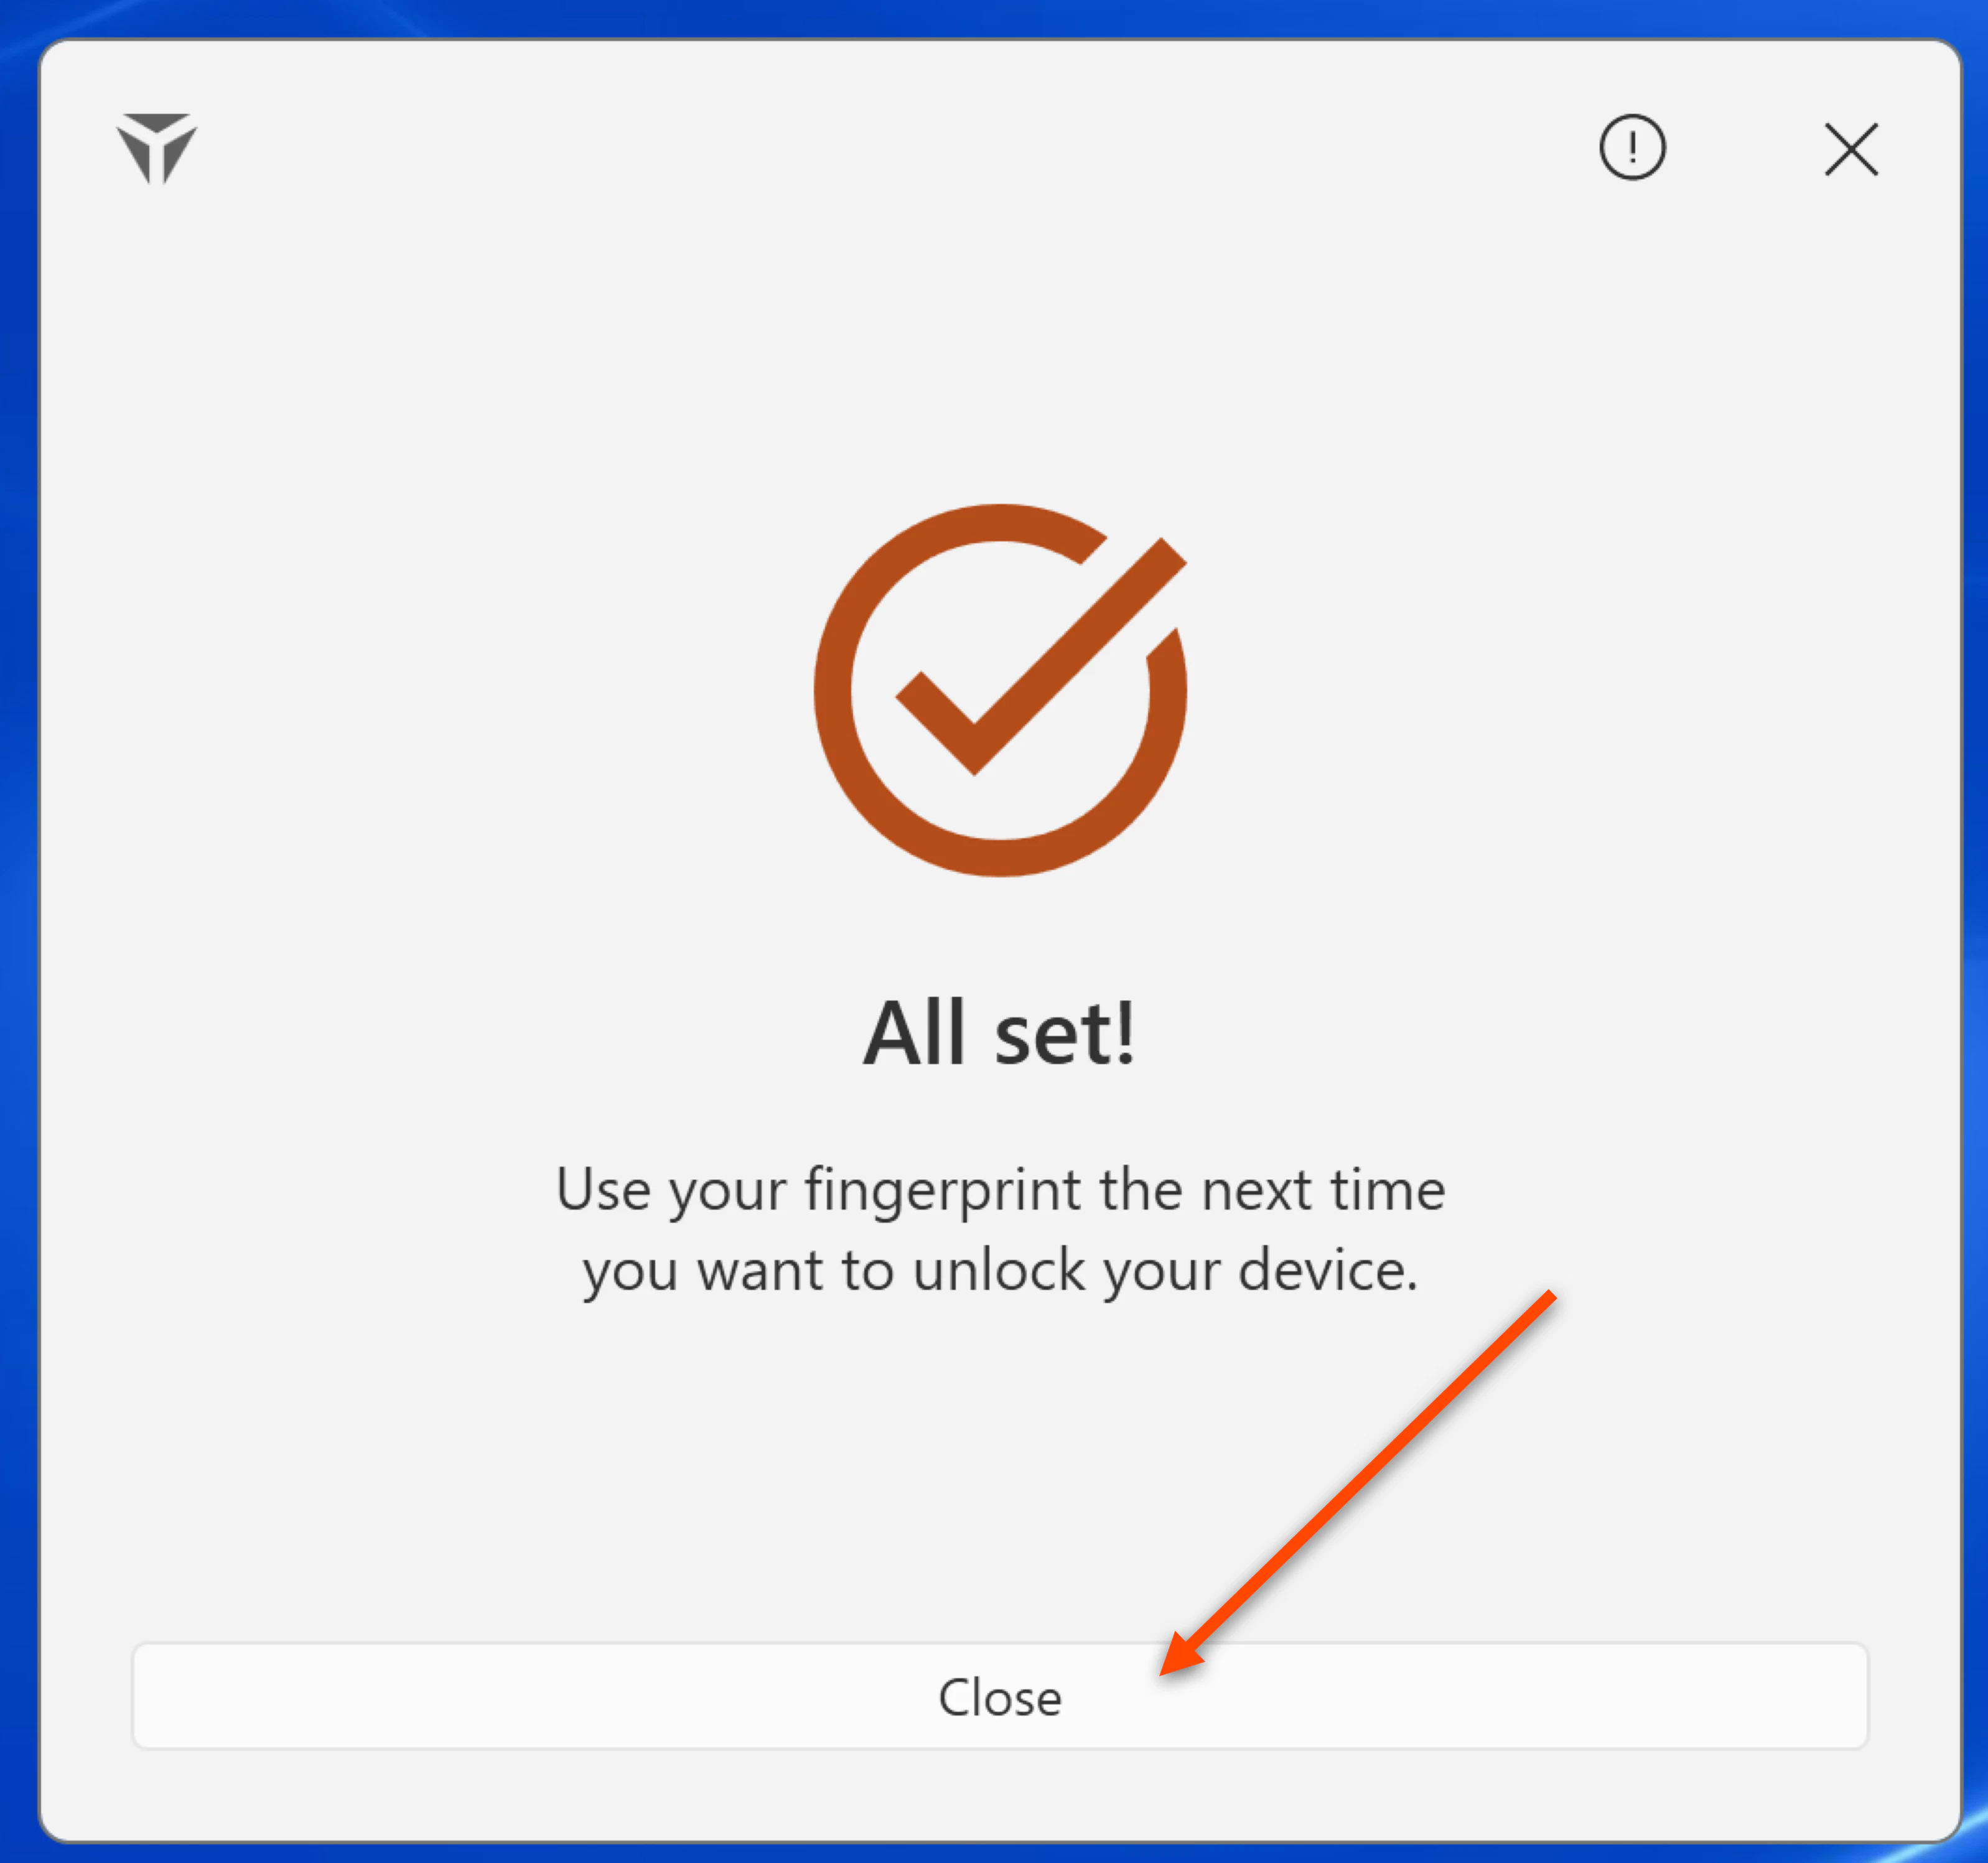
 6. Click **Close** once prompted
 # Enroll Face Biometrics
1. Navigate to the bottom right corner of the Home Screen, hover over the ^ arrow, and right click on the **TruU Logo**
2. Right click on your **Account**, then select **Account Profile**
3. Next, click on **Add Face Biometrics**
# Enroll Face Biometrics
1. Navigate to the bottom right corner of the Home Screen, hover over the ^ arrow, and right click on the **TruU Logo**
2. Right click on your **Account**, then select **Account Profile**
3. Next, click on **Add Face Biometrics**
 4. Follow the on-screen instructions to set up Face biometrics
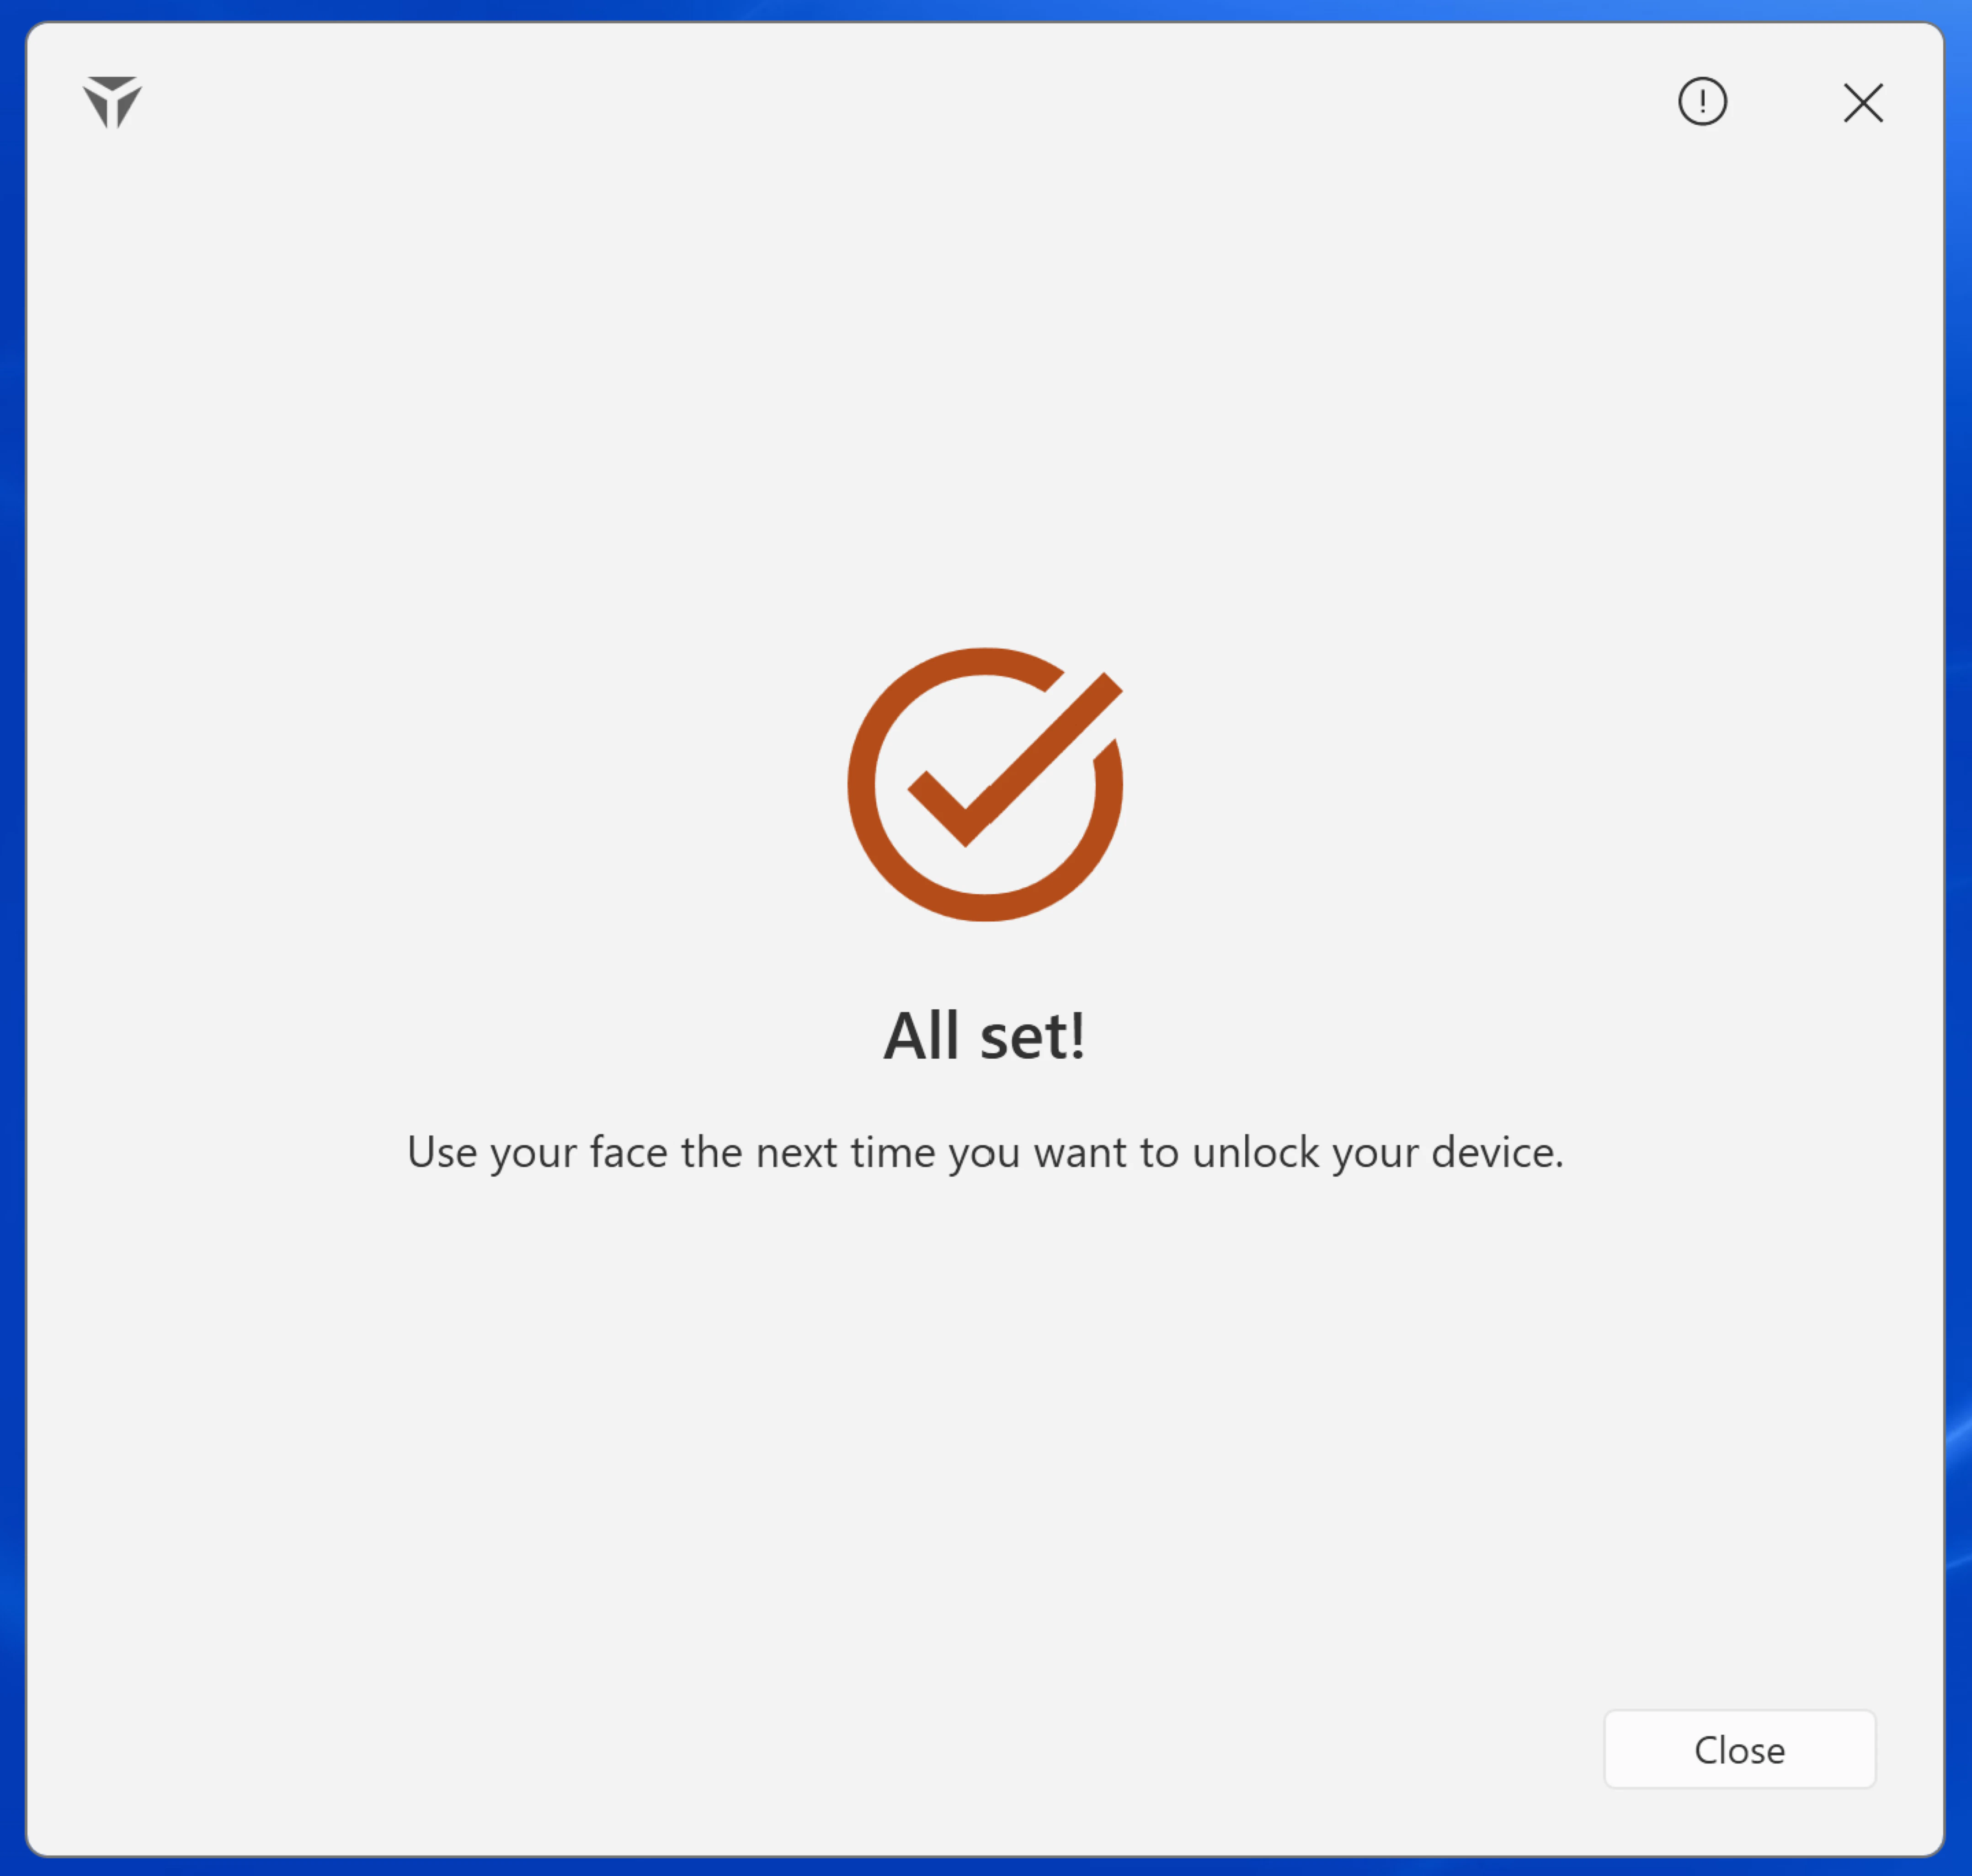
 5. Click **Close** once prompted
 **NOTE**: When enrolling face biometrics on a Windows device, ensure that any external cameras are unplugged during the enrollment process. This step is crucial to guarantee that the biometric is linked to the laptop, rather than the external camera. After enrollment is complete, the external camera can remain connected during future logins. If the laptop lid is closed, the external camera will be used for login, and if the lid is open, the system will default to the internal camera. **Please note that both external and internal cameras must be IR (infrared) cameras for face biometric enrollment and authentication to work properly**
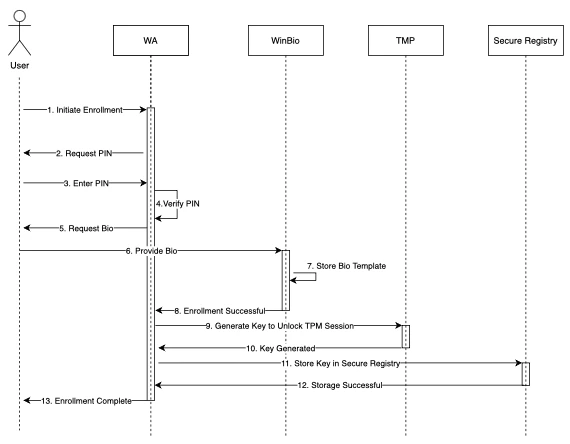
**Initial Biometric Enrollment Workflow**
**NOTE**: When enrolling face biometrics on a Windows device, ensure that any external cameras are unplugged during the enrollment process. This step is crucial to guarantee that the biometric is linked to the laptop, rather than the external camera. After enrollment is complete, the external camera can remain connected during future logins. If the laptop lid is closed, the external camera will be used for login, and if the lid is open, the system will default to the internal camera. **Please note that both external and internal cameras must be IR (infrared) cameras for face biometric enrollment and authentication to work properly**
**Initial Biometric Enrollment Workflow**
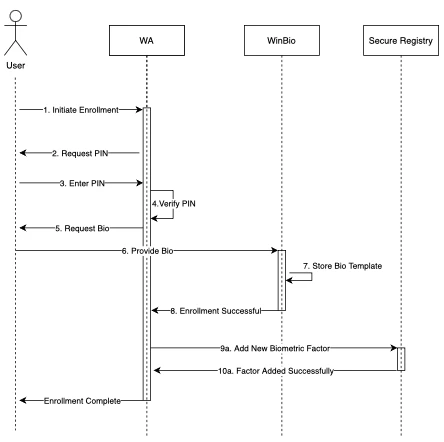
 **Standard Biometric Enrollment Workflow**
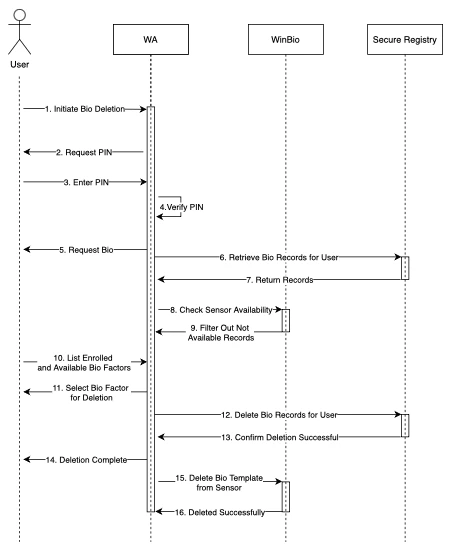
 **Deleting Biometric Records Workflow**
 ***
[Windows Login](/docs/windows-login)
[Passwordless Login to Apps - Windows](/docs/passwordless-login-to-apps-windows)
***
[Windows Login](/docs/windows-login)
[Passwordless Login to Apps - Windows](/docs/passwordless-login-to-apps-windows)