> ## Documentation Index
> Fetch the complete documentation index at: https://docs.truu.ai/llms.txt
> Use this file to discover all available pages before exploring further.
# Hybird Joined / Entra Joined - FIDO2
For prerequisites, config file requirements, and firewall rules, see [TruU Authentication Modalities](/docs/truu-authentication-modalities).
**System Requirements**
* Windows 11 version 24H1 or later
If you are using a directory other than Entra ID, you need the **Entra ID FIDO2 Enrollment Adapter**. This adapter lets TruU verify that a FIDO2 security key has been registered with Entra ID using an OAuth client and mapping attributes. It is required for Windows Authenticator version 24.2 or later in FIDO2 mode. If you are using Entra ID as your directory, this is not needed.
[Entra ID FIDO2 Enrollment Adapter Guide](https://docs.truu.ai/docs/entra-id-fido2-enrollment-adapter)
## Enable FIDO2 Security Keys in Entra ID
1. Sign in to Microsoft Entra ID (Azure AD)
2. Go to **Security** > **Authentication Methods**
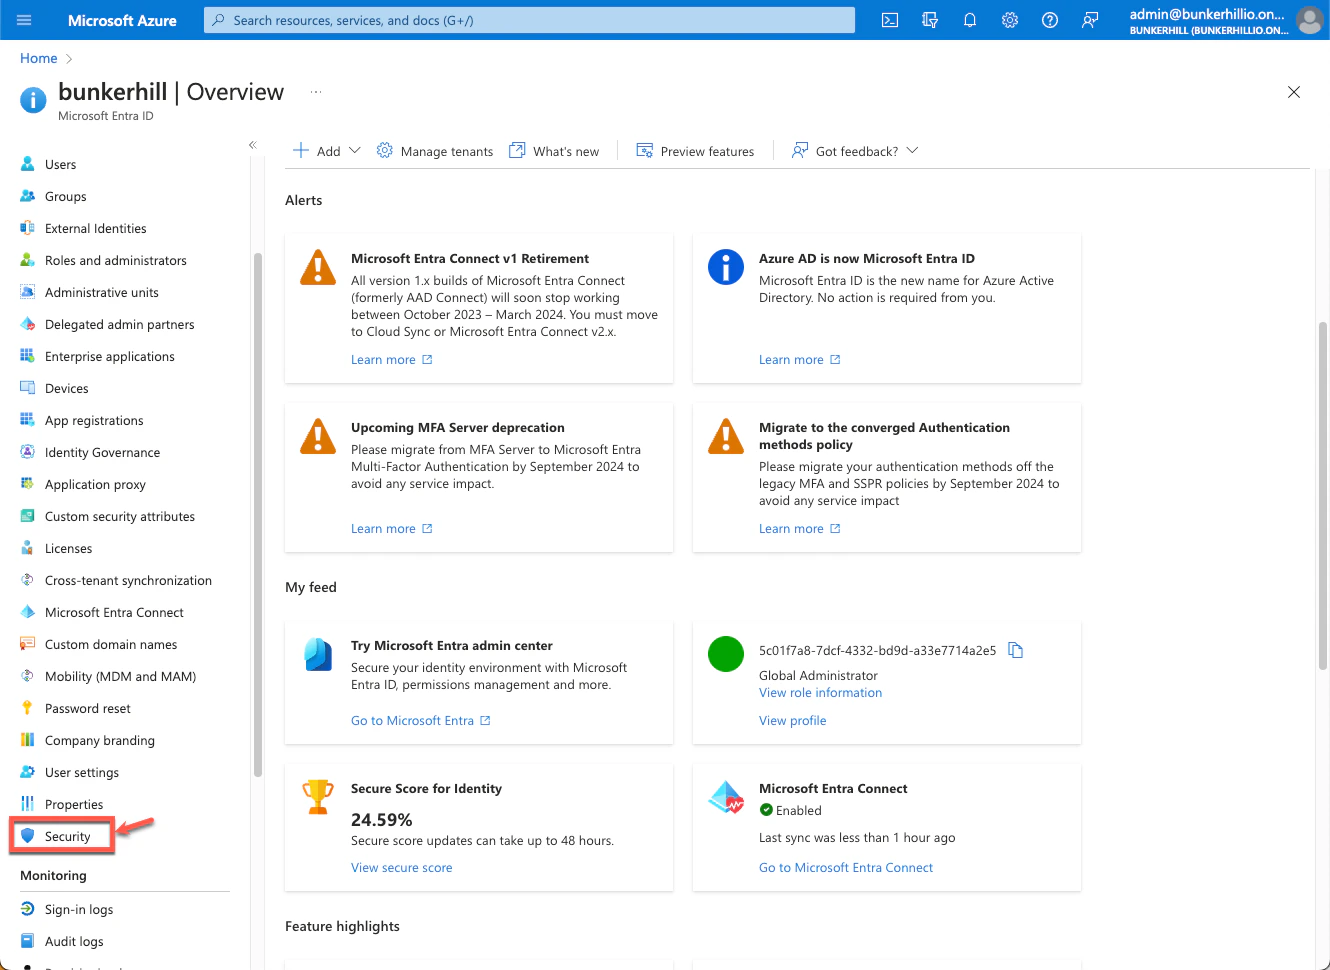
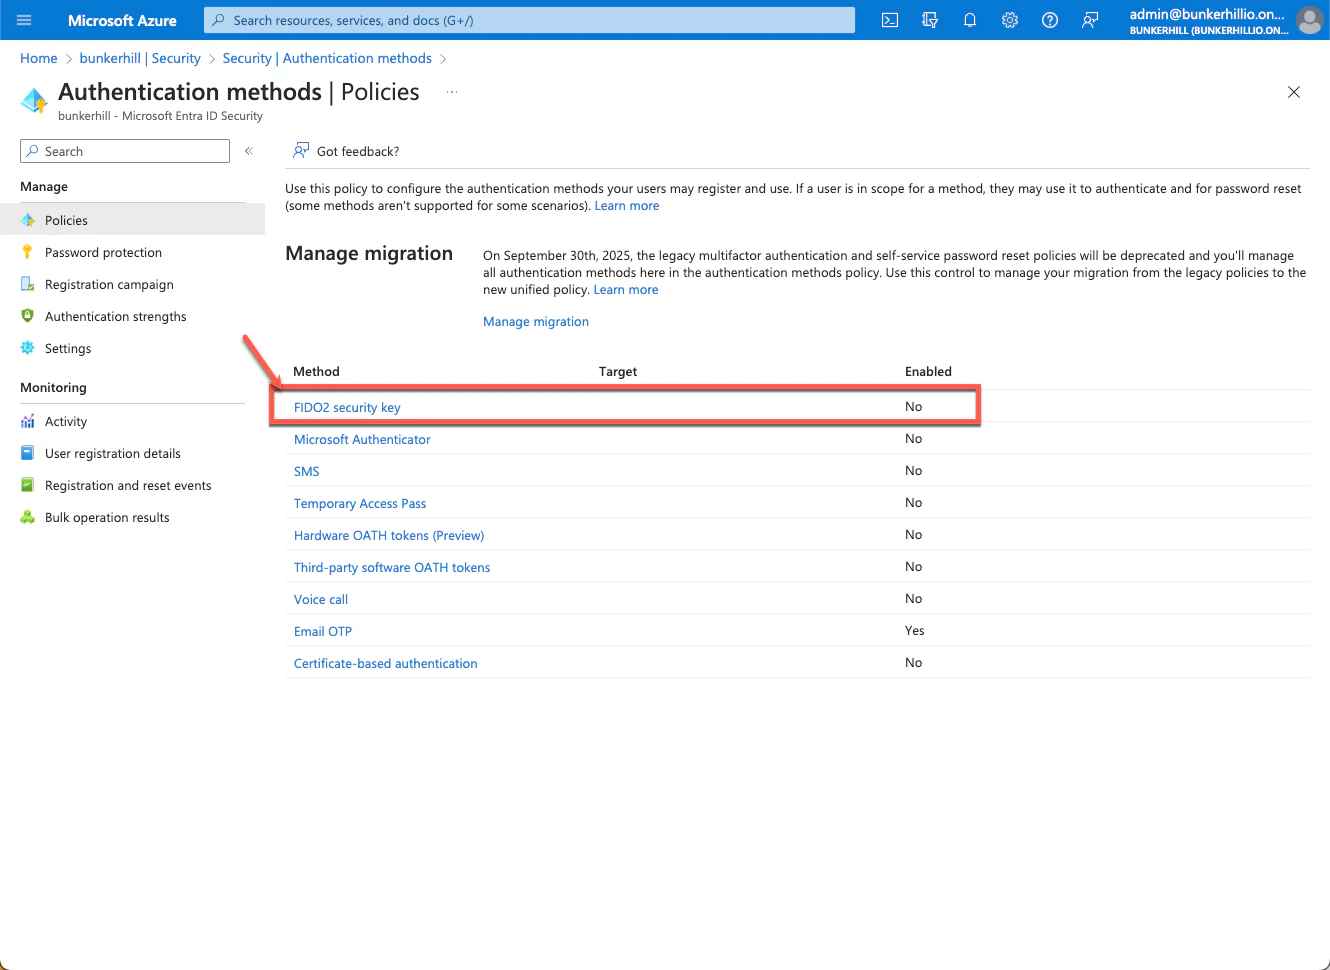
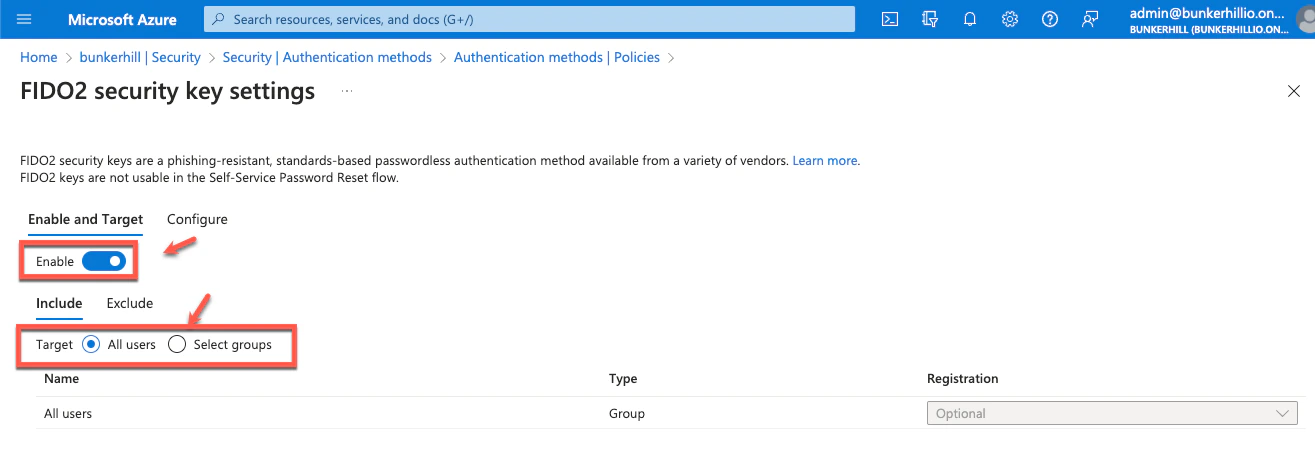
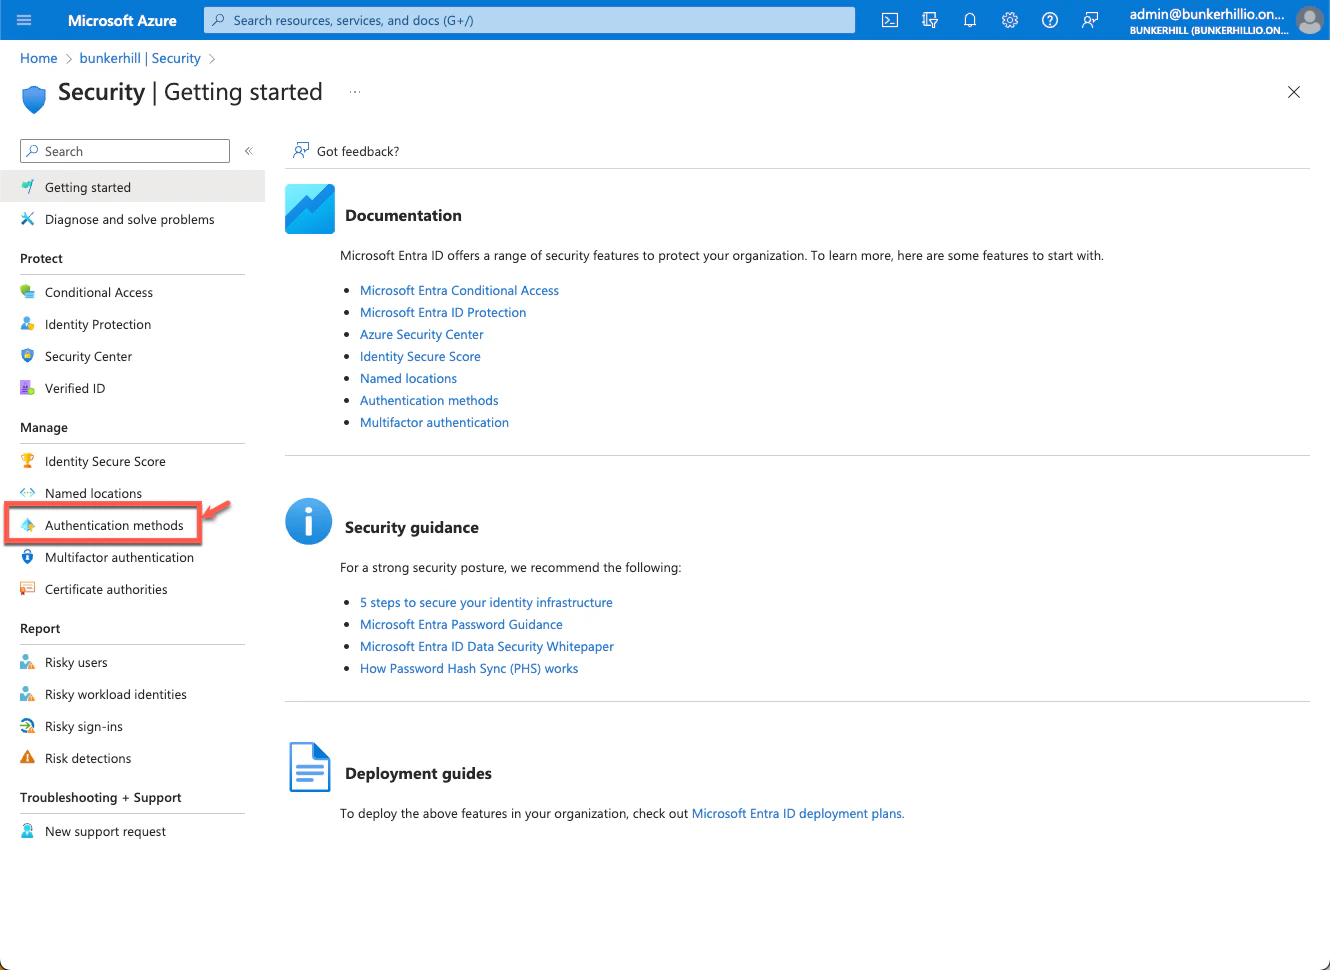 3. Click **FIDO2 Security Keys**, enable it for all users or a selected group, then click **Save**
If FIDO2 Security Keys are already enabled, proceed to **Configure FIDO2 security key settings** below.
3. Click **FIDO2 Security Keys**, enable it for all users or a selected group, then click **Save**
If FIDO2 Security Keys are already enabled, proceed to **Configure FIDO2 security key settings** below.
 ## Configure FIDO2 Security Key Settings
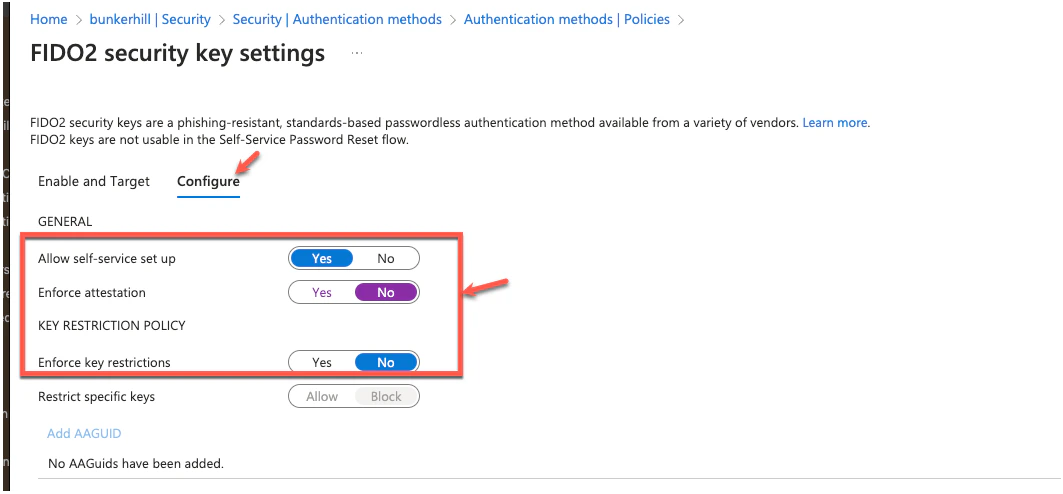
1. Go to the **Configure** tab and set the following:
* **Allow self-service set up:** Yes
* **Enforce attestation:** No
Attestation verifies hardware manufacturing processes to prevent rogue hardware. TruU is a software-based (virtualized) solution that runs on Microsoft-verified hardware and does not require hardware attestation.
* **Enforce key restrictions:** No
## Configure FIDO2 Security Key Settings
1. Go to the **Configure** tab and set the following:
* **Allow self-service set up:** Yes
* **Enforce attestation:** No
Attestation verifies hardware manufacturing processes to prevent rogue hardware. TruU is a software-based (virtualized) solution that runs on Microsoft-verified hardware and does not require hardware attestation.
* **Enforce key restrictions:** No
 2. Click **Save**
## Enable FIDO2 Login via Group Policy
Follow the steps in [Enable TruU FIDO2 Login using Windows](https://docs.truu.ai/docs/enable-truu-fido2-login-using-windows).
2. Click **Save**
## Enable FIDO2 Login via Group Policy
Follow the steps in [Enable TruU FIDO2 Login using Windows](https://docs.truu.ai/docs/enable-truu-fido2-login-using-windows).