> ## Documentation Index
> Fetch the complete documentation index at: https://docs.truu.ai/llms.txt
> Use this file to discover all available pages before exploring further.
# Manually Reporting TruU Logs
> If you find yourself unable to send logs through the TruU Agent, here is a step-by-step guide as to how one is able to capture and send logs manually. Typically our agent is only able to capture logs from the last 24 hours since the incident occurred. The below instructions will allow you to also capture custom date/time ranges for the logs.
To manually report Windows Agent logs, copy the logs from the following paths and zip them and share with TruU:
**System profile logs:**
```
C:\Windows\System32\config\systemprofile\AppData\Local\TruU Inc\Logs
```
**TruU service and installation logs:**
```
C:\ProgramData\TruU Inc\logs
```
**User profile logs (each user has their own folder by`\(user_name)`):**
```
C:\Users\(user_name)\AppData\Local\TruU Inc\logs
```
NOTE: After saving all the logs on your desktop, create a Zip file of the set of logs to prepare them for sharing with the TruU team
### How to Manually Report Event Viewer Logs
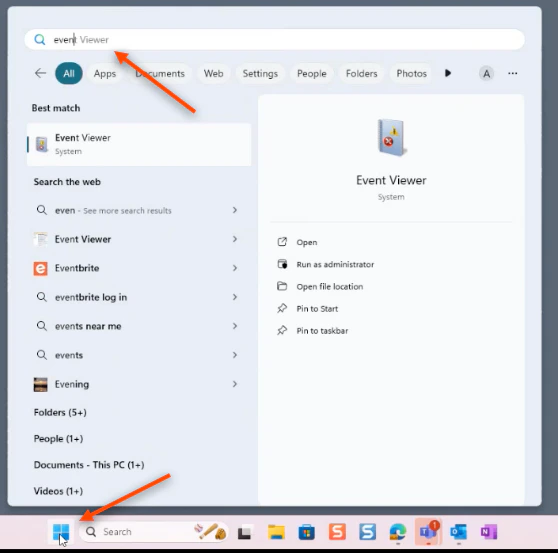
1. Search for "Event Viewer" in your Windows search bar
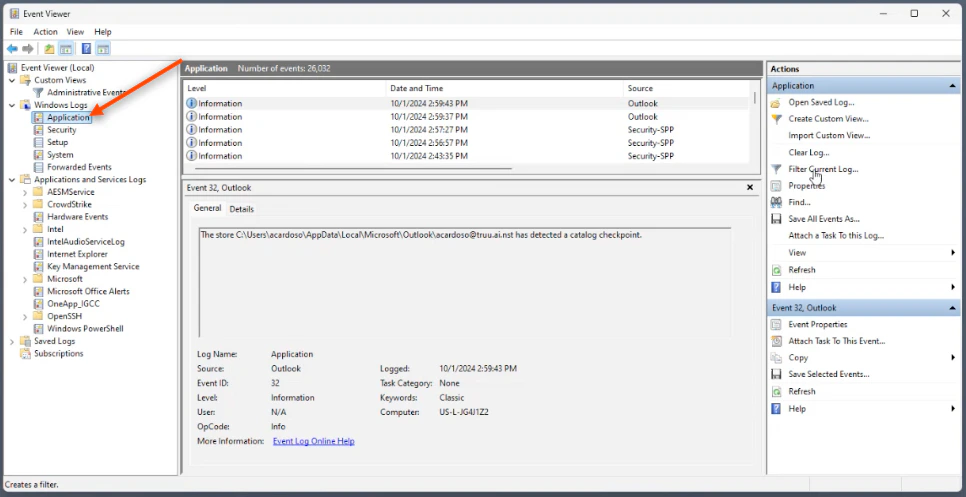
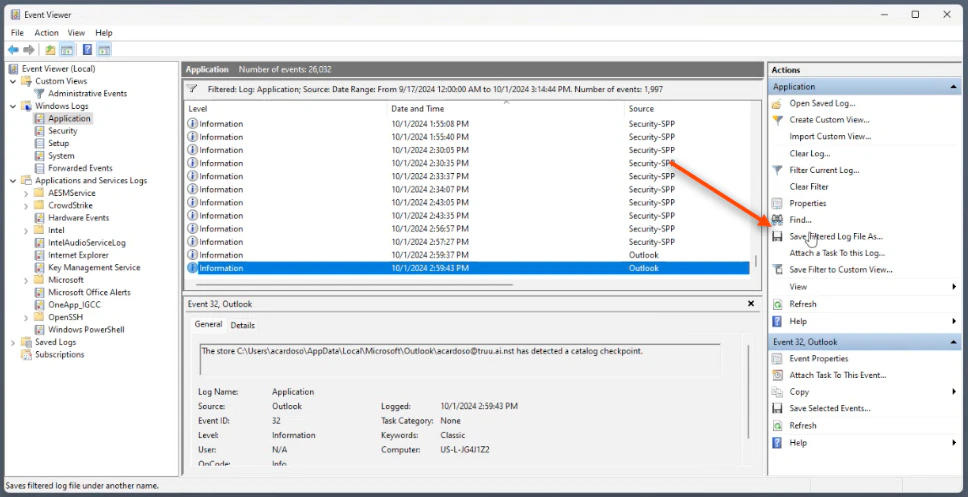
 2. Open the desired logs from the user (whether it be **Application**, **Security**, **Biometrics,** or **System)** in your "Event Viewer Windows Logs". Here, you can see the **Application** logs being selected
 NOTE: You can find Biometrics Logs under Applications, then navigate to "Service Logs", then "Microsoft", then "Windows", then go to "Biometrics" and then "Operational"
3. Click **Filter Current Log**
NOTE: You can find Biometrics Logs under Applications, then navigate to "Service Logs", then "Microsoft", then "Windows", then go to "Biometrics" and then "Operational"
3. Click **Filter Current Log**
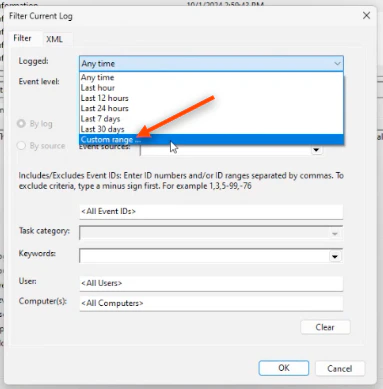
 4. In the prompted dropdown menu, select **Custom Range**
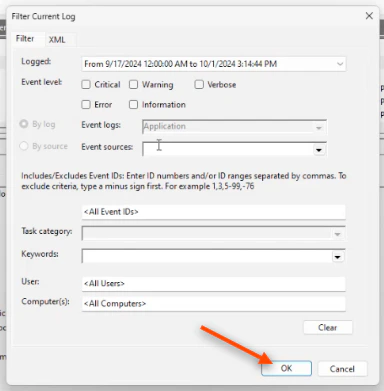
 5. Input the desired time range for the requested logs and click **OK**
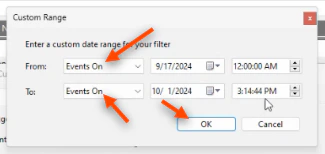 6. Then, click **OK** once again after you had specified your desired "Logged Custom Range"
 7. Next, click **Save Filtered Log File As...** and save it as the type **.evtx**. *Name* your saved file and save it to your desktop. Then, click **Save**
 NOTE: After saving all the logs on your desktop, create a Zip file of the set of logs to prepare them for sharing with the TruU team
***
[Change PIN - Windows](/docs/change-pin-windows)
[Admin Assisted Onboarding: Windows](/docs/admin-assisted-onboarding-windows)
NOTE: After saving all the logs on your desktop, create a Zip file of the set of logs to prepare them for sharing with the TruU team
***
[Change PIN - Windows](/docs/change-pin-windows)
[Admin Assisted Onboarding: Windows](/docs/admin-assisted-onboarding-windows)