> ## Documentation Index
> Fetch the complete documentation index at: https://docs.truu.ai/llms.txt
> Use this file to discover all available pages before exploring further.
# OpenID Connect Adapter Setup
> This is a step-by-step guide as to how one created an OpenID Connect Adapter to facilitate the integration between one's Okta Directory and TruU.
## Prerequisites
* **OpenID Connect IdP**\
In Okta, under Identity Provider, ensure the OpenID Connect IdP integration is enabled
* **Customer directory**\
TruU supports various directories: AD, Entra ID, Okta, or Google
* **Okta version check**\
TruU recommends that the customer run the Okta Identity Engine (OIE) as a platform update from Okta’s classic engine
* **Designate two Admins (this can be the same individual):**
* Okta Admin to perform the Okta configuration and integration with TruU and administer the TruU/Okta relationship
* The Bootstrap admin for the TruU tenant. The Bootstrap admin will be the customer end policy administrator and your TruU tenant point of contact
### Configuring Okta OIDC Integration
#### Add OpenID Connect Adapter
1. Login to your **TruU Admin portal**
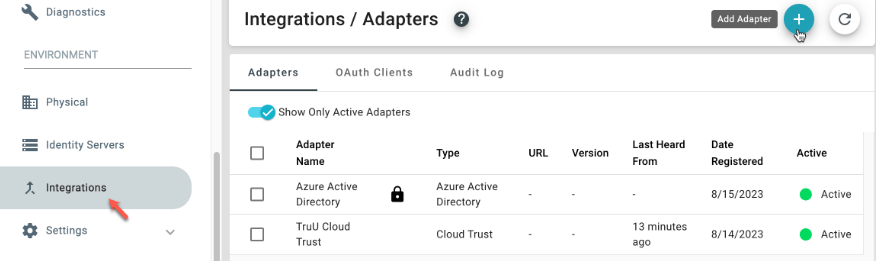
2. Navigate to the "Integrations" tab and ensure you are on the "Adapters" tab. Click on the **(+)** to "Add an Adapter"
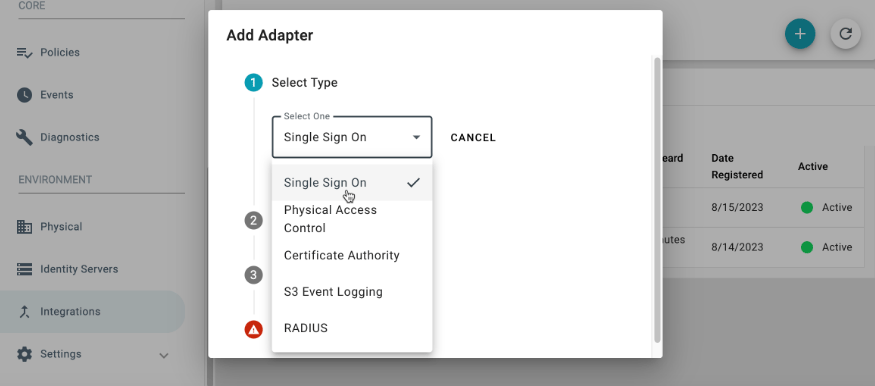
 3. Select **Single Sign On** from the drop-down menu
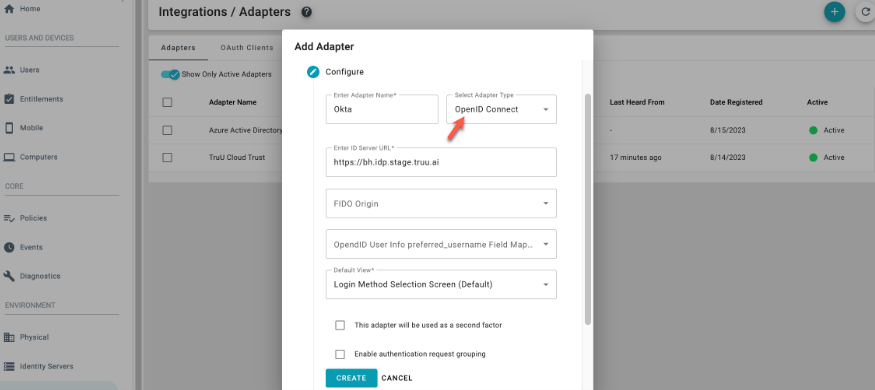
 4. Under "Adapter Type", Select **OpenID Connect**
 5. Select **Digital Admin** (Super Admin if not selected)
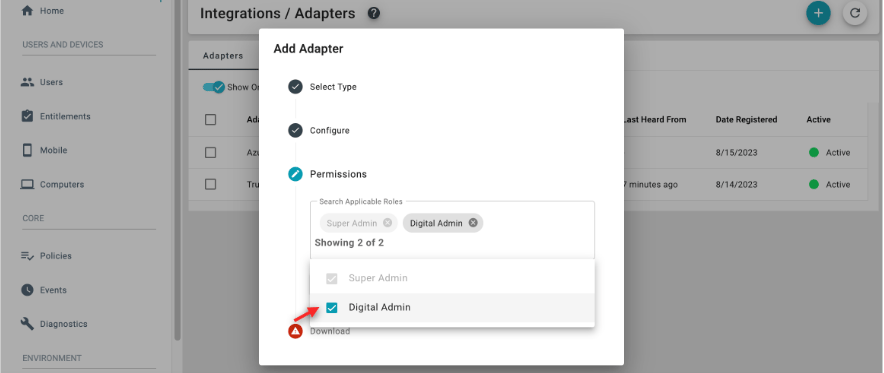 6. Click on **Download and Finish**
NOTE: Save the ensuing files that are downloaded, as you will need them later
7. Log into your "Okta Admin Portal"
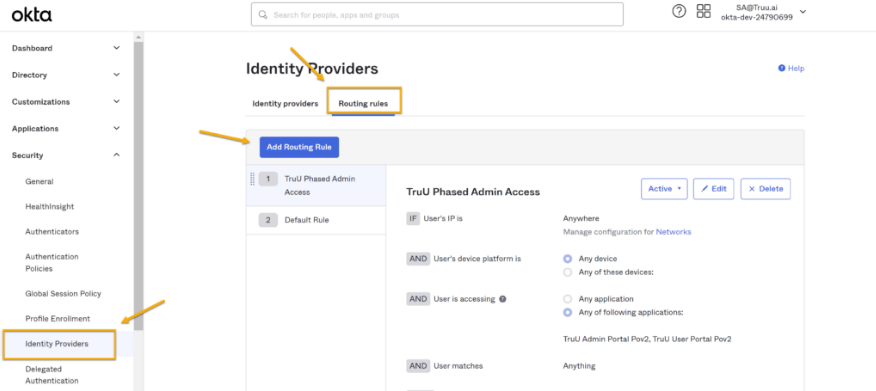
8. Navigate to the **Security** tab, then select the **Identity Providers** tab. Click the **Add Identity Provider** button on this page
6. Click on **Download and Finish**
NOTE: Save the ensuing files that are downloaded, as you will need them later
7. Log into your "Okta Admin Portal"
8. Navigate to the **Security** tab, then select the **Identity Providers** tab. Click the **Add Identity Provider** button on this page
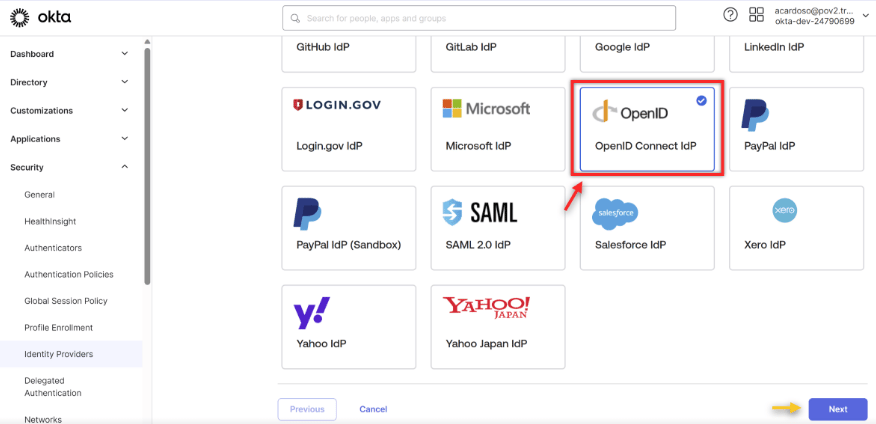
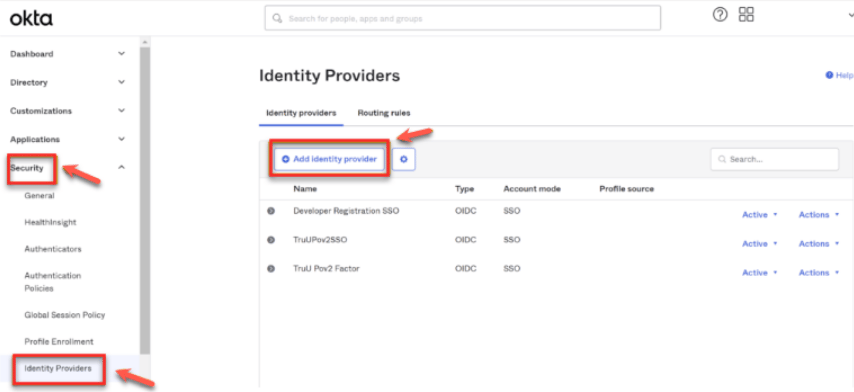 9. Select **OpenID Connect** as the provider, then press **Next**
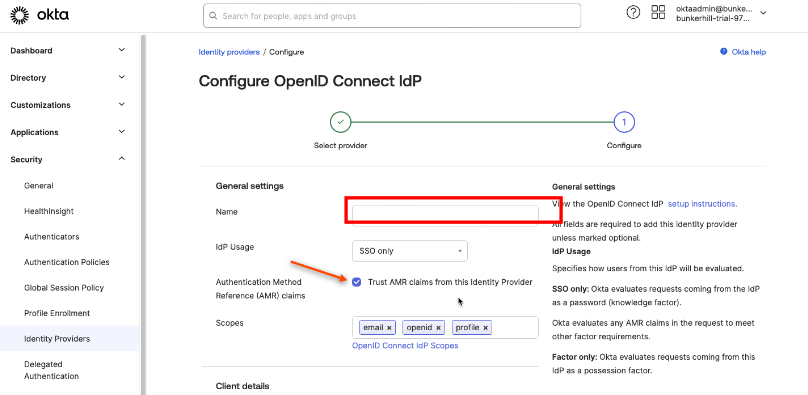
 10. Under **General Settings**
1. Add **Name** (Include TruU in name to help identify)
2. Select **SSO only** under IdP Usage
3. Select **Trust AMR Claims from this Identity Provider**
10. Under **General Settings**
1. Add **Name** (Include TruU in name to help identify)
2. Select **SSO only** under IdP Usage
3. Select **Trust AMR Claims from this Identity Provider**
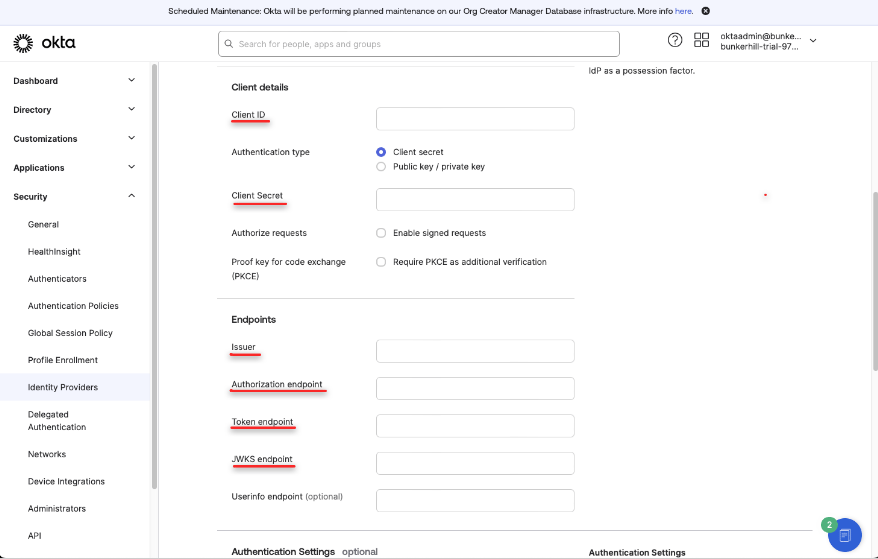
 11. Under **Client Details**
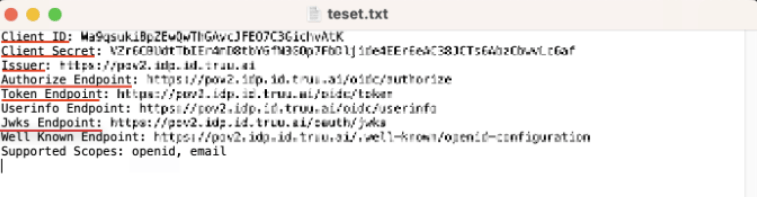
1. Open the file downloaded from "Creating a TruU OpenID Connect Adapter"
2. Fill in the following fields: *Client ID, Client Secret, Issuer, Authorize Endpoint, JWKS Endpoint, and Token Endpoint*. Then, click **Finish**
11. Under **Client Details**
1. Open the file downloaded from "Creating a TruU OpenID Connect Adapter"
2. Fill in the following fields: *Client ID, Client Secret, Issuer, Authorize Endpoint, JWKS Endpoint, and Token Endpoint*. Then, click **Finish**
 12. **Set a** Routing Rule **with TruU as the configured Identity Provider. This allows Okta to delegate authentication requests to TruU under pre-defined Okta conditions. To set this up, navigate to**Security > Identity Providers > Routing Rules **in the Okta Admin Portal and select**Add Routing Rule