

Configuration of Certificate-Based Authentication:
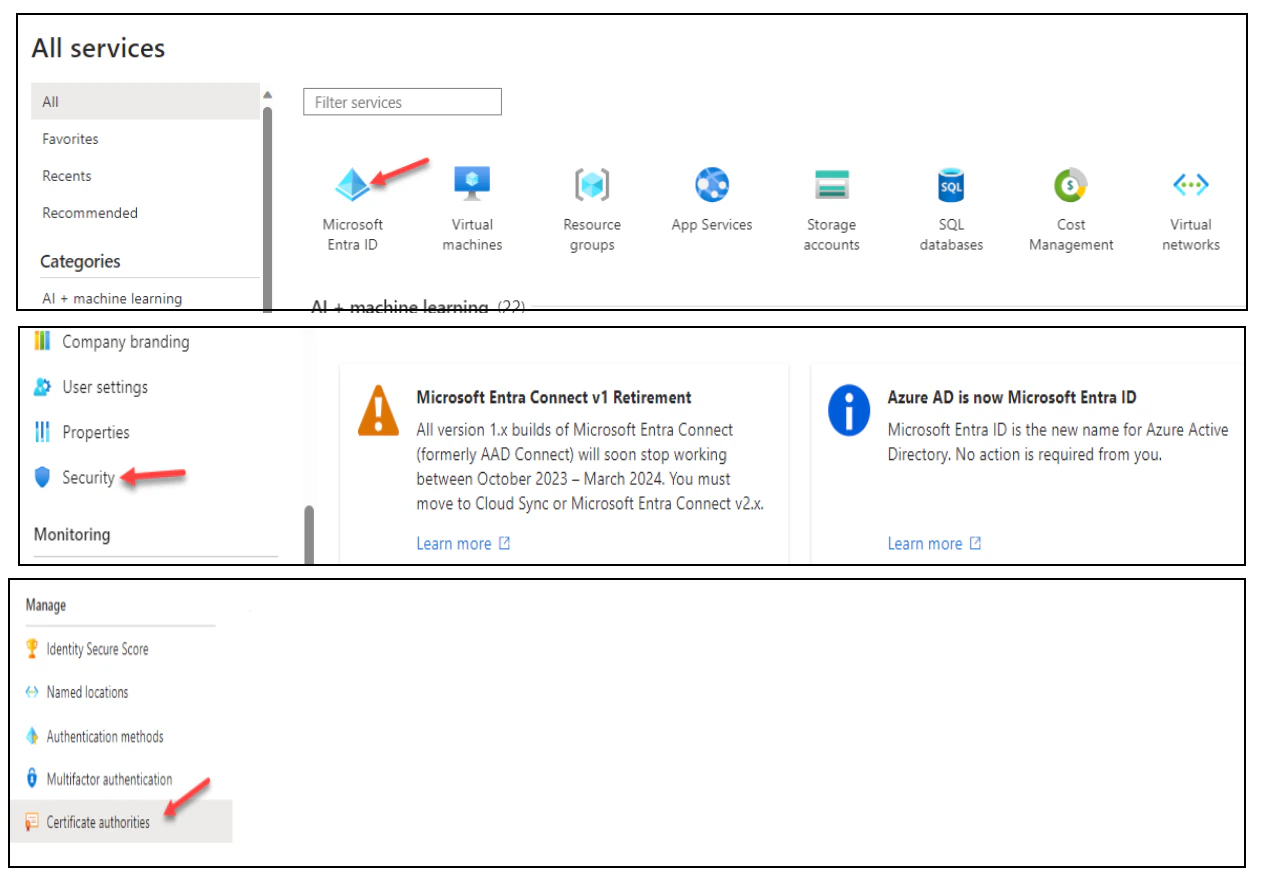
- Sign into the Microsoft Entra portal using a Global Administrator account
- Proceed to Microsoft Entra ID, select Security, and then click on Certificate Authorities in the menu
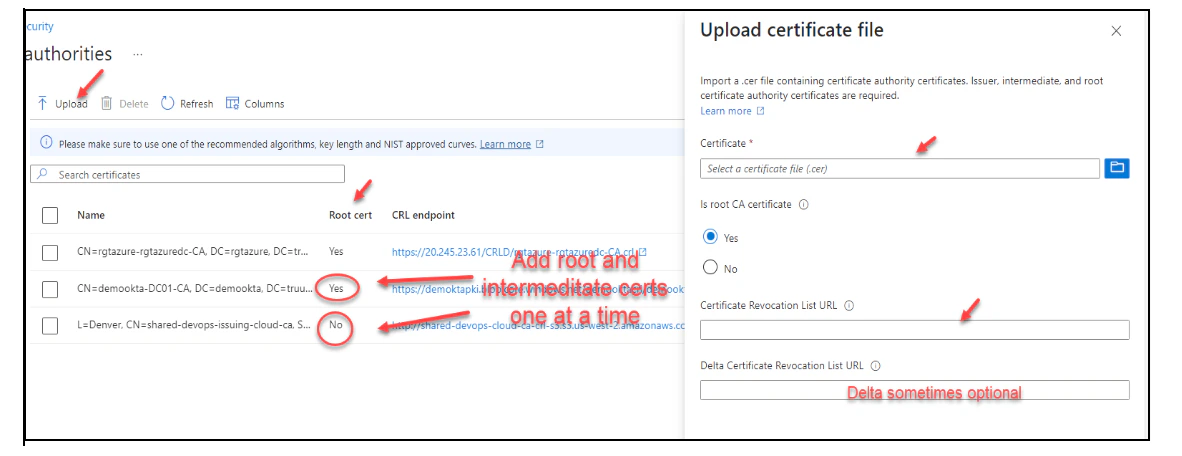
- To upload a CA, click Upload:
- To delete a CA certificate, select the certificate and click Delete
- Click Columns to add or delete columns
Configure Authentication Binding Policy
The authentication binding policy helps determine the strength of authentication to either a single factor or multi factor. An admin can change the default value from single-factor to multifactor and configure custom policy rules by mapping to issuer Subject or policy OID fields in the certificate. To enable the certificate-based authentication and configure user bindings in the Entra portal, complete the following steps:- Sign into the Microsoft Entra portal as Authentication Policy Administrator
- Select Microsoft Entra ID (Azure Active Directory), then choose Security from the menu on the left-hand side
- Click Authentication methods, then Policies
- Under Manage, select Authentication methods, then Certificate-based Authentication
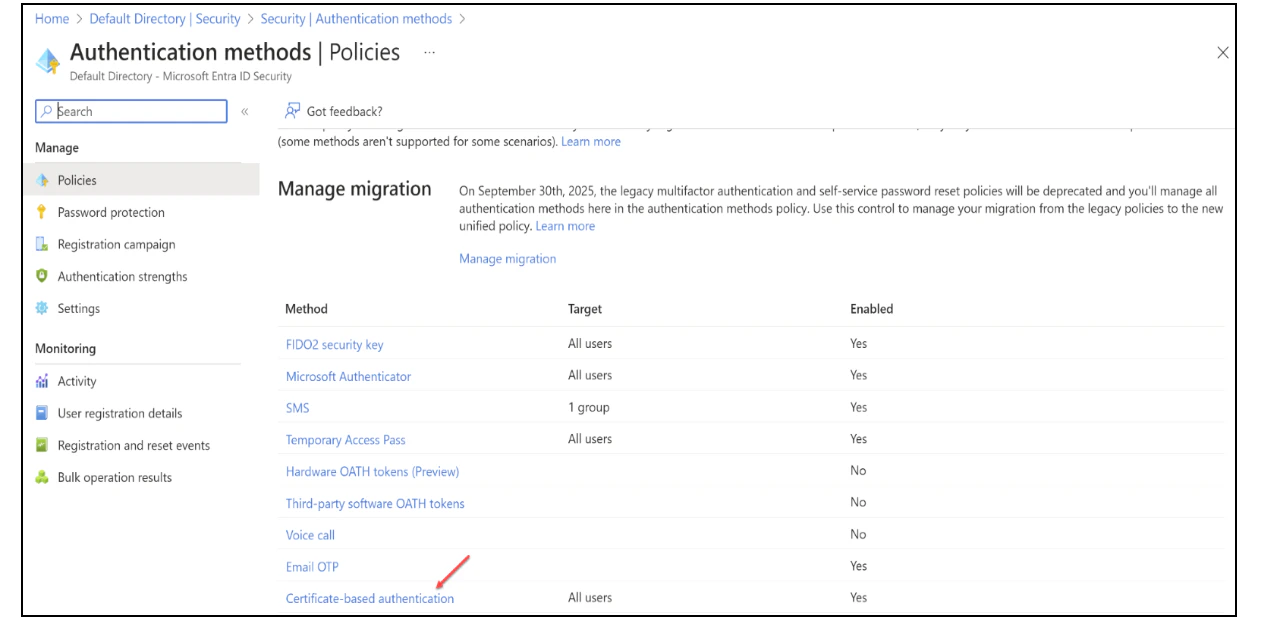
- Click Configure to set up authentication binding and username binding
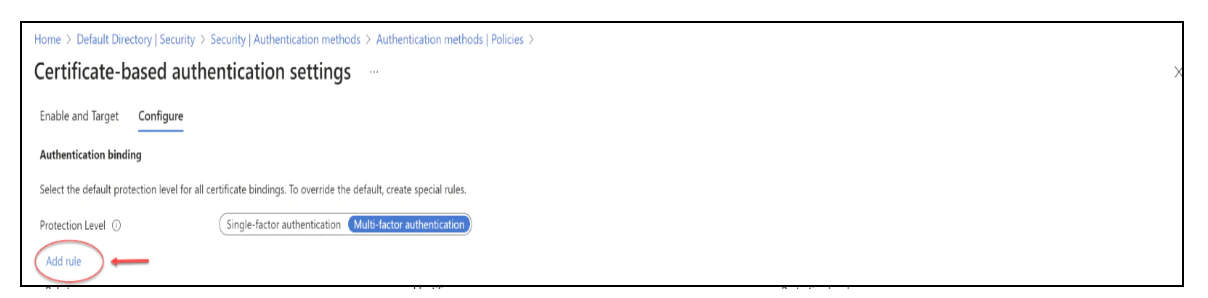
- The protection level attribute has a default value of Single-factor authentication. Select Multi-factor authentication to change the default value to MFA
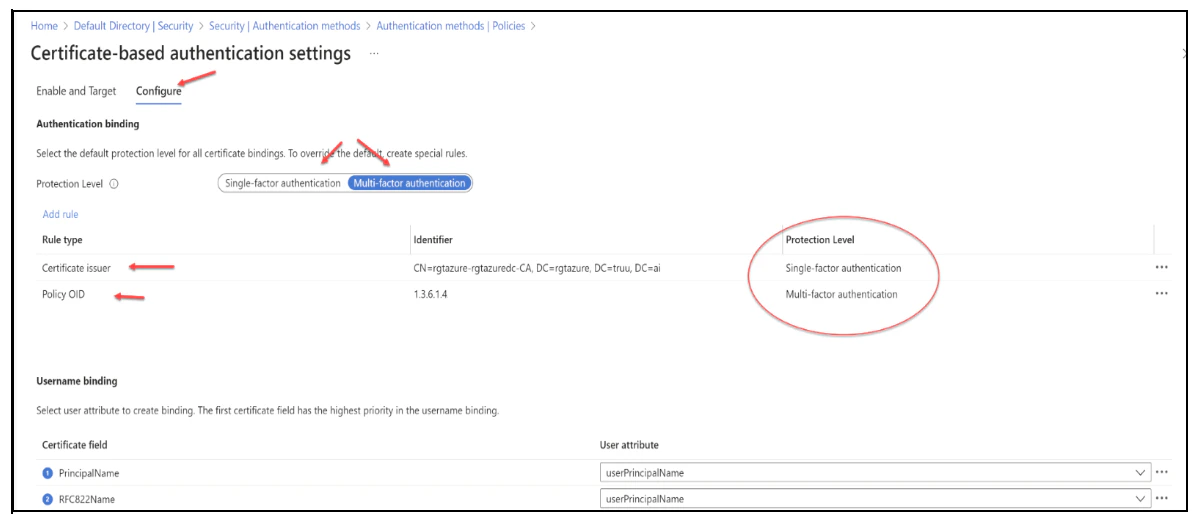
- You can also set up custom authentication binding rules to help determine the protection level for client certificates. It can be configured using either the issuer Subject or Policy OID fields in the certificate
- To add custom rules, click on Add Rule
- To create a rule by certificate issuer, click Certificate issuer
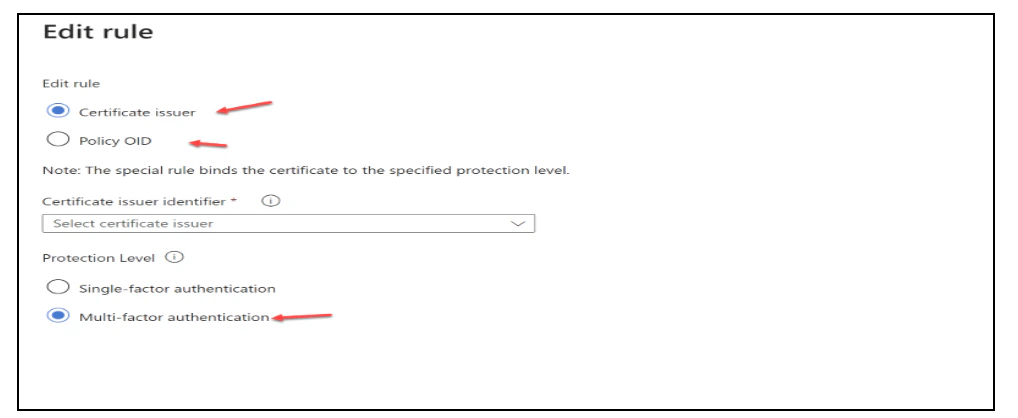
- Click Ok to save any custom rule
Configure Username Binding Policy
The username binding policy helps determine the user in the tenant. By default, we map Principal Name in the certificate to onPremisesUserPrincipalName in the user object to determine the user. An admin can override the default and create a custom mapping. Currently, we support two certificate fields, SAN (Subject Alternate Name) Principal Name and SAN RFC822Name, to map against the user object attribute userPrincipalName and onPremisesUserPrincipalName. Use the following steps to configure the username binding policy. NOTE: If a username binding policy uses synced attributes, such as onPremisesUserPrincipalName attribute of the user object, be aware that any user with administrative access to the Entra ID Connect server can change the sync attribute mapping, and in turn change the value of the synced attribute to their needs. The user does not need to be a cloud admin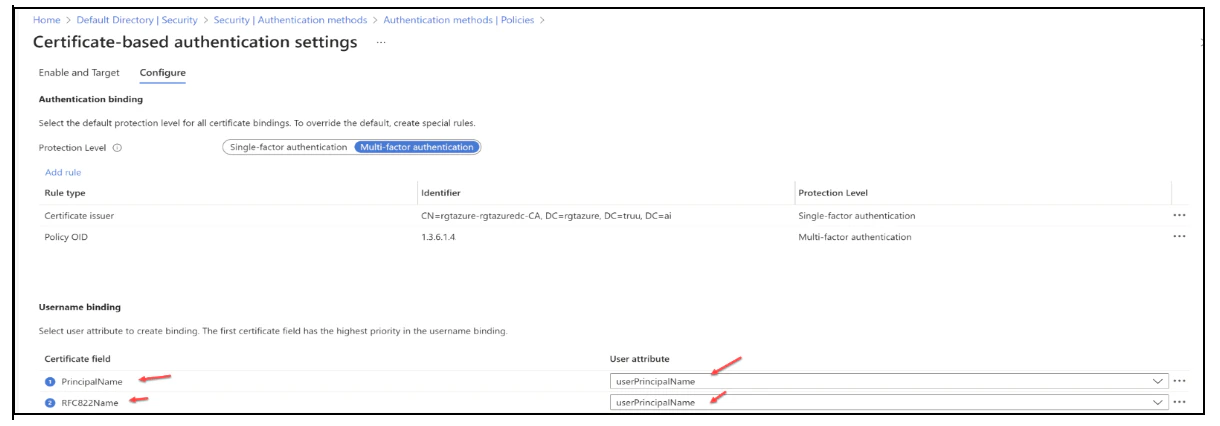
- Create the username binding by selecting one of the X.509 certificate fields to bind with one of the user attributes. The username binding order represents the priority level of the binding. The first one has the highest priority and so on. If the specified X.509 certificate field is found on the certificate, but Microsoft Entra ID doesn’t find a user object using that value, the authentication fails. Microsoft Entra ID doesn’t try the next binding in the list. The next priority is attempted only if the X.509 certificate field is not in the certificate
- Click Save to save the changes
Enable CBA on the Tenant
- Sign in to the Microsoft Entra portal as an Authentication Policy Administrator
- Select Microsoft Entra ID, then choose Security from the menu on the left-hand side
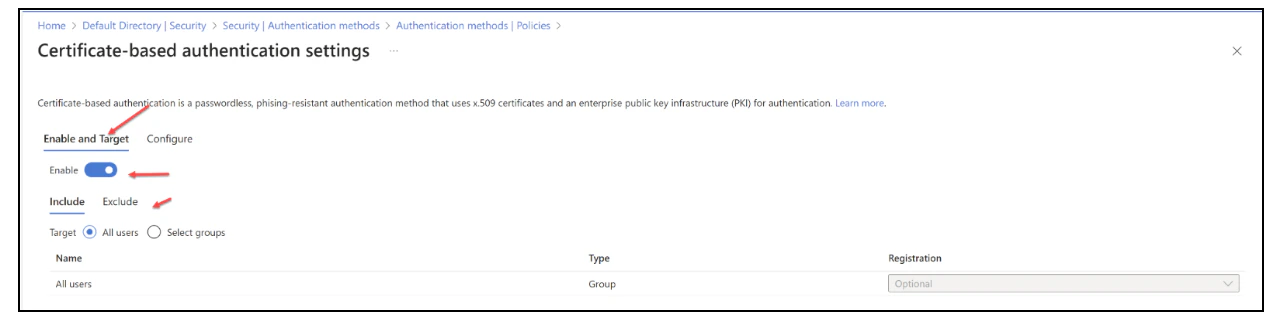
- Under Manage, select Authentication methods, then Certificate-based Authentication
- Then under Enable and Target, select Enable to enable CBA
- CBA can be enabled for a targeted set of users
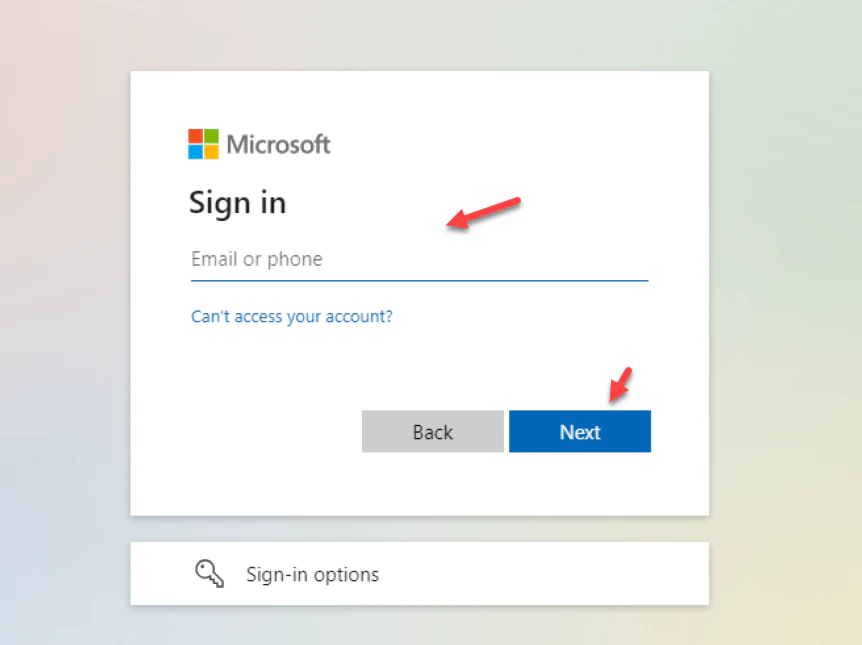
- Enter your User Principal Name (UPN).
- Click Next
- Choose the Sign in with a certificate option
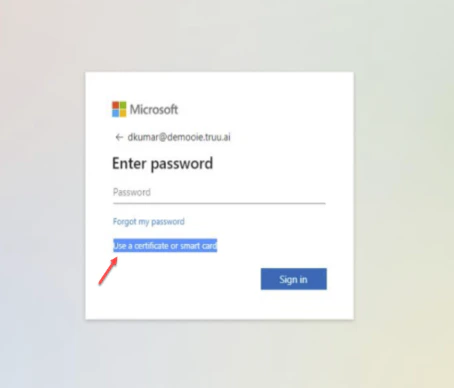
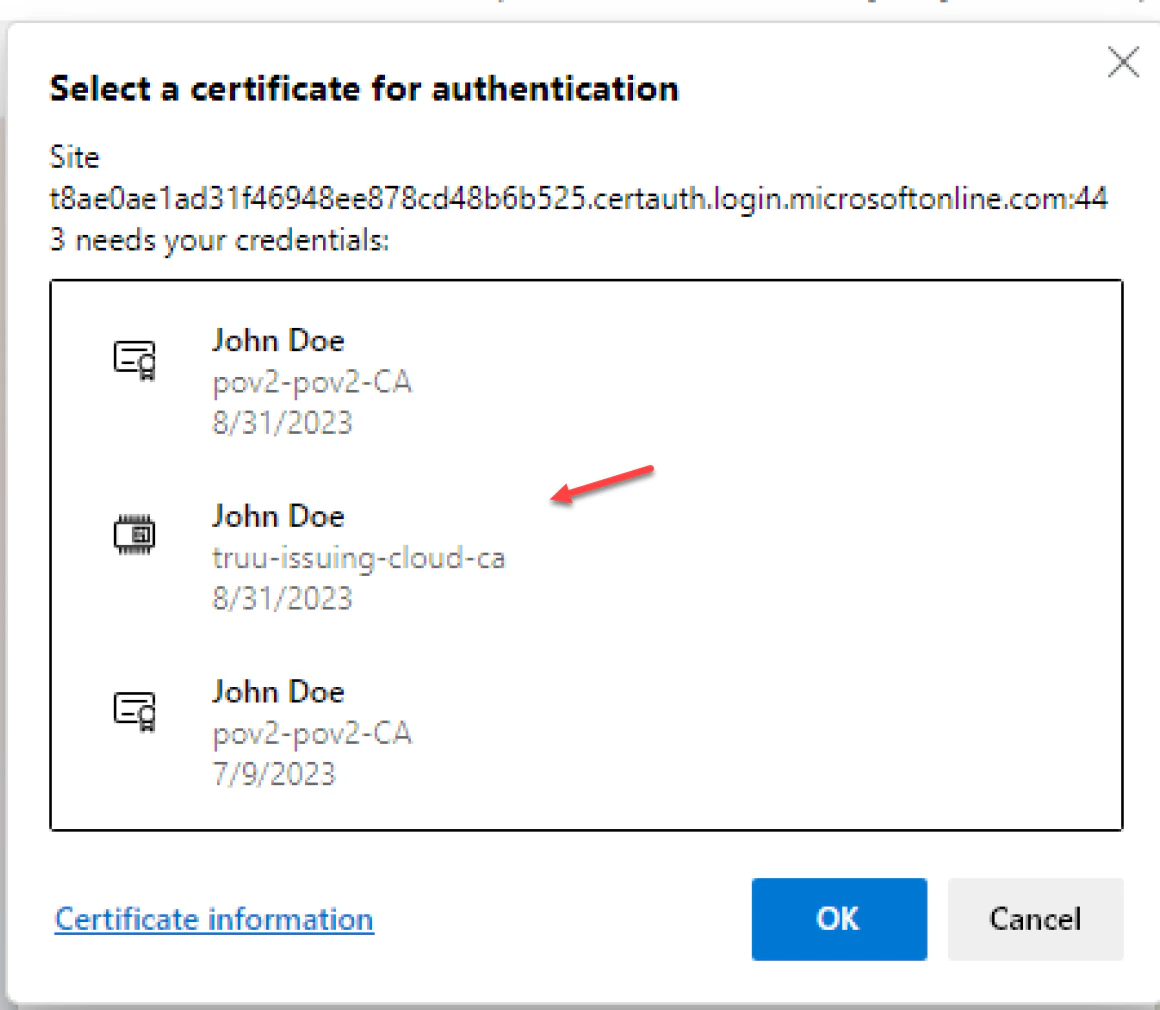
- Select Use Certificate or Smart card Note: It is worth mentioning that users might encounter a certificate prompt during their first login attempt. This prompt can be managed through a registry key or a group policy which can suppress the certificate selection prompt if so desired
Microsoft CBA Overview Configure Entra ID and CBA and Cloud Trust