

Getting Started:
- Sign in to the TruU Admin Console as either a “Digital Admin” or “Super Admin.”

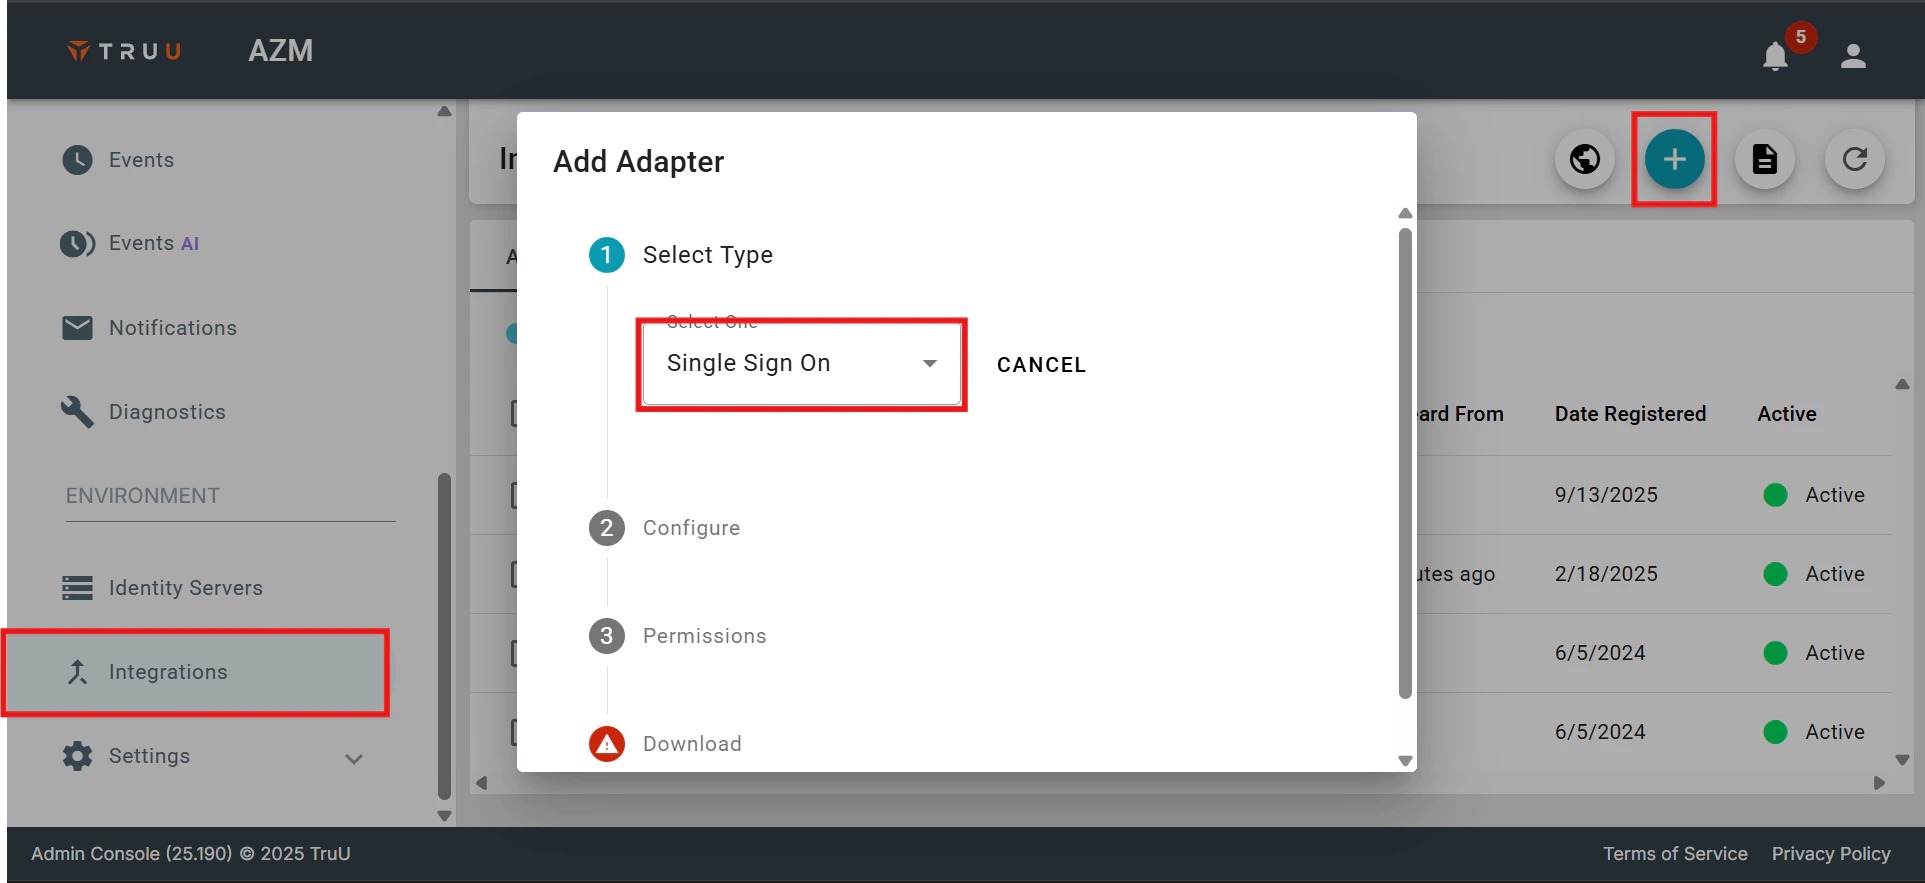
- After logging in, go to the Integrations menu, click the (+) button, and choose New Single Sign-On Adapter.
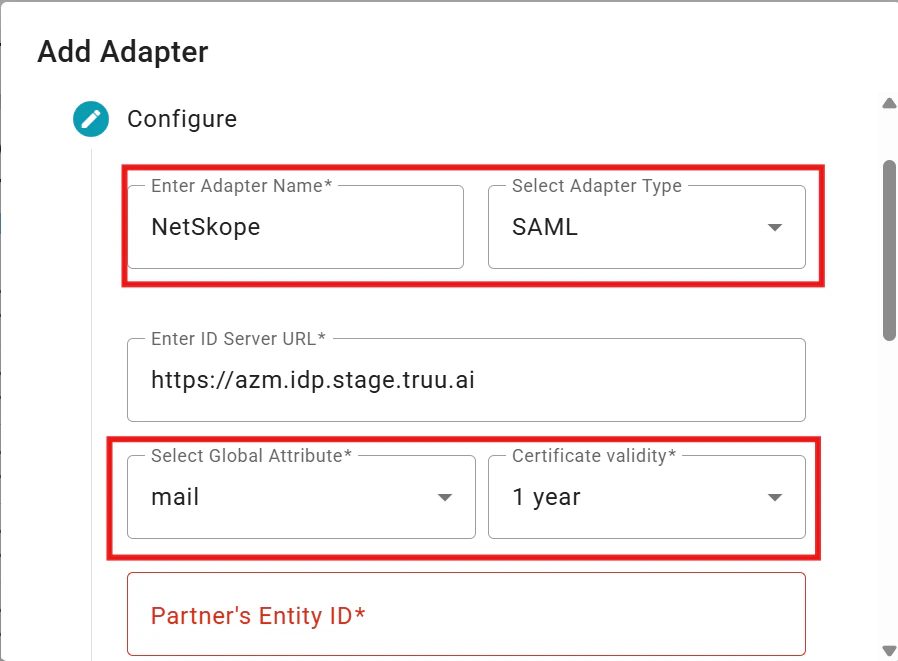
- Configure the SAML Adapter by providing a name, selecting the primary SAML identifier (Global Attribute), specifying the Certificate validity period, Partner’s Entity ID, and the Assertion Consumer Service URL from your NetSkope instance.
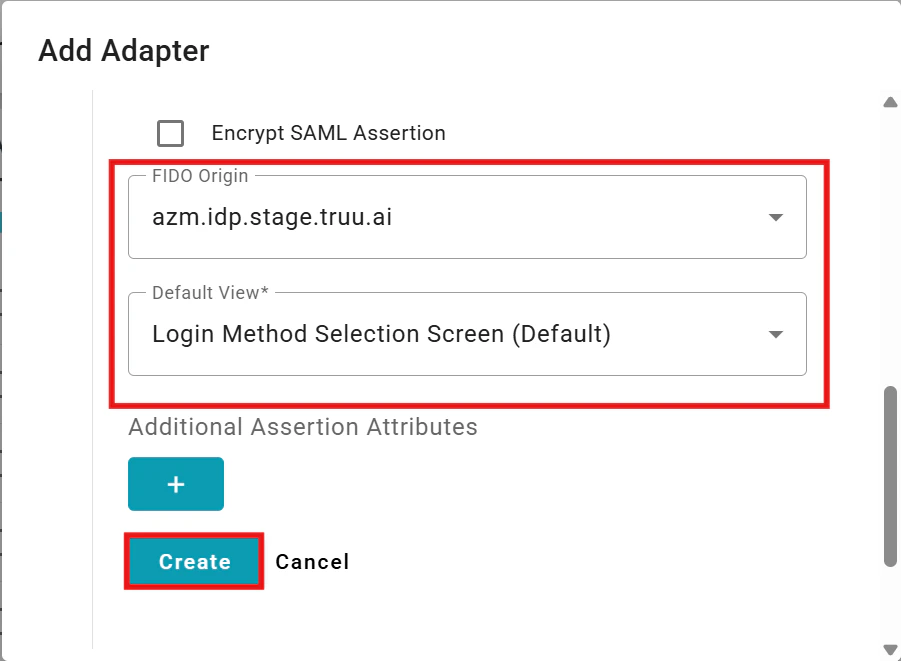
- After configuration, click Create to set up the adapter. A .txt file containing the necessary SAML configuration details for your NetSkope tenant will be automatically downloaded.
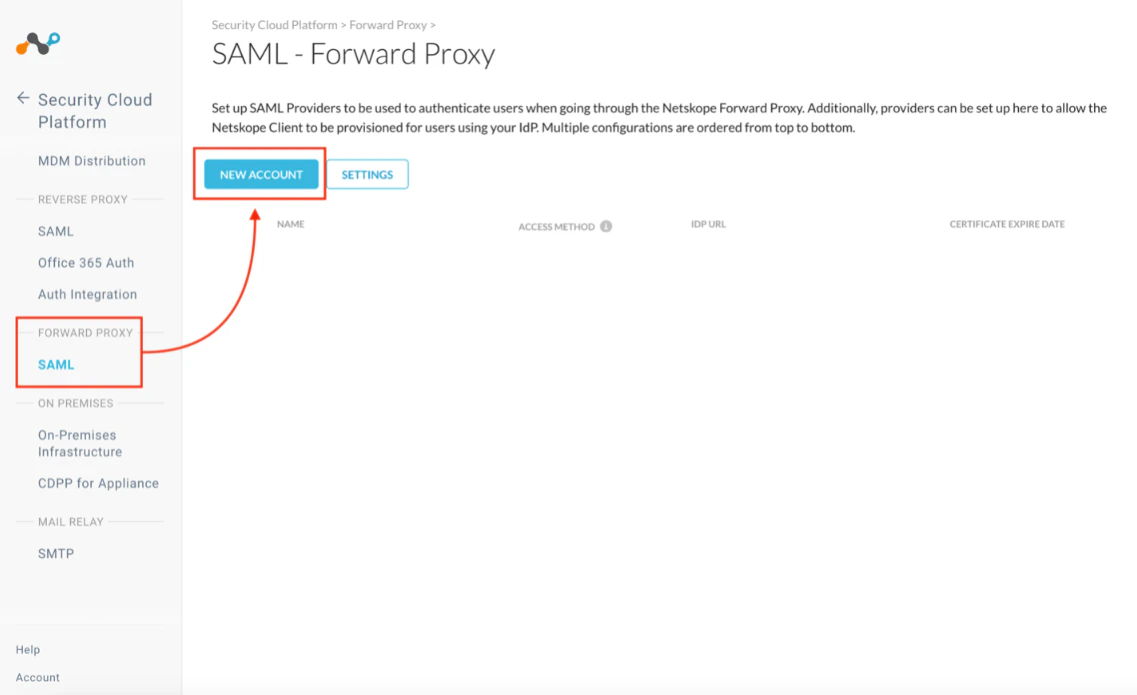
- Next, login to your Netskope instance and navigate to the “Settings” tab, then go to “Security Cloud Platform” and select “SAML – Forward Proxy”. Click New Account to add a SAML integration with TruU
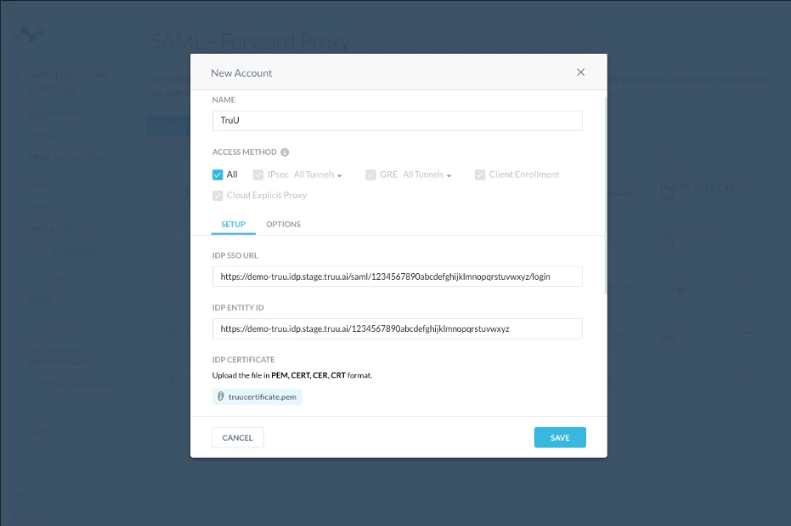
- Add the TruU SAML configurations (from the .txt file downloaded from your browser in Step 4 above) in your Netskope instance
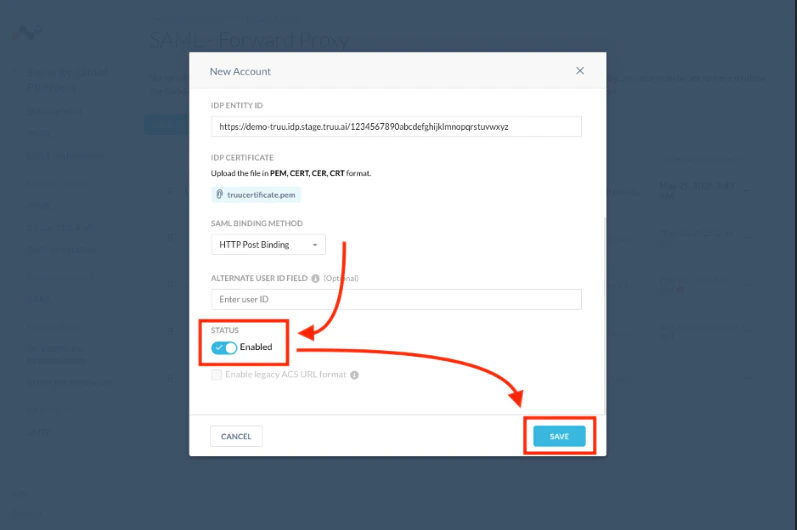
- Once the SAML configurations are complete, toggle the “Status” indicator to Enabled to enable the SAML integration between Netskope and TruU. Click Save to complete
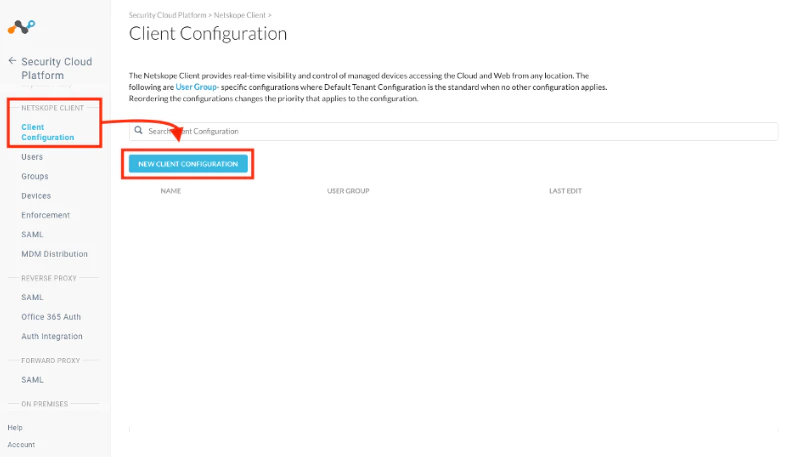
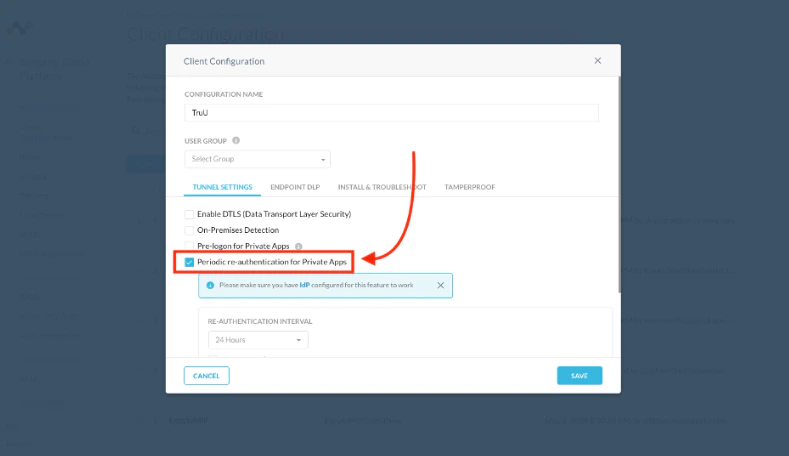
- Once the SAML integration between TruU and Netskope (Step 7) is completed, navigate to the “Client Configuration” menu and click on New Client Configurations to configure a new TruU client within Netskope
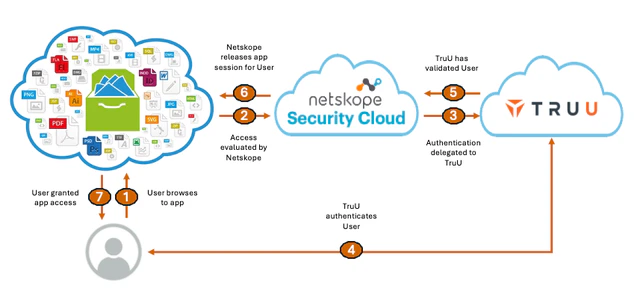
- Within the “Client Configuration” menu, enable the Periodic re-authentication for Private Apps option. When enabled, users must authenticate with TruU (via the SAML integration) before access to private apps is granted
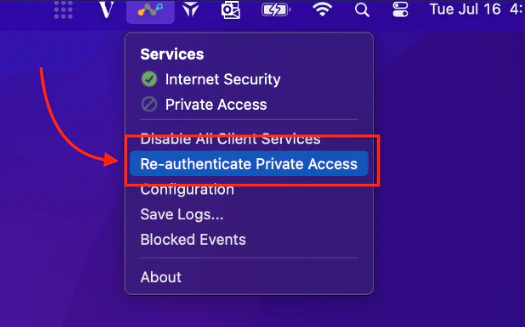
- To test the integration, launch the Netskope client on your computer, and choose the Re-authenticate Private Access option
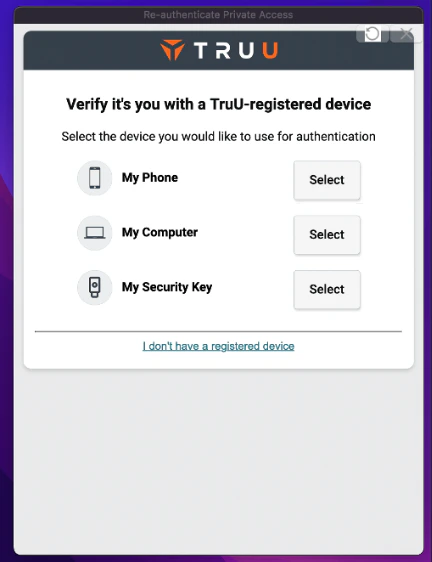
- Once selected, options to authenticate with TruU will appear. Select and complete an authentication option with TruU to access private apps secured by Netskope
Demo GIF:

SAML Adapter Setup Guide ForgeRock