

- Obtaining either the Global admin or Privileged Authentication Administrator role within Microsoft Entra, as only individuals with these roles are authorized to configure the certificate authority (CA) in Microsoft Entra ID
- Configuring the TruU Cloud Trust PKI as specified in the TruU Cloud Trust Configuration Guide
- Setting up a certificate authority (CA) in Microsoft Entra ID (Azure AD) and activating certificate-based authentication (CBA)
- Ensuring the certificate authority (CA) has an Internet-facing URL with a publicly accessible Certificate Revocation List (CRL)
- Confirming that the domain controller can communicate with the CRL by configuring the necessary firewall ports. Alternative solutions are available if company policies restrict internet access for the domain controller
- Issuing and publishing a user certificate designed for client authentication to be used with Microsoft Entra ID (Azure AD)
Configure TruU Cloud Trust and obtain certs and CRL information
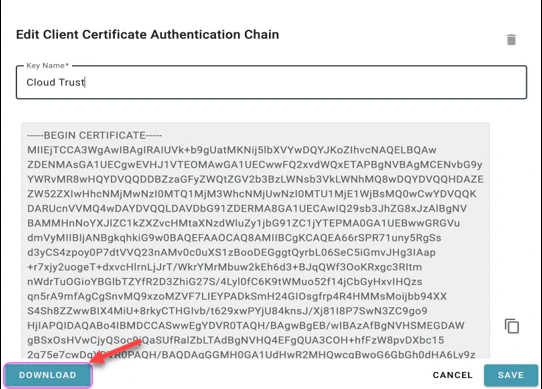
Note: You will need to have the certificates and URLs prepared ahead of time in order to supply this information into the CA setup- In the TruU admin console navigate to the “Identity Servers” tab, then go to the “Key Store” page and search for C_loud Trust entries for Root_ and client certificate authentication chain entries and download the certificates

- Firstly, access the Cloud Trust entry to download the “client_certificate_auth_chain.pem” file
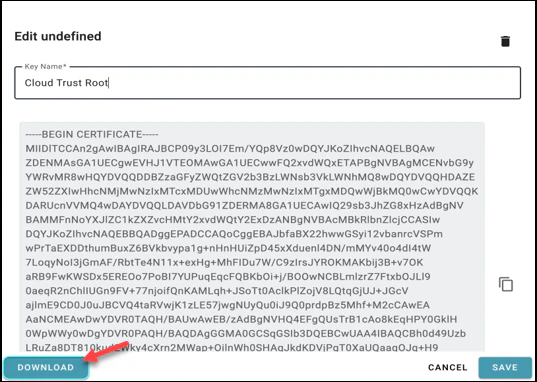
- Subsequently, click on the Cloud Trust Root entry and download the “cloud_ca_root.pem” file
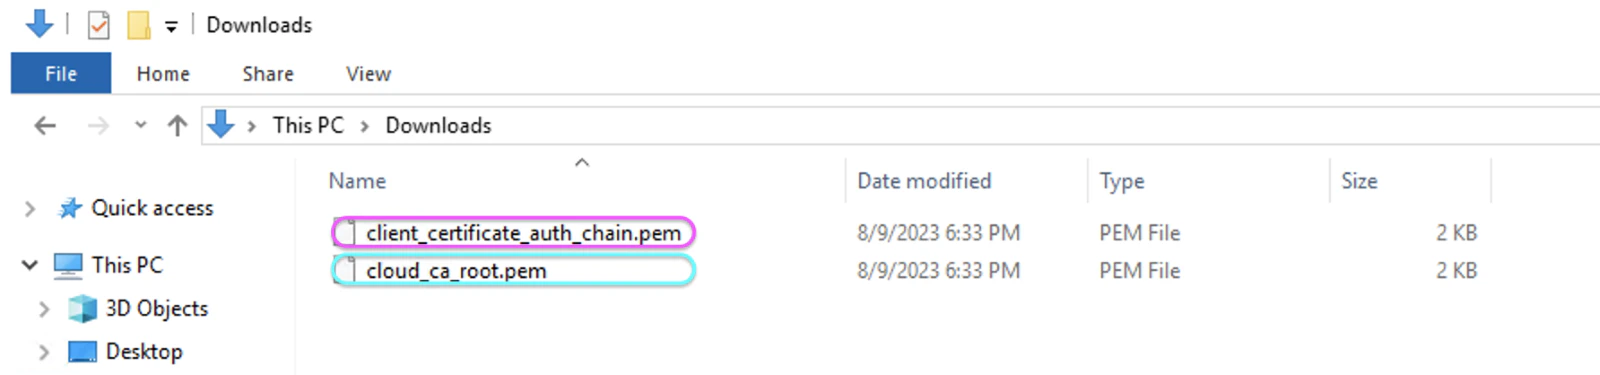
- Once these files are downloaded, they must be copied to the domain controller or to a system that is accessible by your Microsoft Entra portal
- On your domain controller, you must add the Root certificate to the Trusted Root Certificate Authorities store. Additionally, the Issue Cloud Trust CA chain certificate should be added to the Intermediate Certificate Authorities store
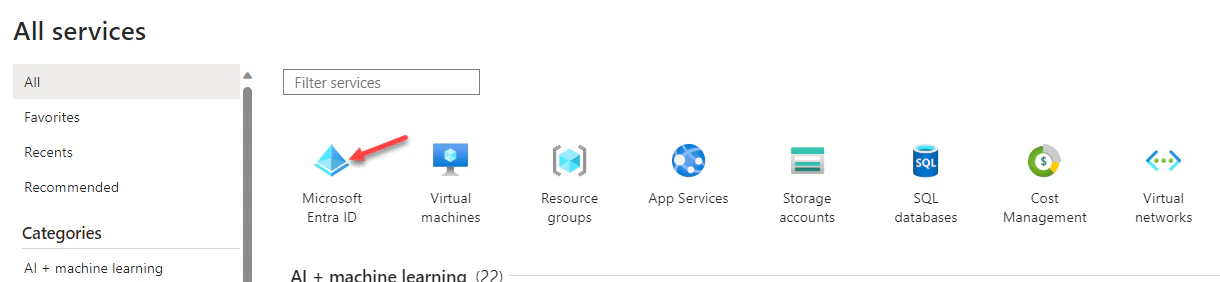
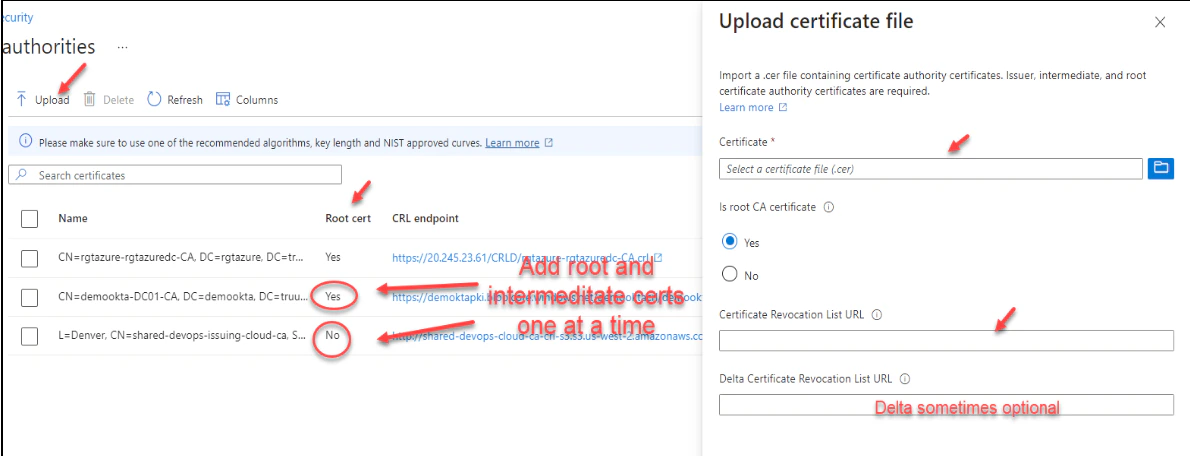
- To proceed with the certification authorities configuration, sign into the Microsoft Entra portal as a Global Administrator. Navigate to Microsoft Entra ID, select Security, and then choose Certificate Authorities from the menu on the left-hand side


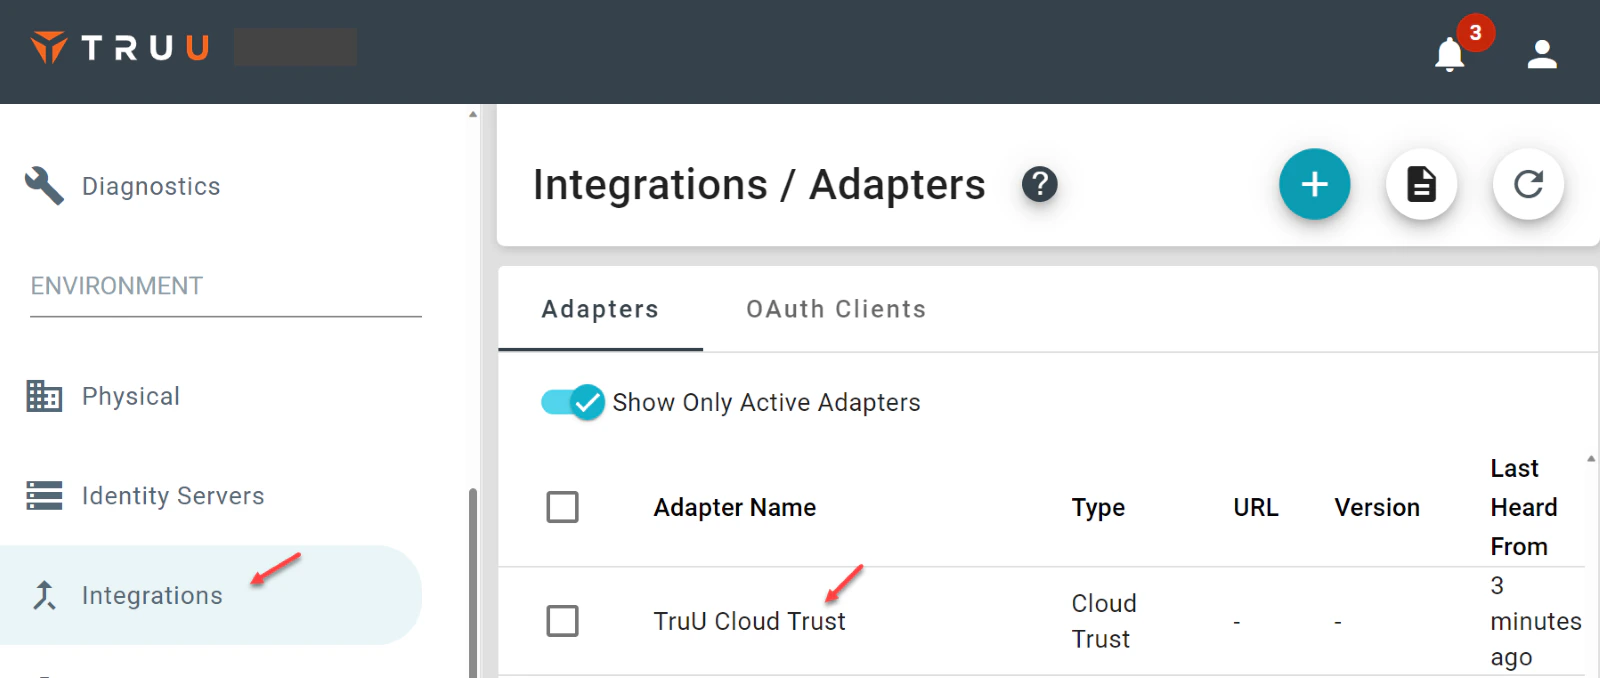
- Next, locate your CRL URL by going to the TruU Admin portal, navigating to “Integrations”, then “Adapters”, and click on TruU Cloud Trust. Upon opening the form, scroll to the top to find your Root and Issuing CA CRL information

- For both the Root and the Issuing CA certificates, follow these sub-steps
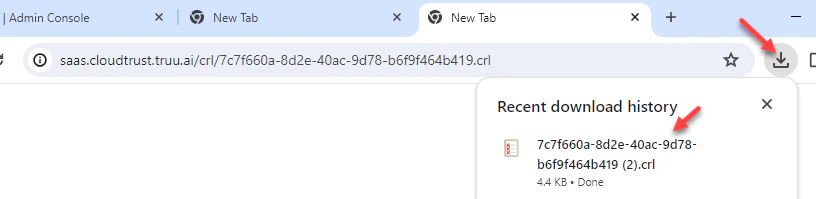
- To ensure the domain controller can successfully reach the published Certificate Revocation List (CRL), there are two verification methods that can be employed: using a web browser or the command prompt
certutil -verify -urlfetch “path to truu chain cert”
During the command’s output, one should examine the Certificate Distribution Point (CDP) section. A status of “Verified” indicates proper communication with the CRL. Conversely, a “Failed” status suggests that there may be an issue, such as the need to consult with the firewall team to ensure that the domain controller’s internet ports are open to reach the CRL

To enable certificate-based authentication and configure user bindings in the Entra portal, follow these steps:
- Log into the Microsoft Entra portal with Authentication Policy Administrator credentials
- Navigate to Microsoft Entra ID (formerly Azure Active Directory), and on the left-hand menu, select Security
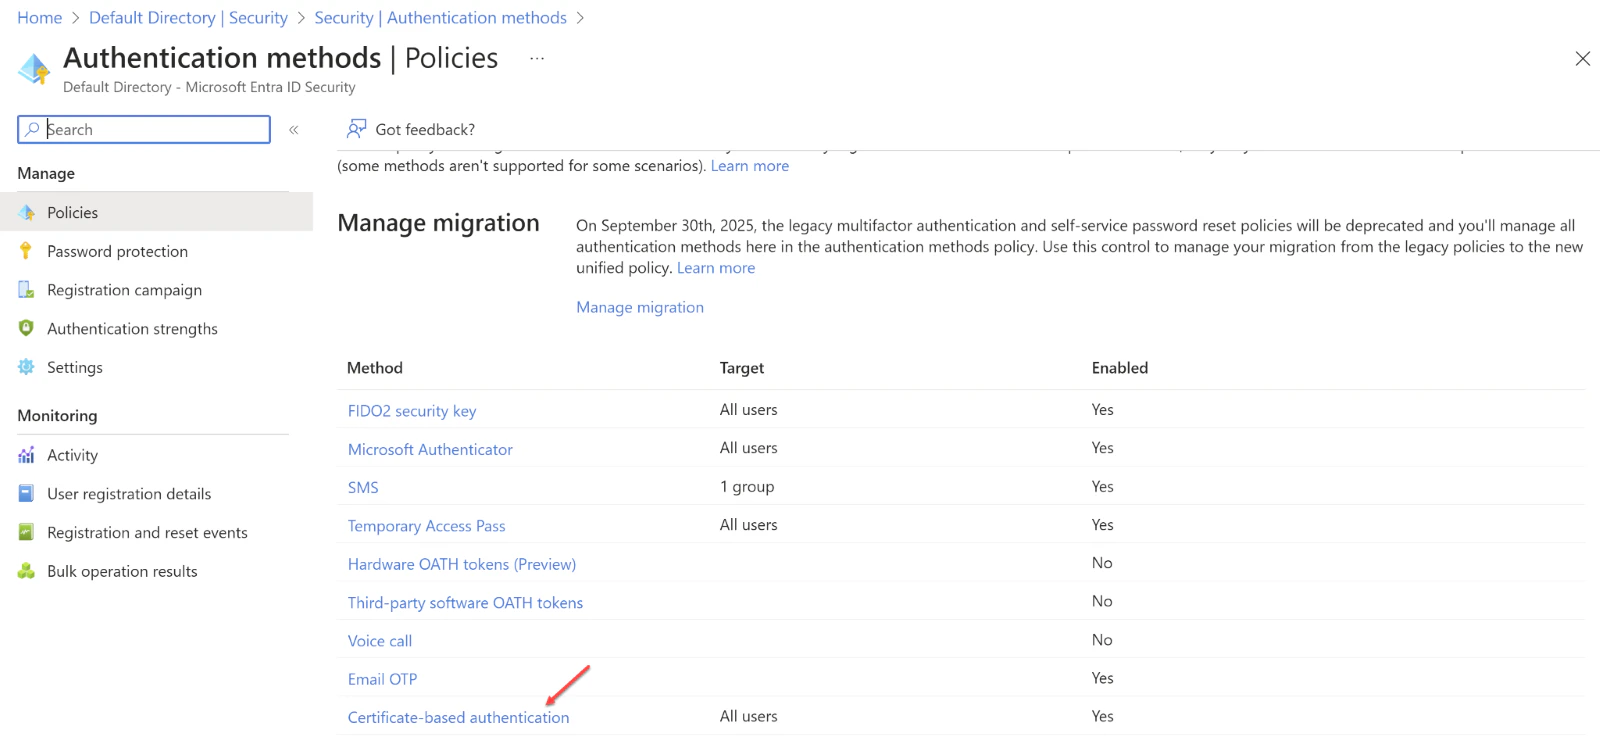
- Proceed to Authentication methods and then to Policies
- Under Manage, find and click on Authentication methods and then Certificate-based Authentication
- Use the Configure option to set up authentication binding and username binding
- Note that the protection level attribute defaults to Single-factor authentication. To enhance security, select Multi-factor authentication to change the default setting to MFA
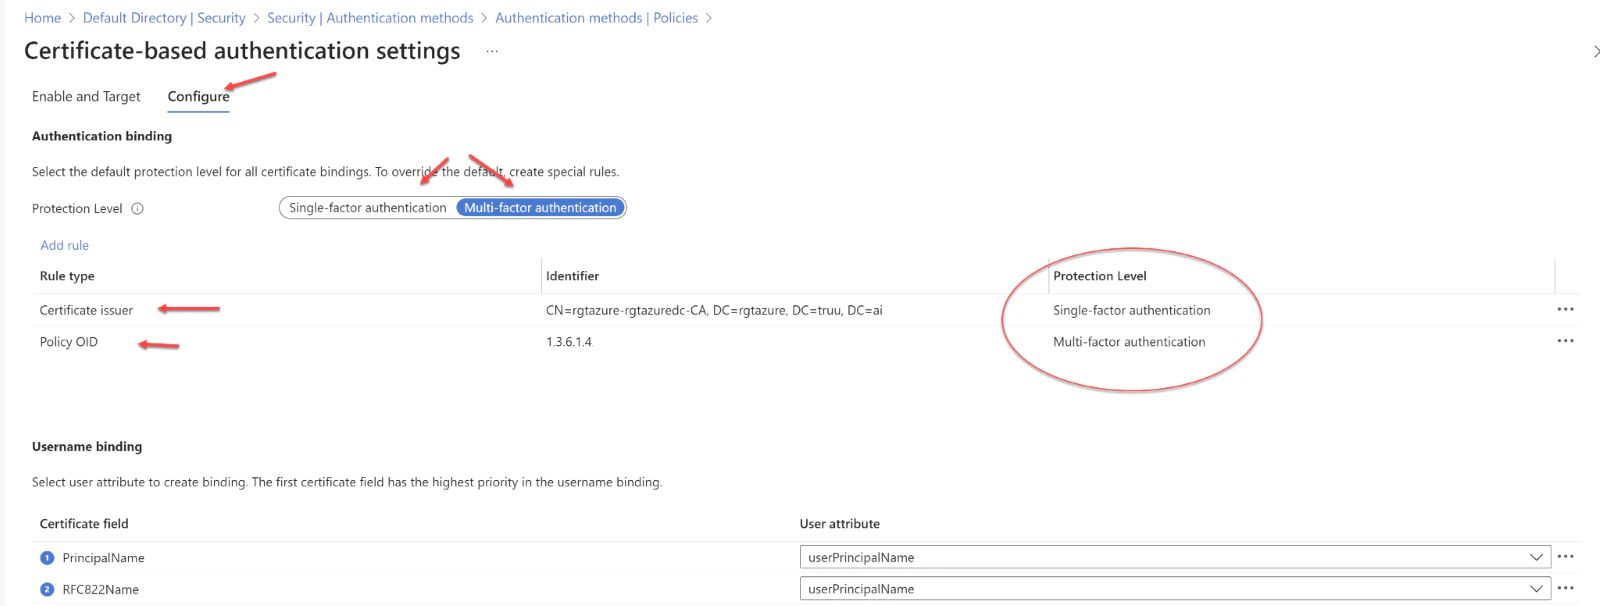
- We can enhance security by setting up custom authentication binding rules, which determine the protection level required for client certificates. These rules can be based on the certificate’s issuer Subject or Policy OID fields. Essentially, authentication binding rules associate certificate attributes—either issuer or Policy OID—with a specified value, establishing a default protection level for that rule. It’s possible to create multiple rules to meet various security requirements. To introduce custom rules, one should navigate to the “Add Rule” option

- When creating a rule based on the certificate issuer, the following steps should be followed
- To set up username binding, one must choose from the available X.509 certificate fields and associate them with corresponding user attributes. The order in which username bindings are arranged is significant because it establishes the hierarchy of priority. The top binding in the list is given the highest precedence. If the authentication system locates the designated X.509 certificate field within the certificate and fails to match it with a user object, the authentication will not succeed. In this scenario, Microsoft Entra ID ceases further attempts with subsequent bindings. It is only when the specific X.509 certificate field is absent from the certificate that the system proceeds to the next priority level
- Once the desired binding is configured, one must click Save to ensure the changes are captured
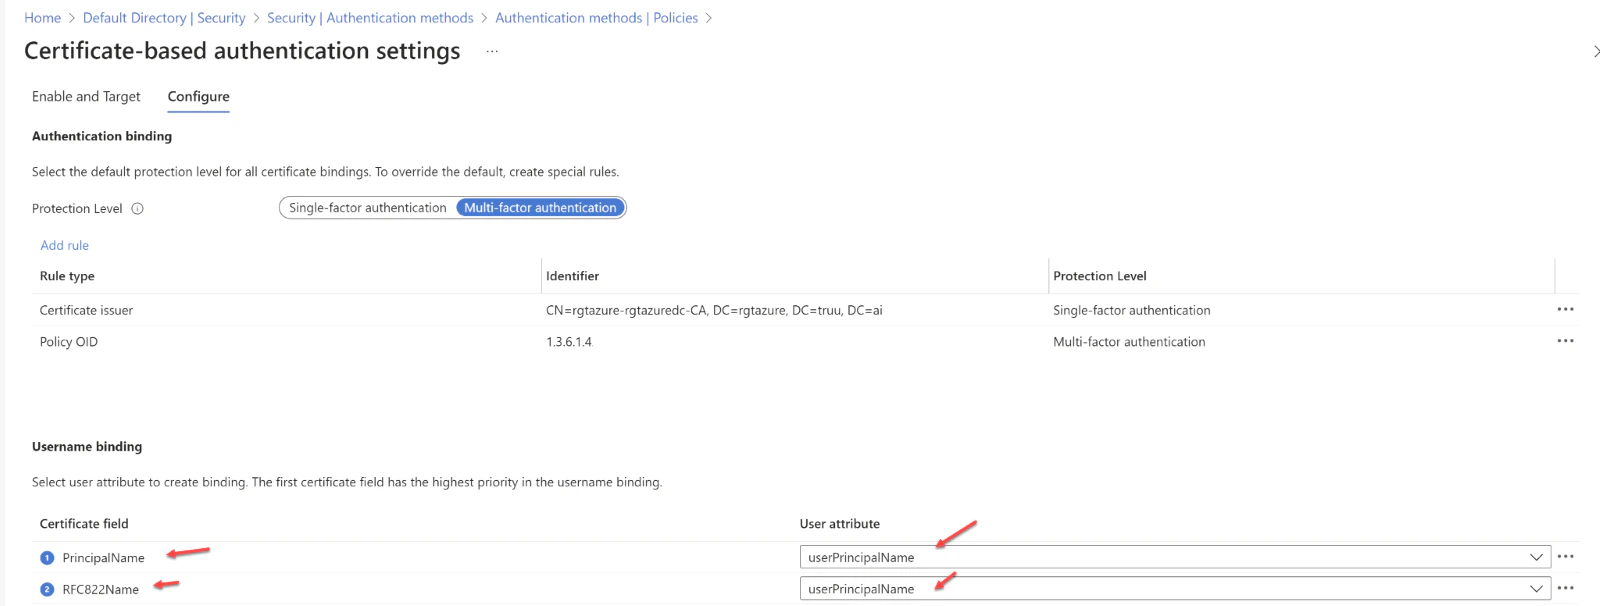
- Subject Alternative Name (SAN) Principal Name bound to userPrincipalName
- SAN Principal Name bound to onPremisesUserPrincipalName
- SAN RFC822Name bound to userPrincipalName
- SAN RFC822Name bound to onPremisesUserPrincipalName
Enabling Certificate-Based Authentication (CBA) within the tenant,
- Begin by logging into the Microsoft Entra portal as an Authentication Policy Administrator
- Navigate to the “Security” section found in the menu on the left-hand side
- Under the “Manage” category, locate and select Authentication methods followed by Certificate-based Authentication
- To activate CBA, you will find an “Enable and Target” section, where you should select Enable to switch on CBA
- CBA can be implemented for all users or a targeted subset of users
- To enable CBA for every user, click on All Users
- Alternatively, if you wish to activate CBA for specific users or groups, opt for Select Users

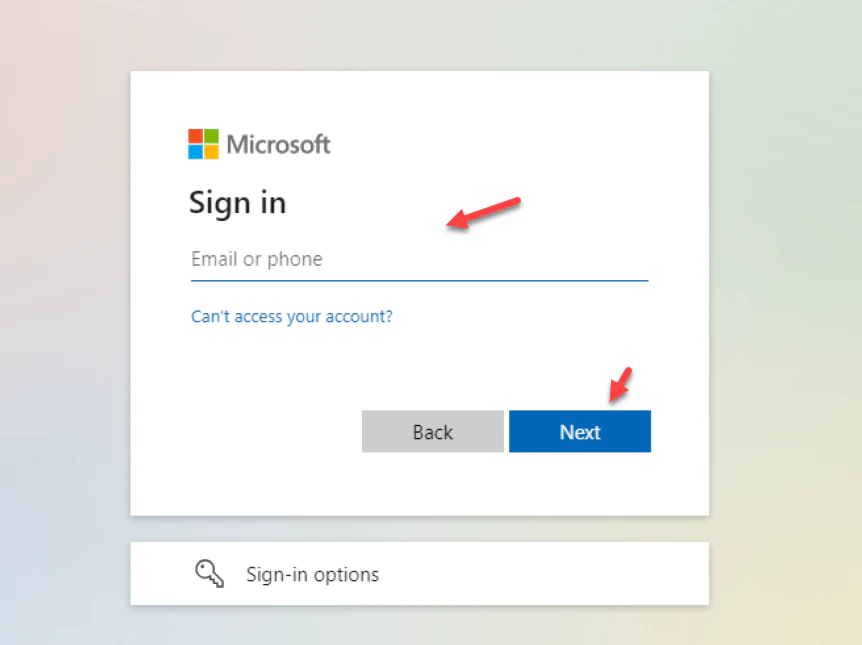
- Enter your User Principal Name (UPN)
- Click Next
- Choose the Sign in with a certificate option
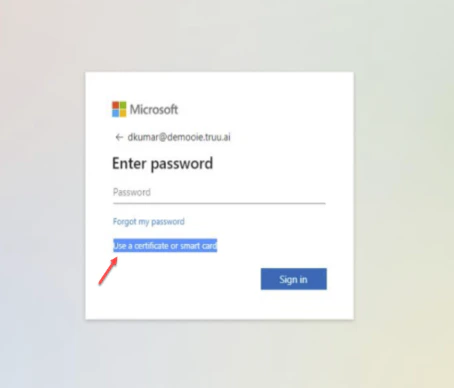
- Select Use certificate or Smart card option
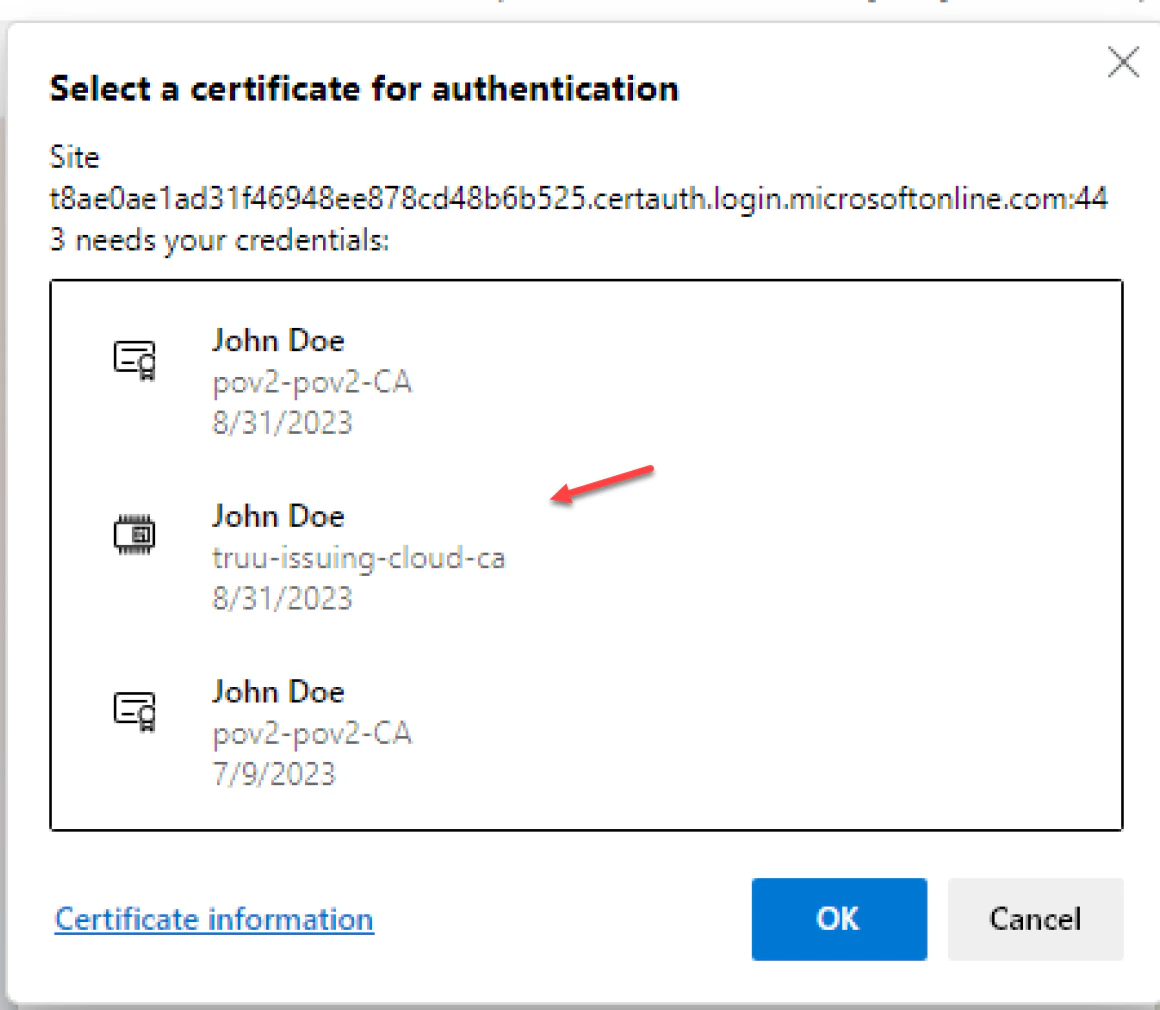
- It is worth mentioning that users might encounter a certificate prompt during their first login attempt. This prompt can be managed through a registry key or a group policy which can suppress the certificate selection prompt if so desired
Configure Entra ID for Microsoft CBA