Before beginning, ensure that you have:Documentation Index
Fetch the complete documentation index at: https://docs.truu.ai/llms.txt
Use this file to discover all available pages before exploring further.
- Administrative permissions for both the Microsoft Entra admin center and the TruU Admin Console
- Both portals open in separate browser tabs to facilitate the transfer of credentials.
Microsoft Entra ID Configuration
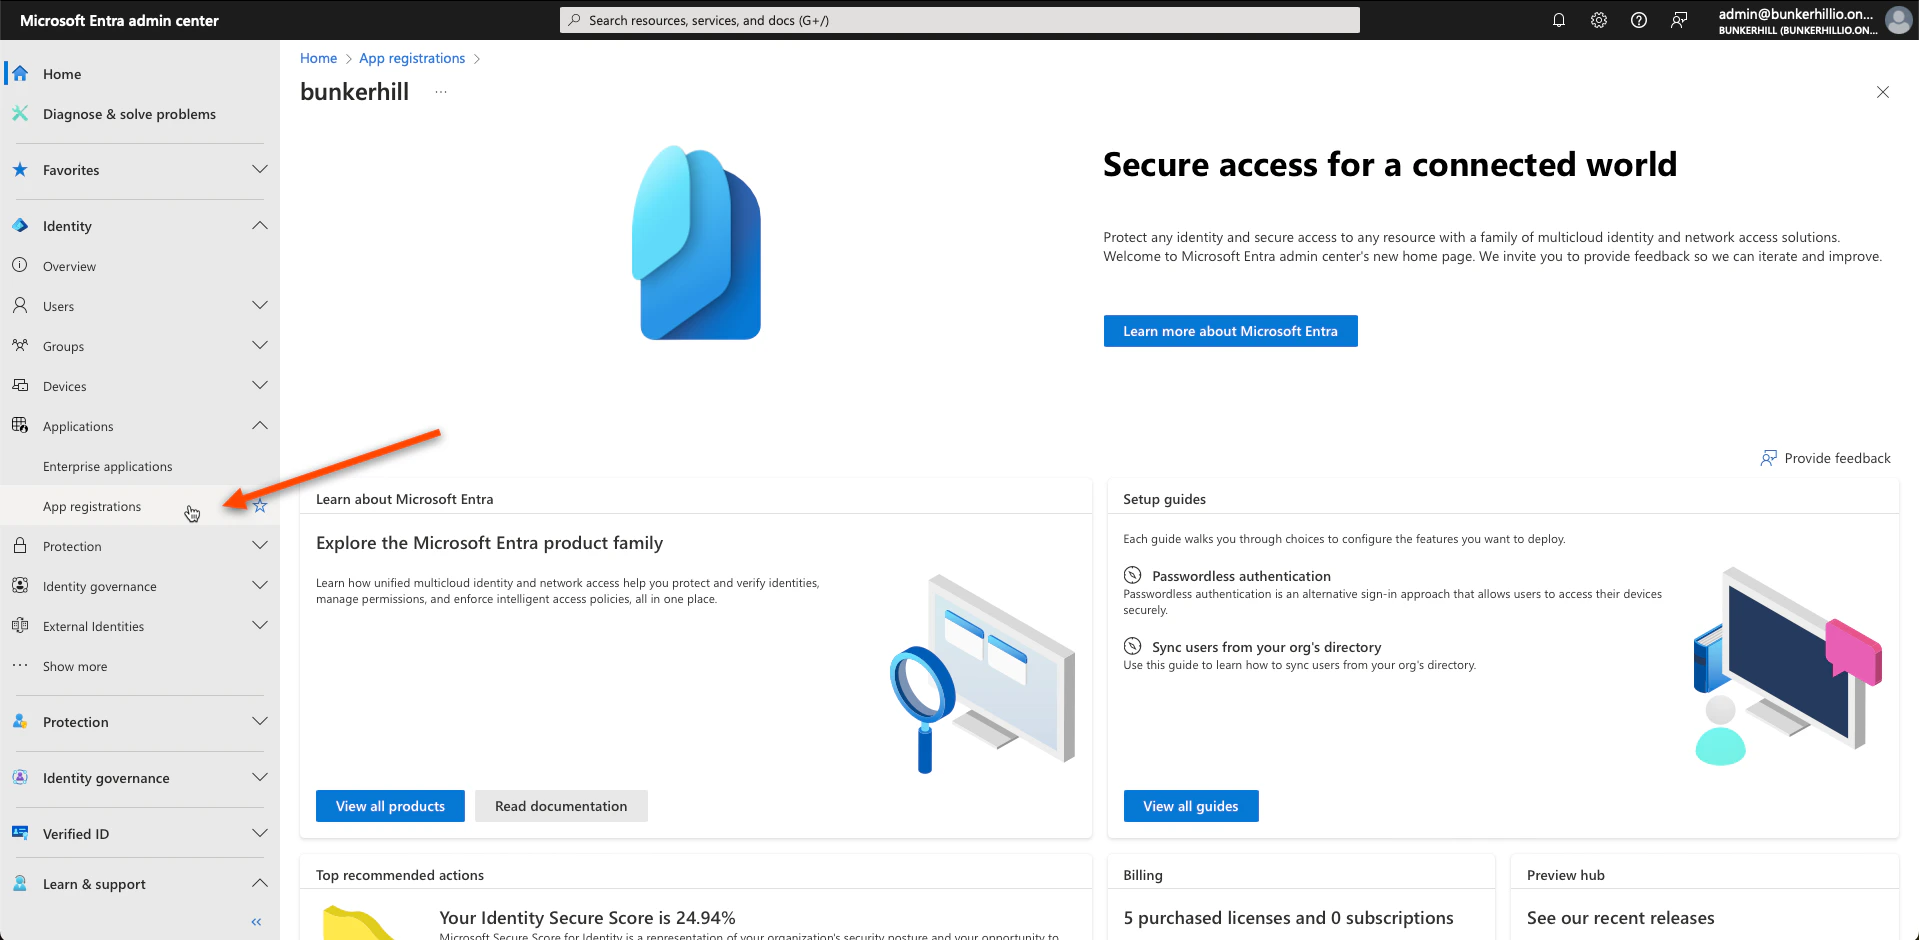
- Navigate to your Microsoft Entra ID admin center and select the App Registrations tab under the Applications drop down menu
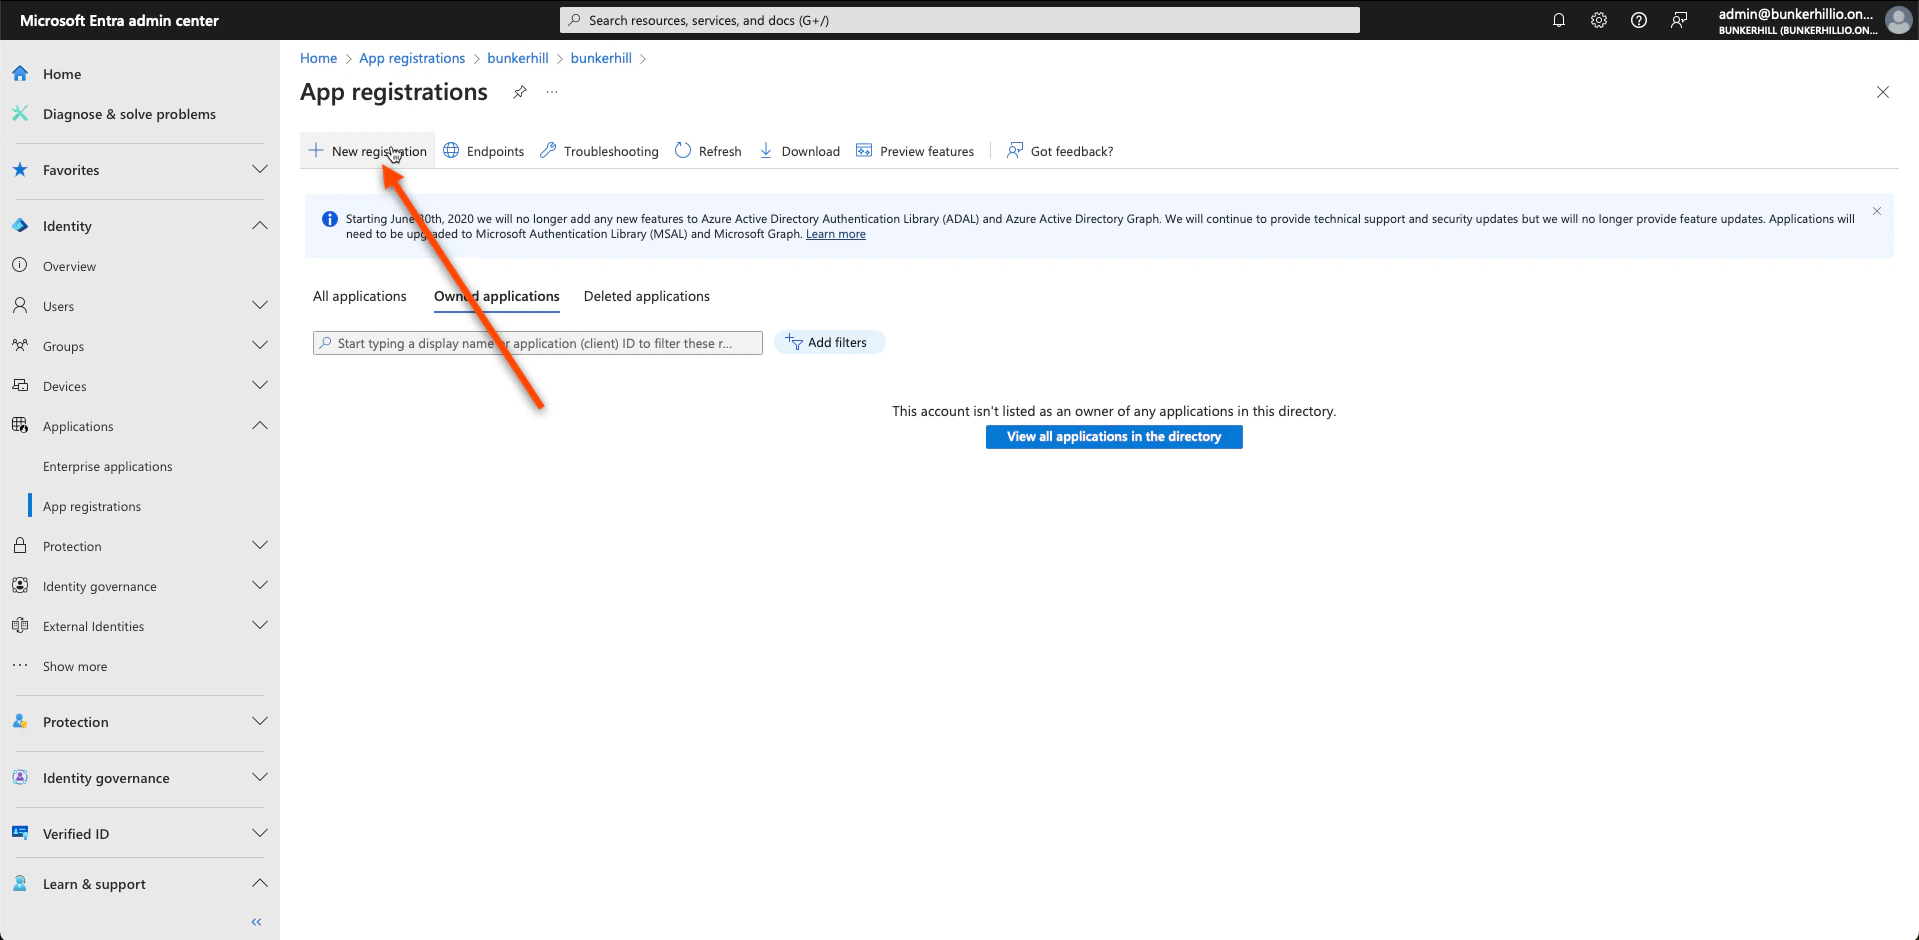
- Go to New Registration
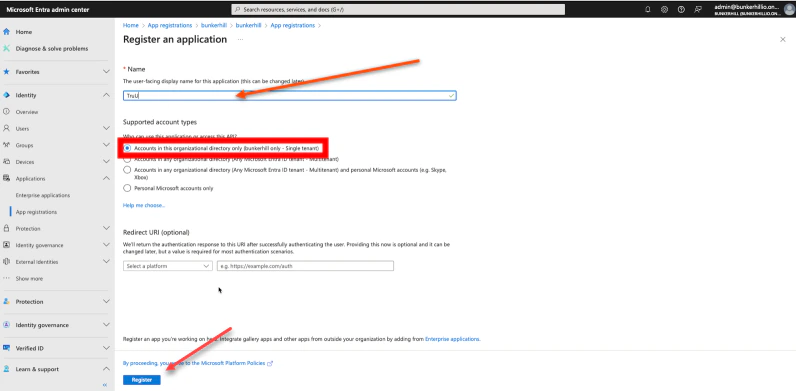
- Set the user-facing display TruU and click Register at the bottom when done. Note: This can be changed later.
- Now, navigate back to the Entra ID Admin page and select API permissions
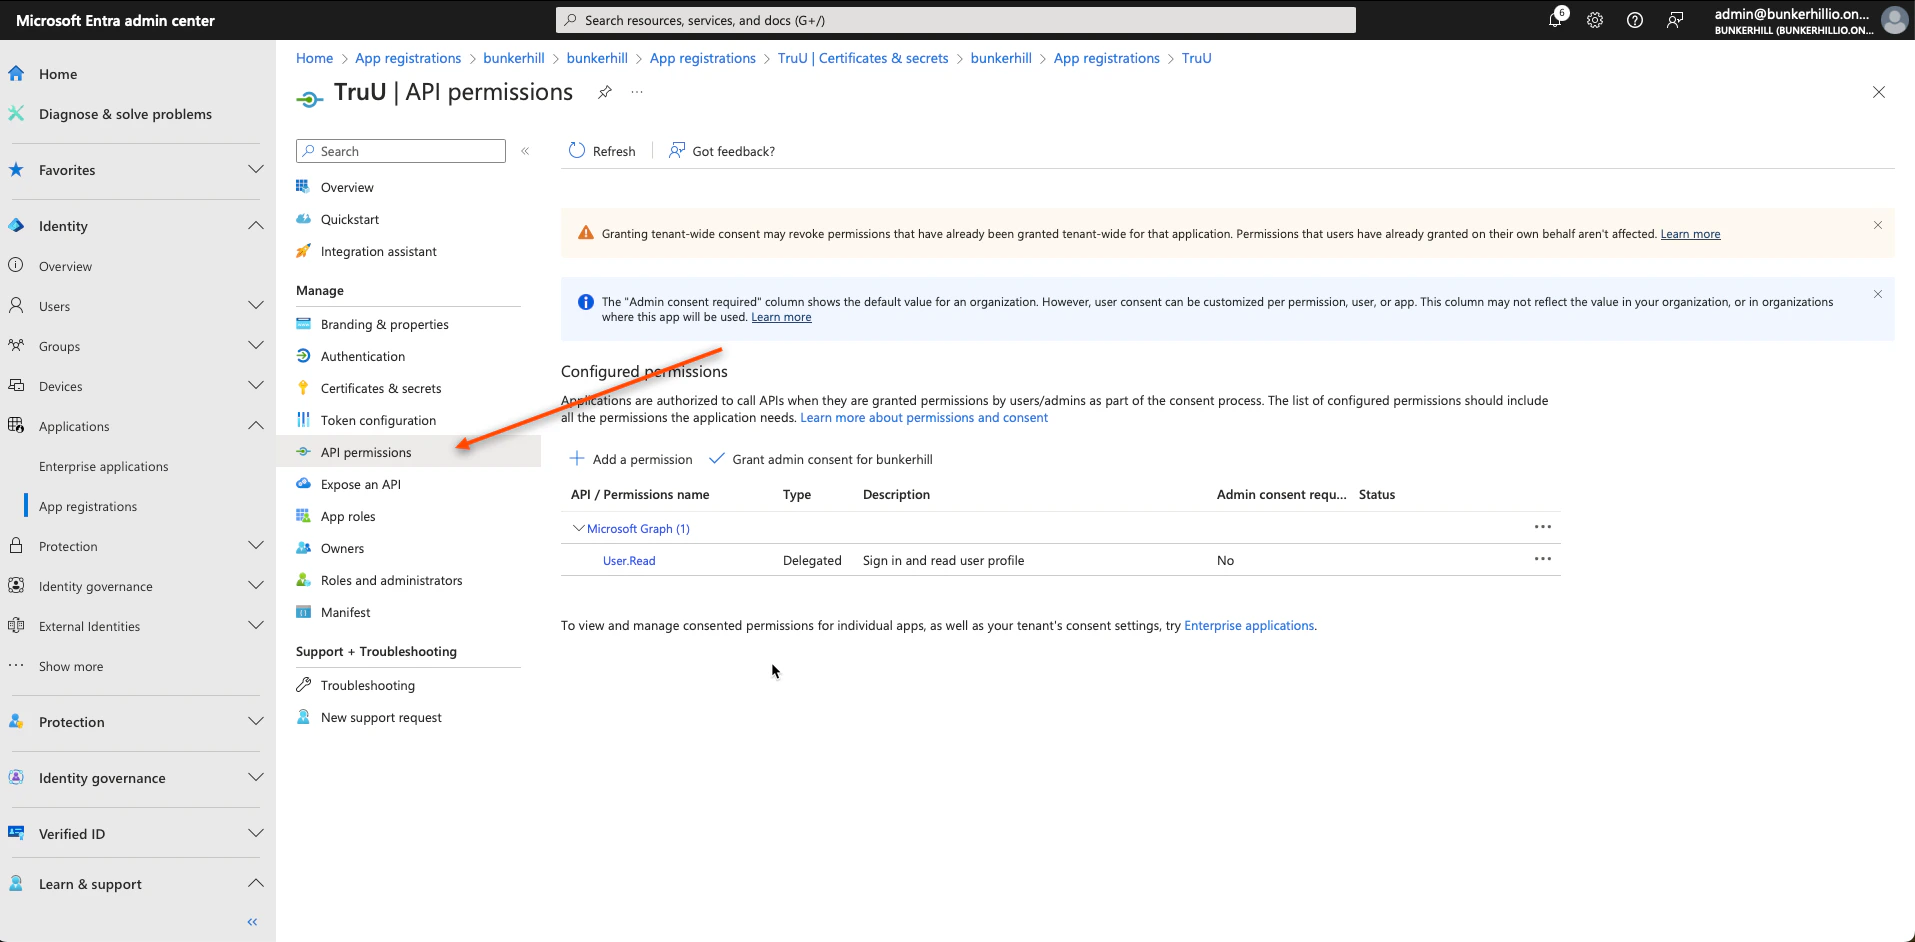
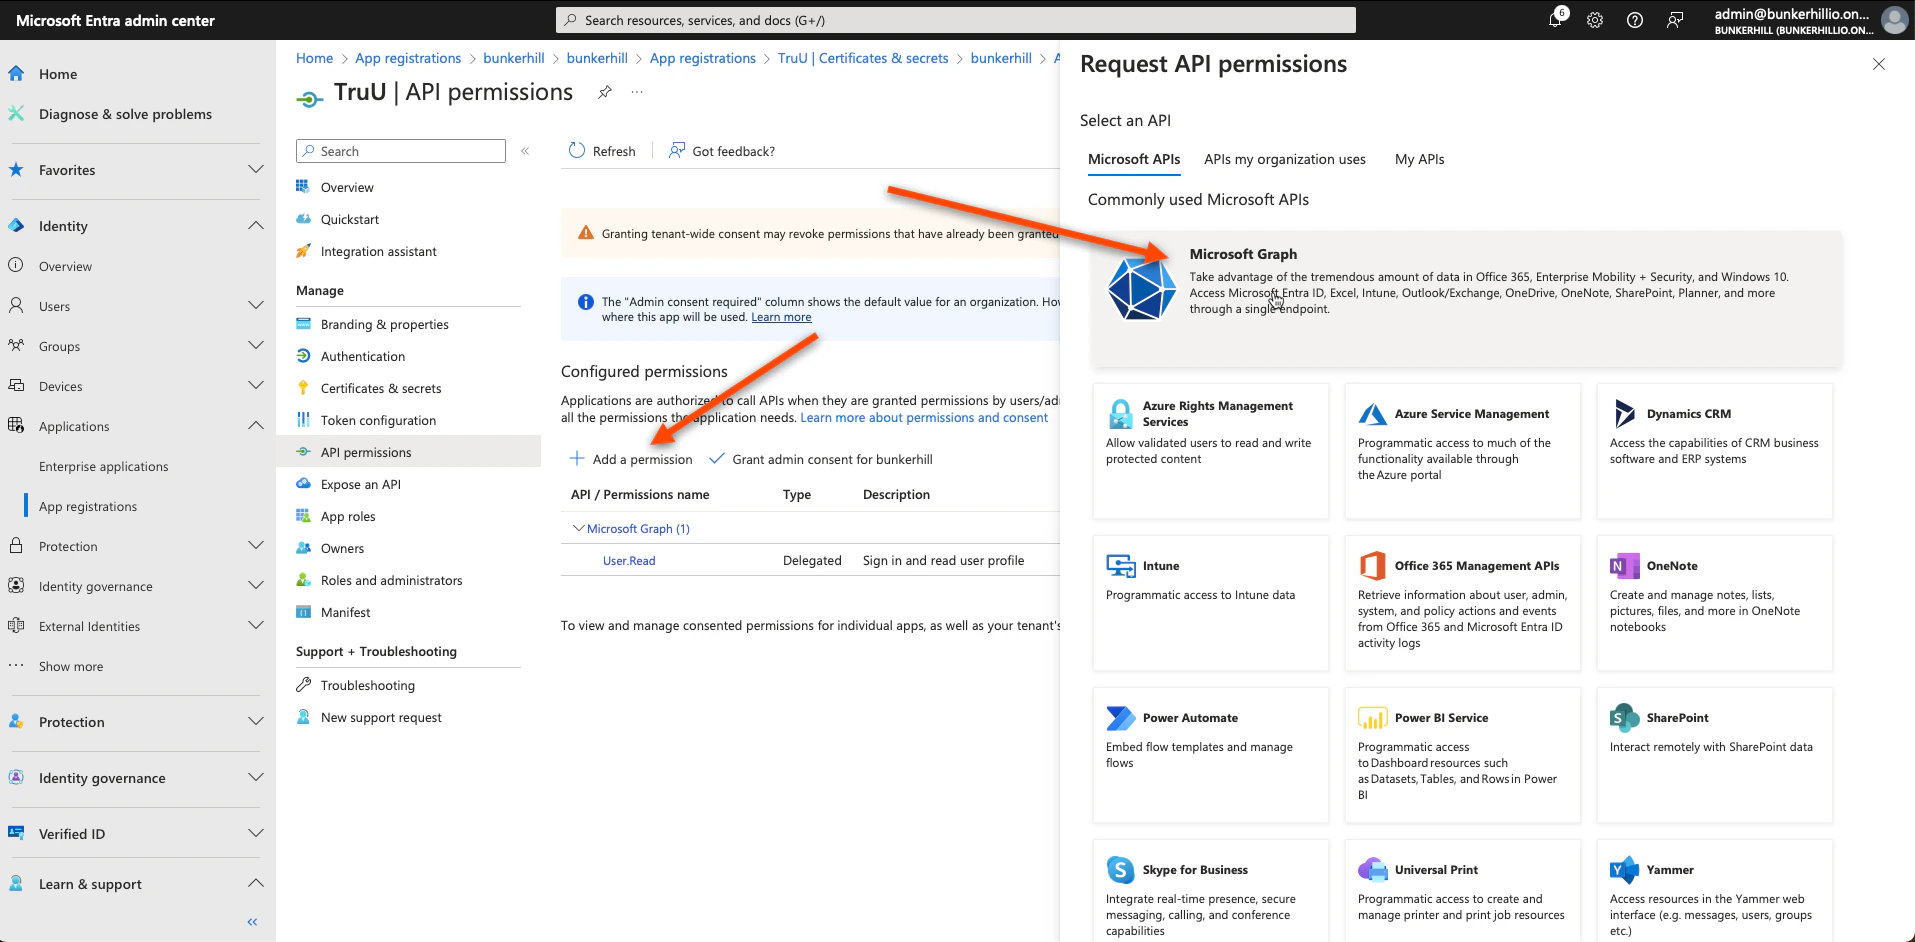
- Next, select Add a permission and choose Microsoft Graph
- Select Application Permissions
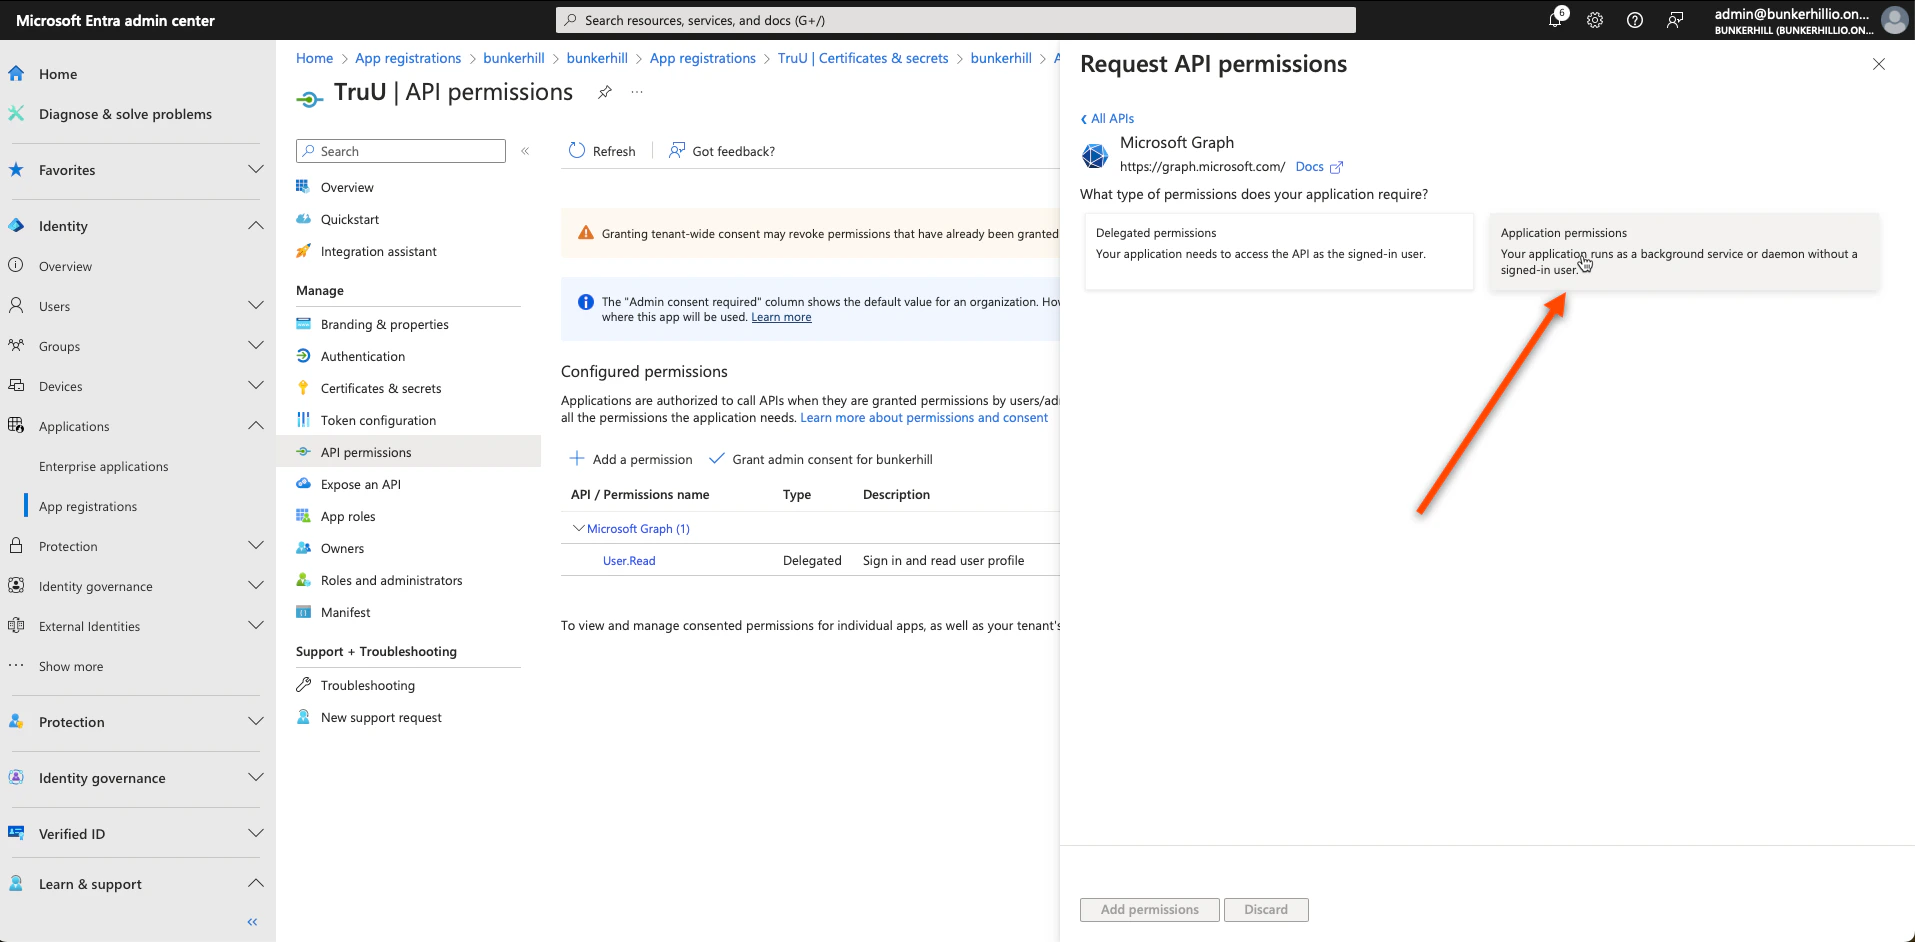
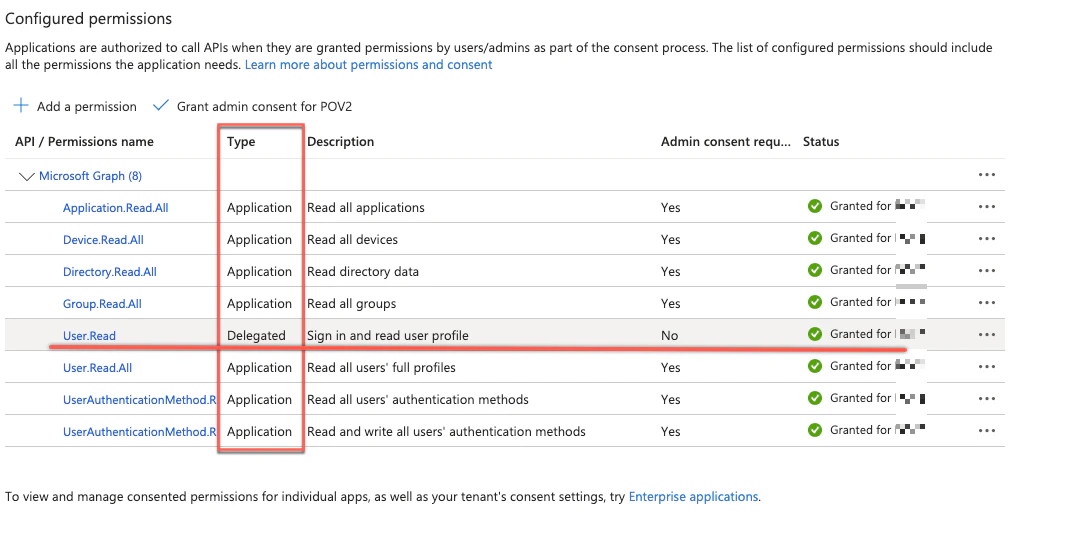
- Select Application permissions and grant admin consent for the following specific requirements:
- Device.Read.All
- Group.Read.All
- Directory.Read.All
- User.Read (User.Read is enabled by default, as Delegated , ensure admin consent is granted. If missing, add with Delegated permission.)
- User.Read.All
- UserAuthenticationMethod.Read.All
- Application.Read.All
- User.AuthenticationMethod.ReadWrite.All.*
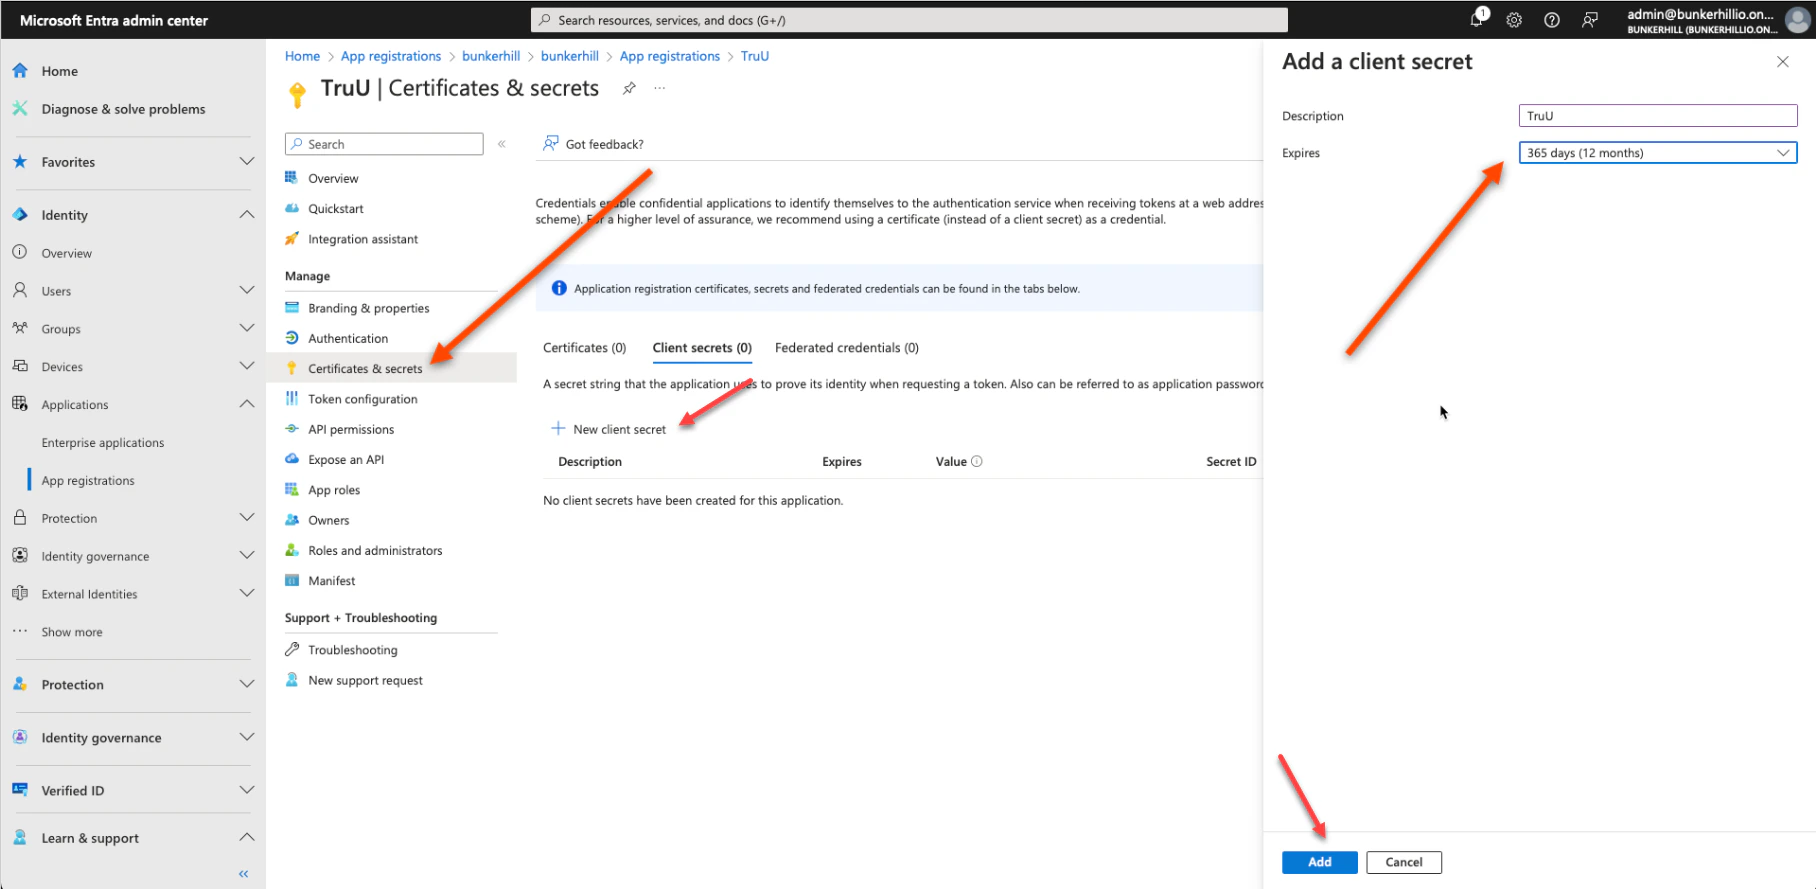
- Navigate to Certificates & secrets, select New client secret, and enter “TruU” as the description. Set the expiration to your preference; a 12-month duration is recommended.
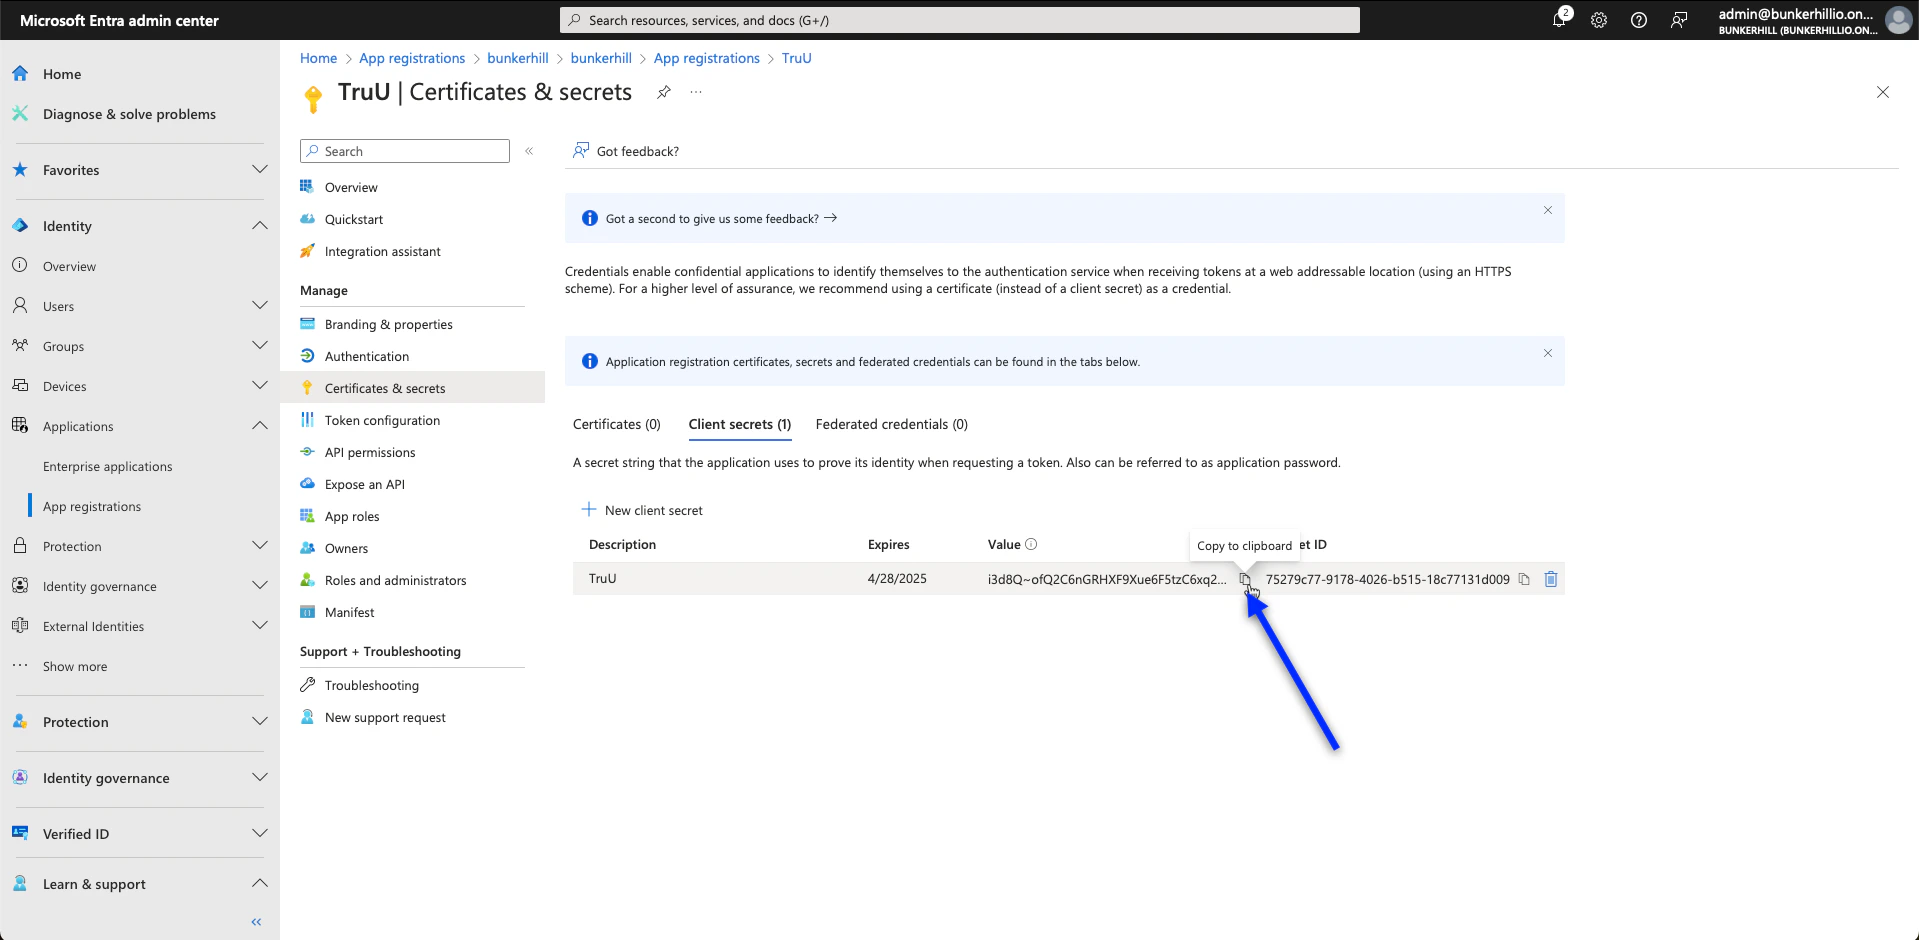
- After adding the secret, immediately copy the entry in the Value column and save it. This value is required for the integration in the TruU Admin Console and will not be accessible again once you leave the page.
TruU Admin Console Configuration
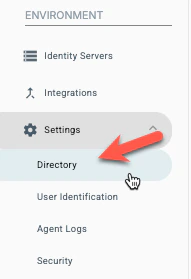
- In the TruU Admin console, go to Directory
- On the top left, click the blue ’+’ option to add a directory.

- Navigate to the drop-down menu and select Entra ID.
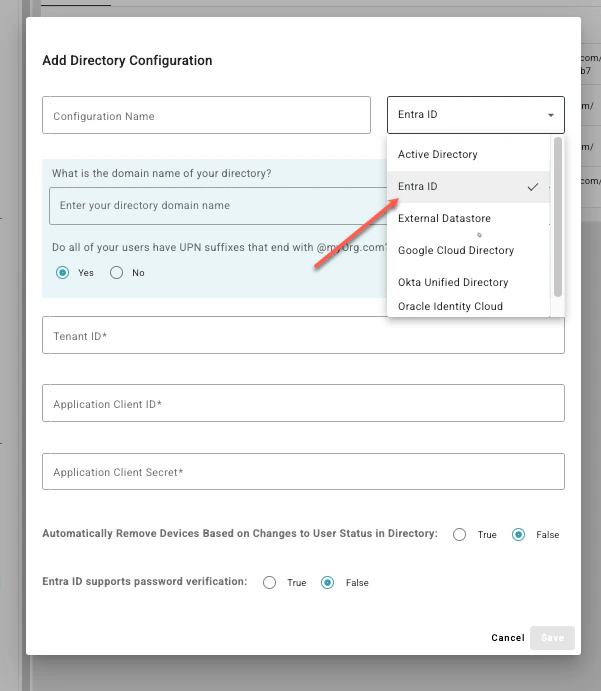
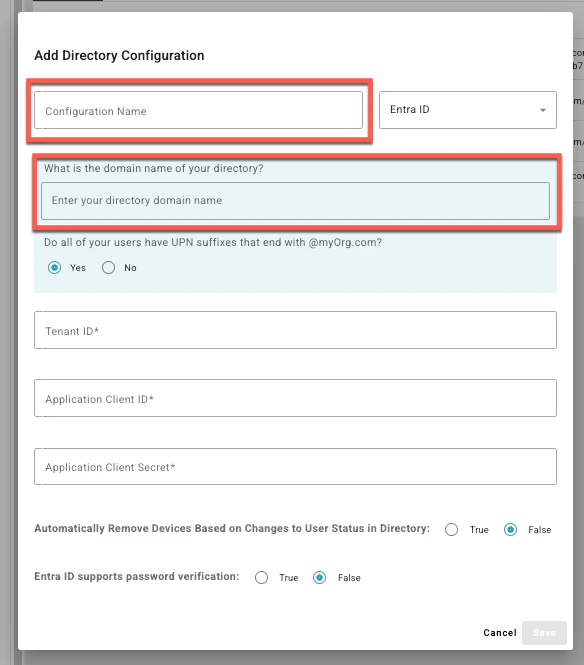
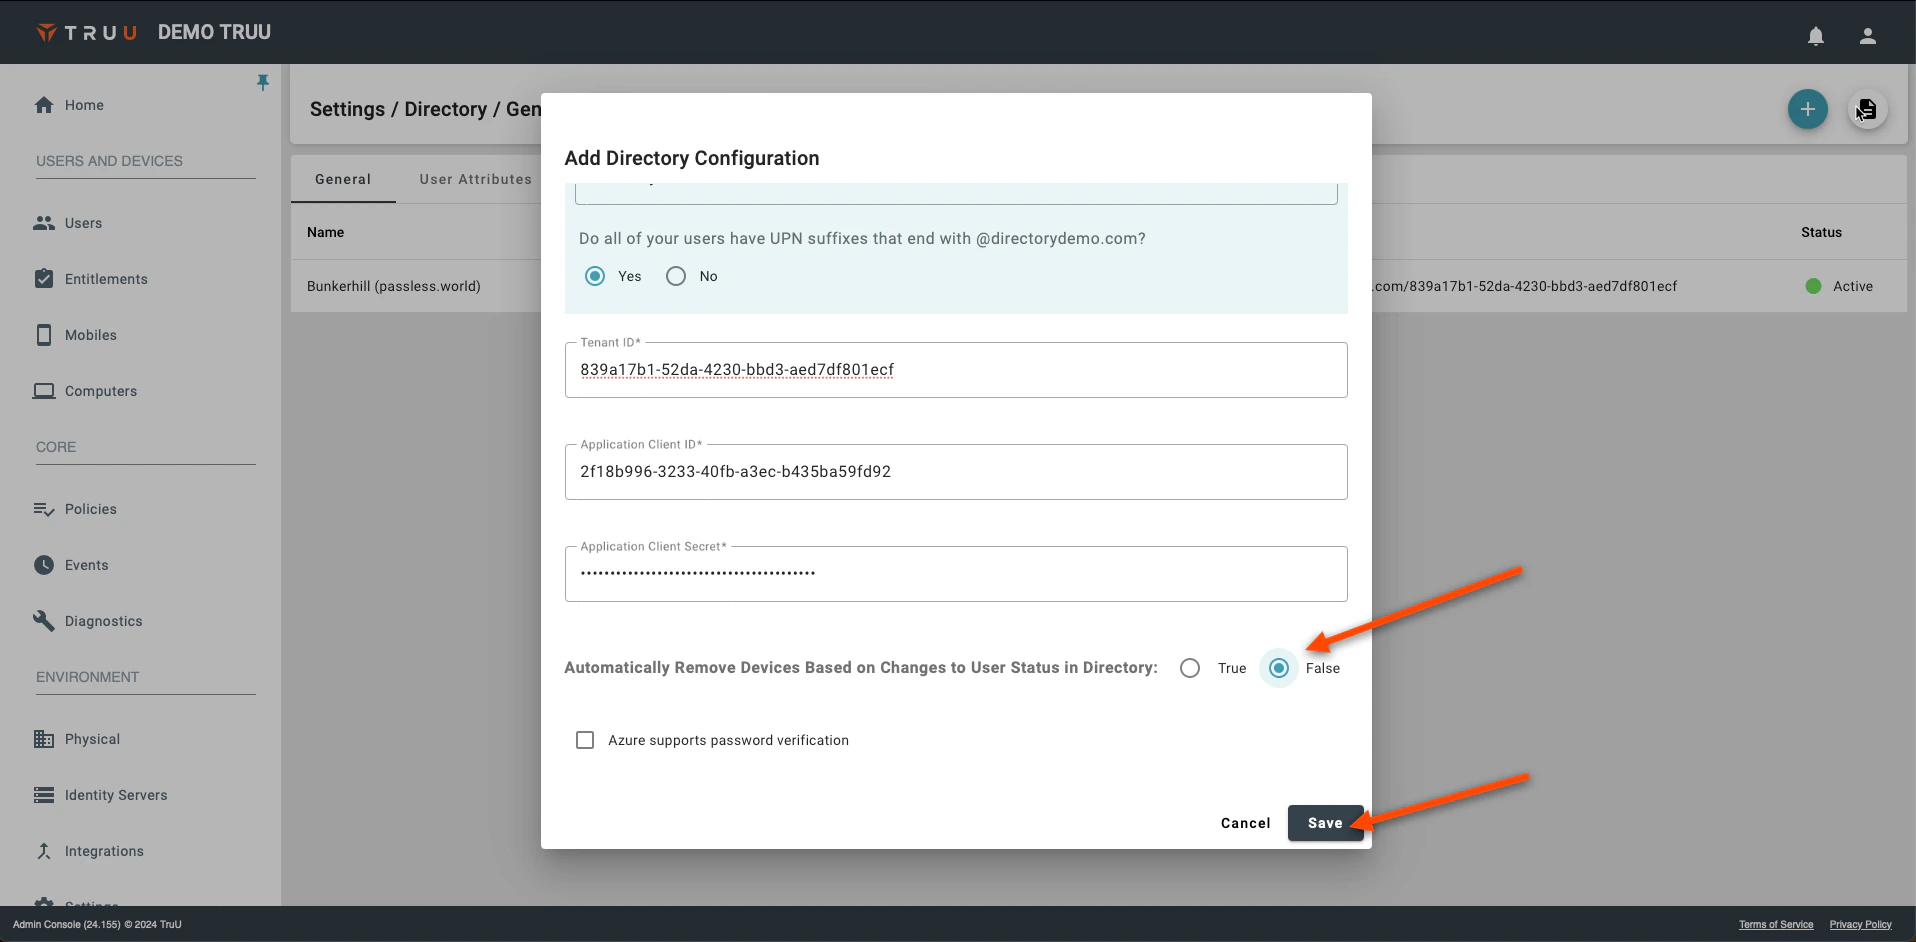
- Set a Configuration Name along with the domain name (your Entra ID domain) of the directory that you will be integrating
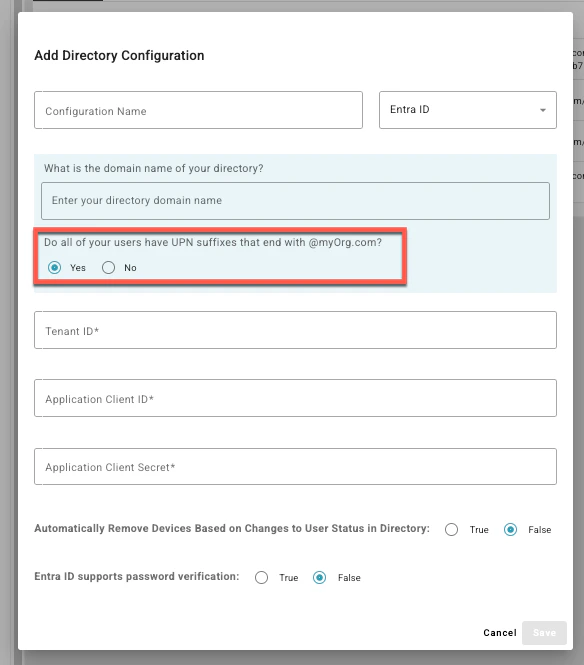
- Select if all your users have UPN suffixes that end with the domain name
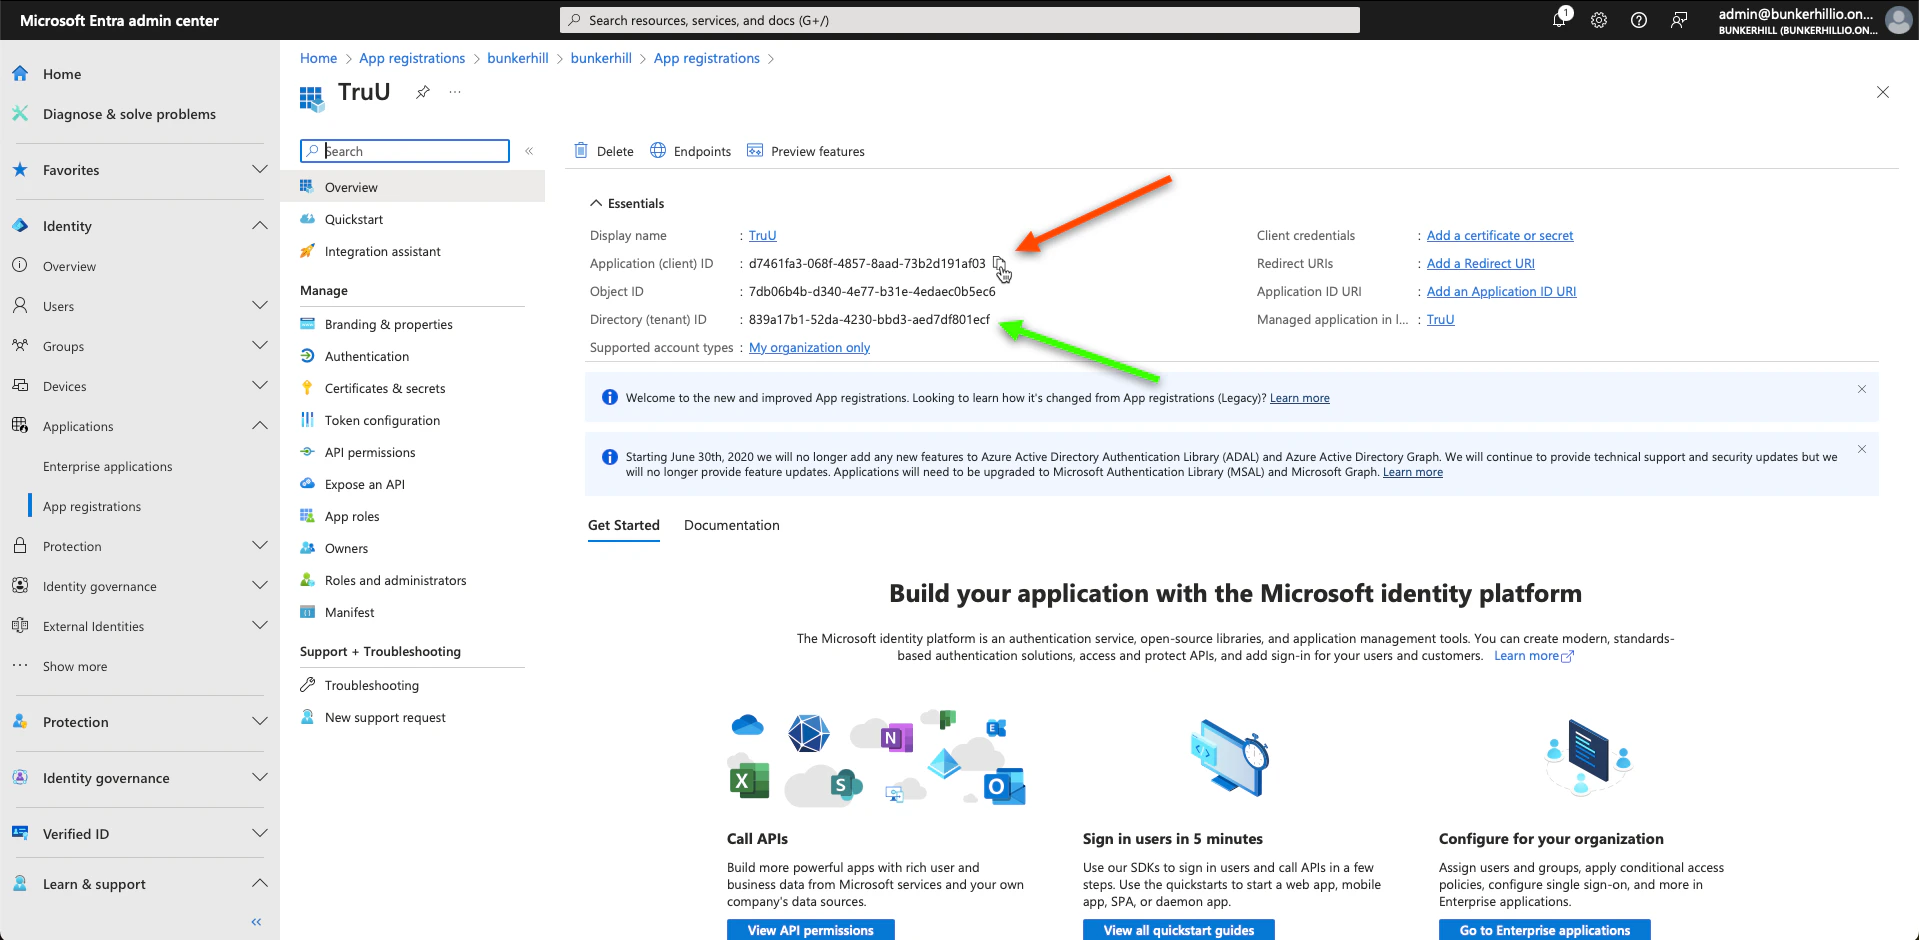
- Go back to the Entra ID Admin Center and locate the Application (client) ID and the Directory (tenant) ID on the application’s overview page. Copy and paste the:
- Directory(Tenant ID)
- Application Client ID
- Application Client Secret Value (copied and saved from Step 9)
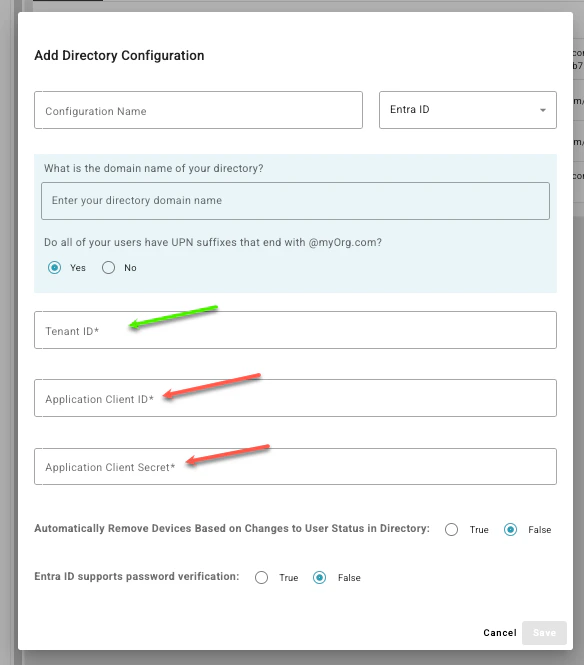
- Choose True or False to determine if the system should automatically unenroll or remove devices based on user status changes in the directory, then click Save
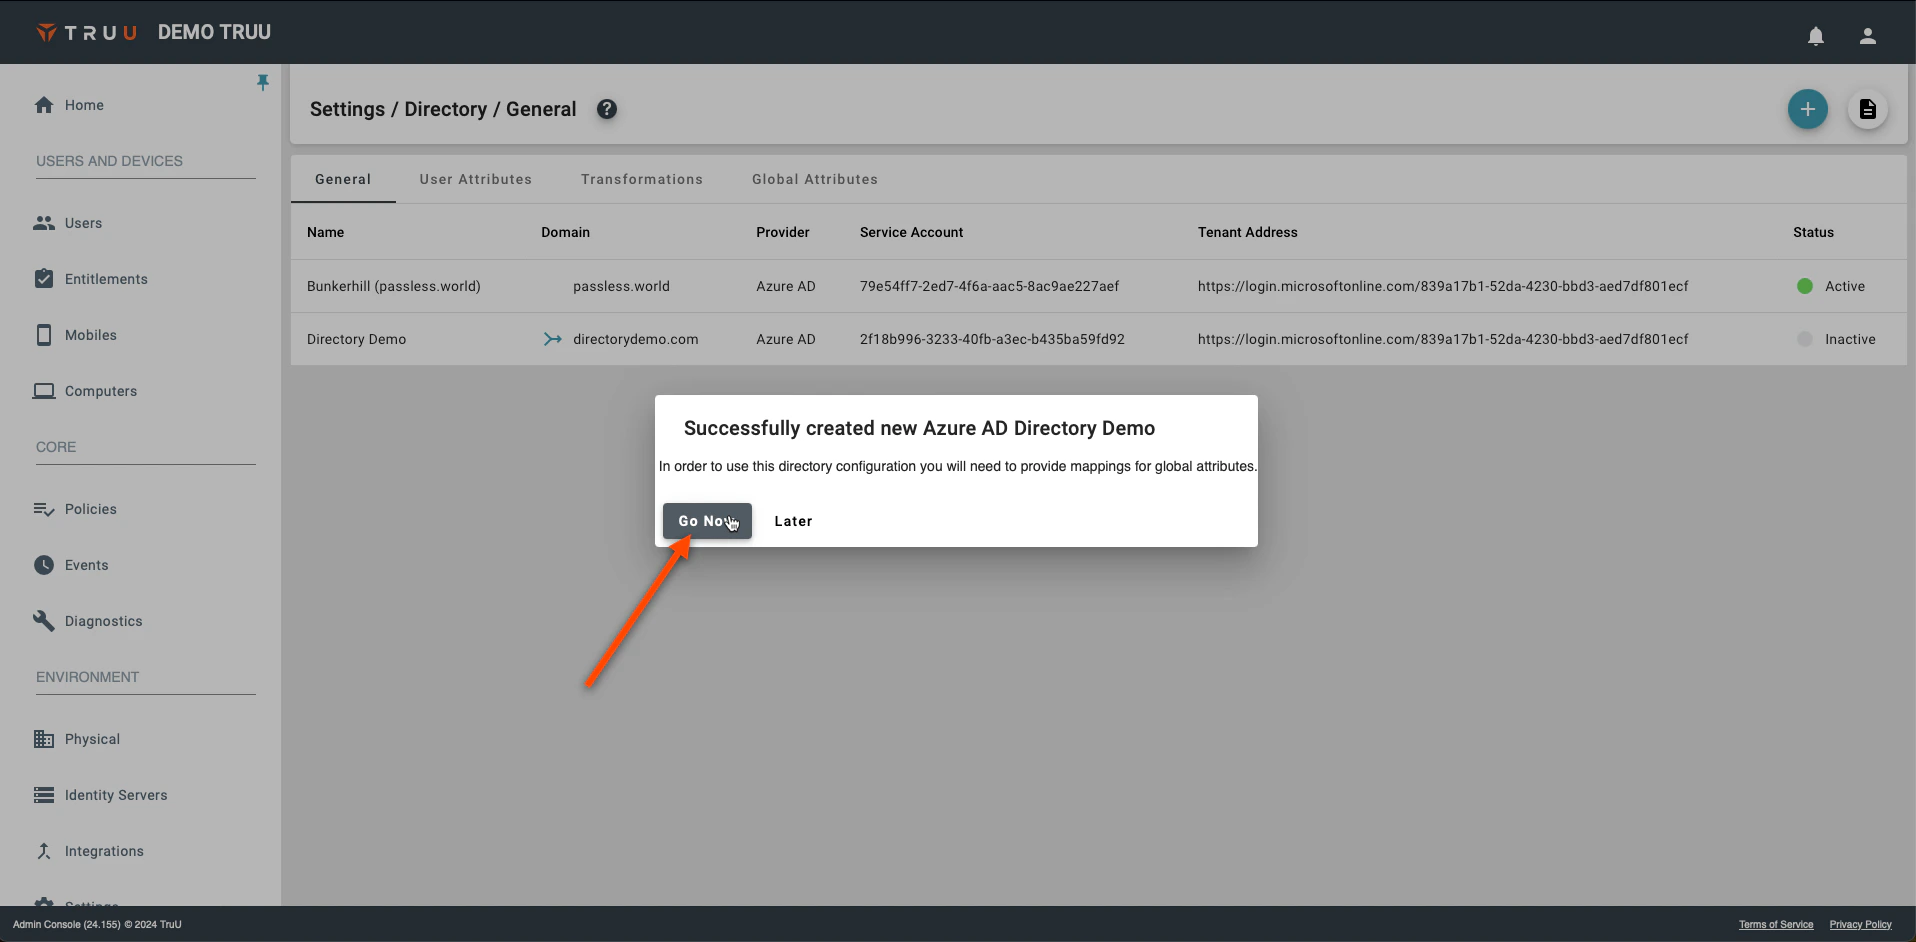
- You will be prompted with the following pop-up, which will redirect you to the Global Attributes Tab. Select Go Now
- Click on the Gear icon on the top right. Select your Primary User Identifier (typically “mail”) to be used for lookups and diagnostics, then click Save.

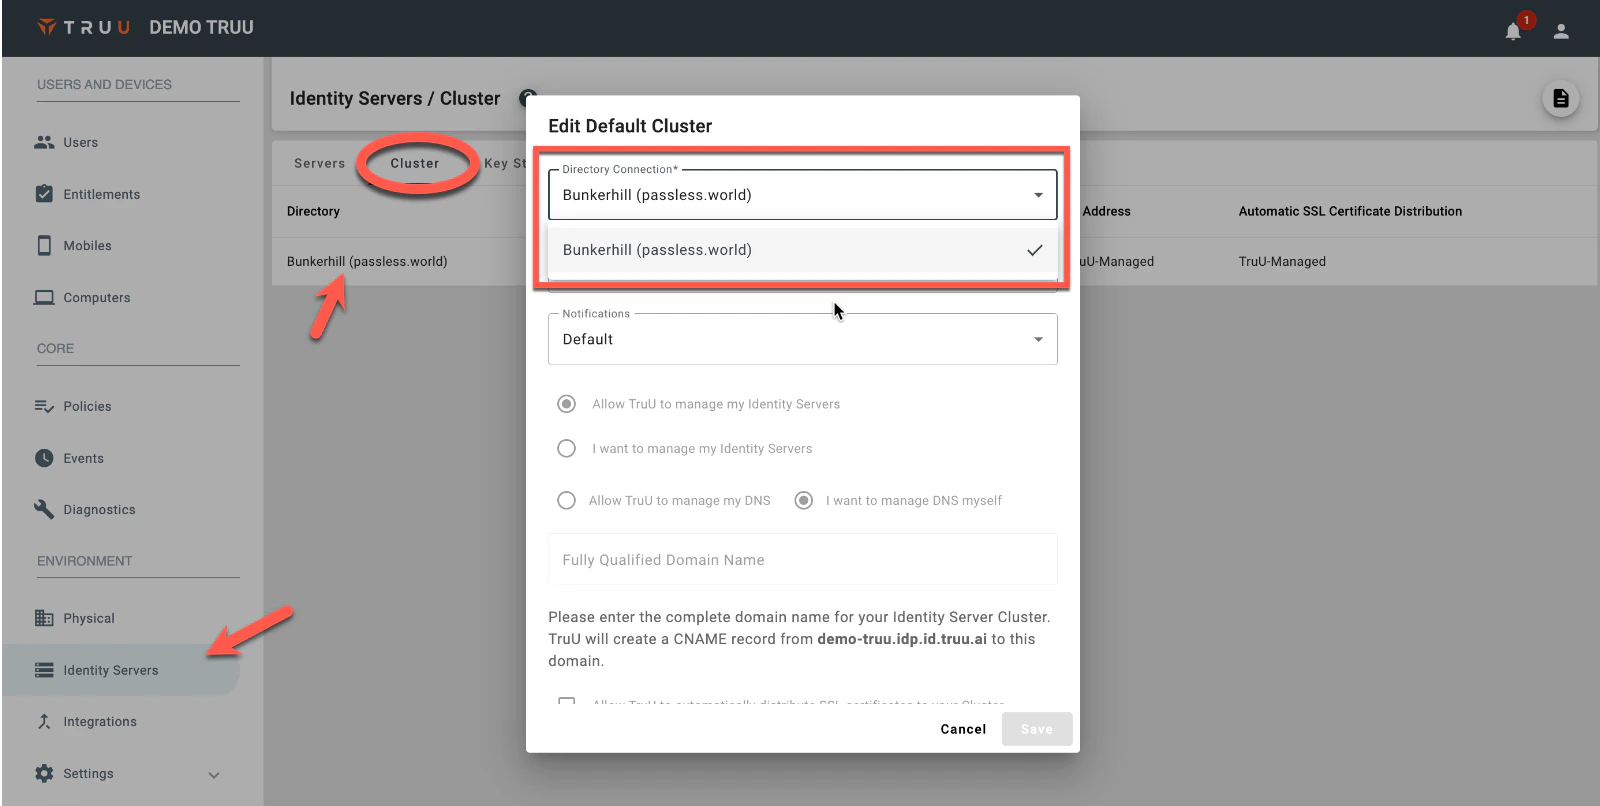
- Navigate to “Identity Servers”> Cluster. Under Directory Connection, select your directory and Click Save.