

Downloading CyberArk ZTPKI Certificates from the CyberArk Console
- Log into your CyberArk console
- Navigate to Certificates
-
Download the root CA certificate
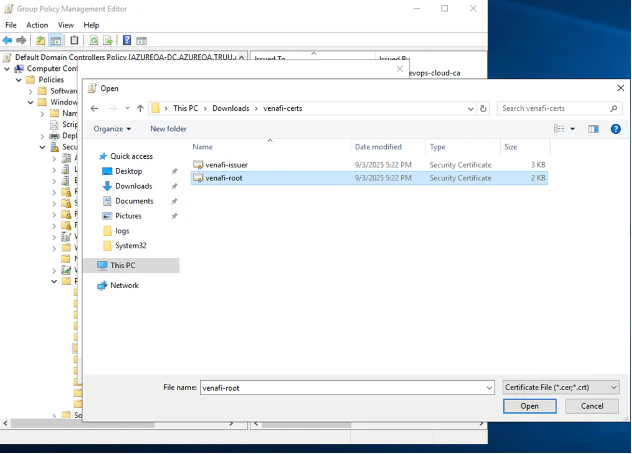
- For the purposes of this document, we will refer to this as venafi-root.cer
-
Download the issuing CA certificate
- We will refer to this as venafi-issuer.cer
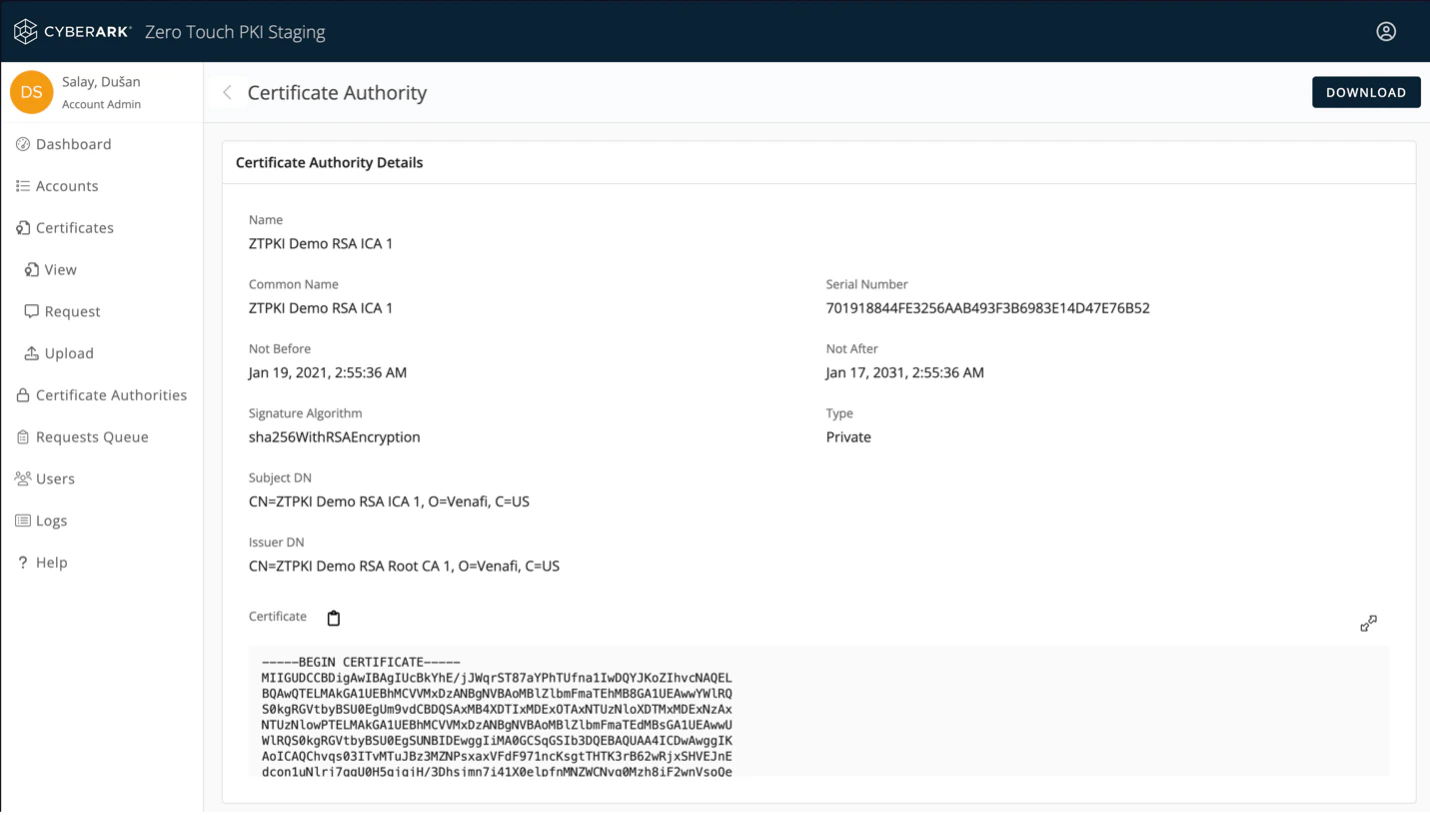
 Body of root CA certificate can be copied from Issuer Details section

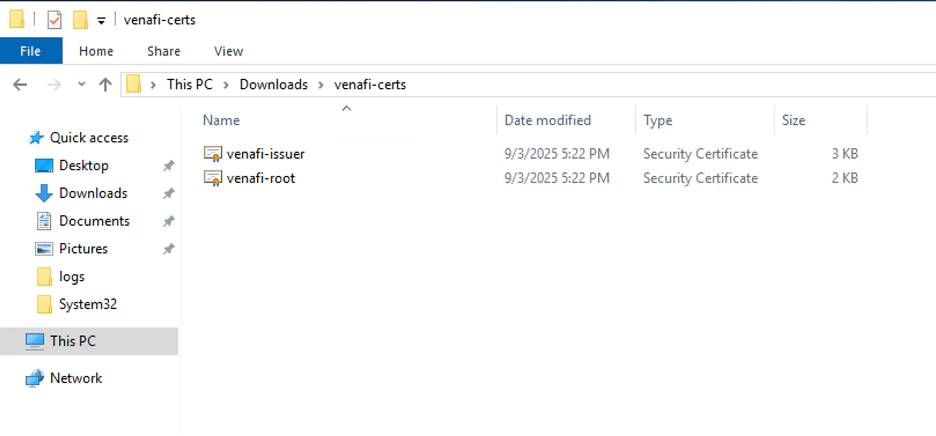
- Copy the downloaded .cer files to your domain controller.
Adding Certs to NT AuthStore
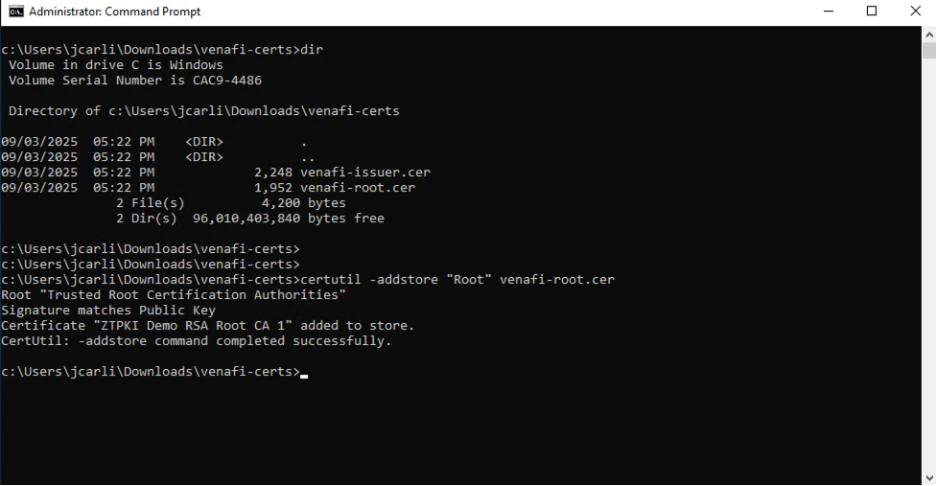
- Open a command prompt as an Administrator and navigate to the Downloads folder or location where you have copied the downloaded certificates.
- Execute certutil -addstore “Root” venafi-root.cer
- Open Run on the server by pressing Windows Key + R.
- In Run type in mmc and hit Enter.
-
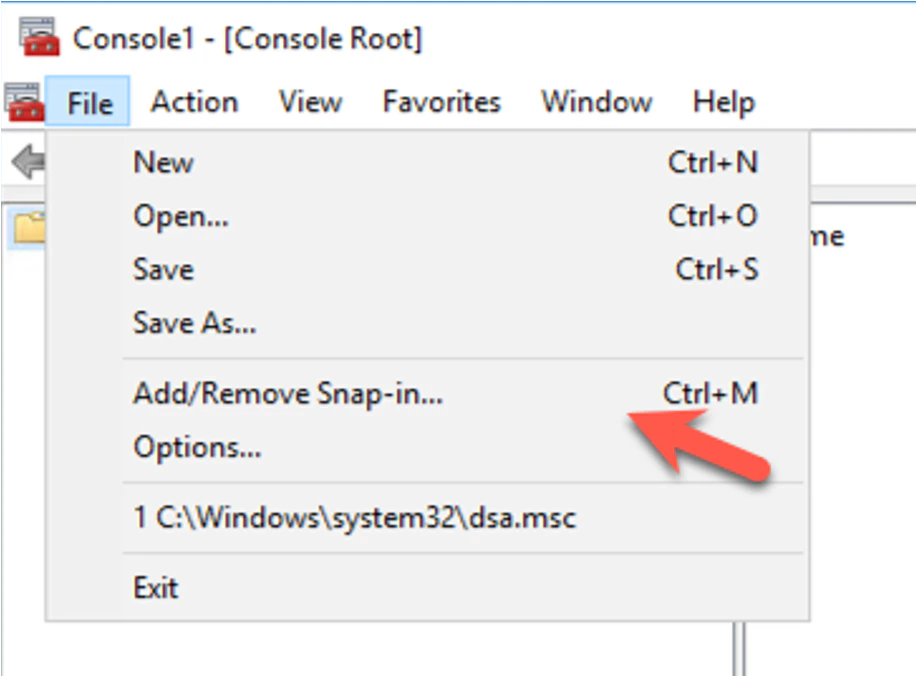
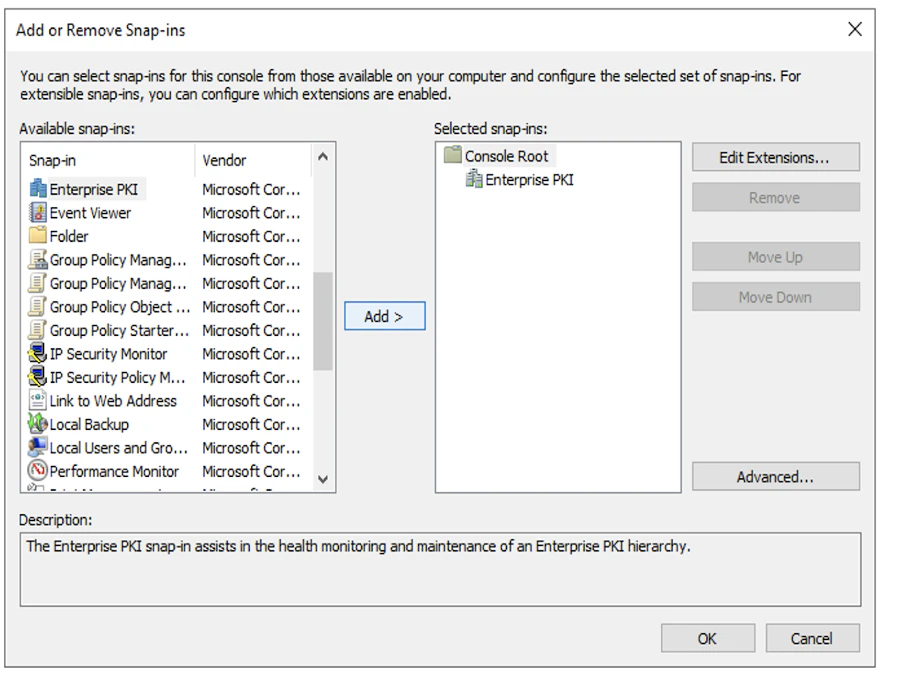
Go to File and then select Add/Remove Snap In.

-
Add Enterprise PKI snap-in then click OK.
-
Right-click on Enterprise PKI and Select Manage AD Containers


-
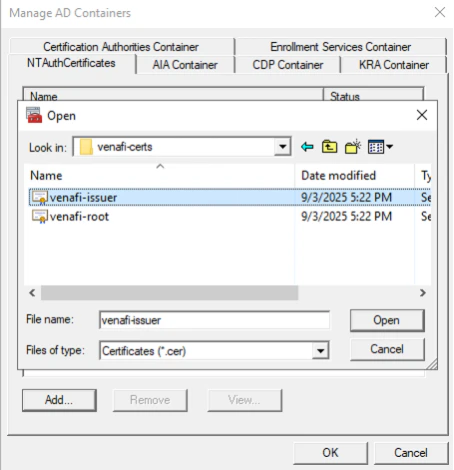
From the NTAuthCertificates tab, Click Add

-
Locate the venafi-issuer.cer file and Click Open. (If file not present, Set File types to All Files)
-
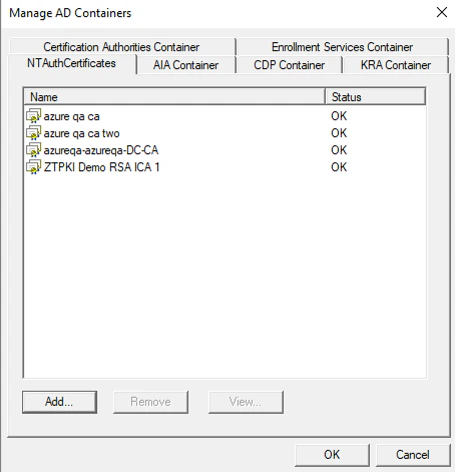
See that the issuing CyberArk certificate is now listed with Status OK. Click OK
Adding CyberArk Certificates to Each Domain Controller
CyberArk certificates must be added to each domain controller. Customers can use group policy or manually install the certificates on each domain controller.Updating Domain Controller GPO
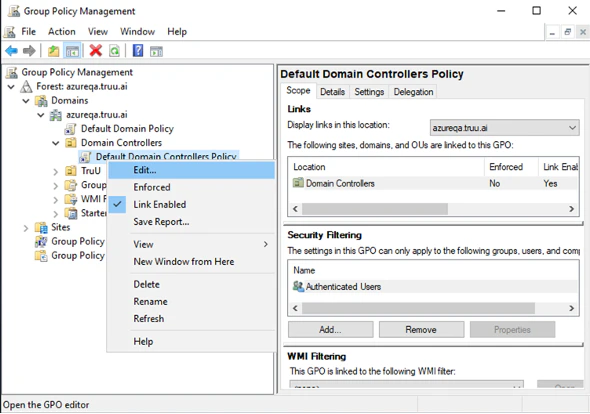
- Go to Group Policy Management.
-
Edit the “Default Domain Controller Policy”
-
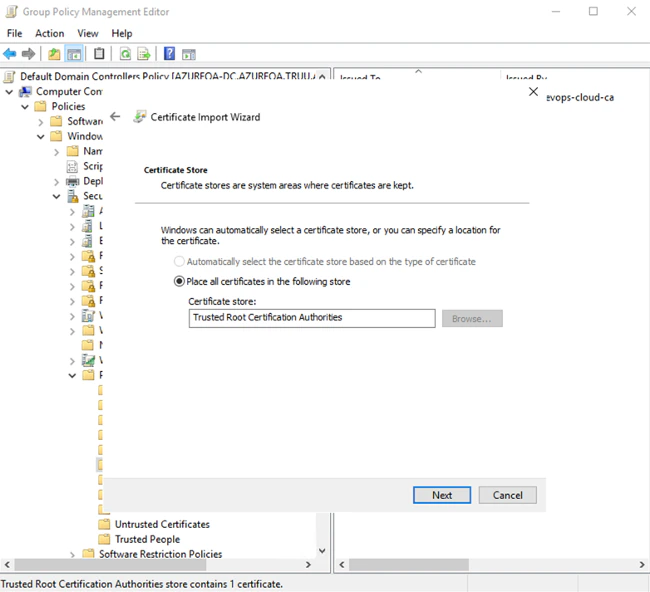
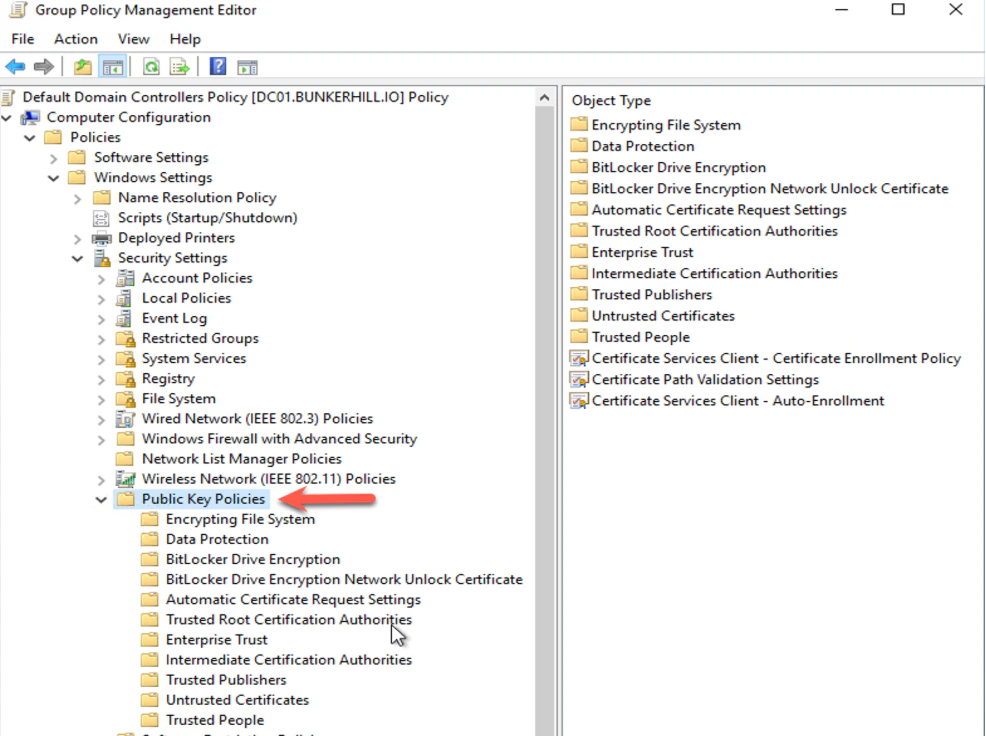
Go to Computer Configuration > Windows Settings > Security Settings > Public Key Policy
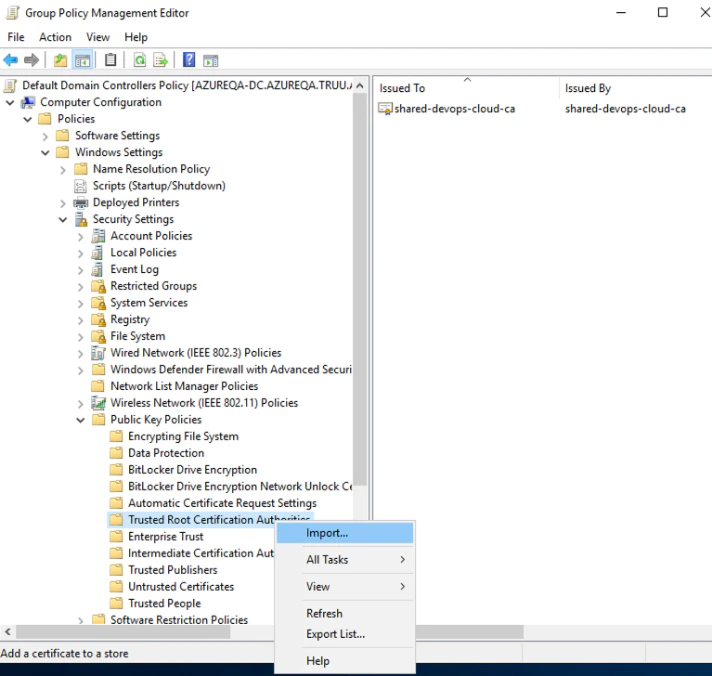
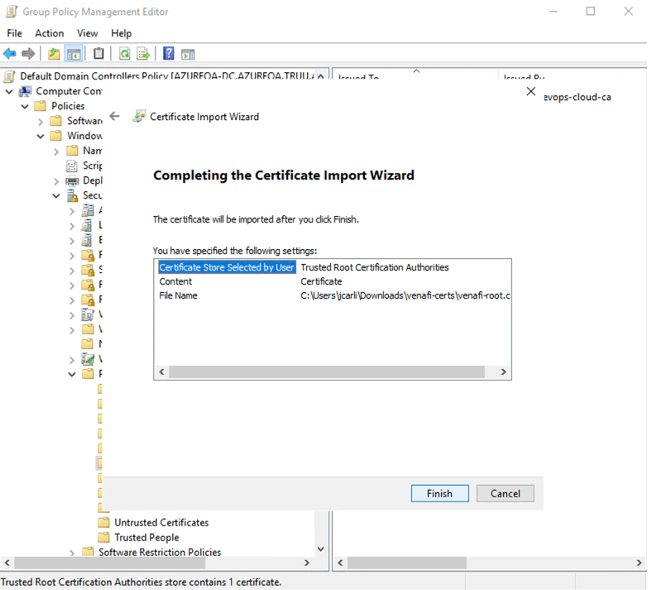
- Right Click on Trusted Root Certification Authorities and Click Import
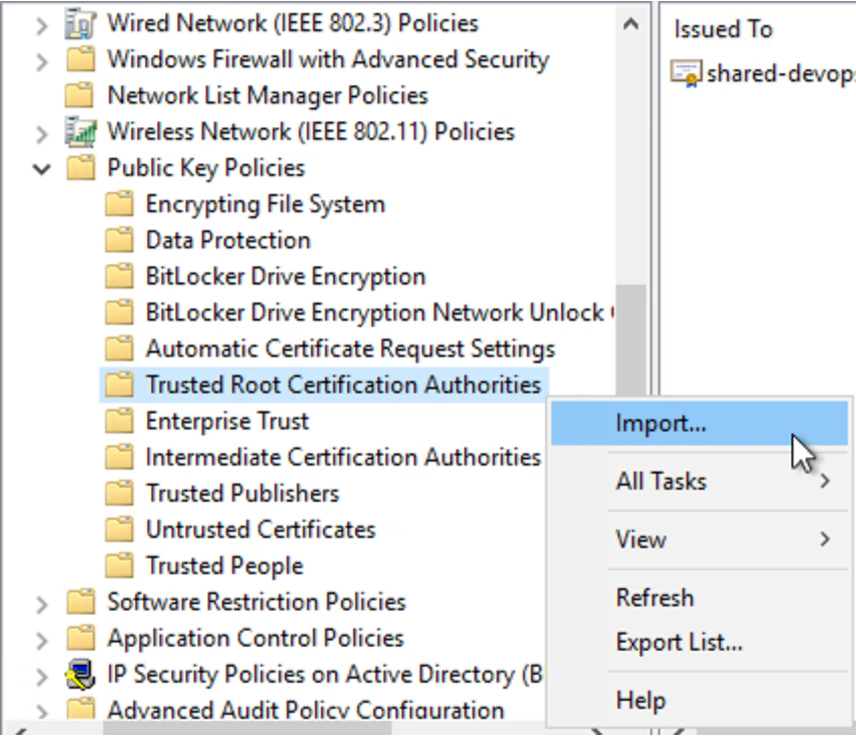
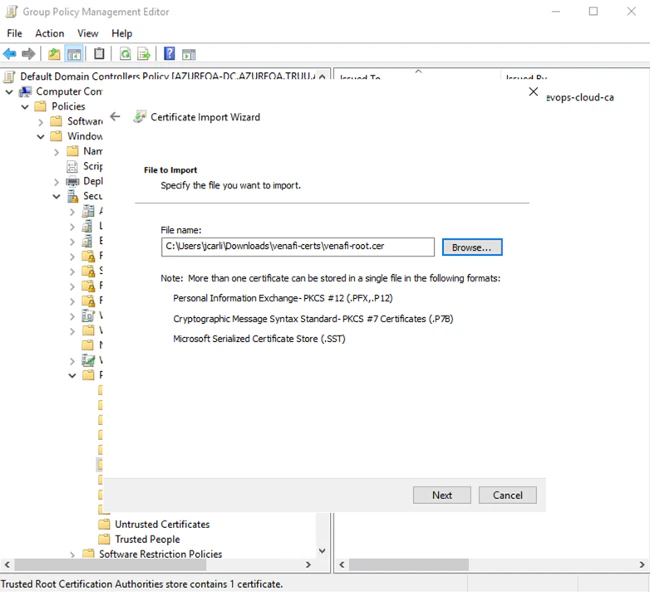
- Import the CyberArk root certificate

-
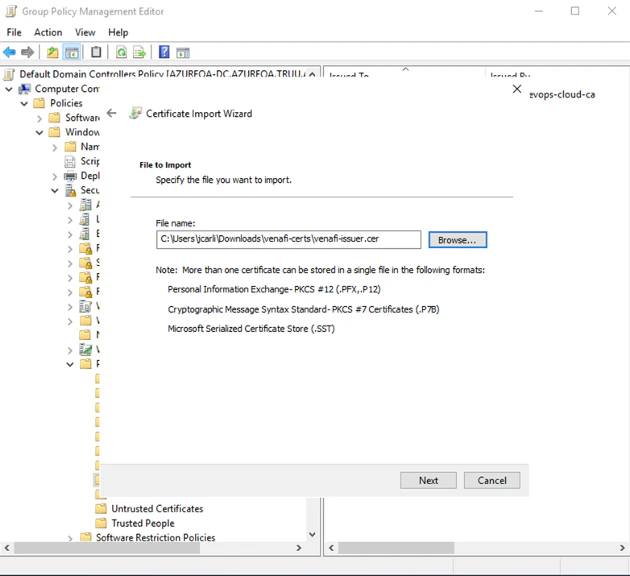
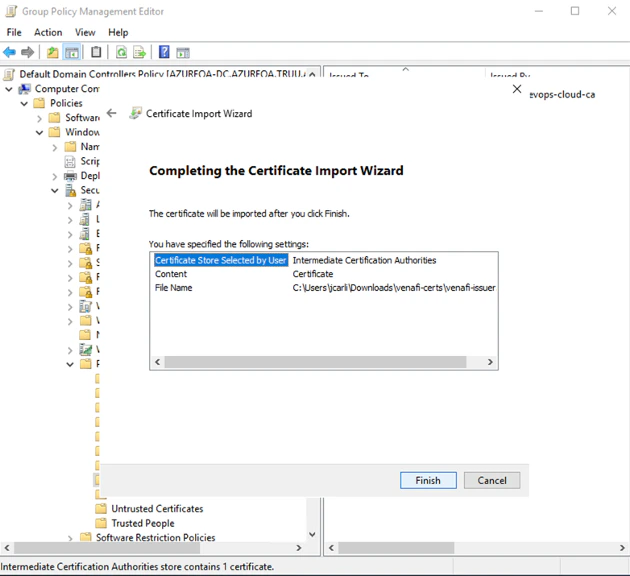
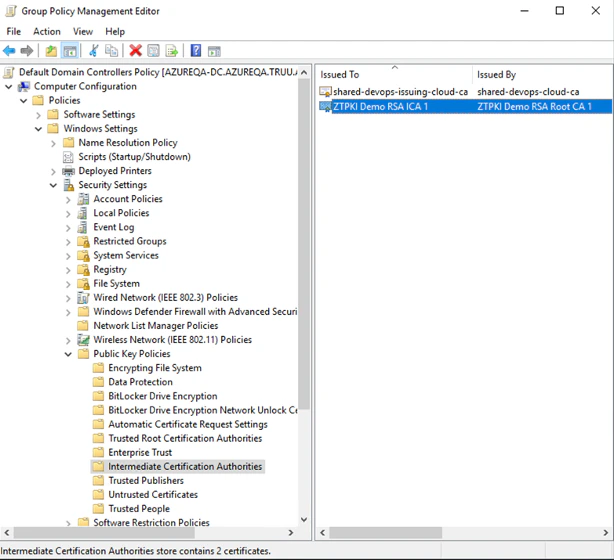
Right Click on Intermediate Certification Authorities and Click Import
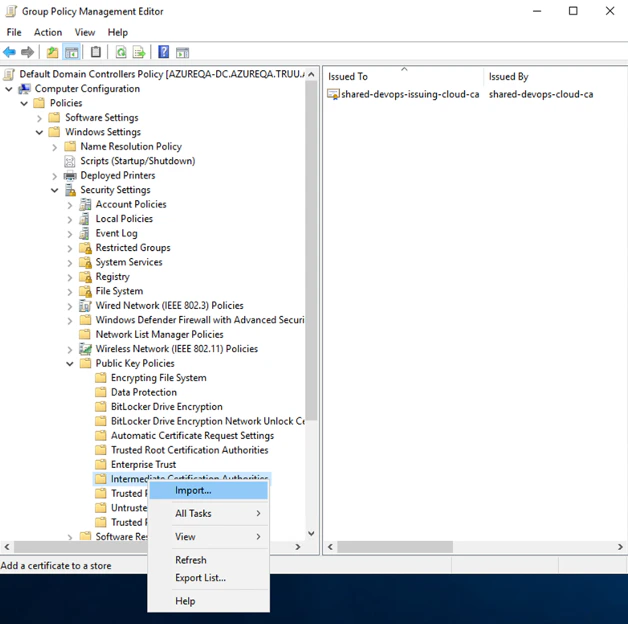
- Import the Issuing CyberArk certificate
Validating
- Go to Domain controller
-
Open the command prompt as administrator and run gpupdate /force.

- Open local domain controller certificate store
- Open Run on the server by pressing Windows Key + R.
- In Run type in certlm.msc and hit Enter.
-
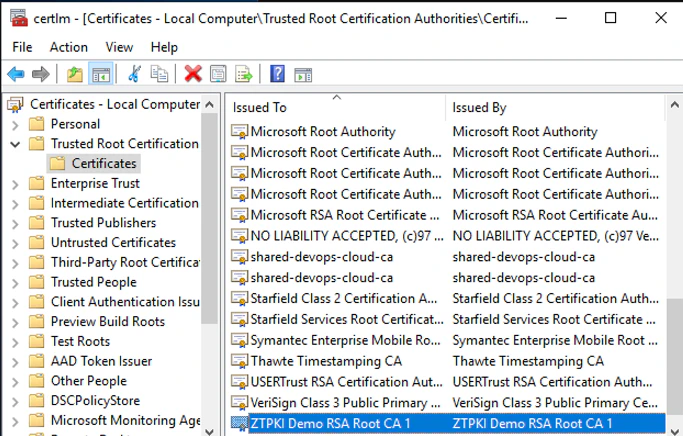
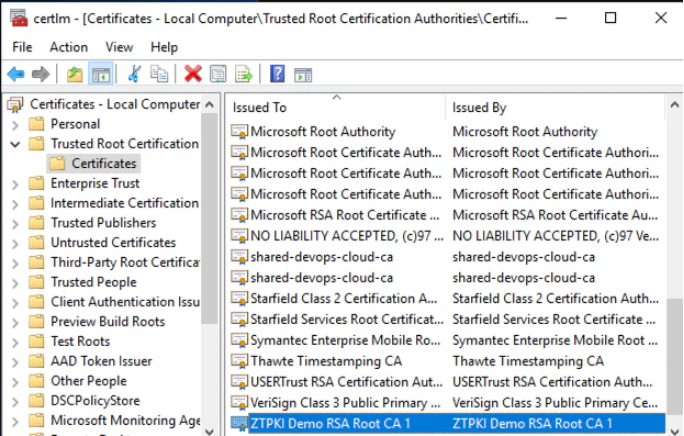
Go to the Trusted Root Certification Authorities and then Certificates, you will see the root certificate.
-
Go to the Intermediate Root Certification Authorities and then certificates, you will see the issuing certificates certificate.

Adding CyberArk Certificates to Computers
CyberArk certificates must be added to each computer for authentication to work.Creating GPO
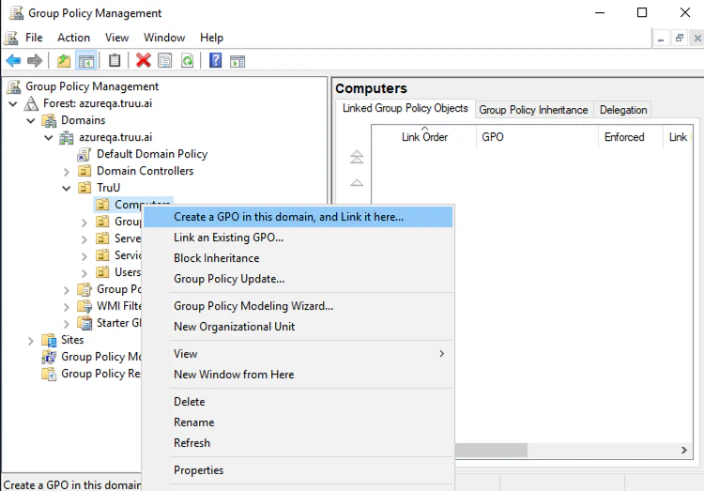
- Go to Group Policy Management.
-
Create a New group policy at your Computers OU to apply to your workstations.
-
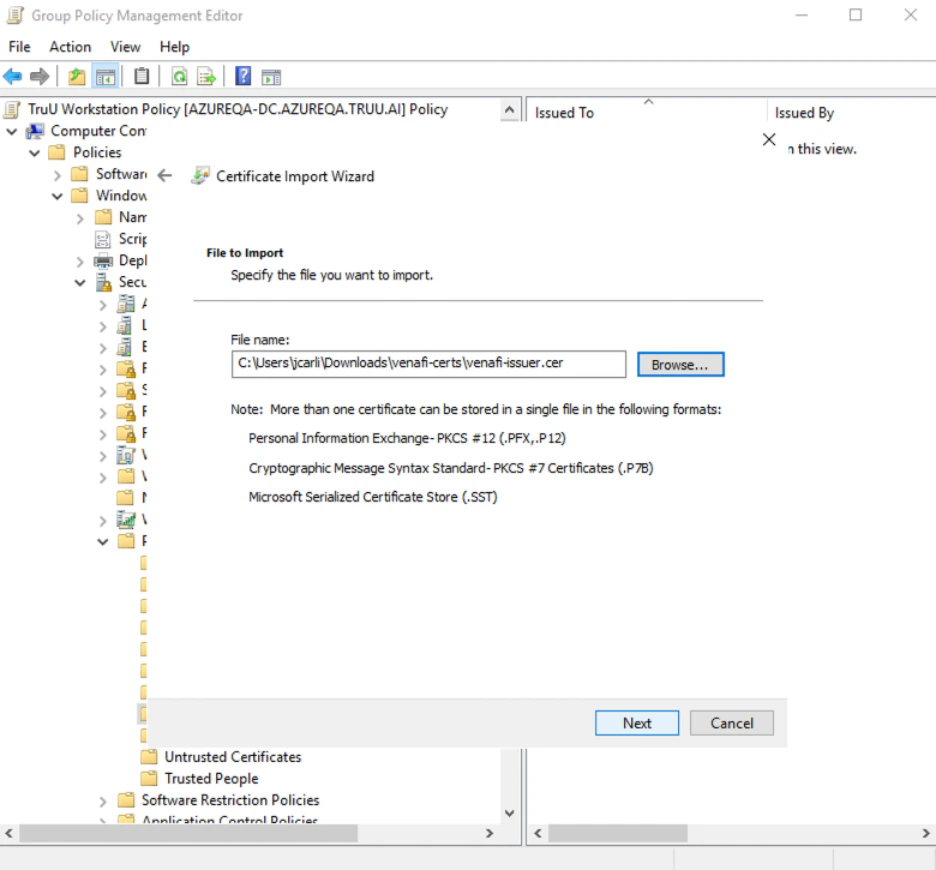
Edit the new group policy for the workstations (new screenshot below).
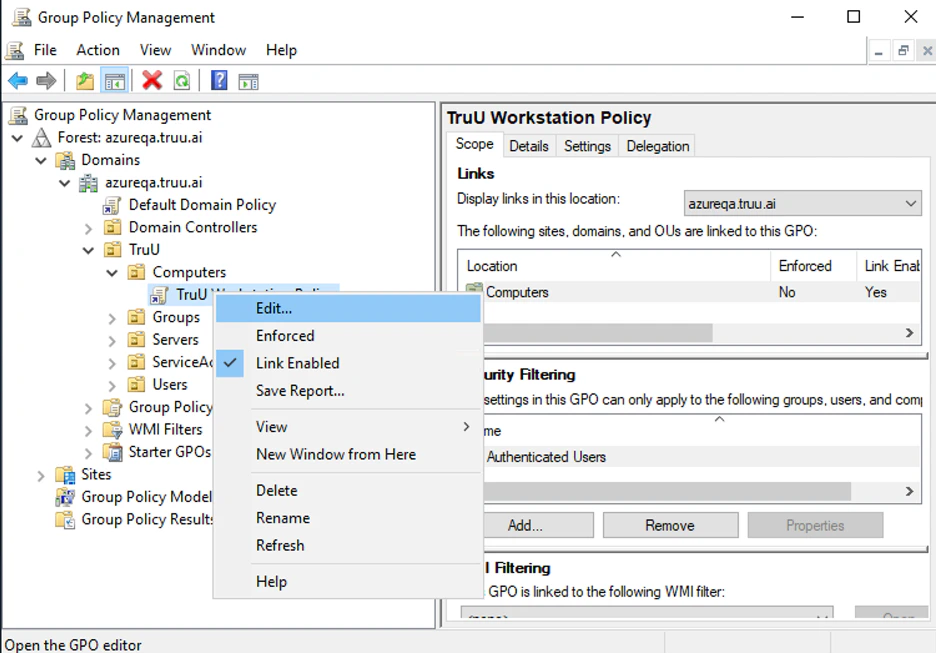

-
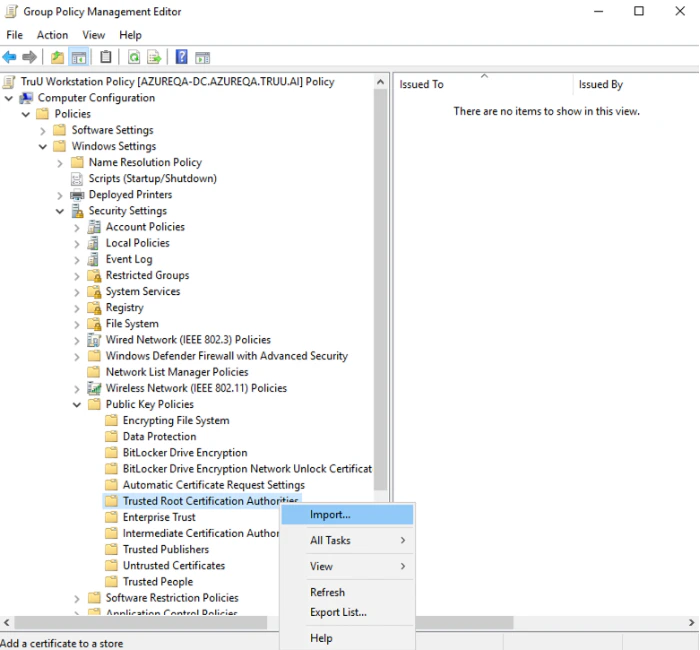
Go to Computer Configuration > Windows Setting > Security Settings > Public Key Policy

- Right Click on Trusted Root Certification Authorities and Click Import
-
Import the CyberArk root certificate


-
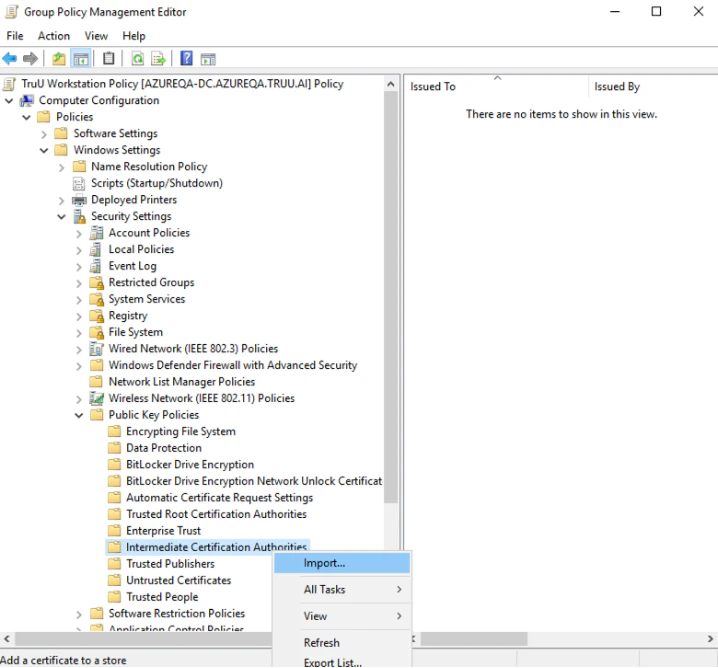
Right Click on Intermediate Certification Authorities and Click Import
-
Import the Issuing CyberArk certificate
Validating
- Go to the domain controller and also any workstation GPO is applied to.
-
Open the command prompt as administrator and run GPUPDATE /force.

- Open local computer certificate store
- Open Run on the server by pressing Windows Key + R.
- In Run type in certlm.msc and hit Enter.
-
Go to the Trusted Root Certification Authorities and then Certificates, you will see the root certificate.
- Go to the Intermediate Certification Authorities and then certificates, you will see the issuing certificates certificate.
CyberArk Zero Touch PKI TruU Tenant Setup