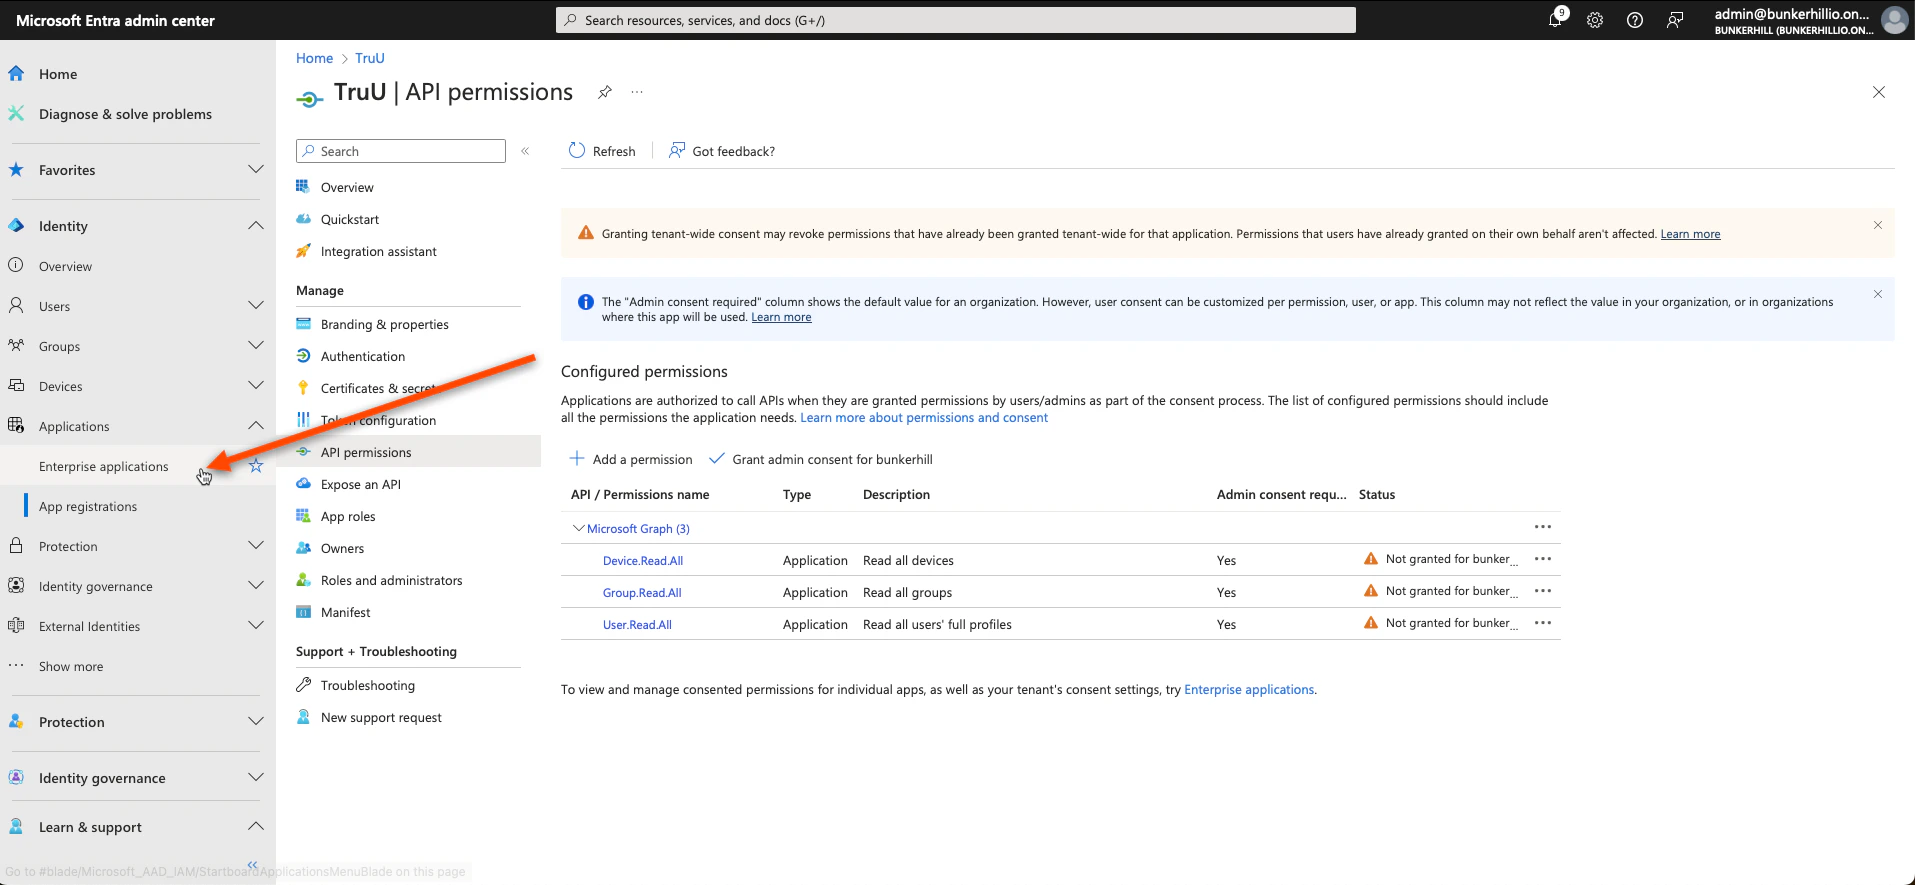
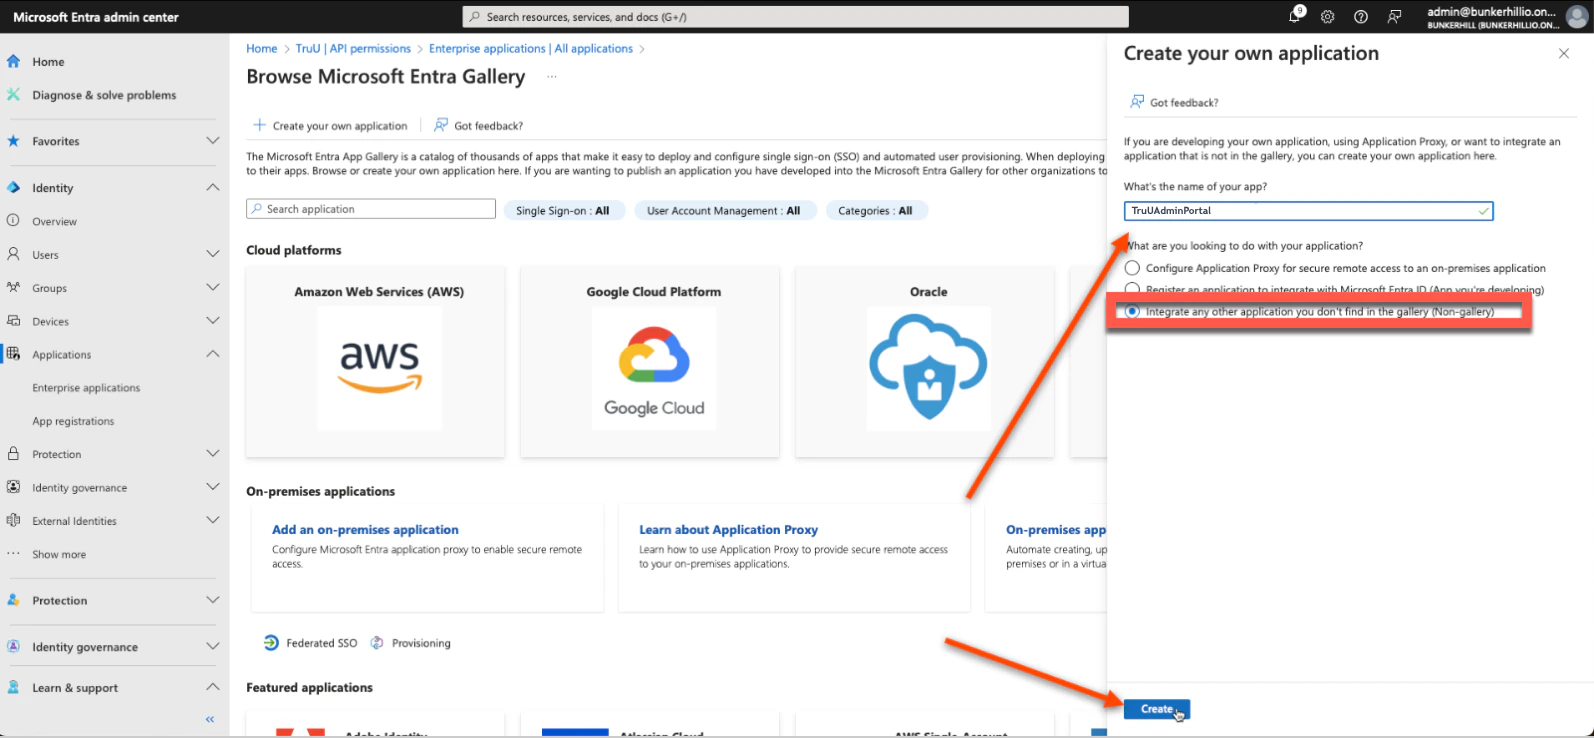
- Navigate to the Entra ID admin center. Click Enterprise Applications under the “Applications” tab on and follow the picture prompted steps below
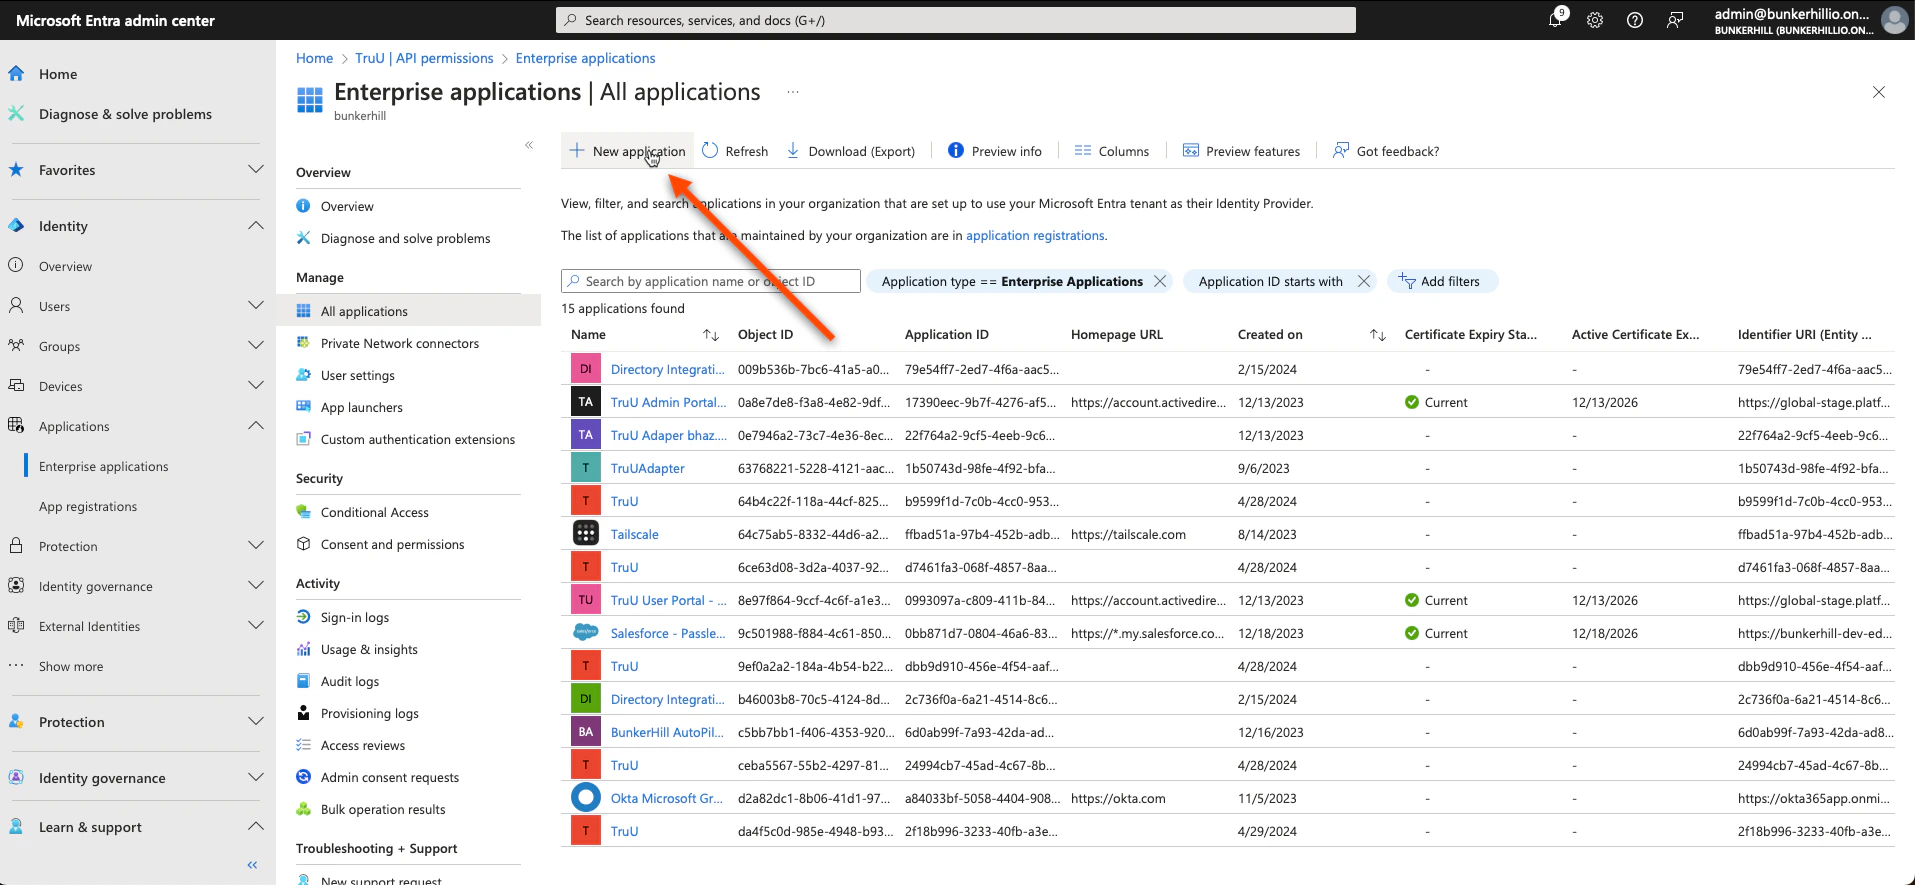
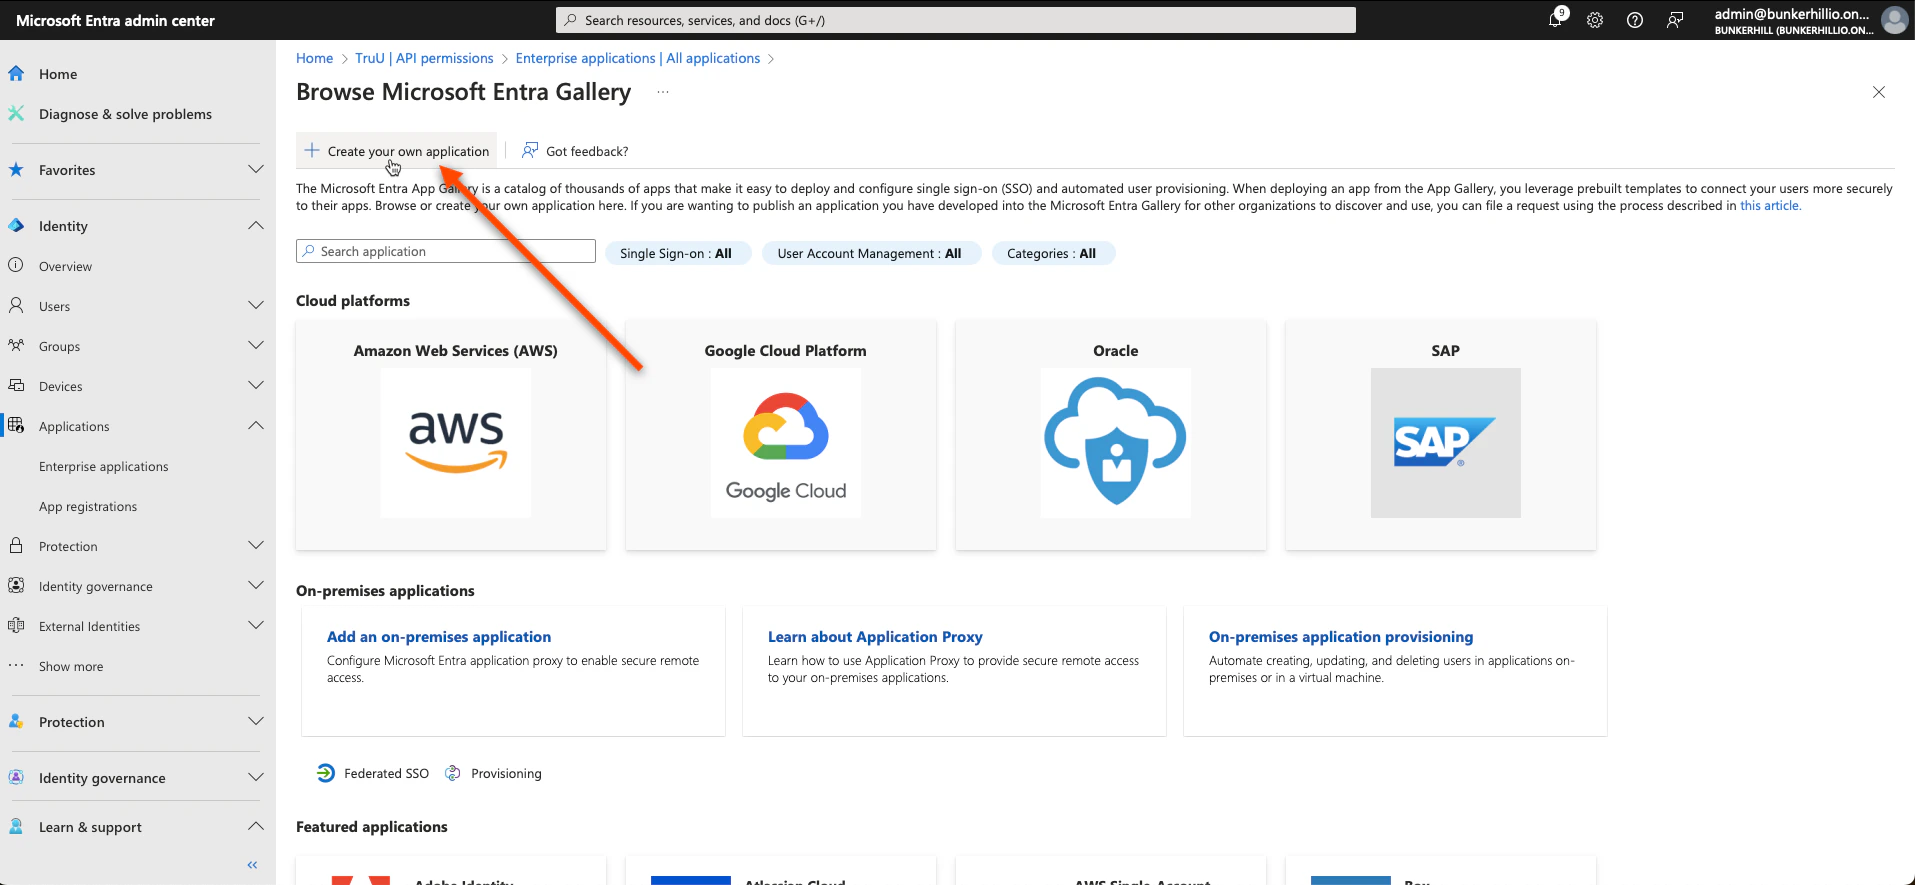
- We will be creating two new applications: TruUAdminPortal and TruUUserPortal. Name the first one TruUAdmin Portal
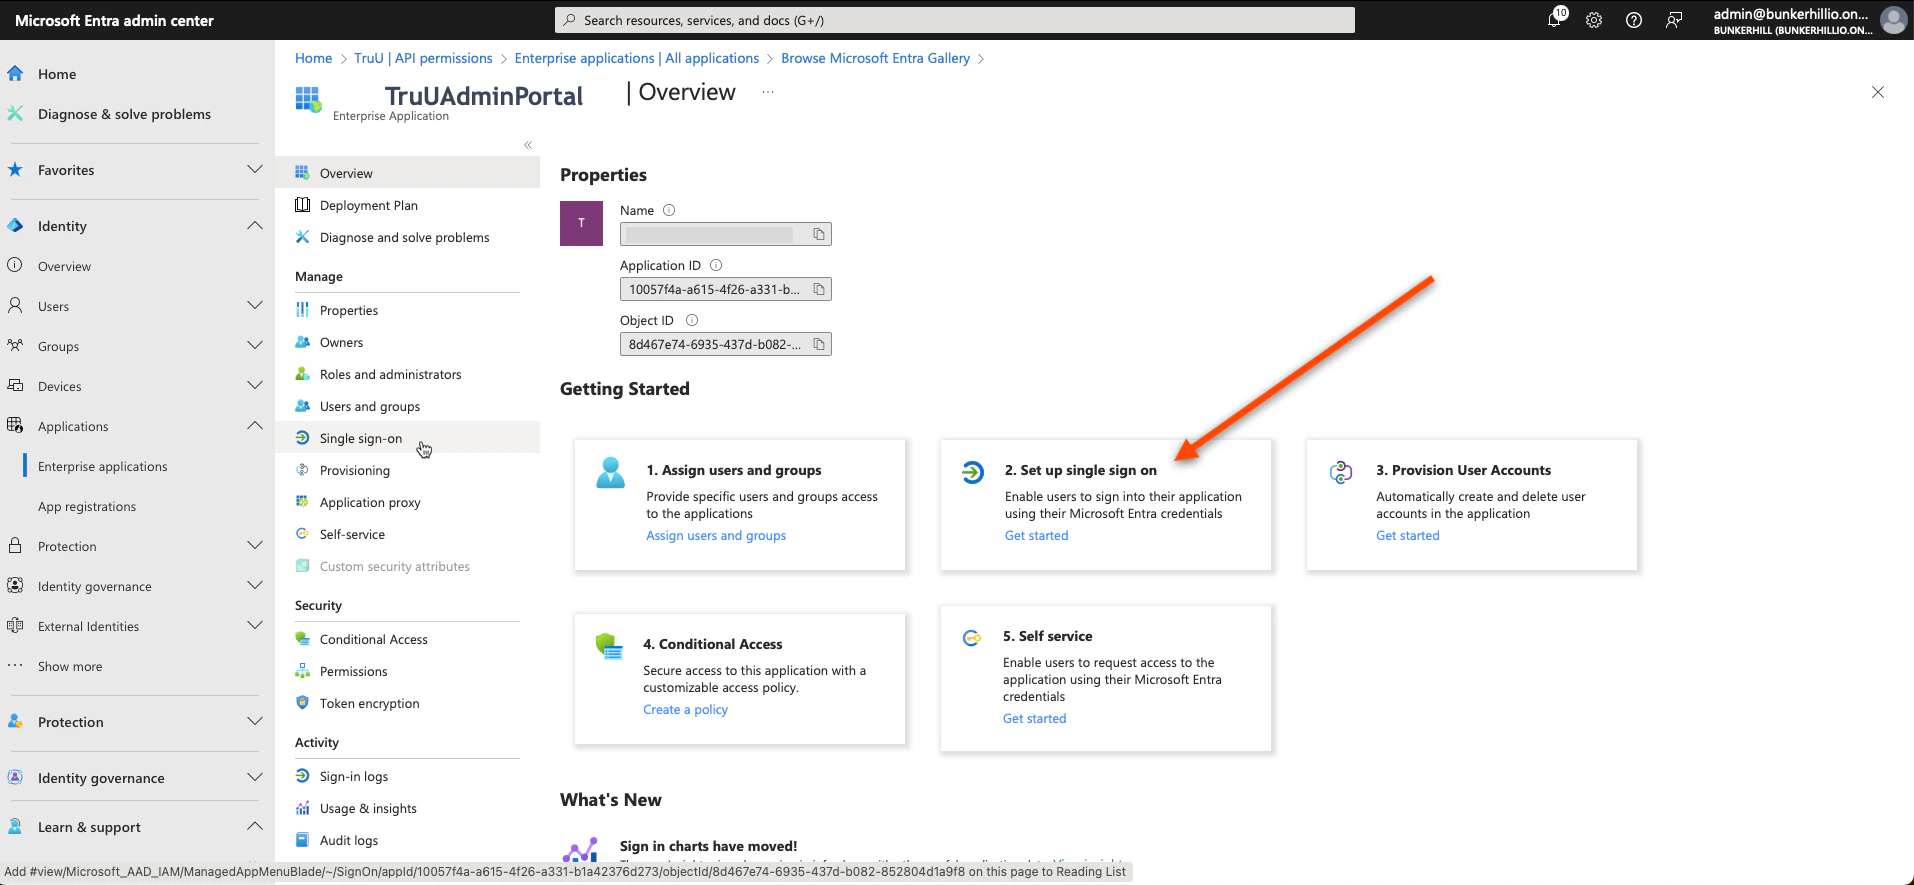
- Select Single Sign-on
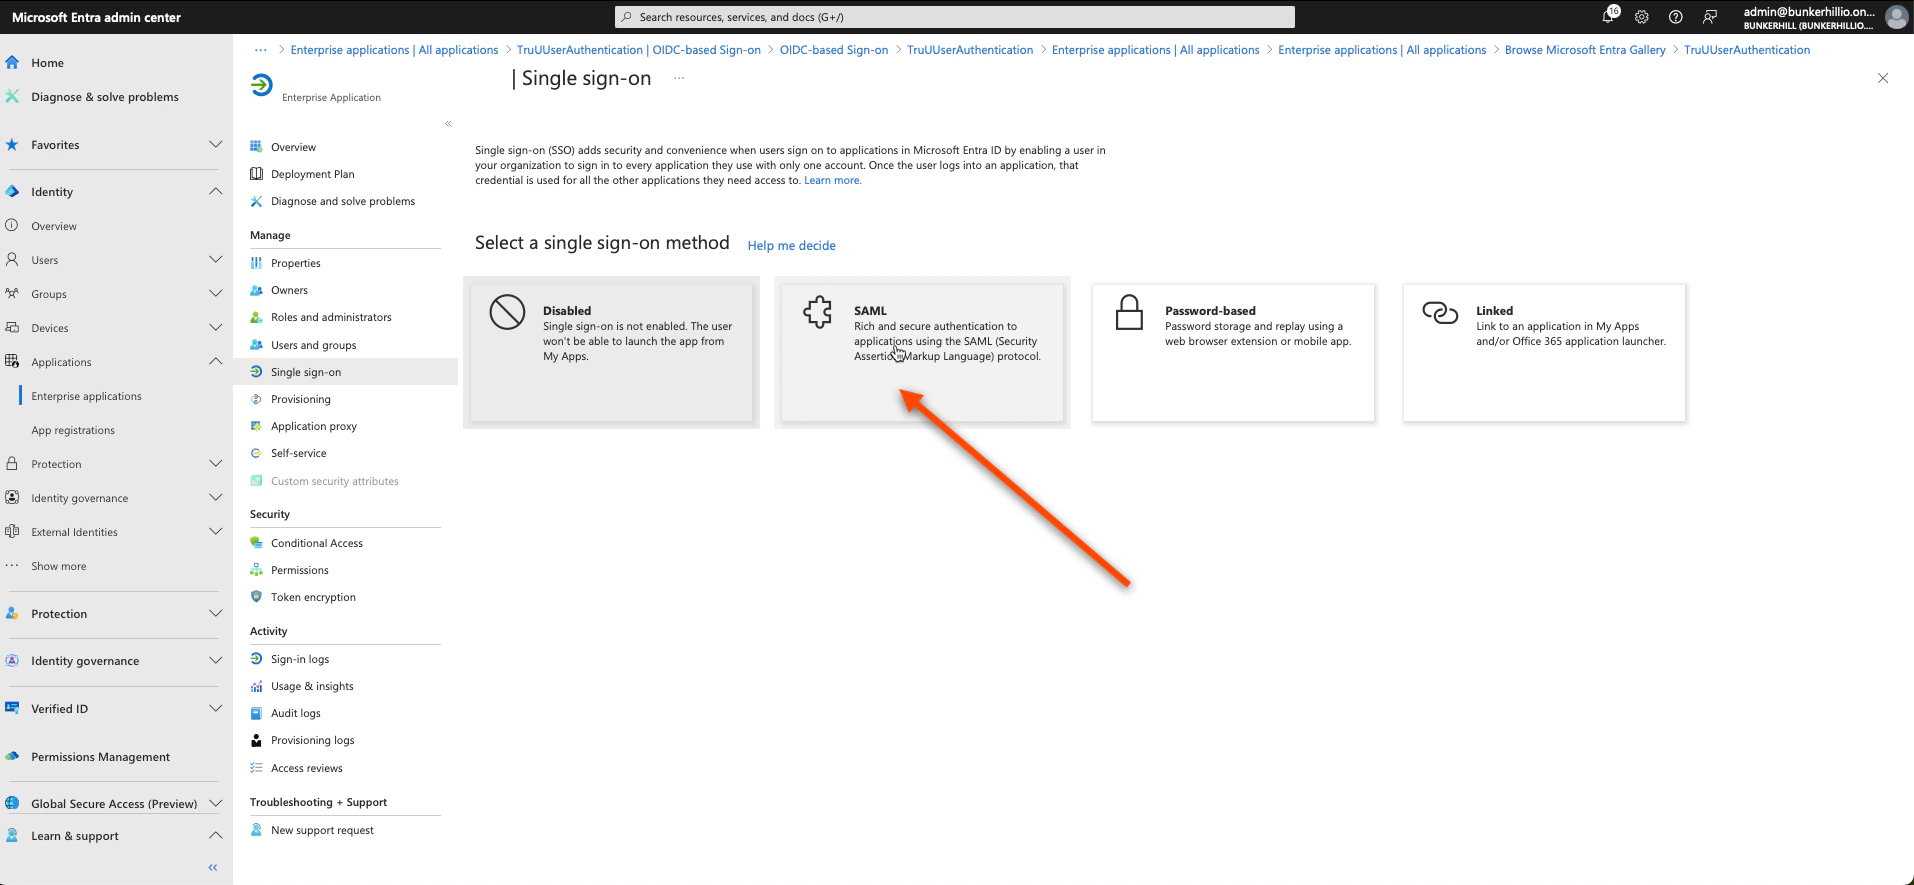
- Select SAML
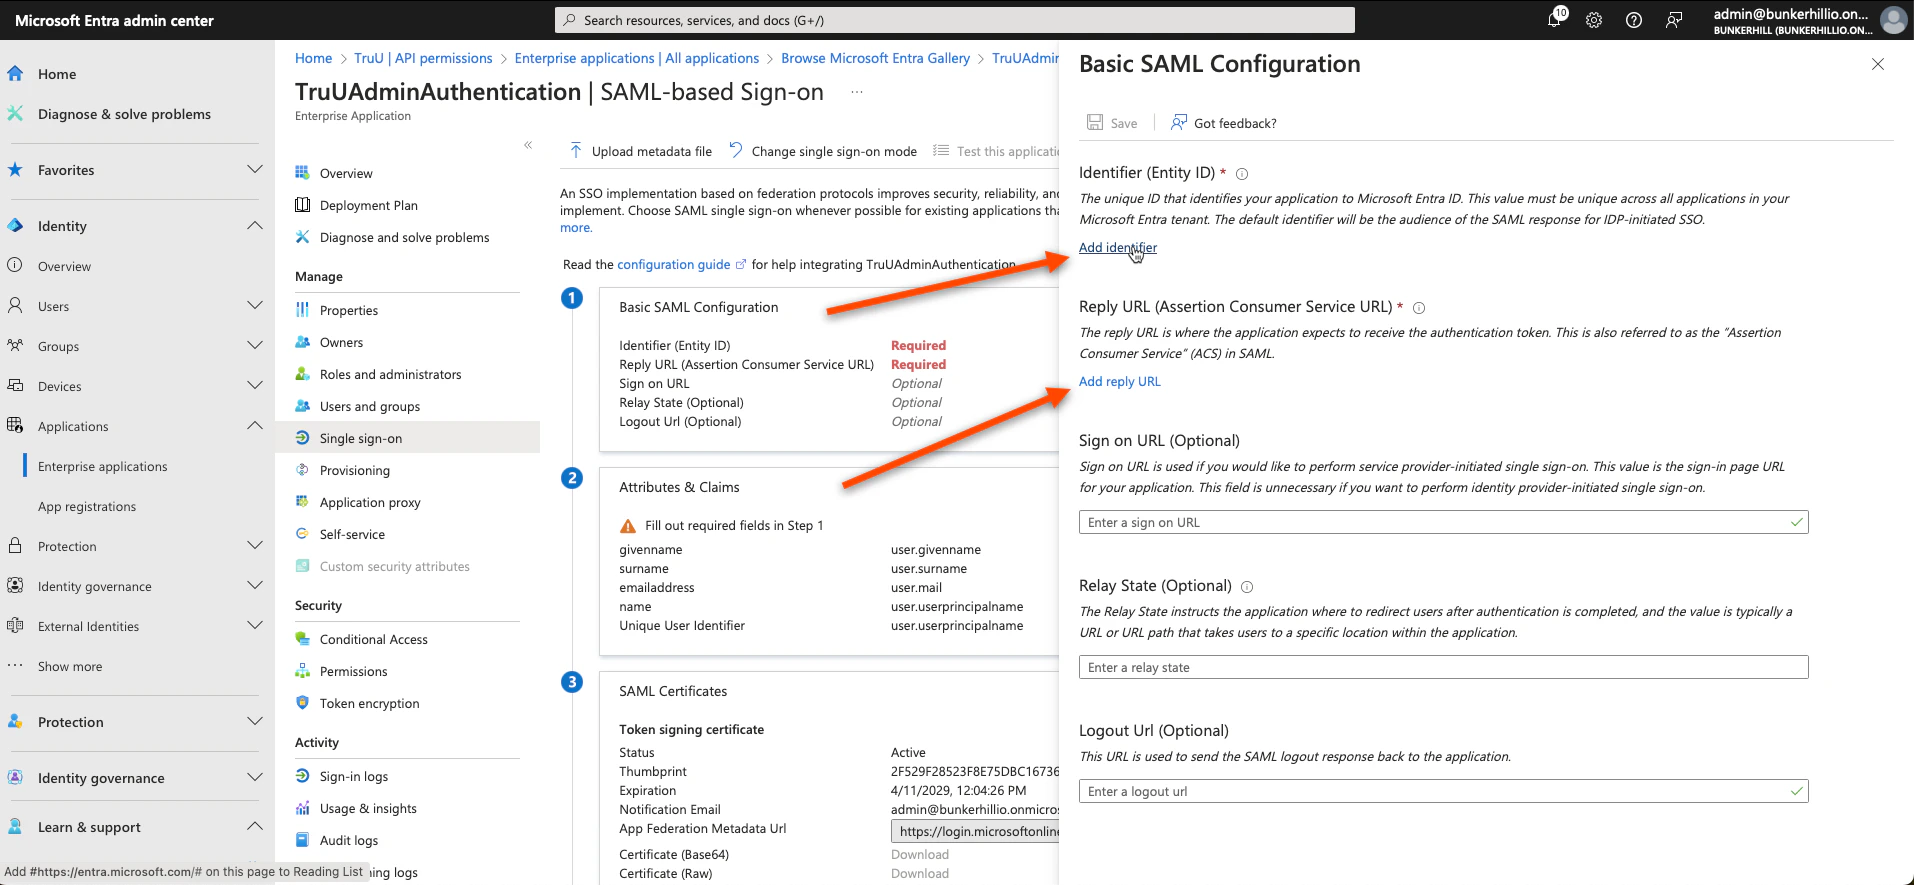
- Click Edit on the first box
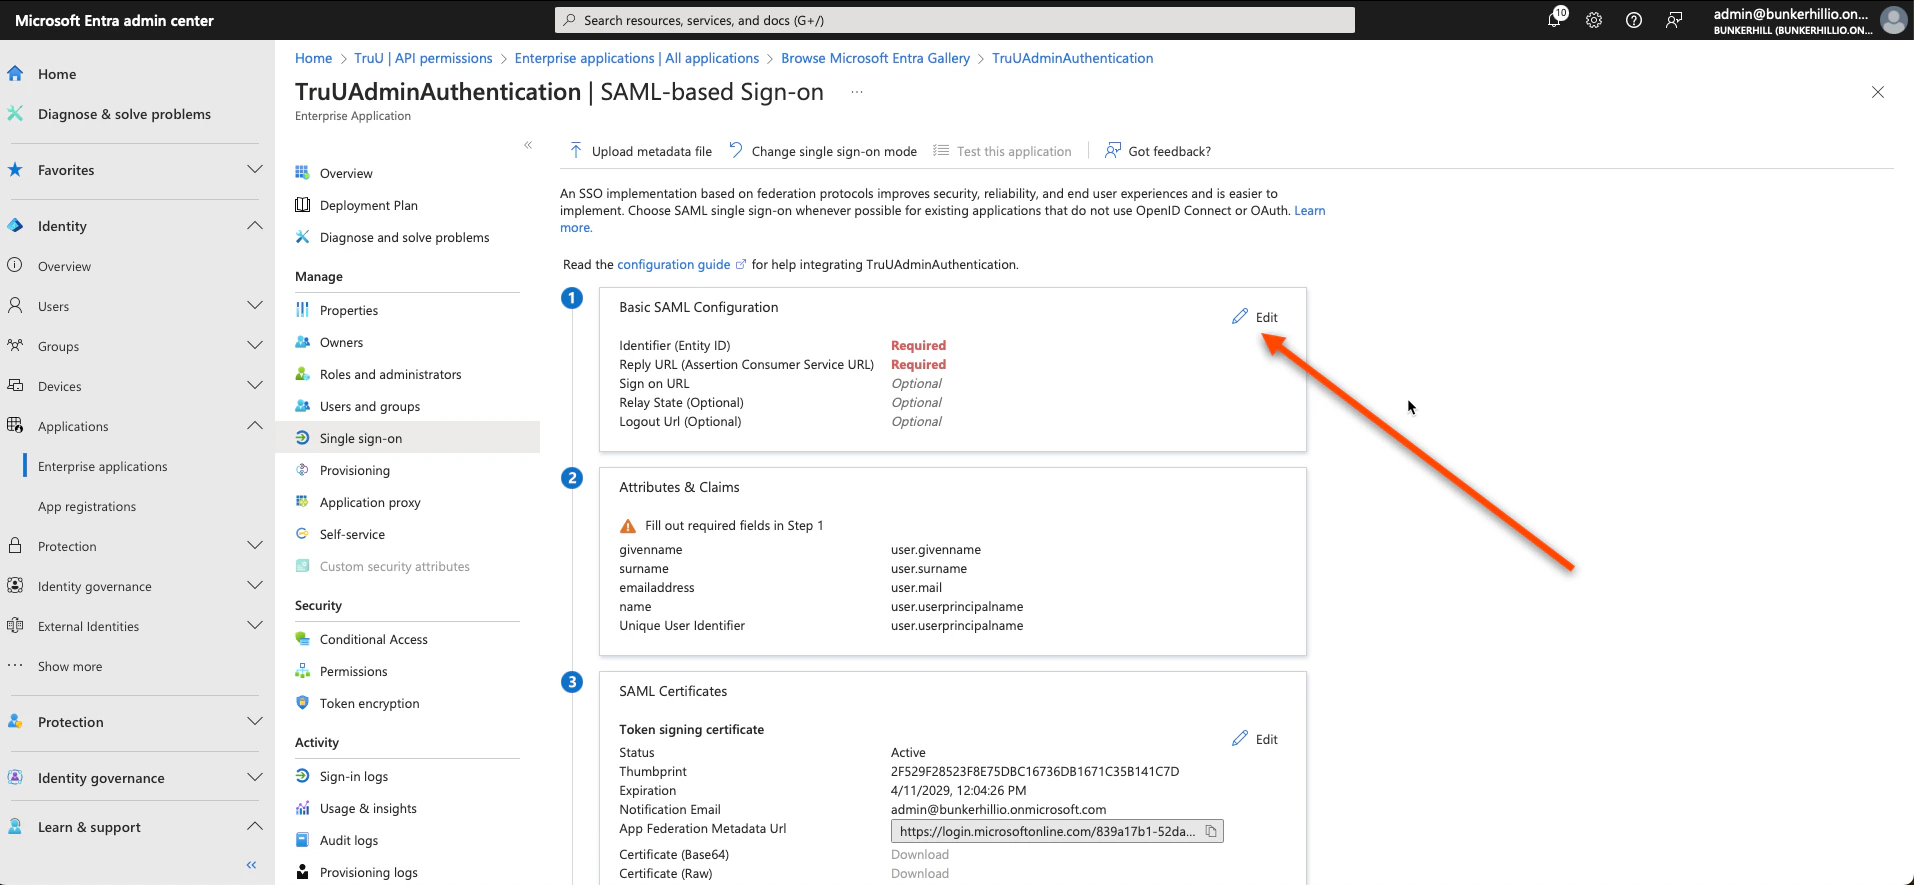
- Click Add Identifier and Add Reply URL and follow the steps below to get the values you need
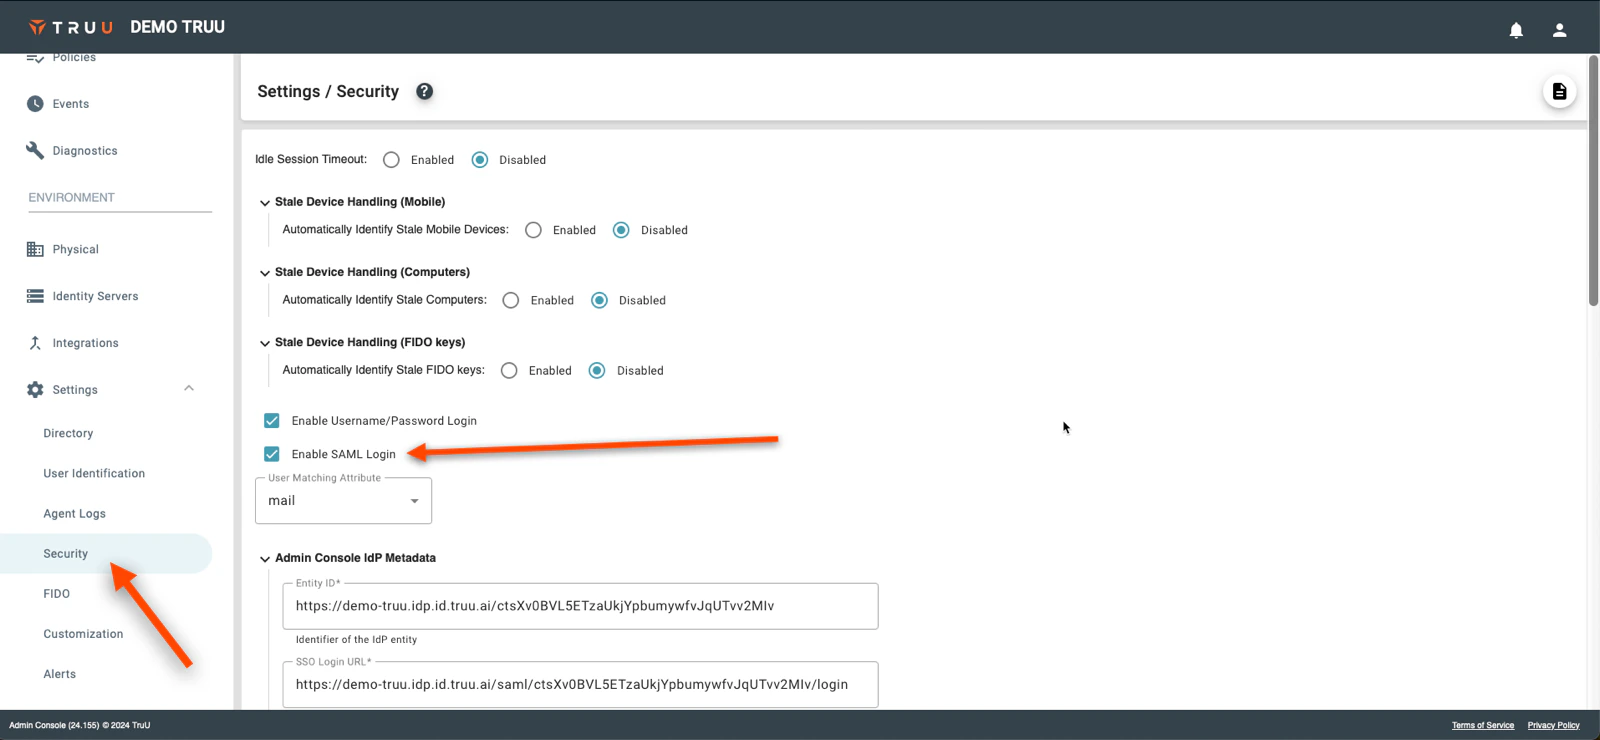
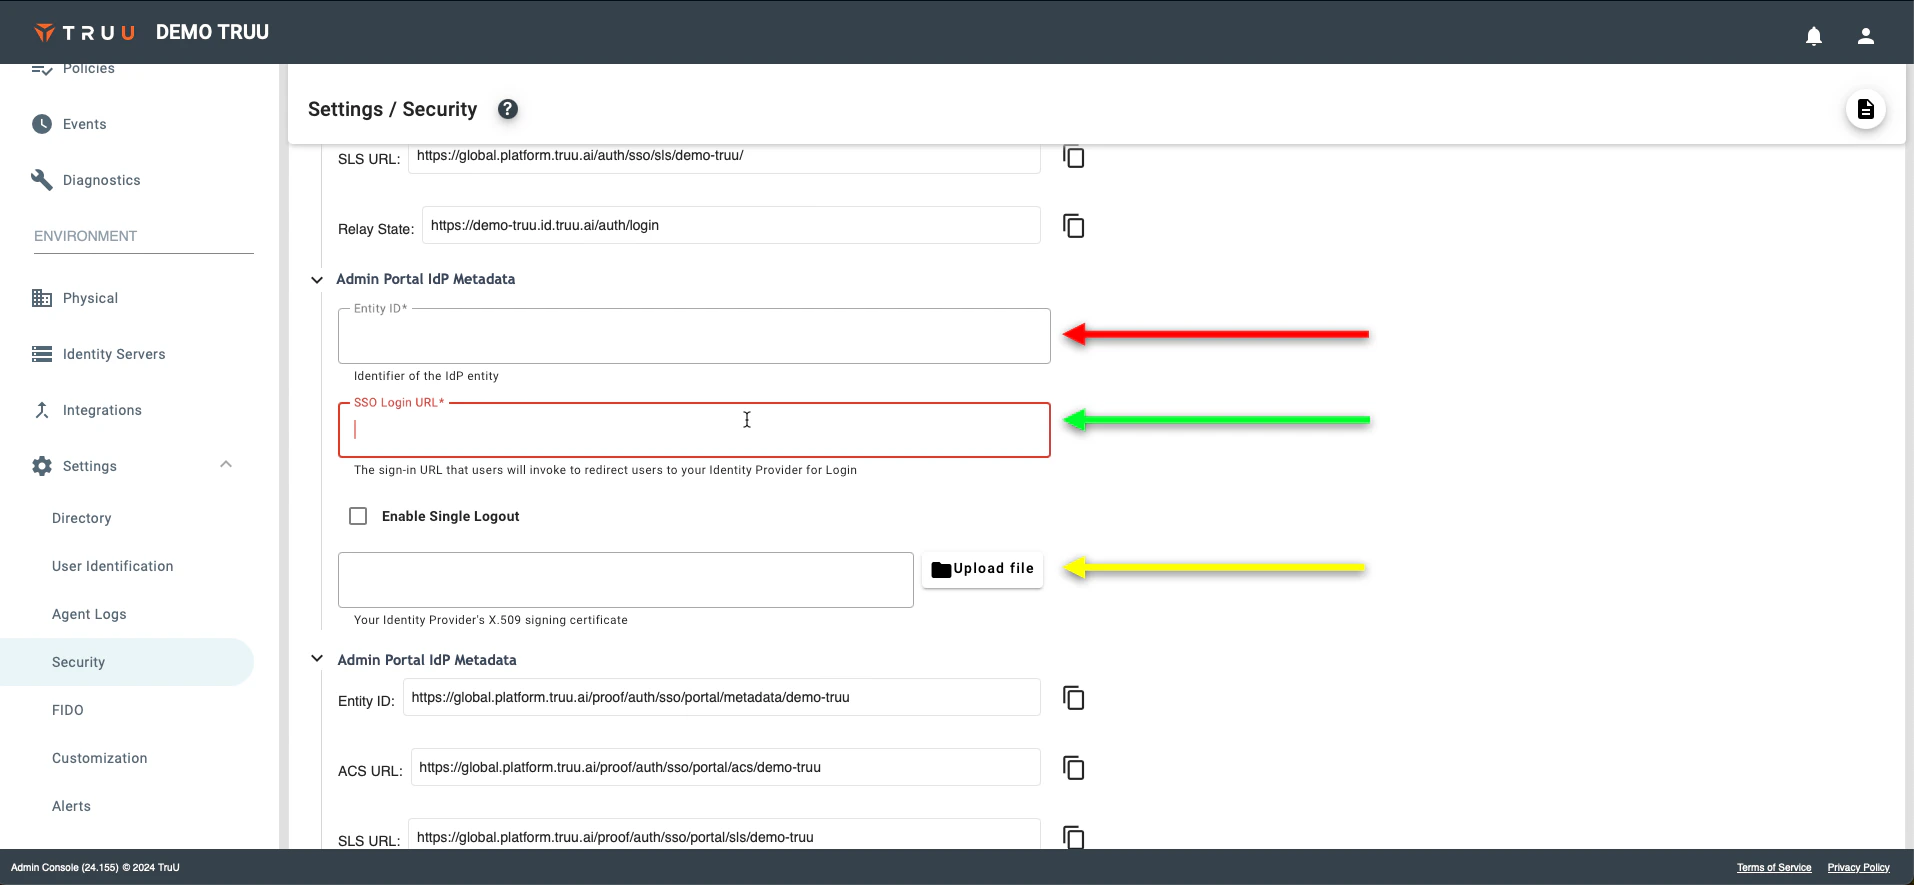
- Return to the TruU Admin Console and navigate to the “Settings” → “Security” tabs under the “Environment” section and then select Enable SAML Login
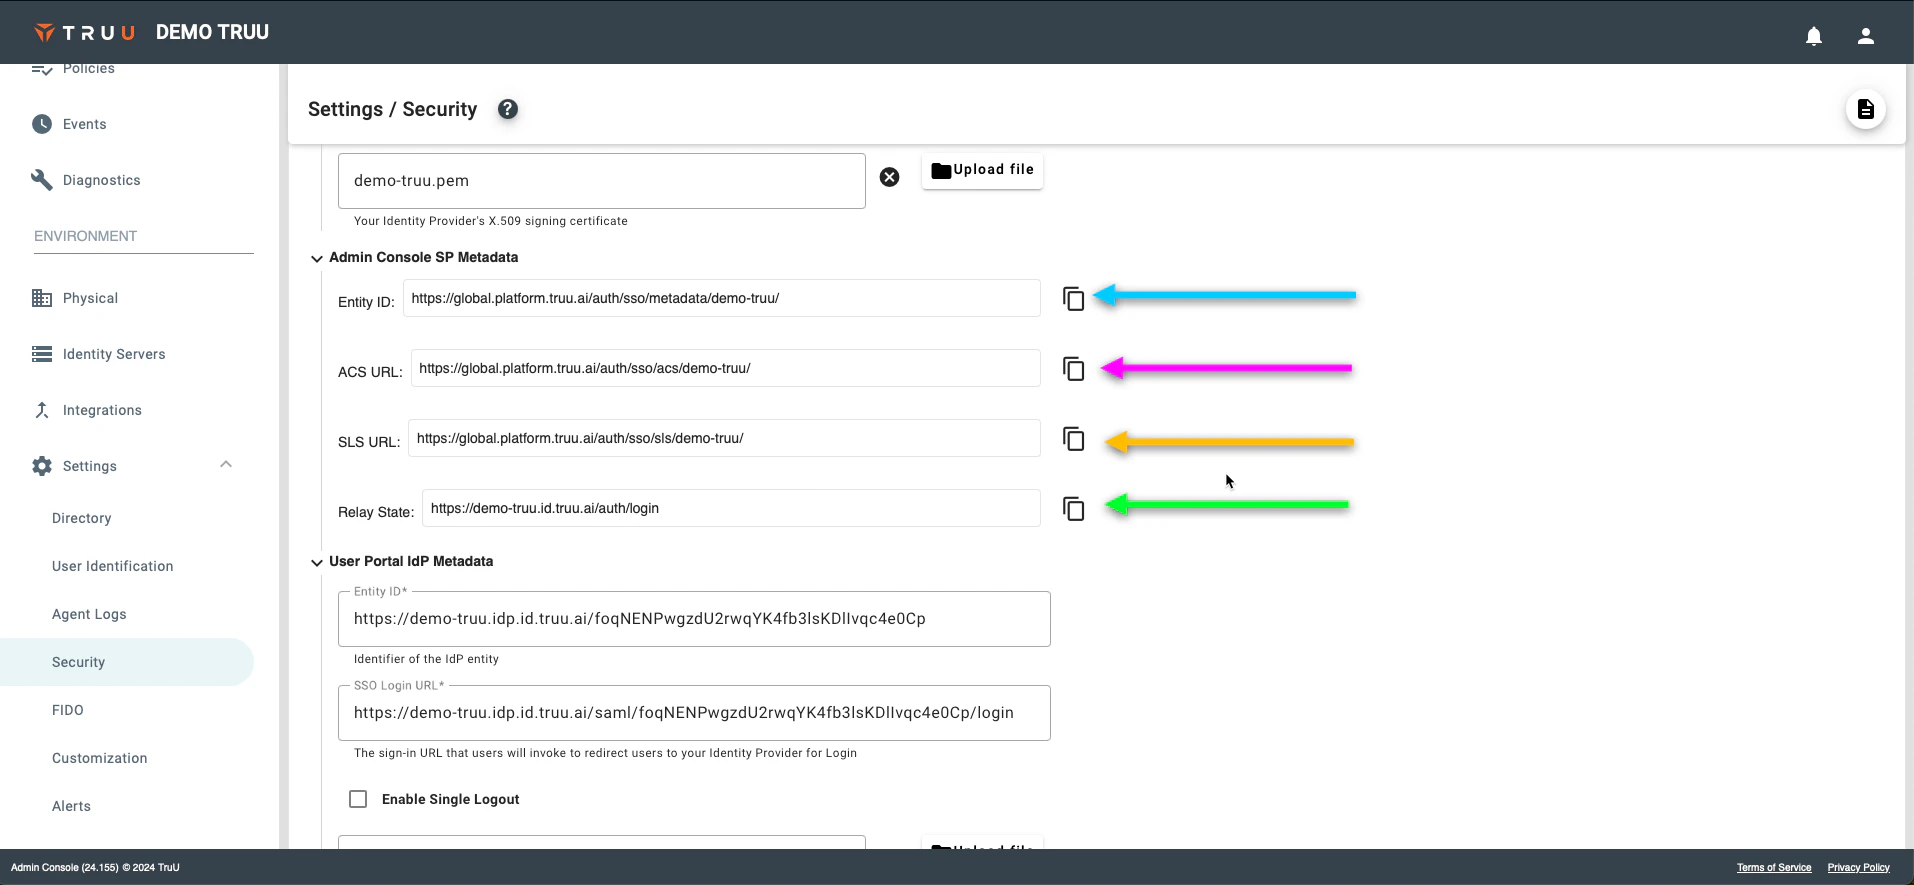
- We are interested in the “Admin Console SP Metadata” links. Follow the pictures below to copy the required information to the Entra ID console
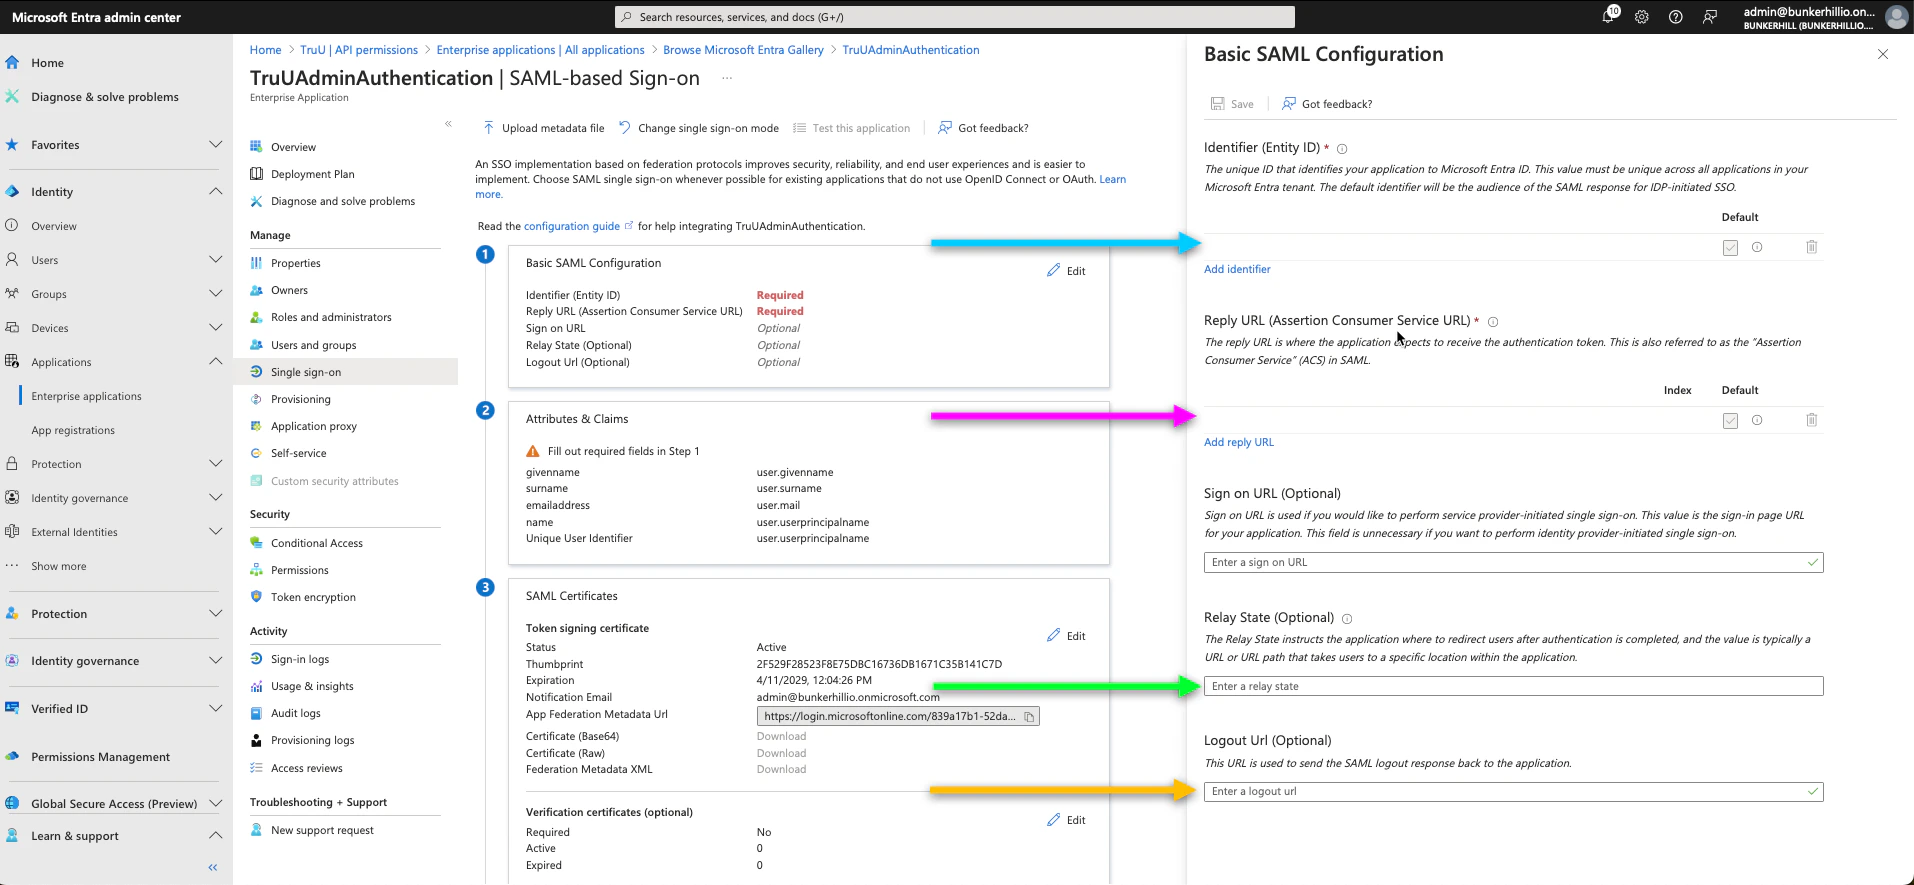
- Click Save
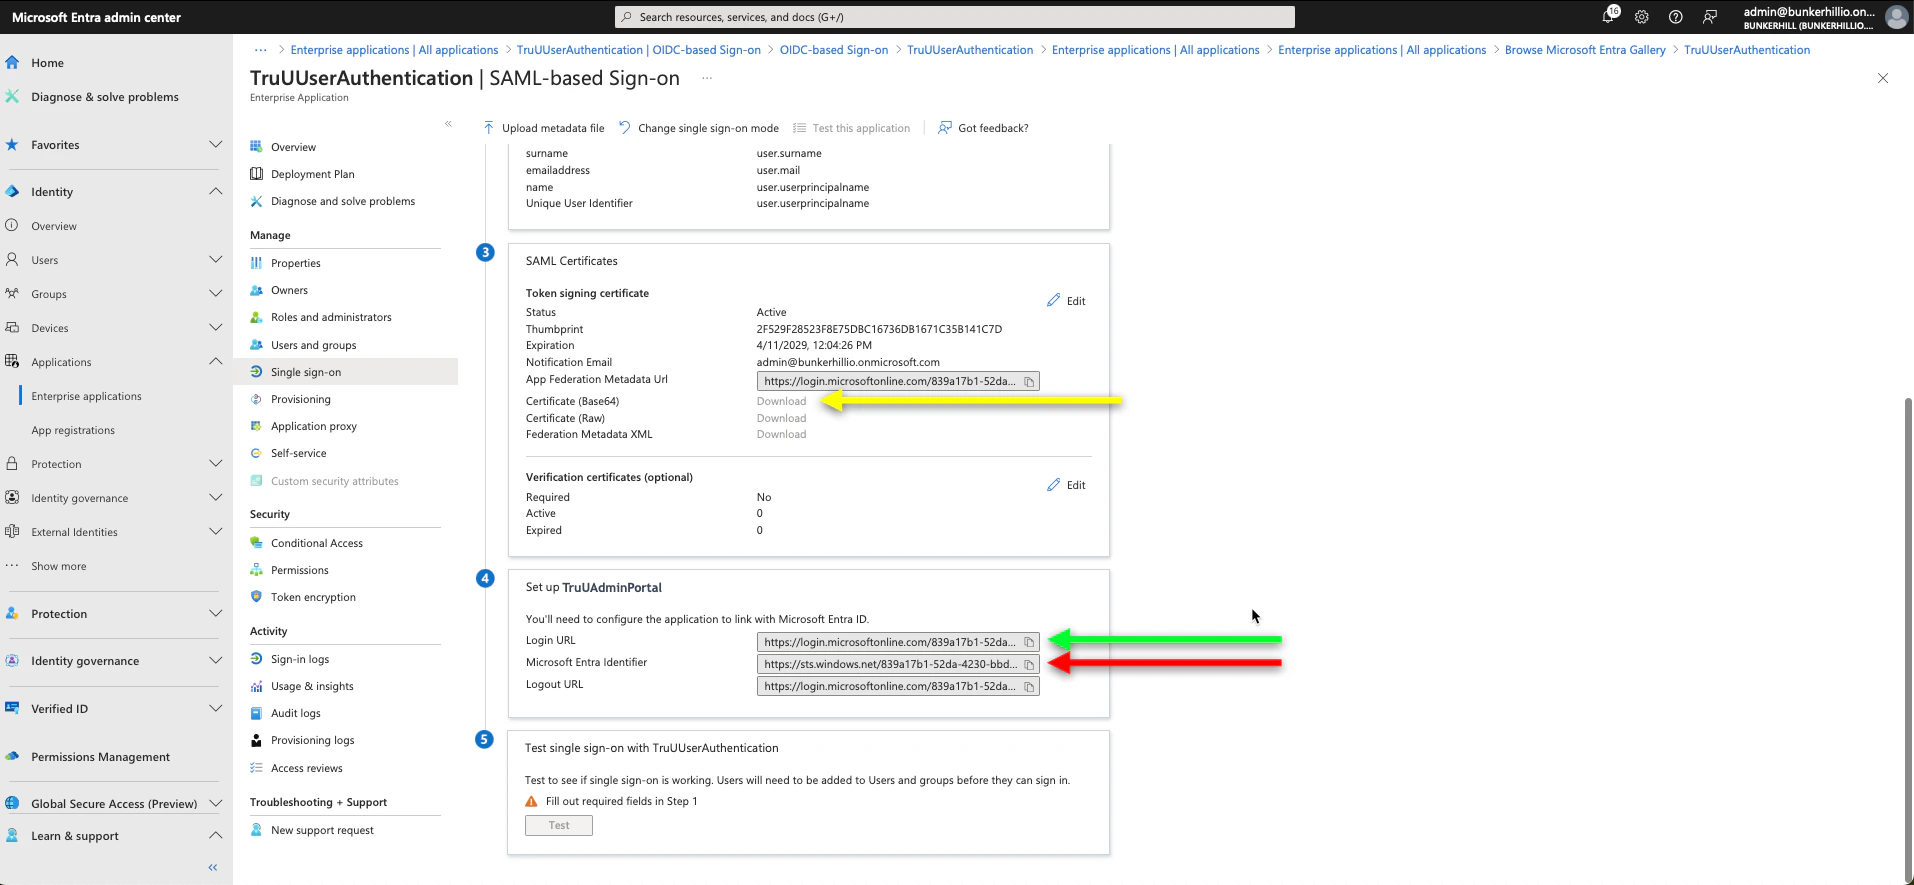
- Scroll down on this same page to the 3rd and 4th boxes; as we need the Login URL, Microsoft Entra Identifier, and Certificate (Base64). Once all of these steps have been completed, you have now setup your TruU Admin Portal SSO.
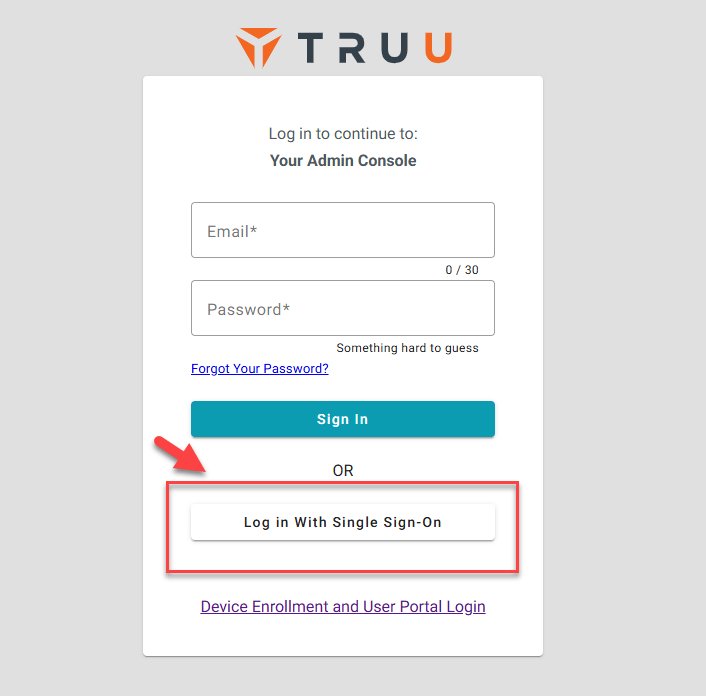
- To test this, visit the TruU Admin Portal URL provided by your TruU CSR. Once you visit the page, it will allow you to logon with Single Sign-On.