

verify and a name in a chat with the TruU bot and watch the request update live, and, if you turn it on, employees can type verify me to verify themselves.
This connector starts verifications.
How it works for agents
- An agent messages the bot in a 1:1 chat, or @mentions it in a channel:
verify jamie@contoso.com. - The bot finds the person in your directory and shows a card with their name and UPN, a use case choice and a delivery choice (Email or SMS). SMS shows “number on file”, never the digits.
- The agent chooses Send verification link. The employee gets the link and verifies on their phone.
- The card updates in place: link sent, opened, then Verified, Failed (also shown for a declined verification), Needs review, Cancelled or Expired. After a verification passes, it also shows any after-success action (for example “TAP issued”), never the code itself.
How it works for employees
With Self-service turned on, employees can verify themselves, for example after getting a new phone:- The employee messages the bot directly (not in a channel) and types
verify me, or taps Verify me on the welcome card. - If more than one use case is allowed for self-service, they pick what it’s for, then choose Start verification.
- The bot replies in the chat with their personal verification link. Nothing is sent by email or text.
- They complete the verification in their browser, and the use case’s after-success action runs, such as issuing a Temporary Access Pass or resetting PingOne MFA.
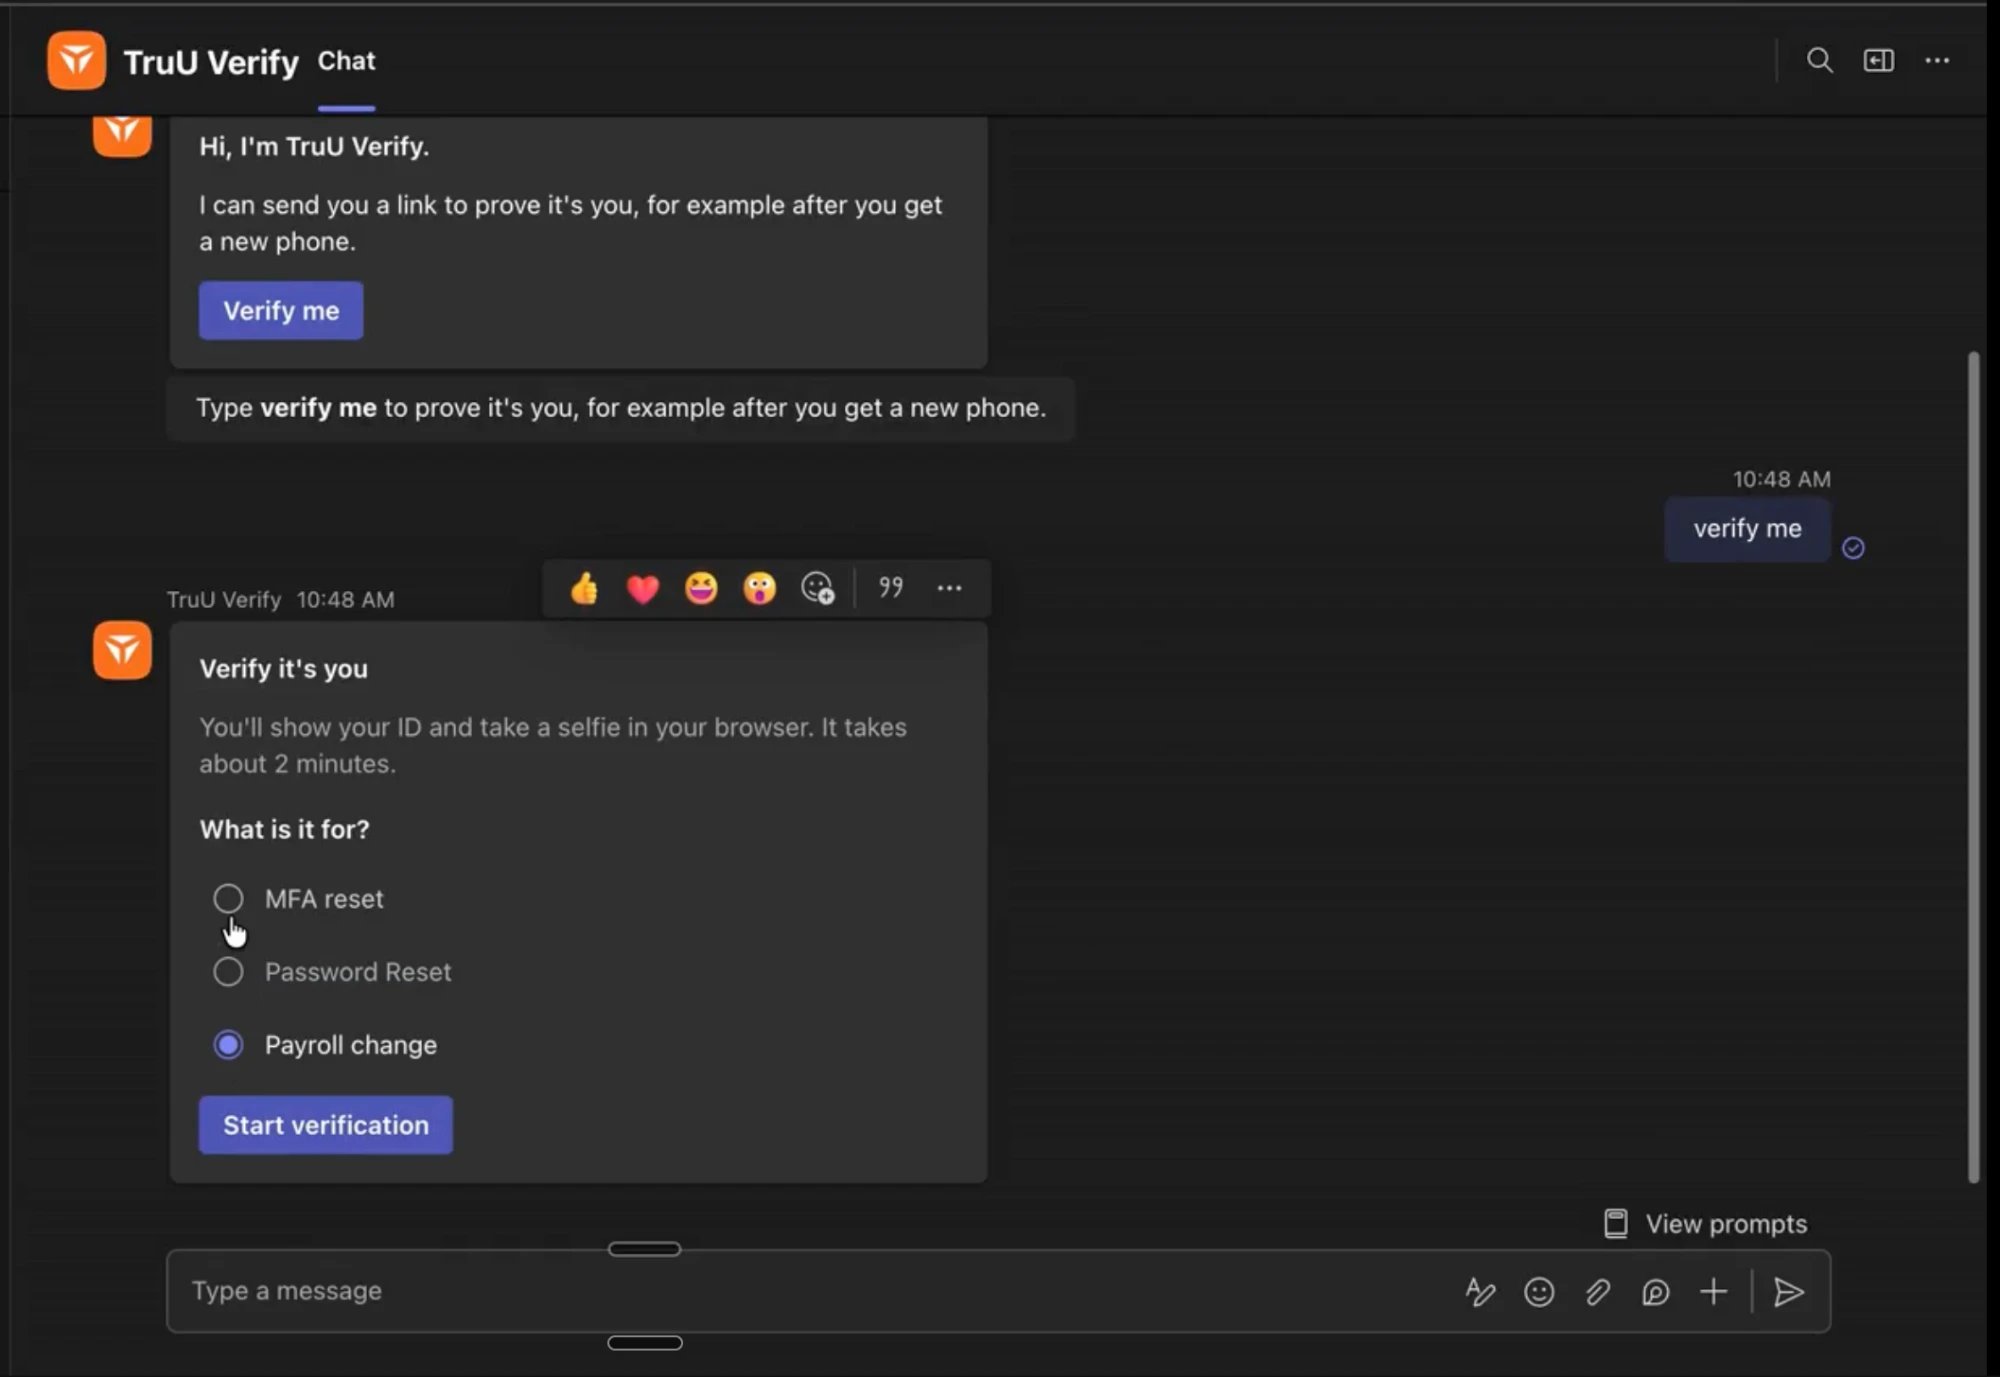
An employee types verify me, picks what it's for, and starts. The link comes back in the chat.
Before you start
- A connected Microsoft Entra ID directory. Agents are checked against an Entra group, so this connector needs Entra. See Connect Microsoft Entra ID.
- An Azure subscription where you can create an Azure Bot resource.
- A Teams administrator who can upload a custom app in the Teams admin center.
- An Entra group containing the agents who may send verifications.
- An Owner or Admin seat in TruU IDV.
Set it up
Open Settings → Connectors → Microsoft Teams.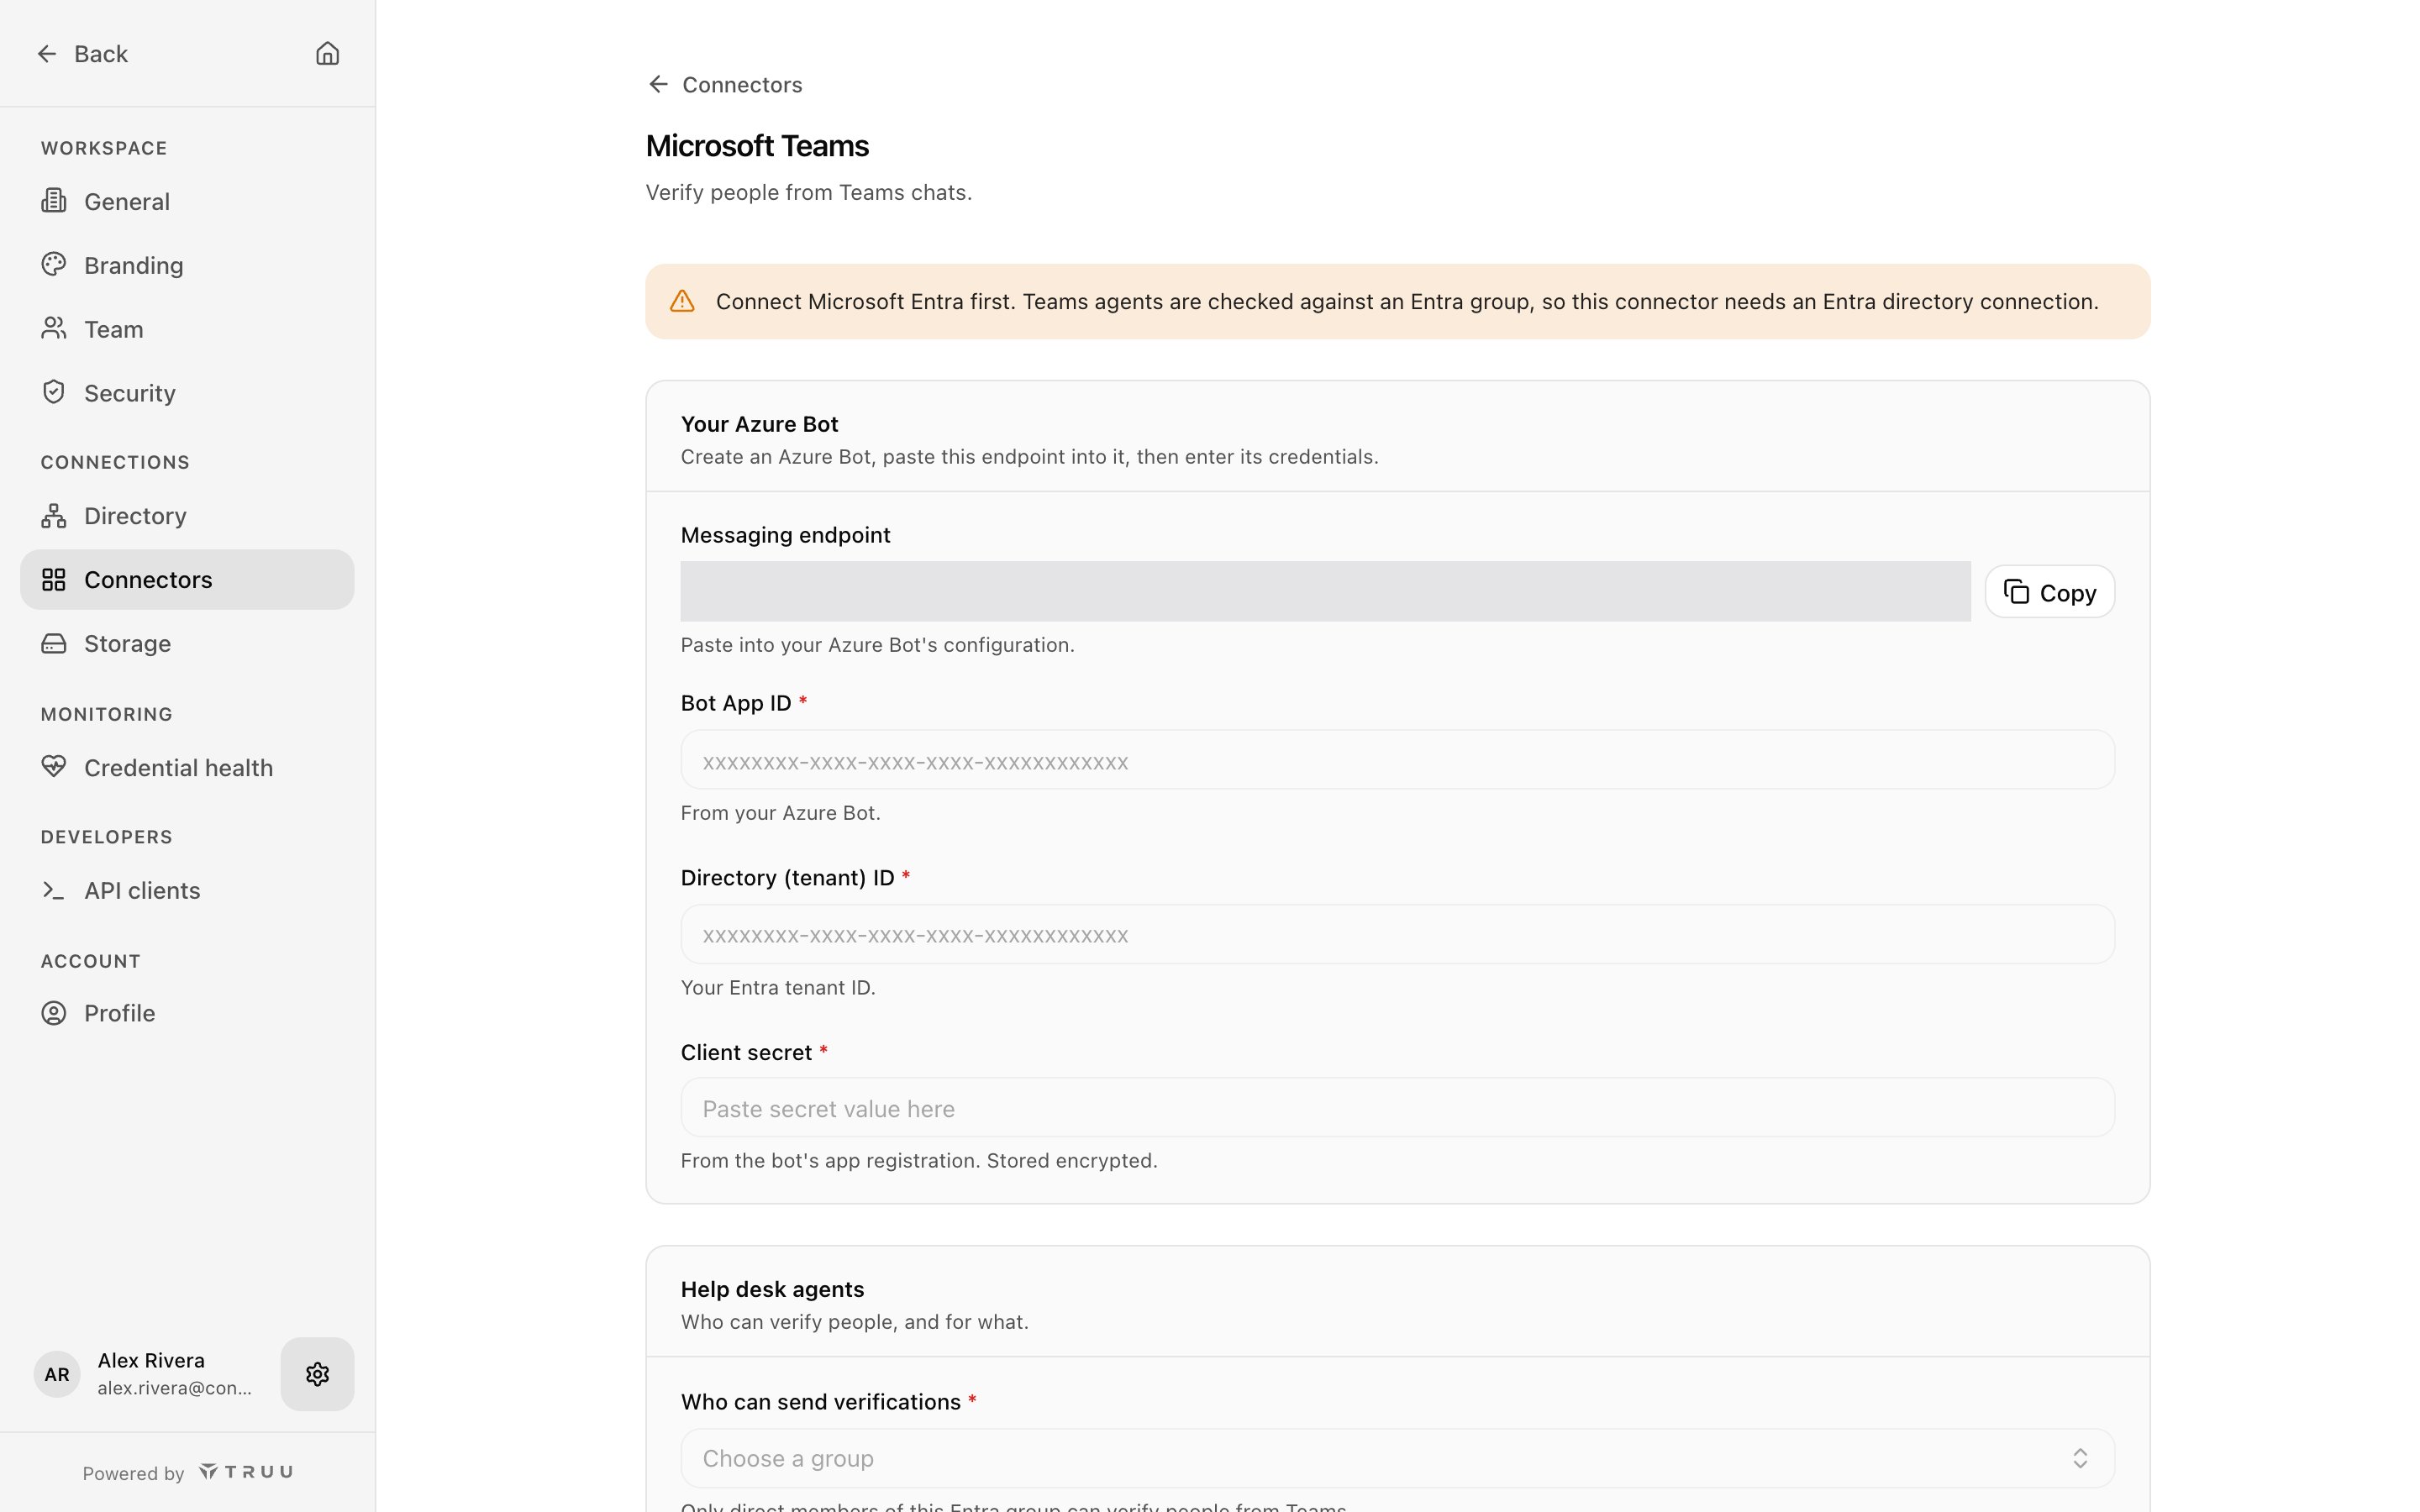
1
Create an Azure Bot
In the Azure portal, create an Azure Bot resource. Choose Single Tenant as the app type, and let Azure create a new Microsoft App ID (app registration) for it.
2
Point the bot at TruU
In the bot’s Configuration, paste the Messaging endpoint shown on the TruU page (use Copy), and save.
3
Add the Microsoft Teams channel
In the bot’s Channels, add Microsoft Teams and accept the terms.
4
Create a client secret
Open the bot’s app registration (Configuration → Manage Password) and create a client secret. Copy its value (shown once).
5
Enter the bot's credentials in TruU
Enter the Bot App ID (the Microsoft App ID), your Directory (tenant) ID and the Client secret. The secret is stored encrypted and never shown again.
6
Choose agents and use cases
Under Help desk agents, choose the Entra group in Who can send verifications, and tick the Use cases agents may pick (at least one; Helpdesk is the usual choice). Then choose Connect Teams.
7
Turn on self-service (optional)
Once connected, turn on Self-service (“Employees type verify me to verify themselves”) and tick the Use cases employees may start, for example Credential reset. Self-service is open to everyone in your directory.
8
Install the Teams app
Download the TruU app package from the connector page and upload it in the Teams admin center under Teams apps → Manage apps → Upload new app. Make it available to your agents in the Teams admin center. If self-service is on, also add the app to a Teams setup policy for employees so they can find the bot.
Test it
As a member of the agent group, open a chat with the TruU bot in Teams and typeverify followed by your own email. Send the link to yourself, complete the verification on your phone, and watch the card update to Verified. If self-service is on, type verify me in a direct chat and complete the link it returns.