
1. Navigate to Authentication Methods
Sign in to the Entra ID Admin Portal, go to the Entra ID dropdown, select Authentication Methods, then click Policies.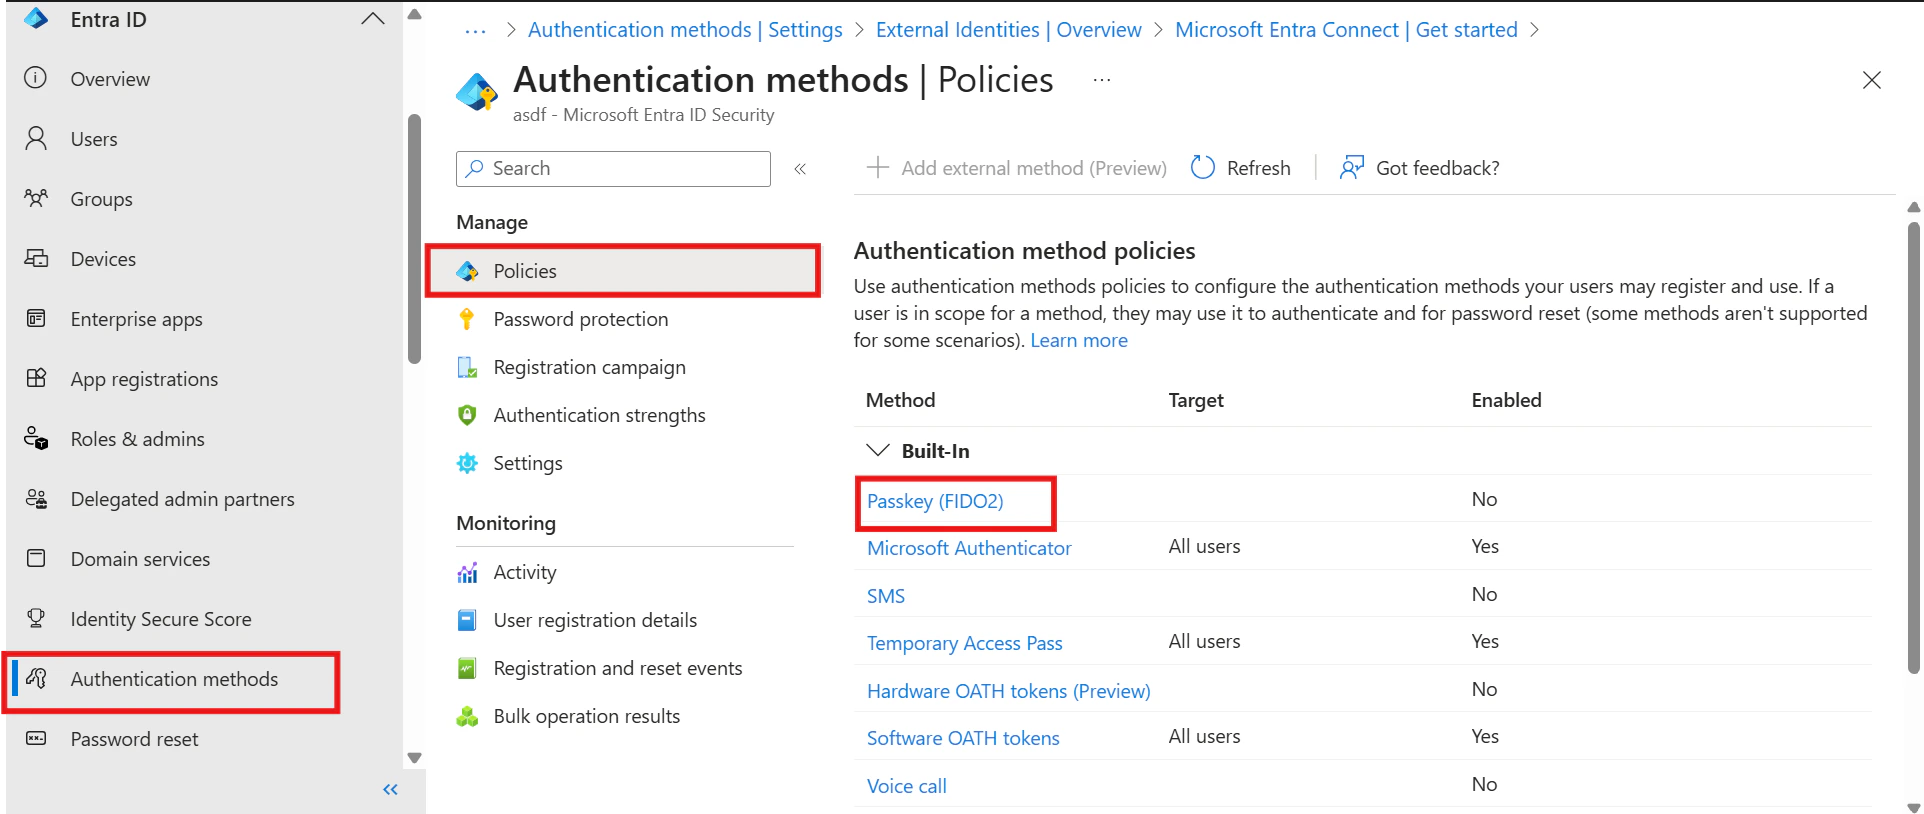
2. Enable Passkey (FIDO2)
Select the Passkey (FIDO2) policy. On the Enable and target tab, toggle Enable to On.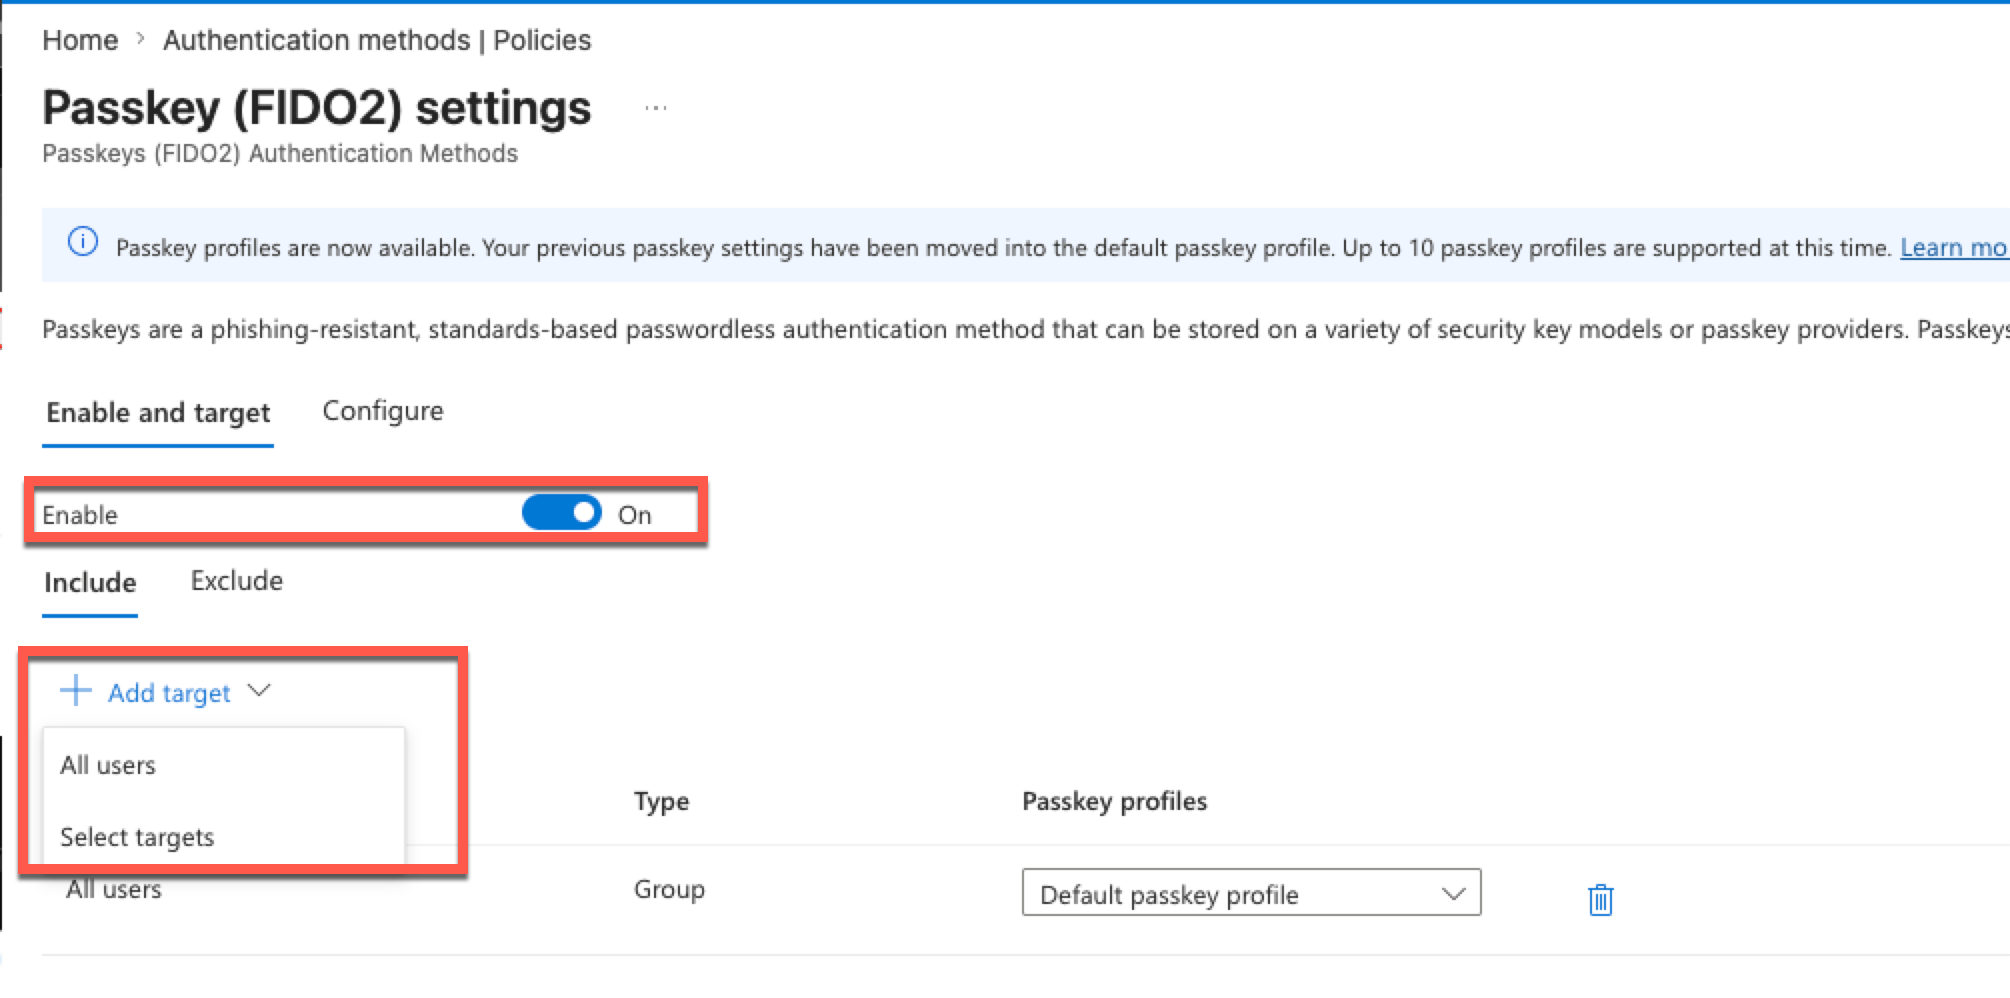
TruU recommends to enable the policy for all users and provides control in the TruU tenant to limit the enrollment of Passkeys to selected group of users.
3. Enable Self-Service Setup
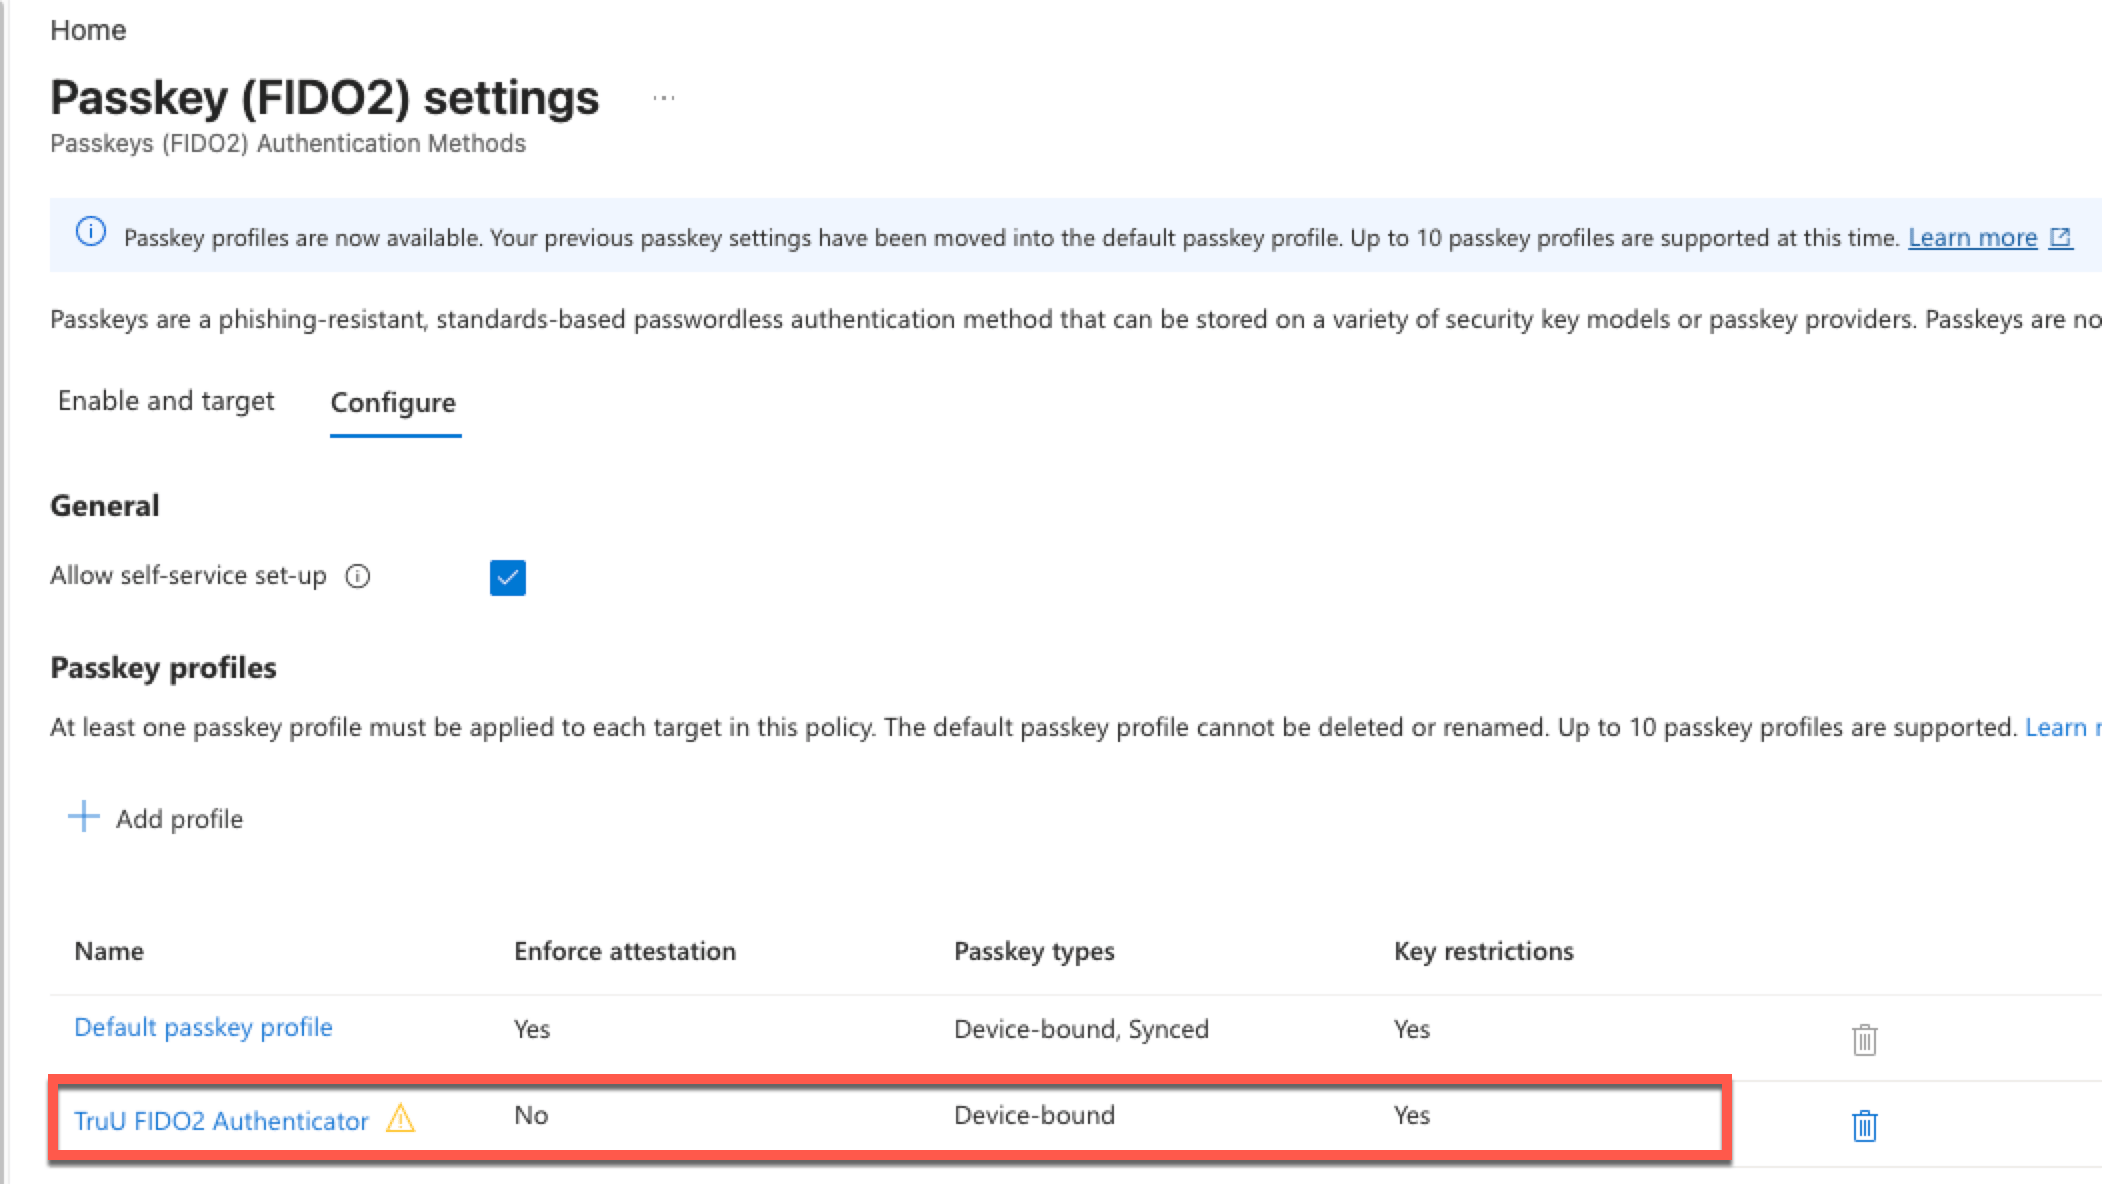
Click the Configure tab. Under General, ensure Allow self-service set-up is checked. If disabled, users cannot register a passkey through Security Info even when Passkey (FIDO2) is enabled.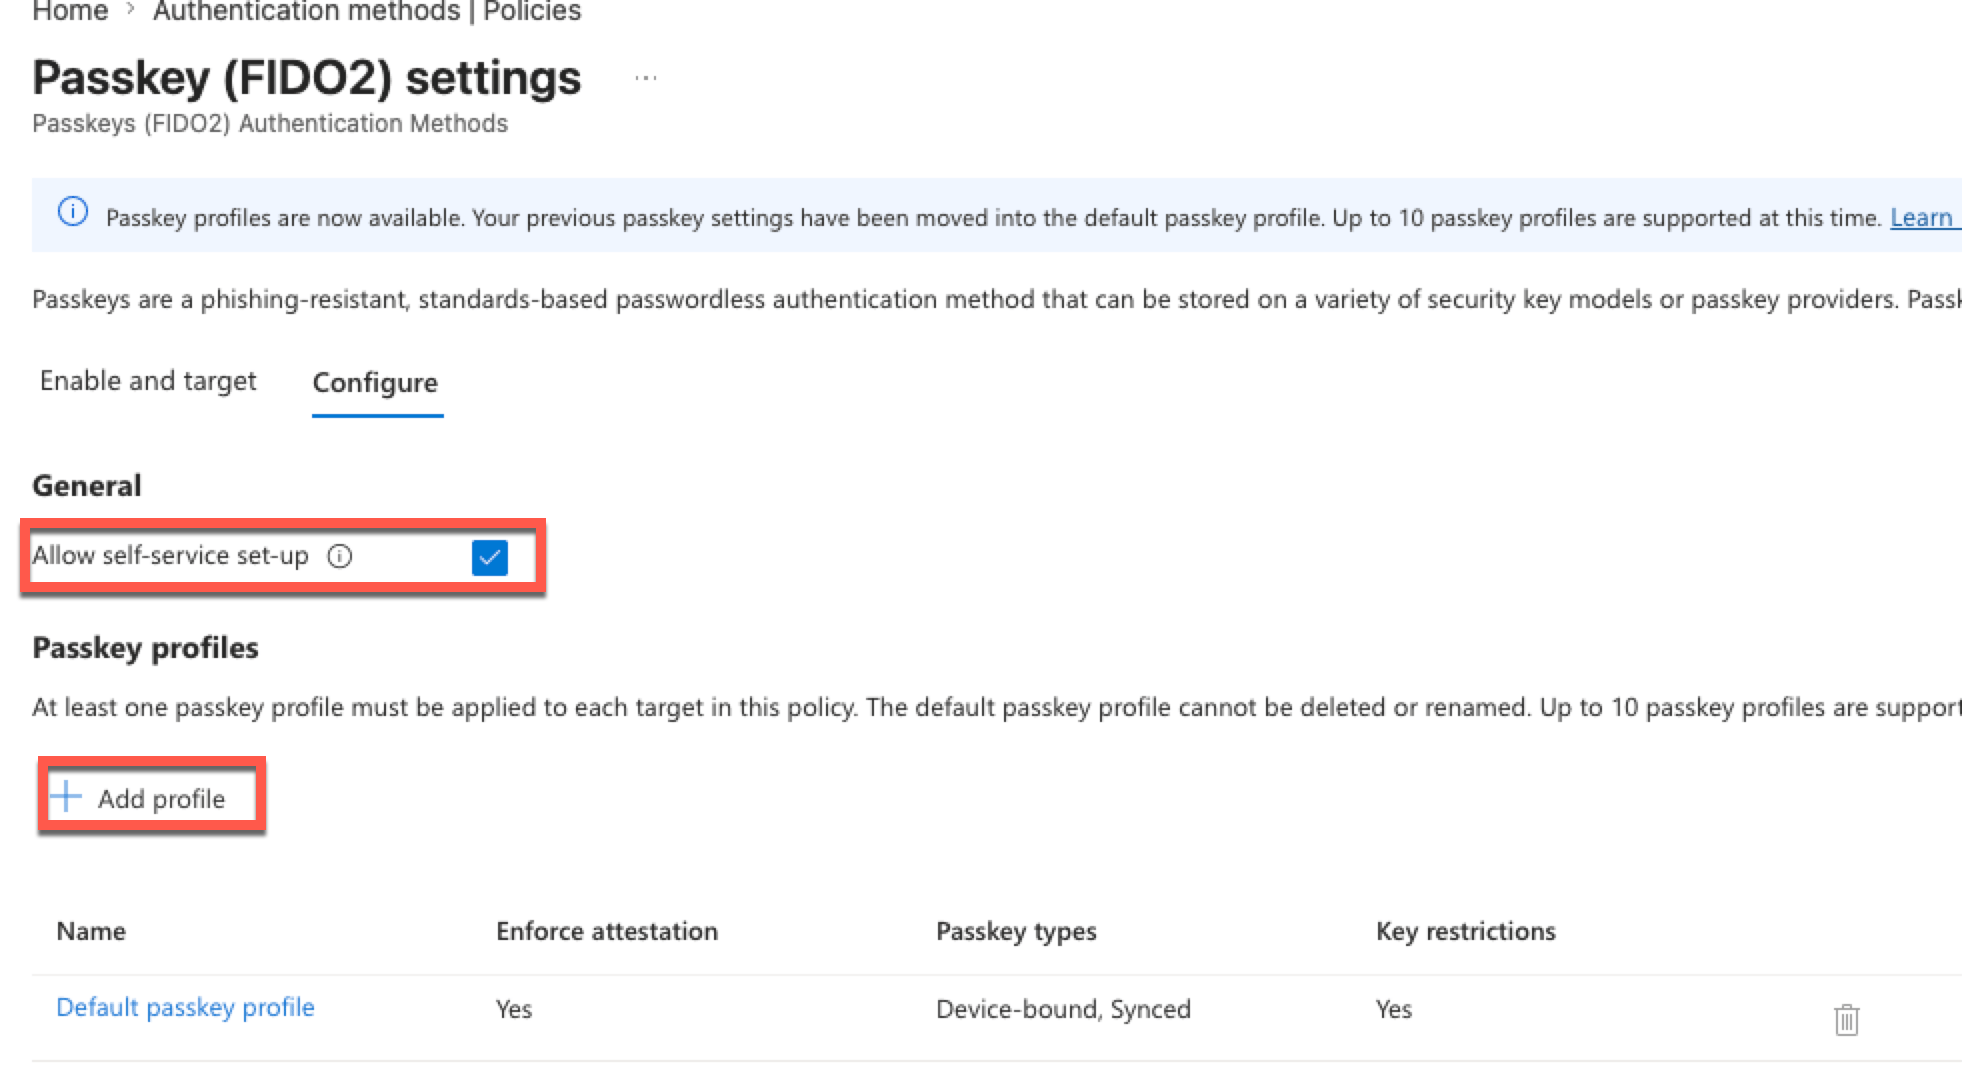
4. Add a TruU FIDO2 Passkey Profile
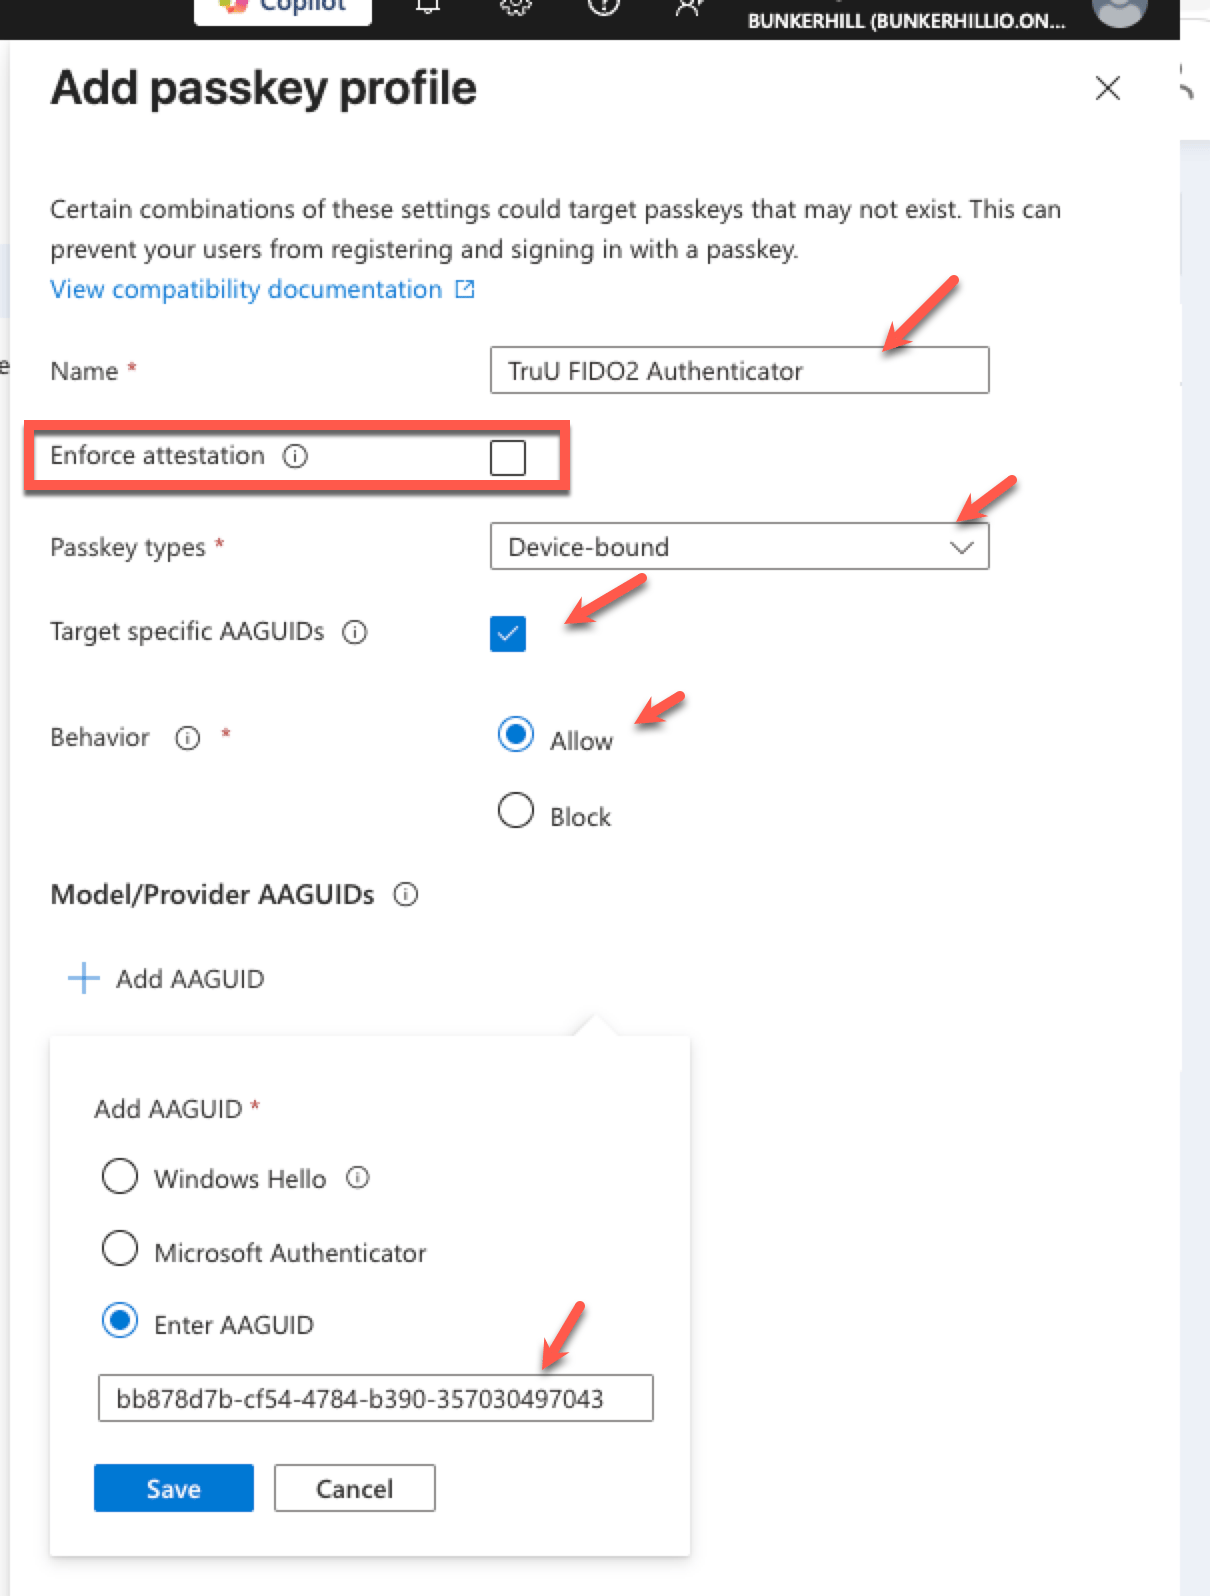
On the Configure tab, under Passkey profiles, click + Add profile and fill in the following:
Under Model/Provider AAGUIDs, click + Add AAGUID, select Enter AAGUID, and enter the value for your TruU version:
- Version 24.x / 25.x (deprecated):
ba86dc56-635f-4141-aef6-00227b1b9af6 - Version 26.x and above:
bb878d7b-cf54-4784-b390-357030497043
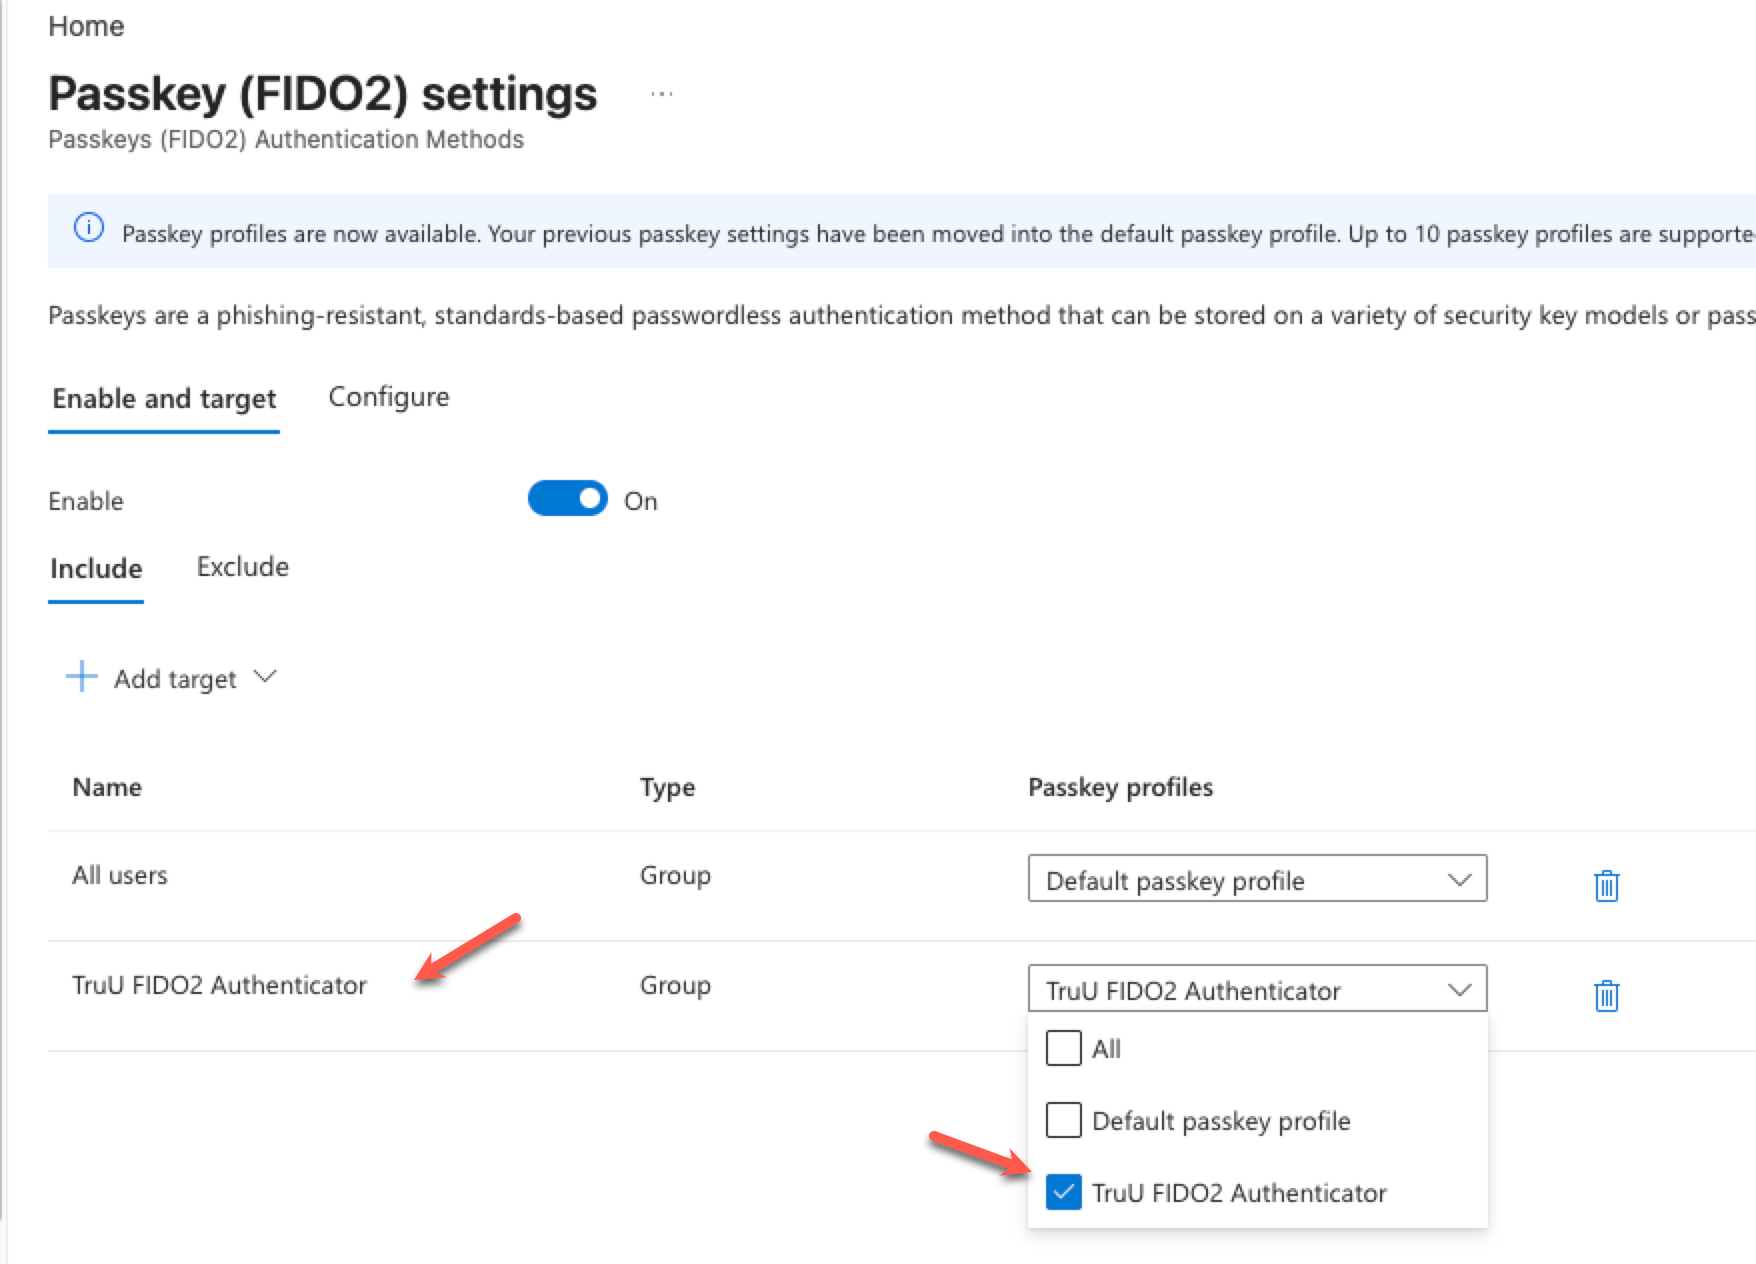
5. Assign the Profile to a Target Group
Go back to the Enable and target tab. Click + Add target, select Select targets, and choose your user security group or deploy to All users In the Passkey profiles column for that group, select TruU FIDO2 Authenticator from the drop-down.