
Prerequisites
- OpenID Connect IdP
In Okta, under Identity Provider, ensure the OpenID Connect IdP integration is enabled - Customer directory
TruU supports various directories: AD, Entra ID, Okta, or Google - Okta version check
TruU recommends that the customer run the Okta Identity Engine (OIE) as a platform update from Okta’s classic engine - Designate two Admins (this can be the same individual):
- Okta Admin to perform the Okta configuration and integration with TruU and administer the TruU/Okta relationship
- The Bootstrap admin for the TruU tenant. The Bootstrap admin will be the customer end policy administrator and your TruU tenant point of contact
Configuring Okta OIDC Integration
Add OpenID Connect Adapter
- Login to your TruU Admin portal
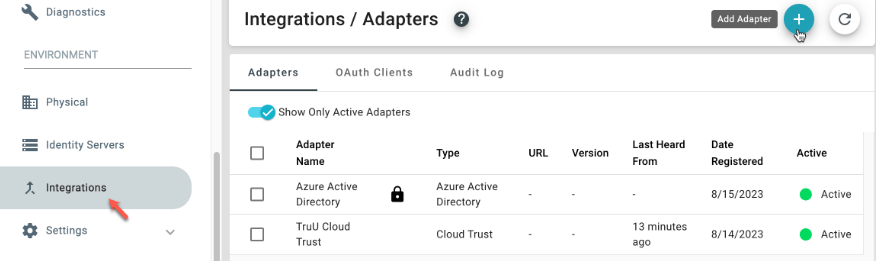
- Navigate to the “Integrations” tab and ensure you are on the “Adapters” tab. Click on the (+) to “Add an Adapter”
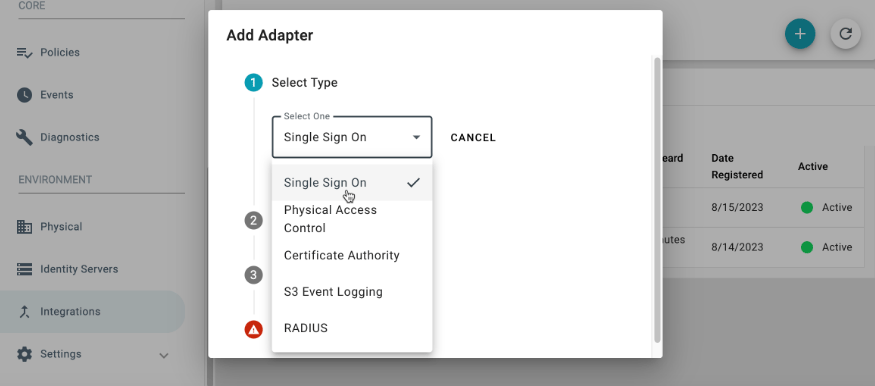
- Select Single Sign On from the drop-down menu
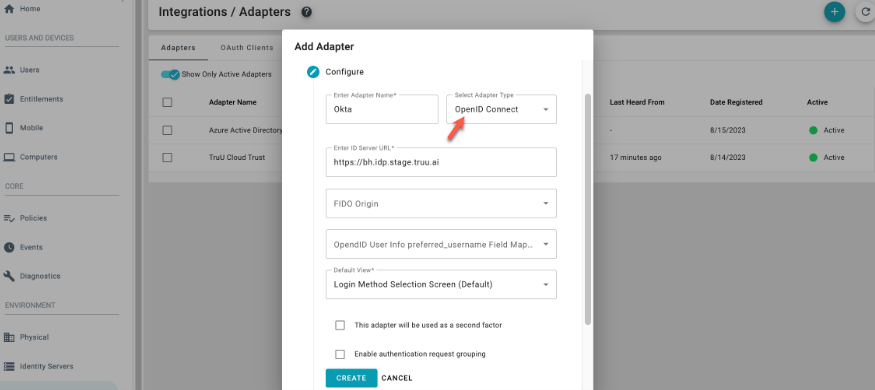
- Under “Adapter Type”, Select OpenID Connect
- Select Digital Admin (Super Admin if not selected)
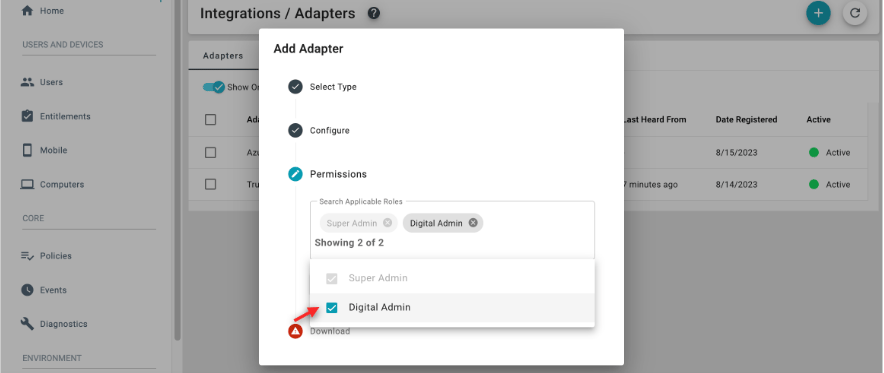
- Click on Download and Finish
- Log into your “Okta Admin Portal”
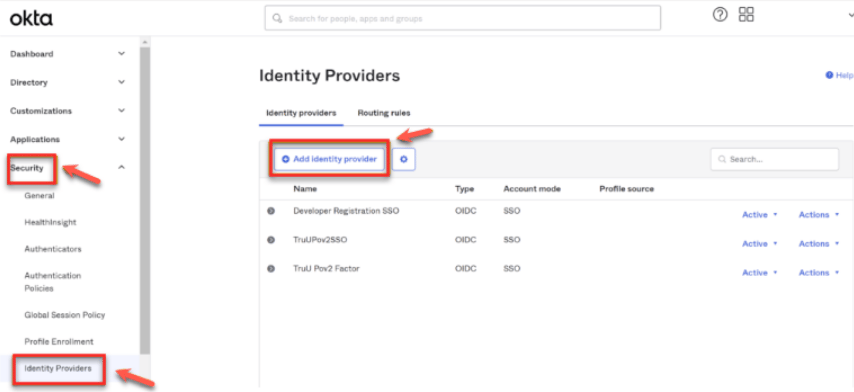
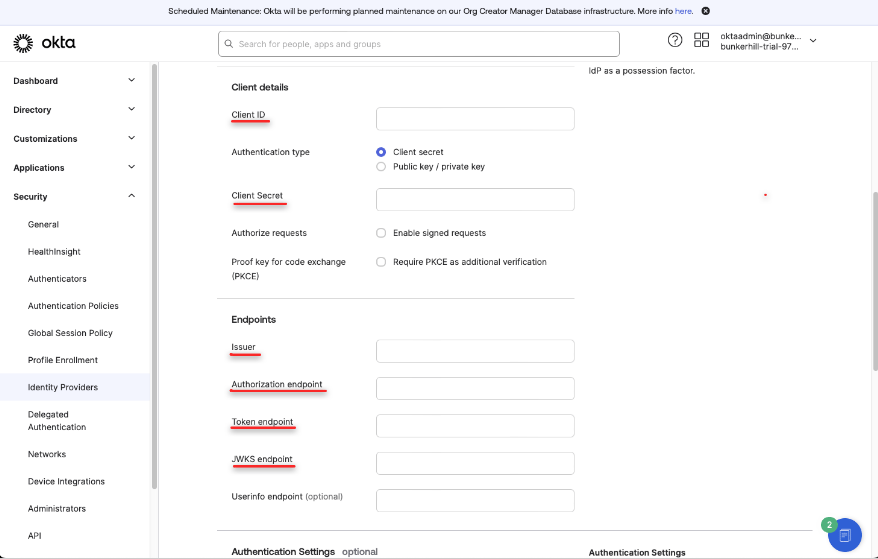
- Navigate to the Security tab, then select the Identity Providers tab. Click the Add Identity Provider button on this page
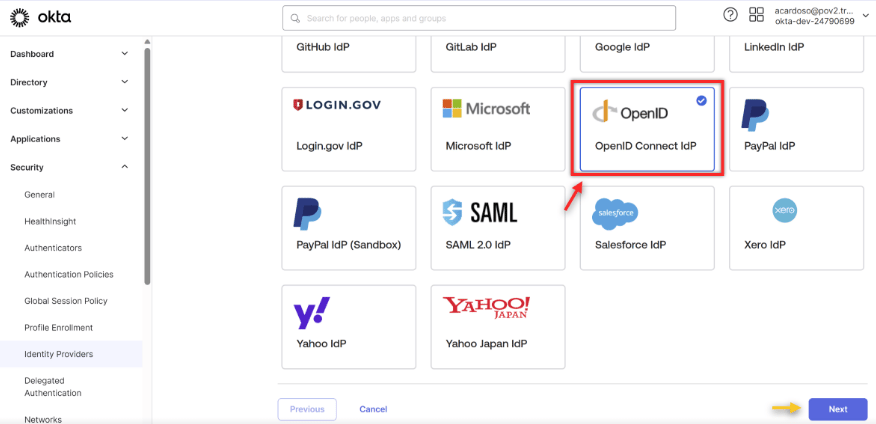
- Select OpenID Connect as the provider, then press Next
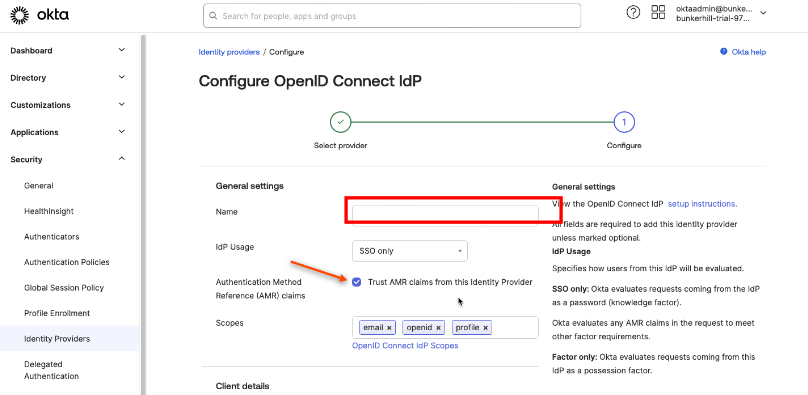
- Under General Settings
- Add Name (Include TruU in name to help identify)
- Select SSO only under IdP Usage
- Select Trust AMR Claims from this Identity Provider
- Under Client Details
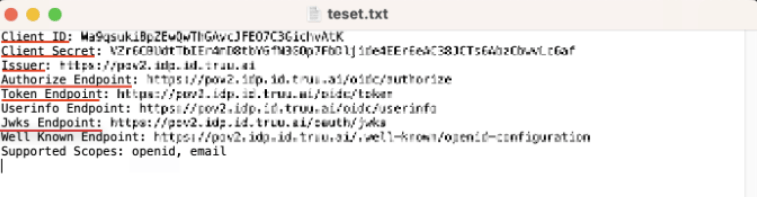
- Open the file downloaded from “Creating a TruU OpenID Connect Adapter”
- Fill in the following fields: Client ID, Client Secret, Issuer, Authorize Endpoint, JWKS Endpoint, and Token Endpoint. Then, click Finish
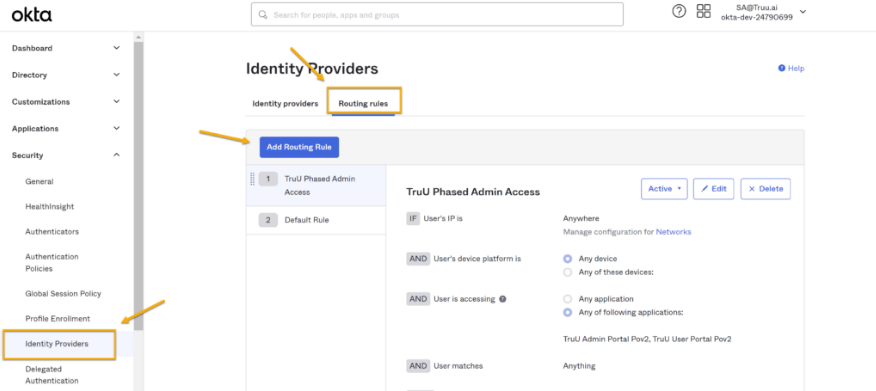
- Set a Routing Rule with TruU as the configured Identity Provider. This allows Okta to delegate authentication requests to TruU under pre-defined Okta conditions. To set this up, navigate toSecurity > Identity Providers > Routing Rules in the Okta Admin Portal and selectAdd Routing Rule