

-
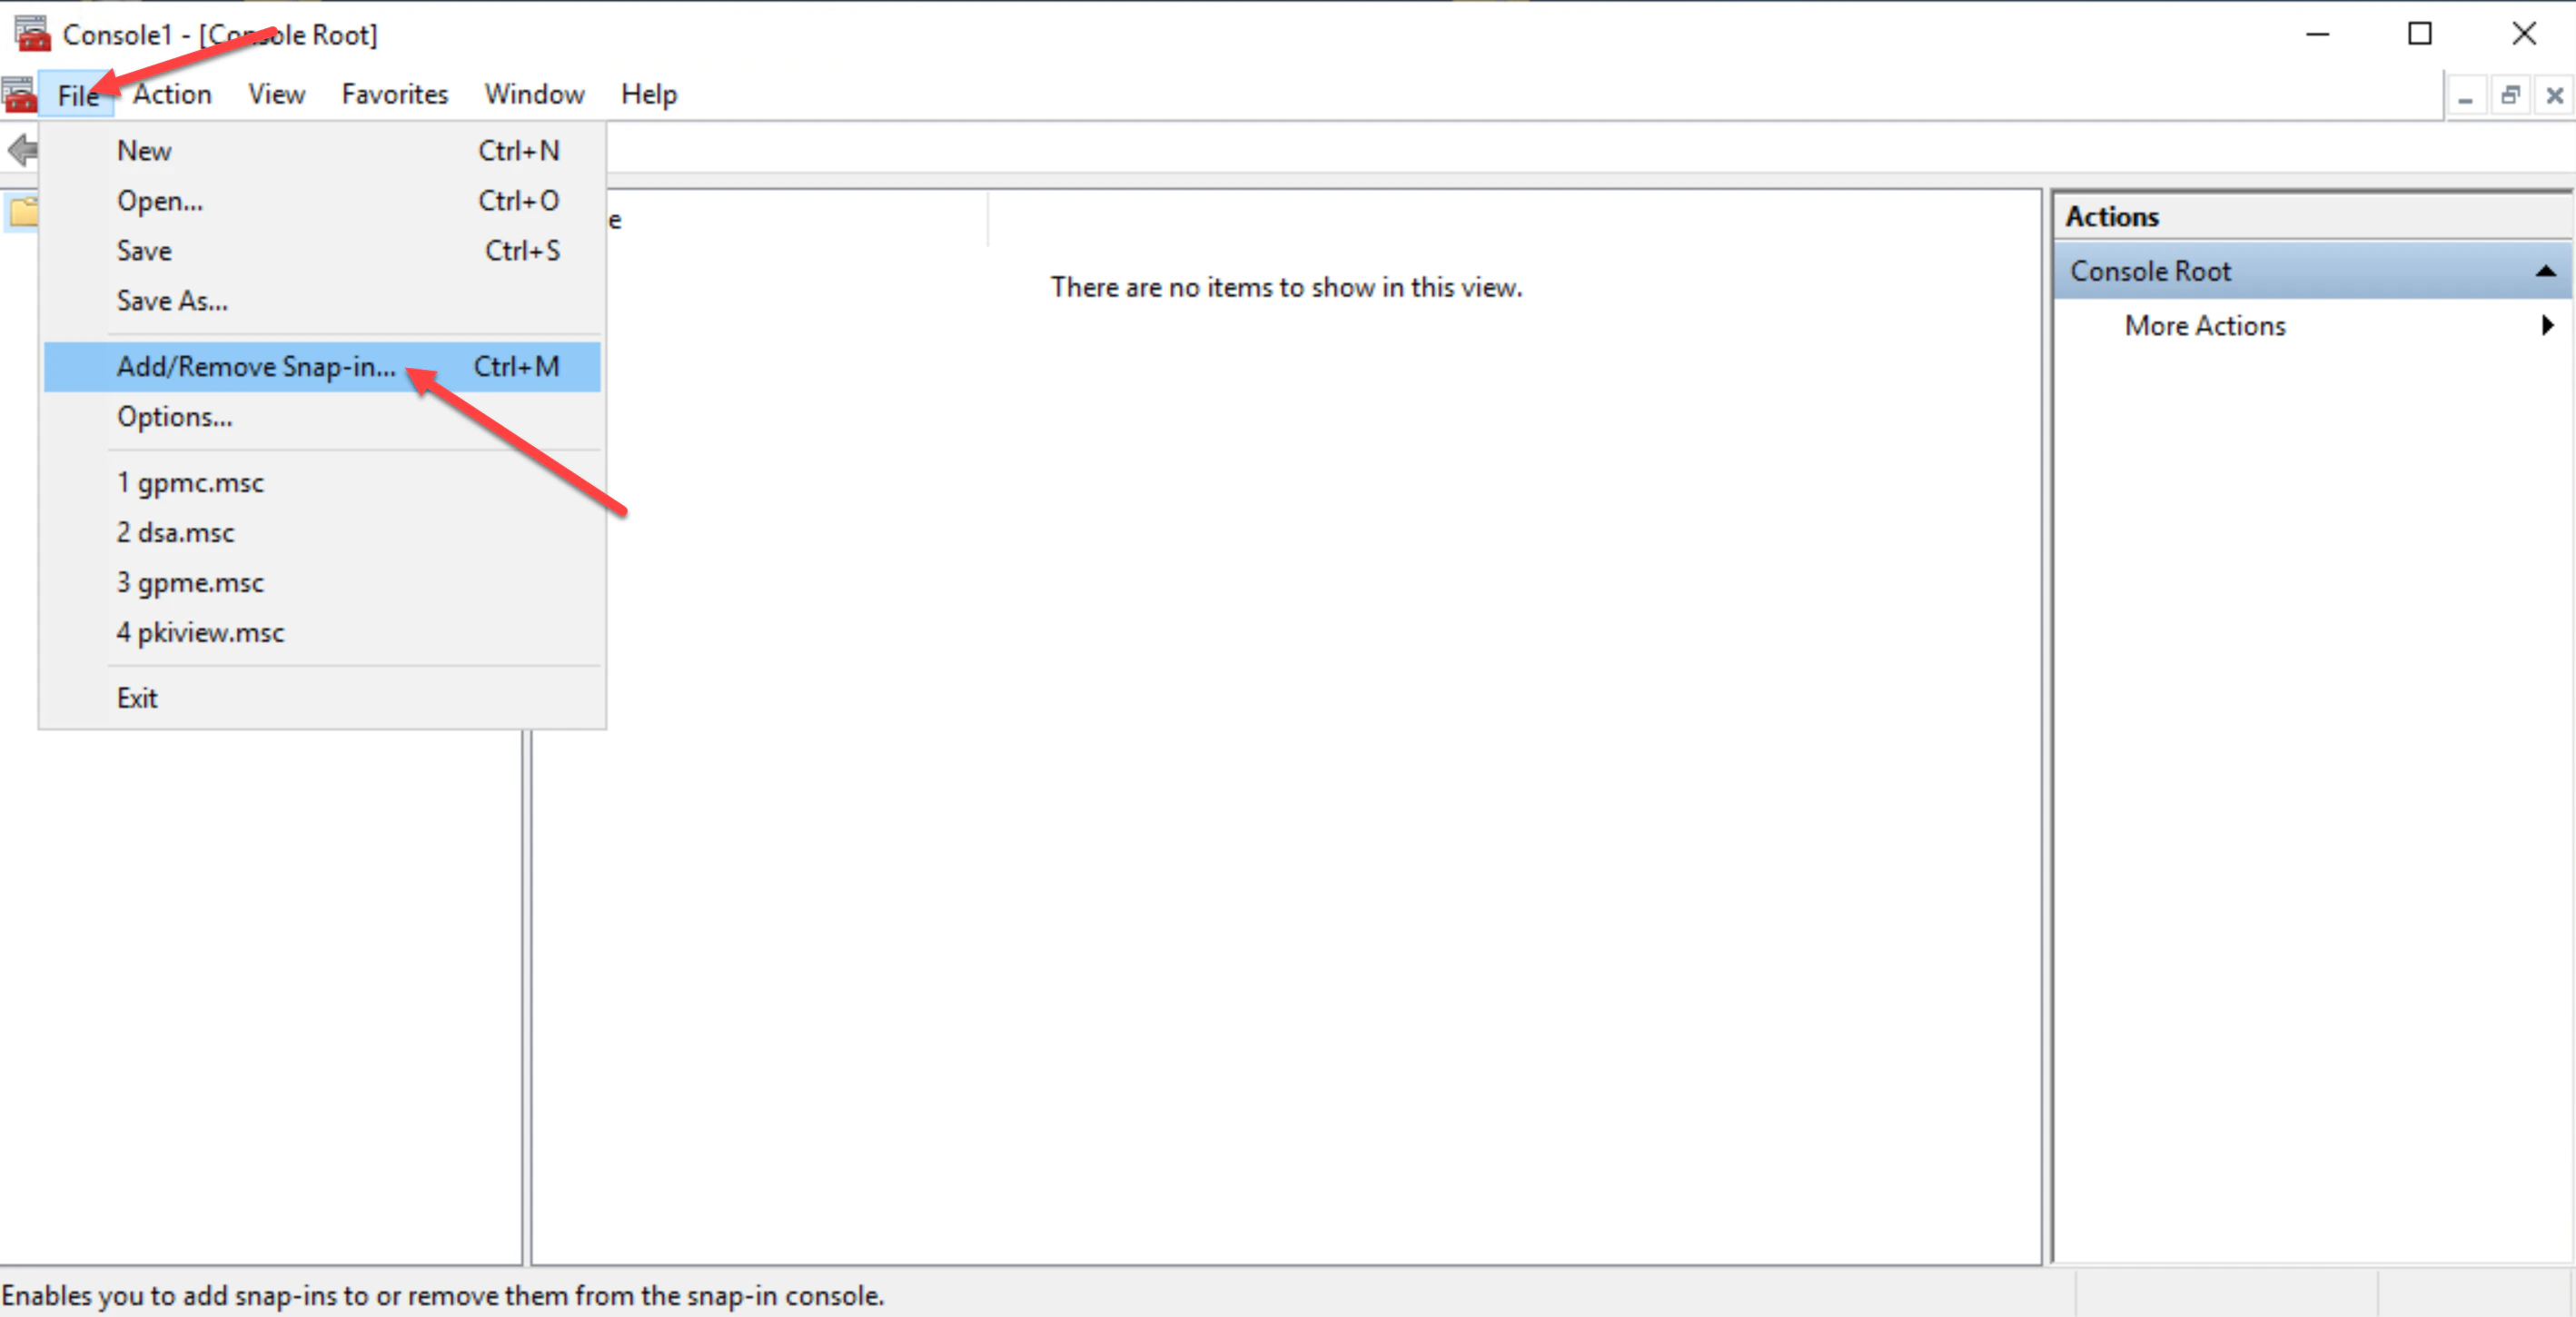
Log onto the certificate authority server, then launch the Microsoft Management Console (MMC) and click File then Add/Remove Snap-in.
-
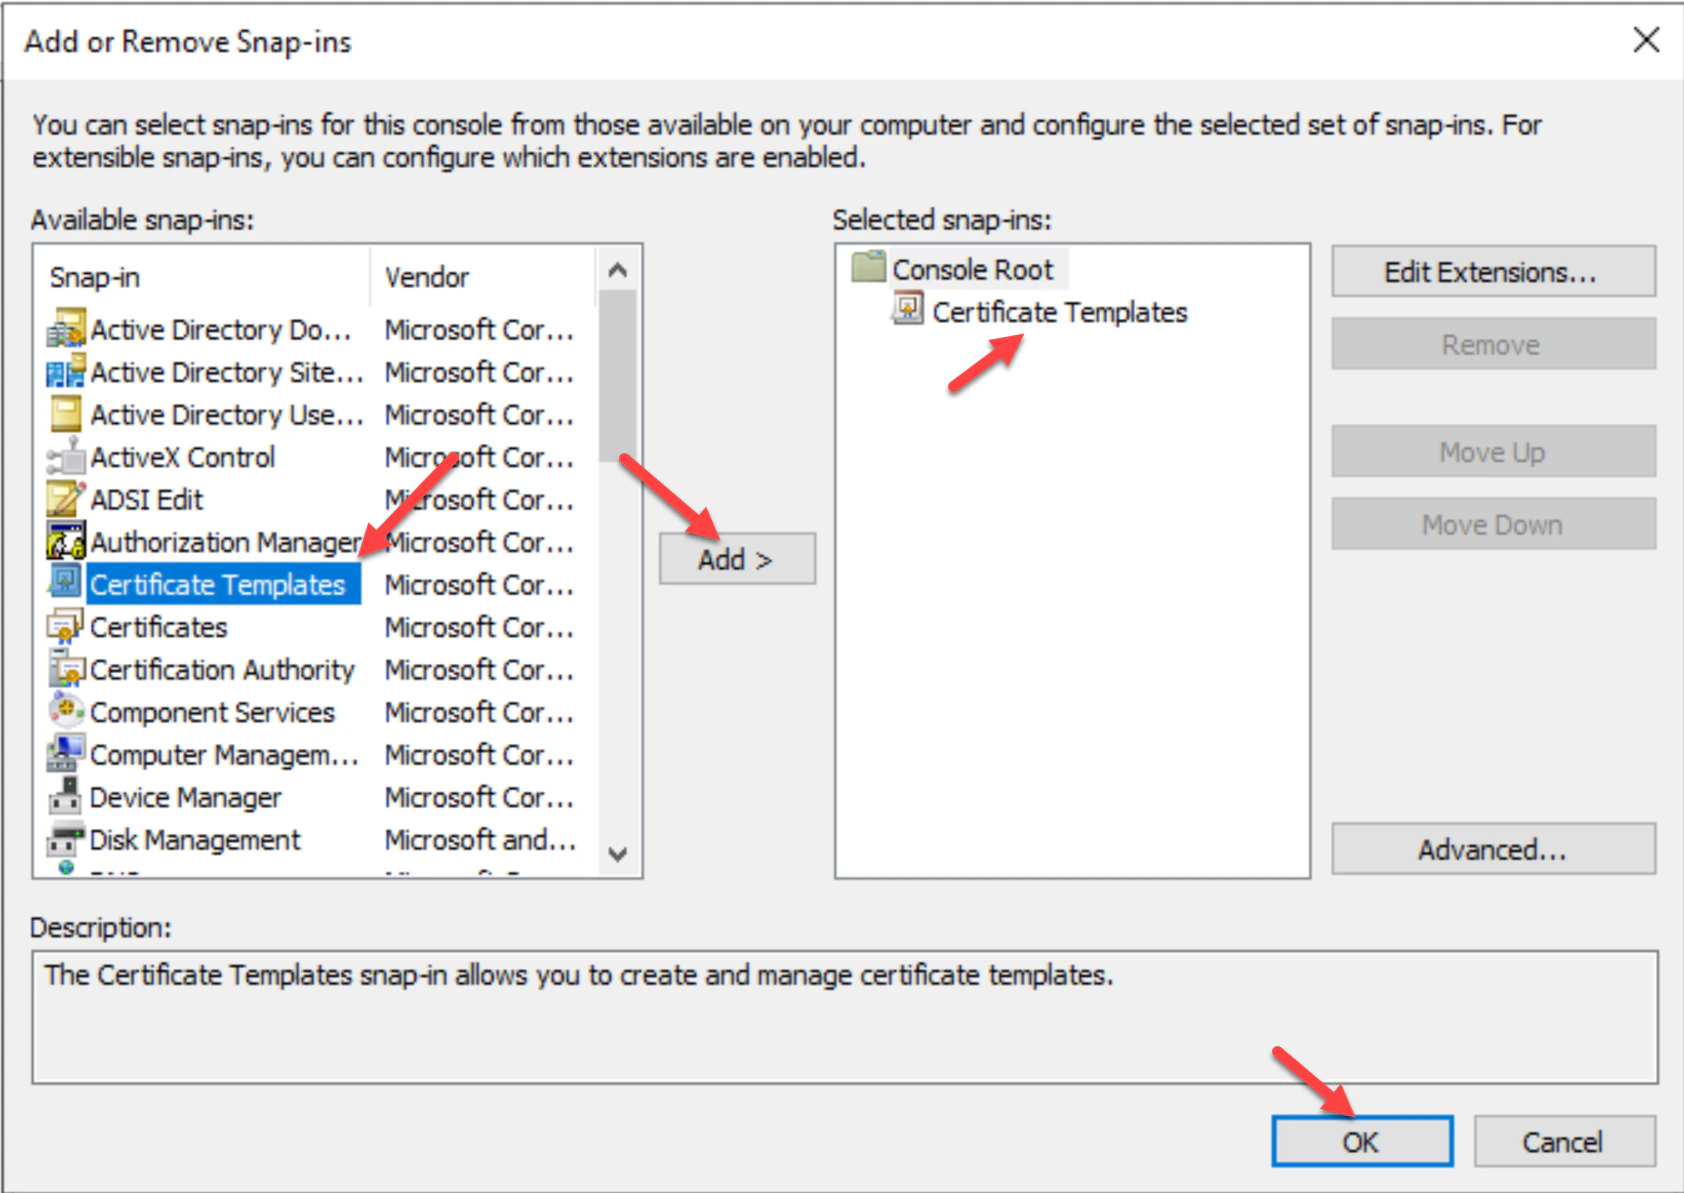
In the “Add or Remove Snap-ins” list, choose Certificate Templates, then click Add.
-
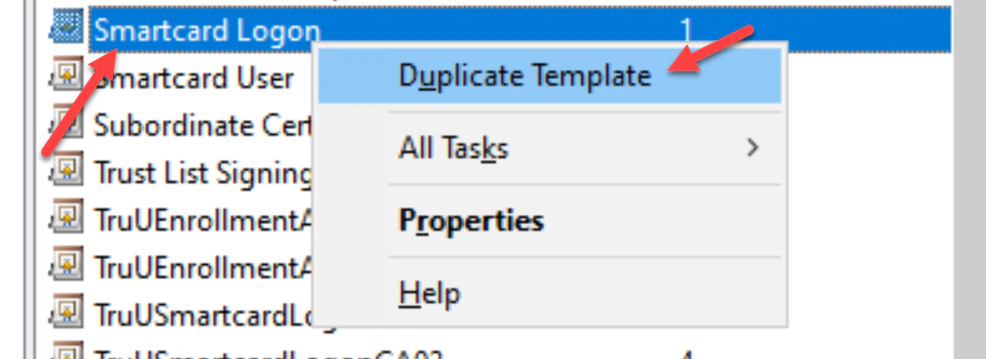
Double-click on the Certificate Template under Selected snap-ins, then right click on the Smartcard Login template. Choose Duplicate Template.
-
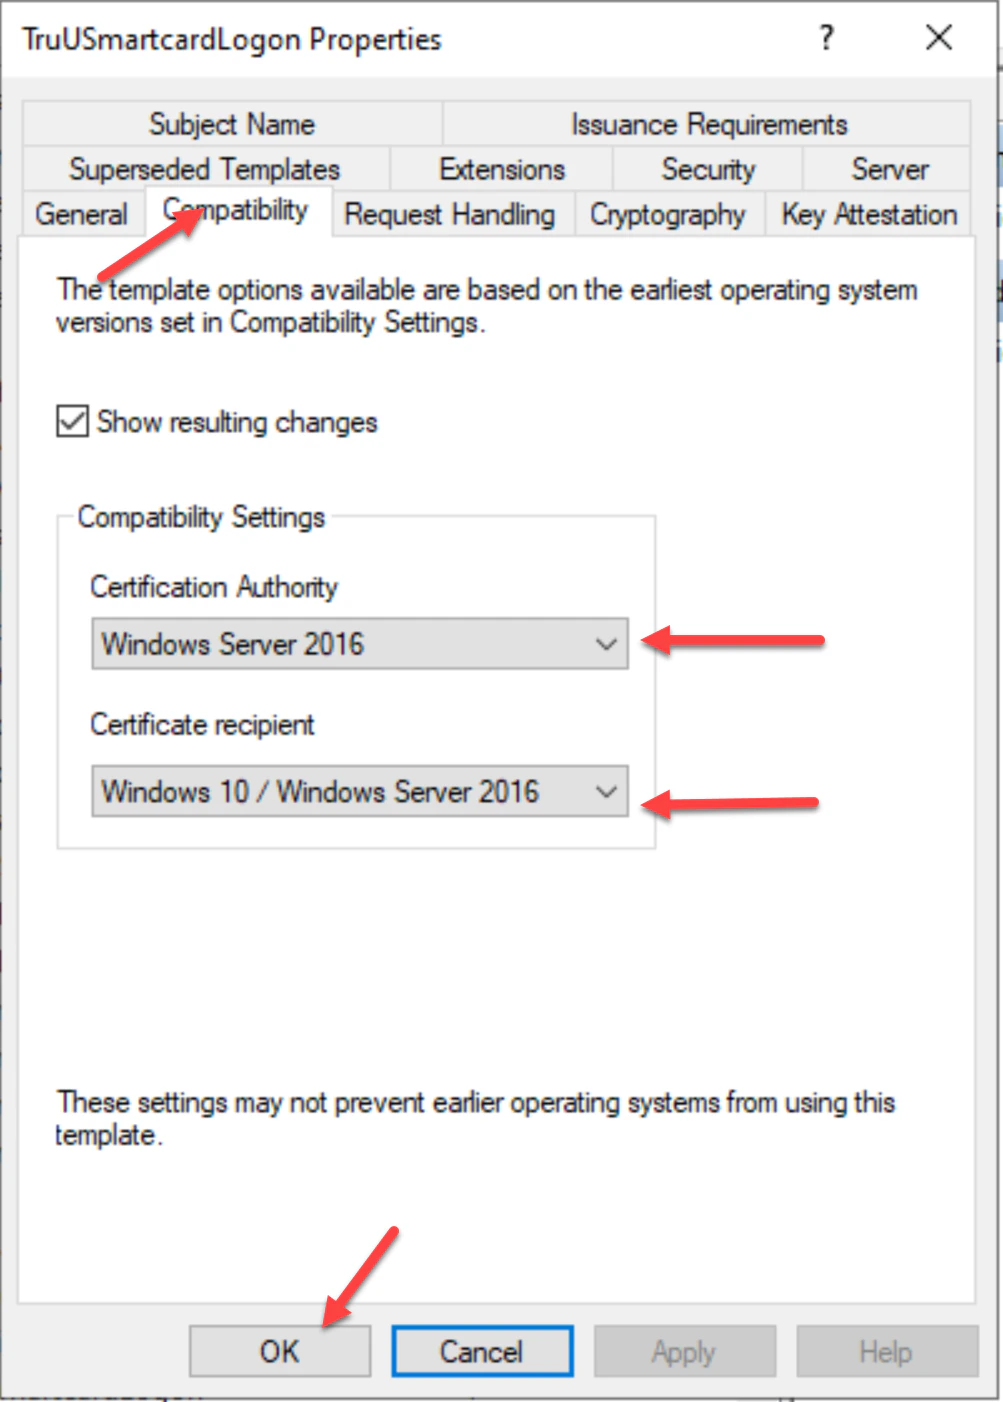
Navigate to the Compatibility tab and check to make sure the operating system versions of the Certificate Authority and Certificate recipient are appropriately selected for your environment.
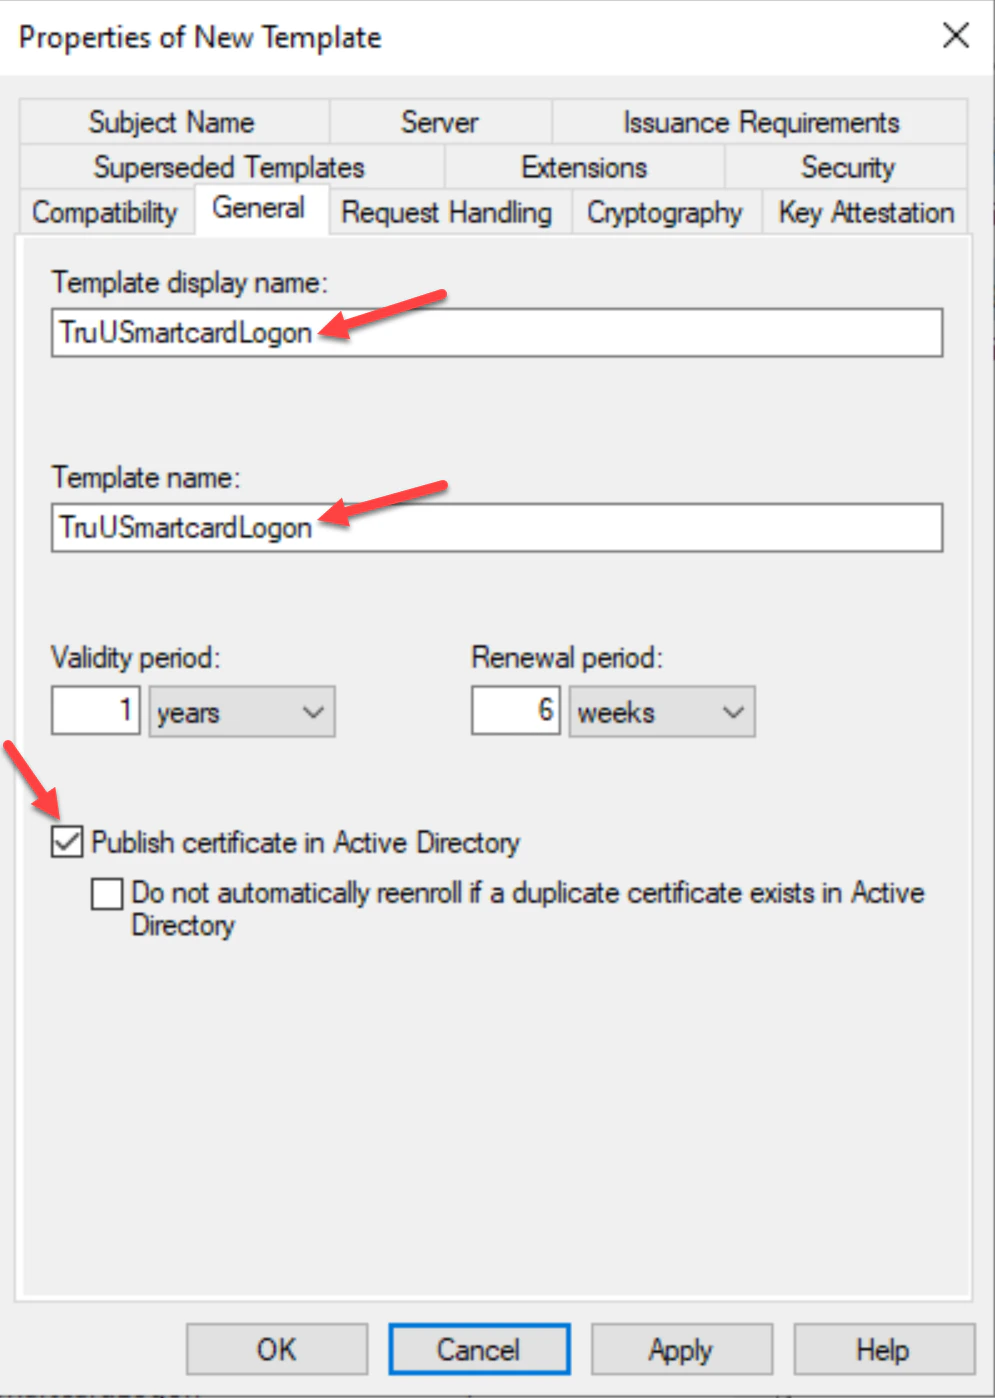
- In the General tab, create a Template Display Name for the template, then select Publish certificate in Active Directory. Additionally, specify the appropriate template validity and renewal period for your environment. I.E _TruUSmartCardLogon
-
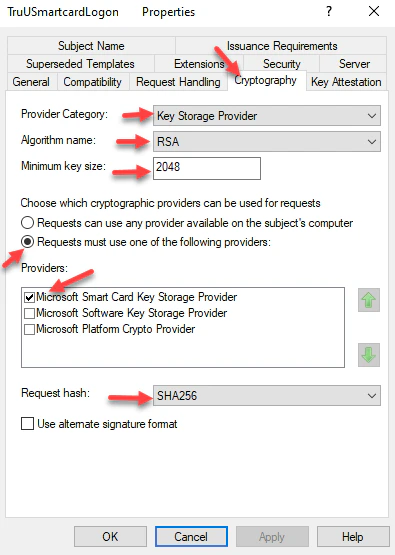
Navigate to the Cryptography tab and set the following settings for Key Storage Provider (KSP) support:
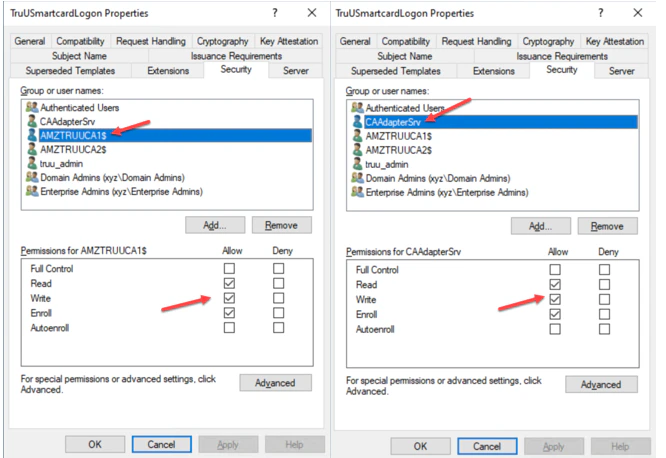
- Navigate to the Security tab, add the Server that the CA Adapter is Installed on with Read, Write and Enroll permissions. Then, select the TruU service account with Read, Write and Enroll permissions. Click Apply to complete setup in this tab. Then, click OK.
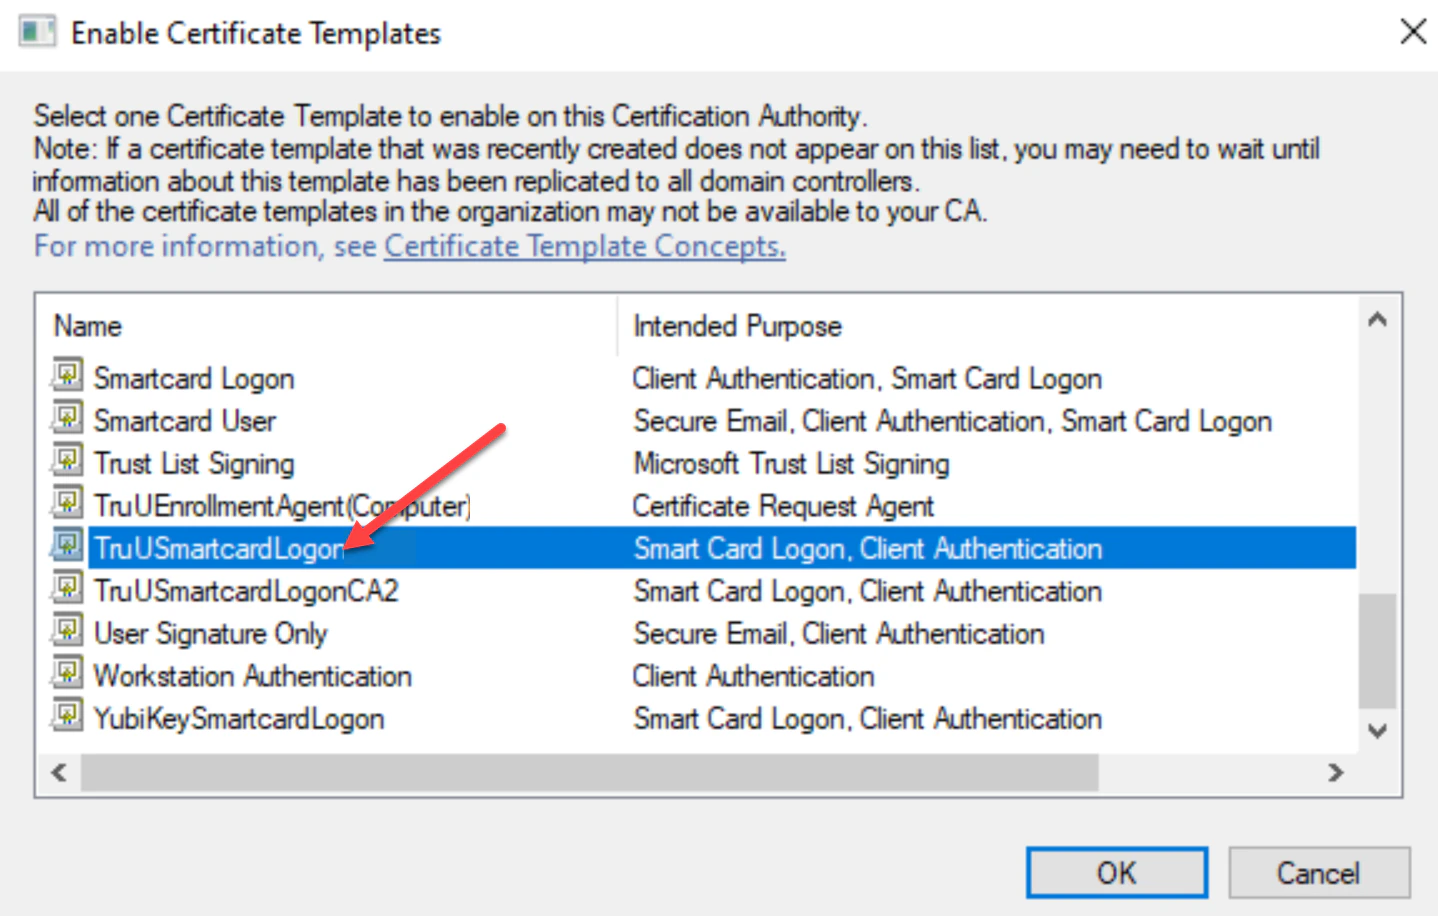
- Next, navigate to your Certificate Authority tab and click the Certificate Templates folder. Right-click on the folder and choose New then Certificate Template to Issue.

- Select the TruUSmartcardLogon template, then click OK.
- Right-click on the new TruUSmartcardLogon template to verify its properties are set. Then, click OK.
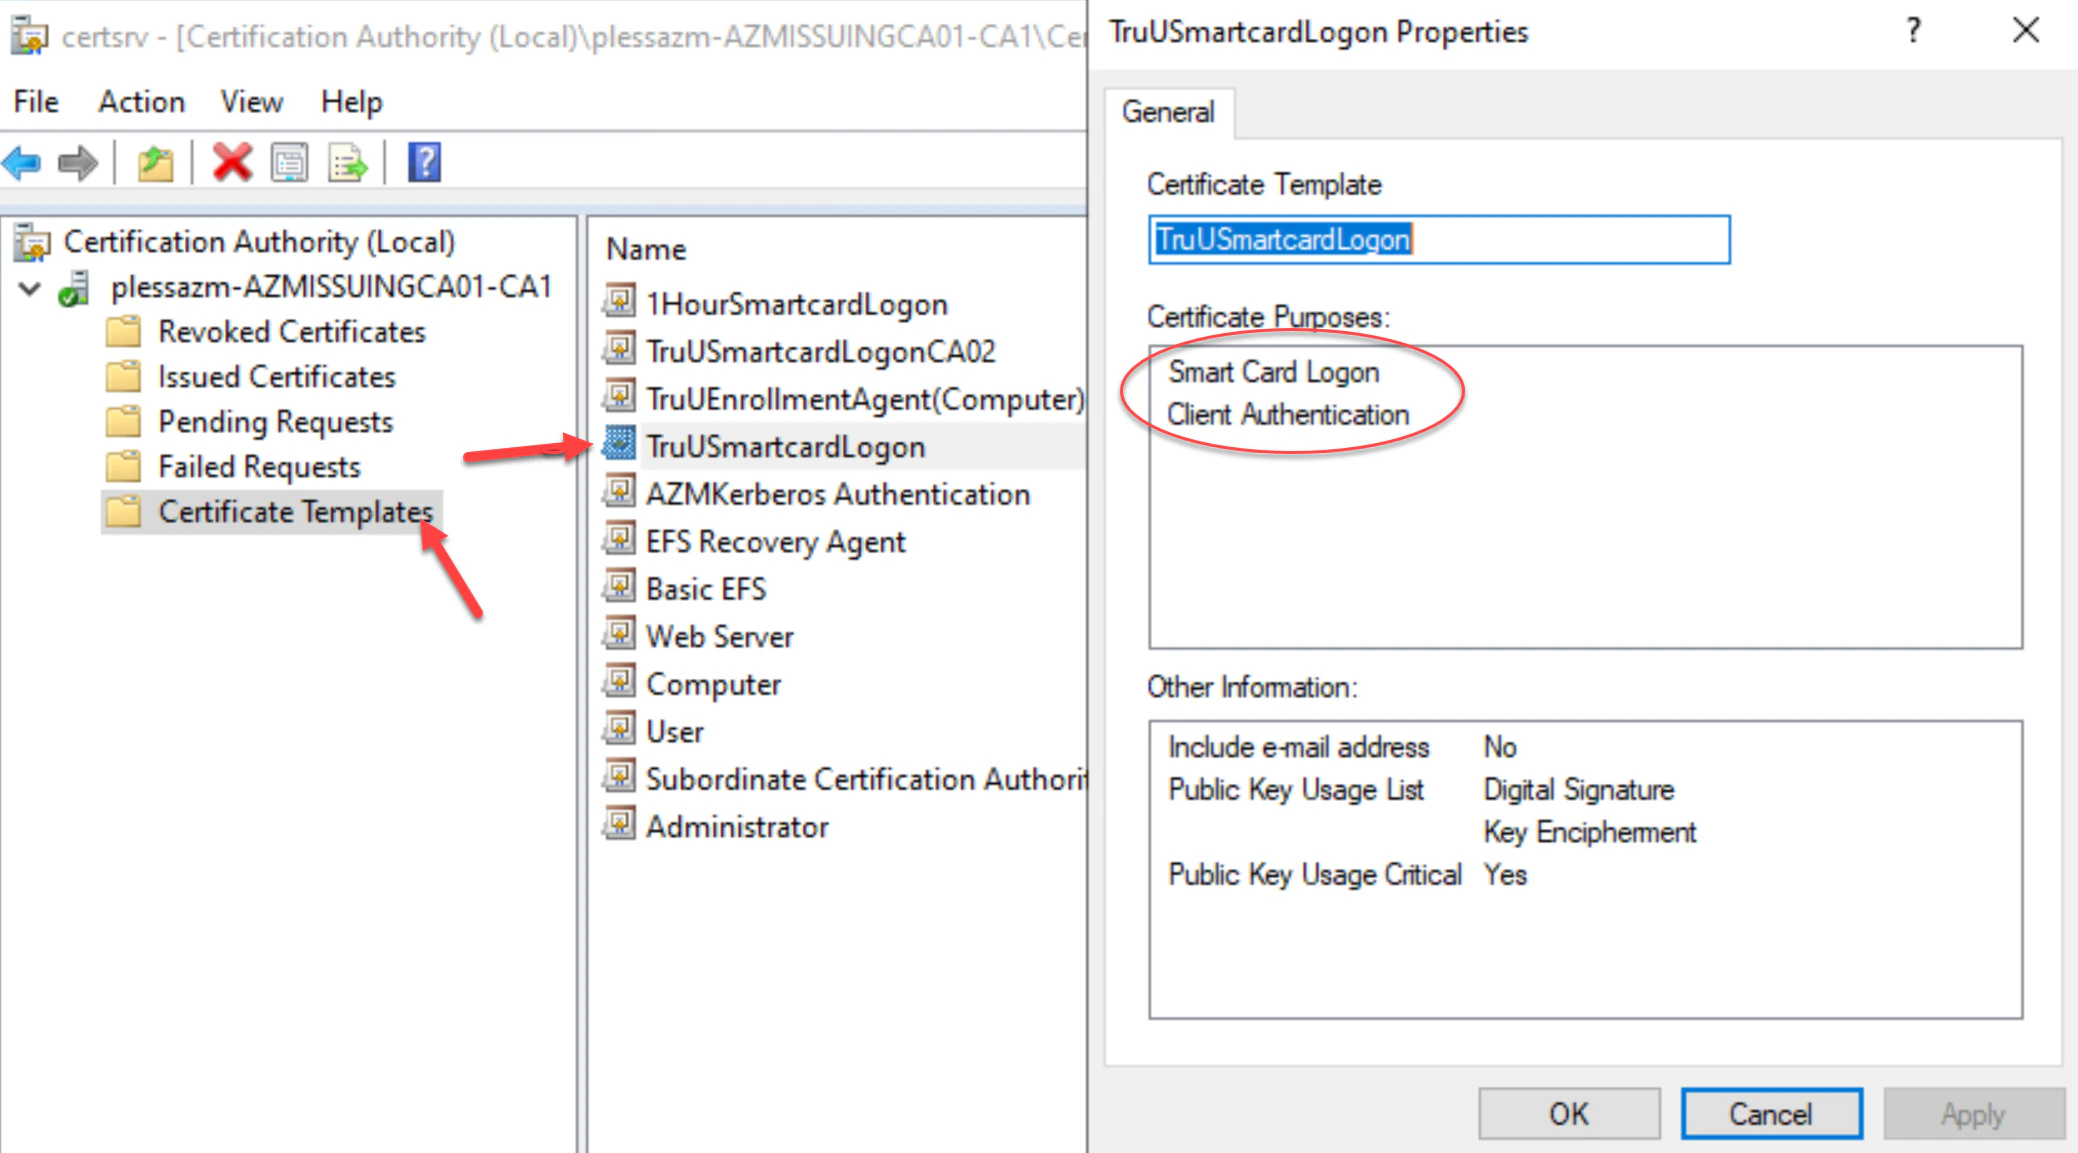
Create Enrollment Agent Computer Template Create Enrollment Agent Certificate