

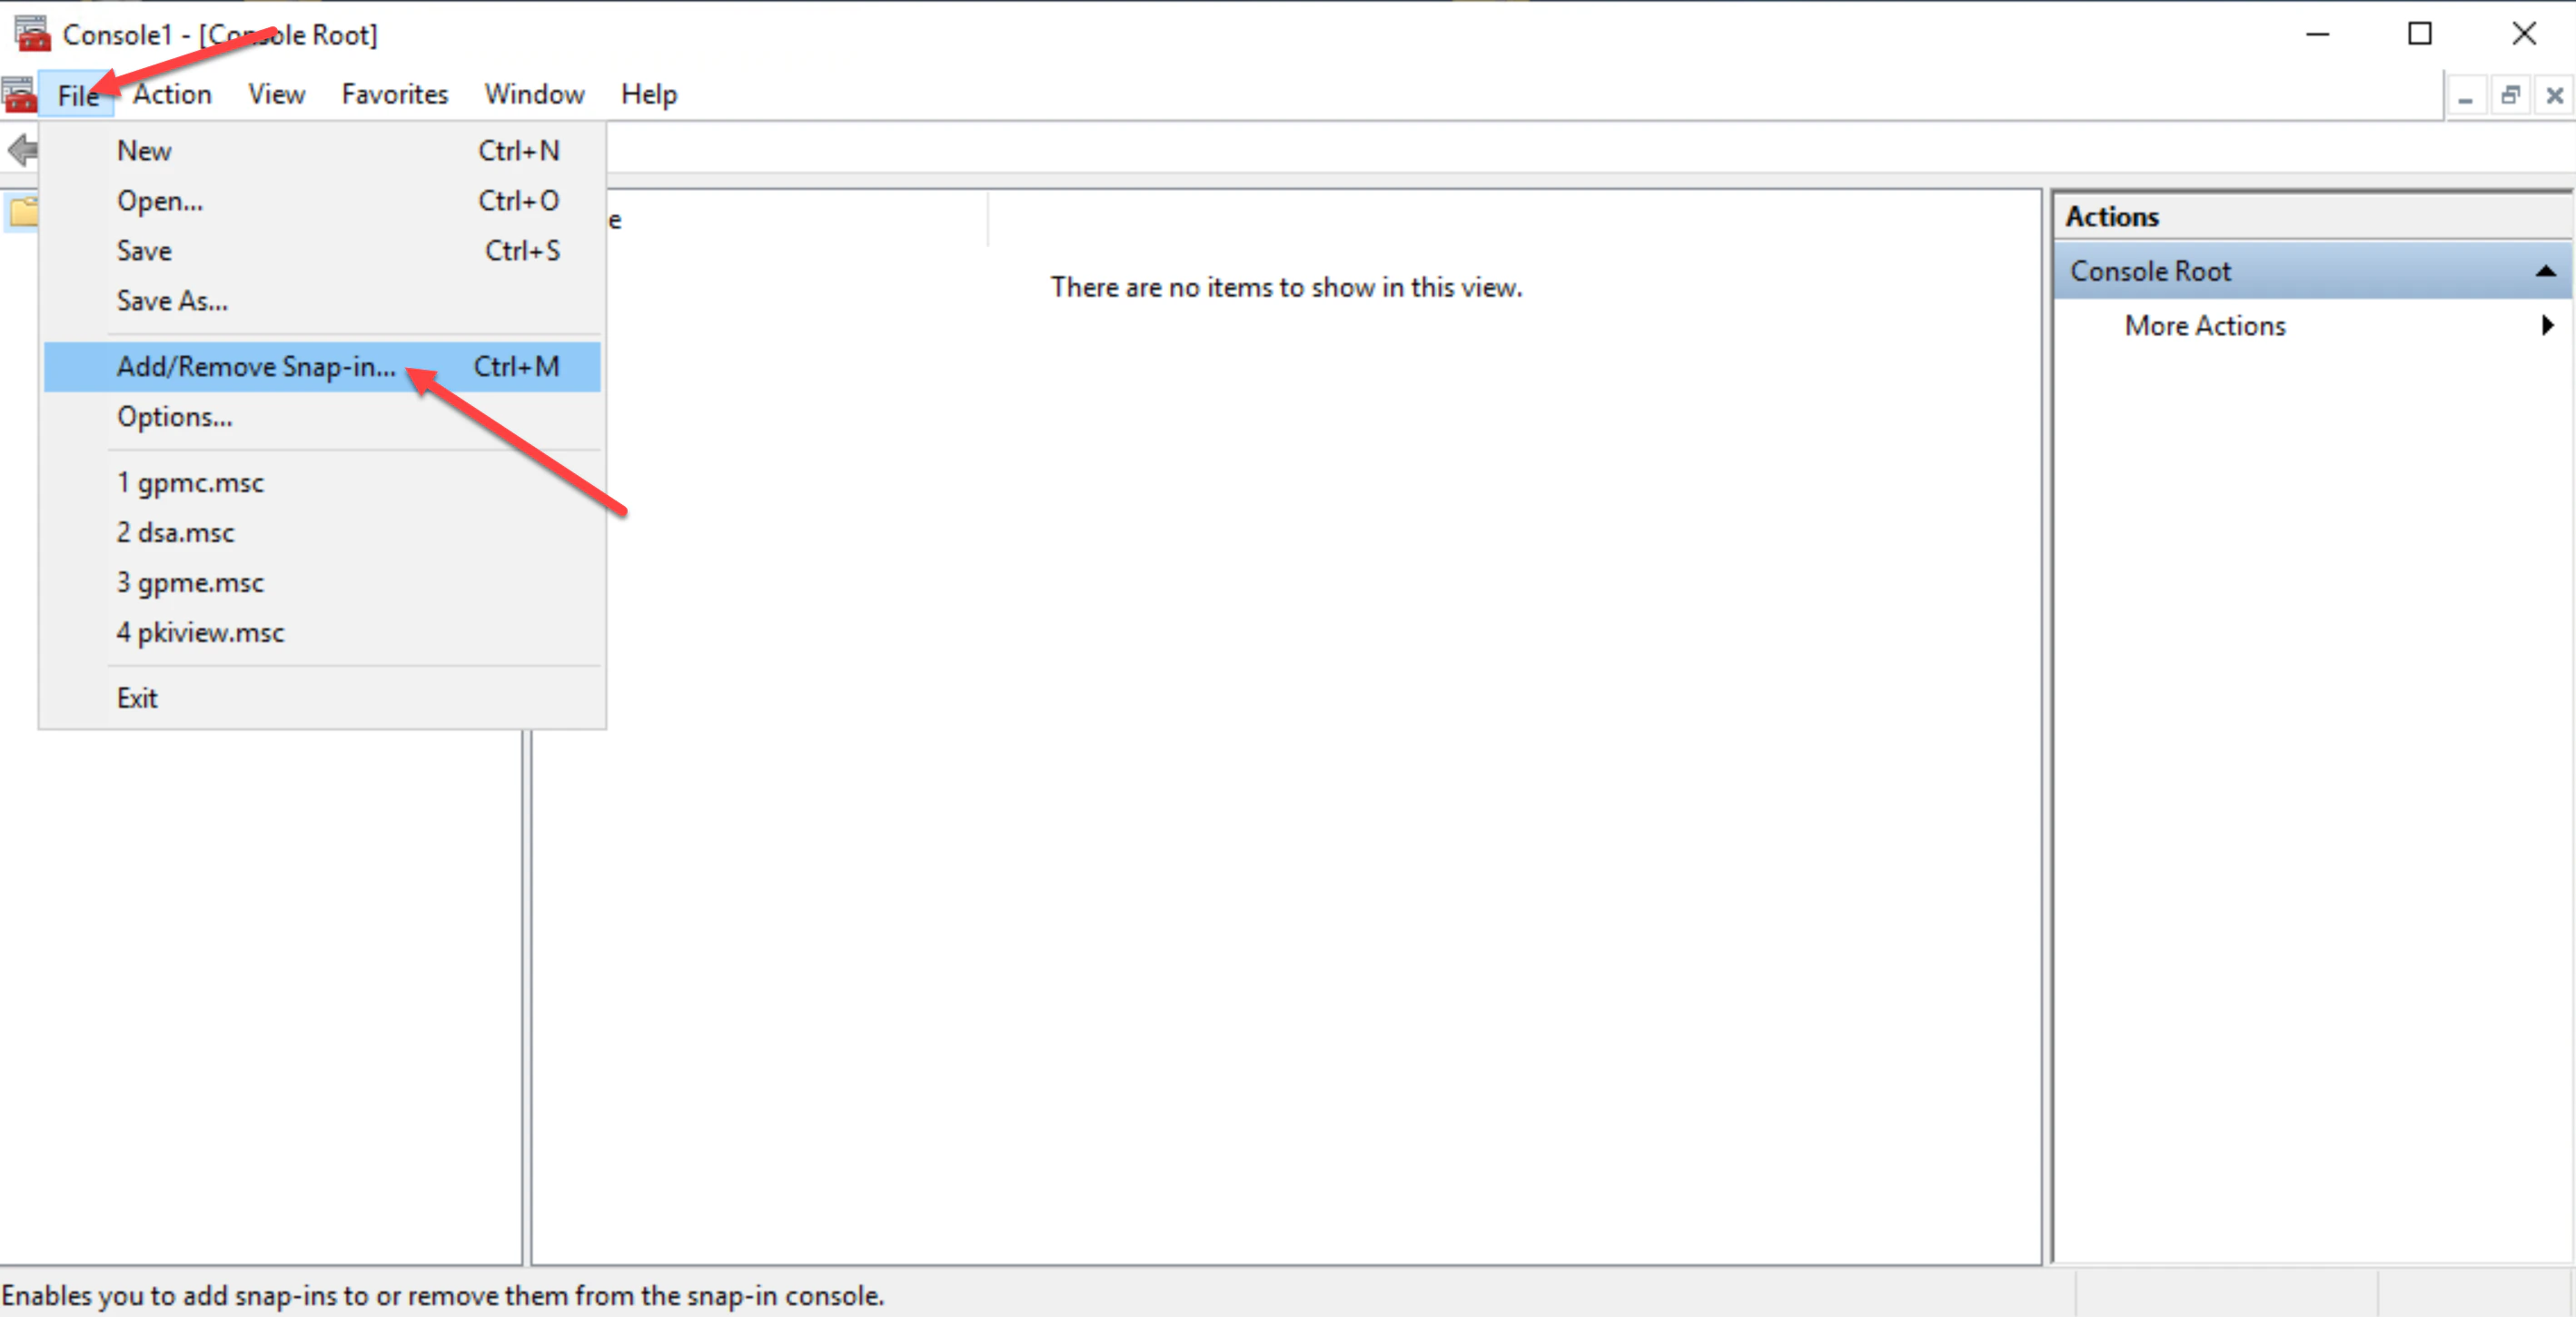
- Log onto the server you are deploying the TruU CA Adapter on, then launch the Microsoft Management Console (MMC) and click File, then Add/Remove Snap-in.
-
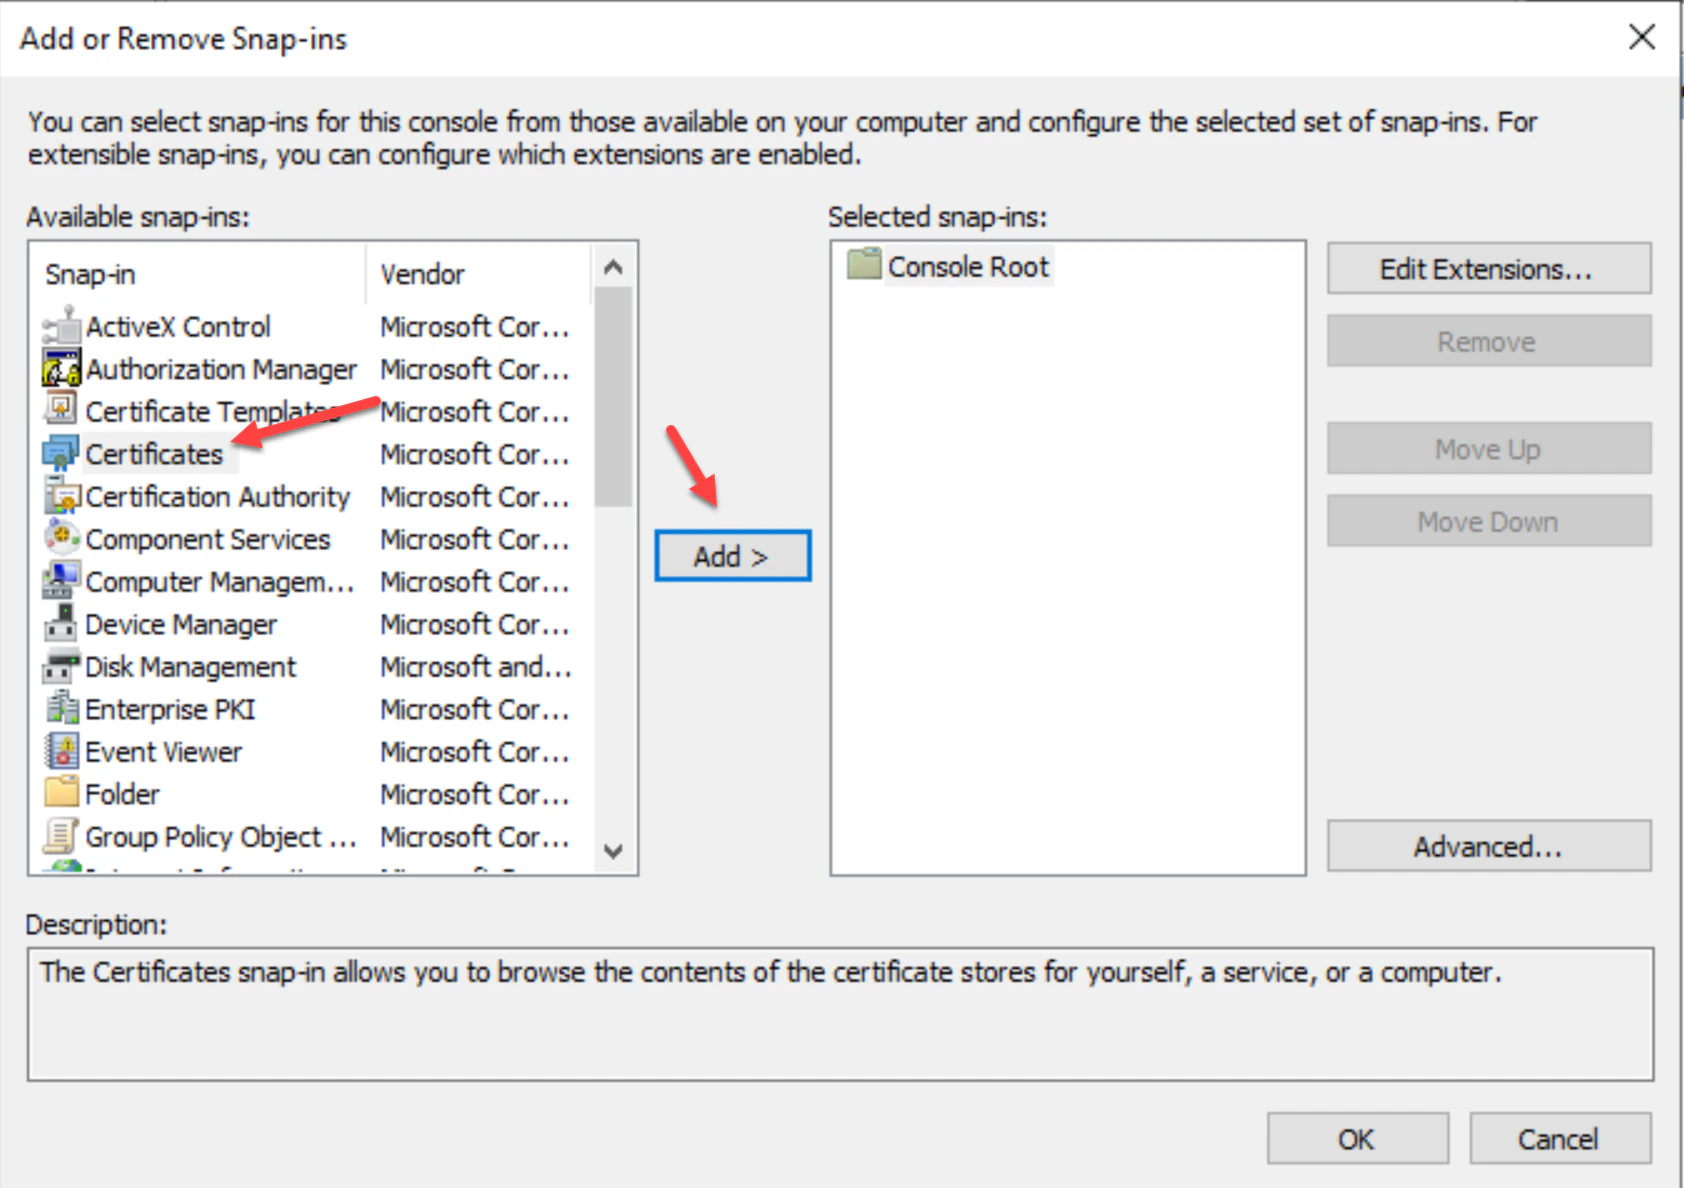
In the “Add or Remove Snap-ins” list, choose Certificates, then click Add.
-
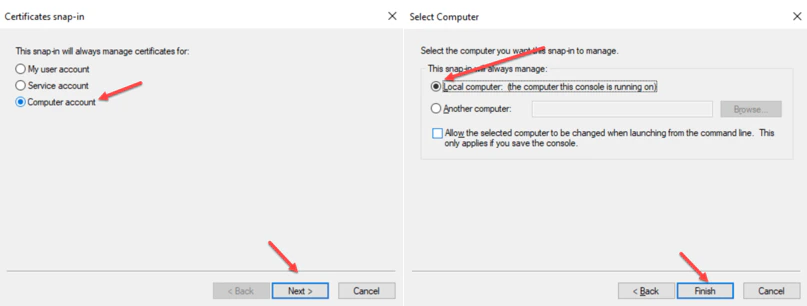
Choose ‘Computer account’ for the snap-in to manage certificates for, then choose ‘Local computer’ for the computer you want the snap-in to manage. Click ‘Finish’ to complete.
-
Next, right-click on the Personal folder, then navigate to All Tasks and then the Request New Certificate.
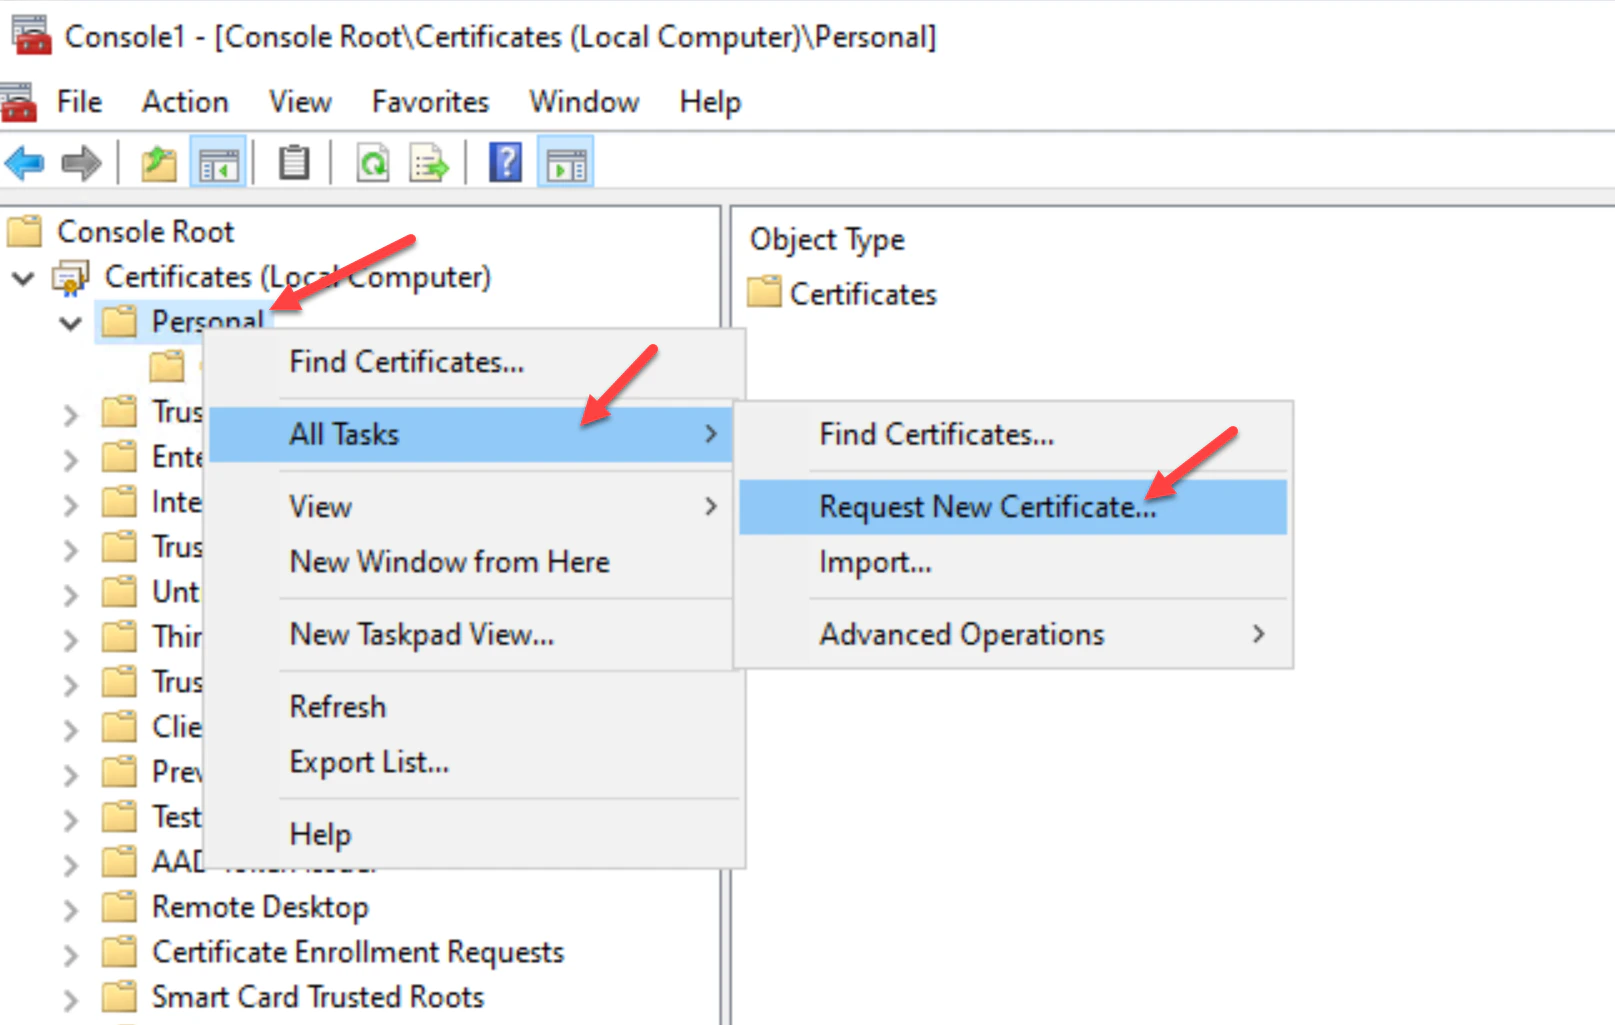
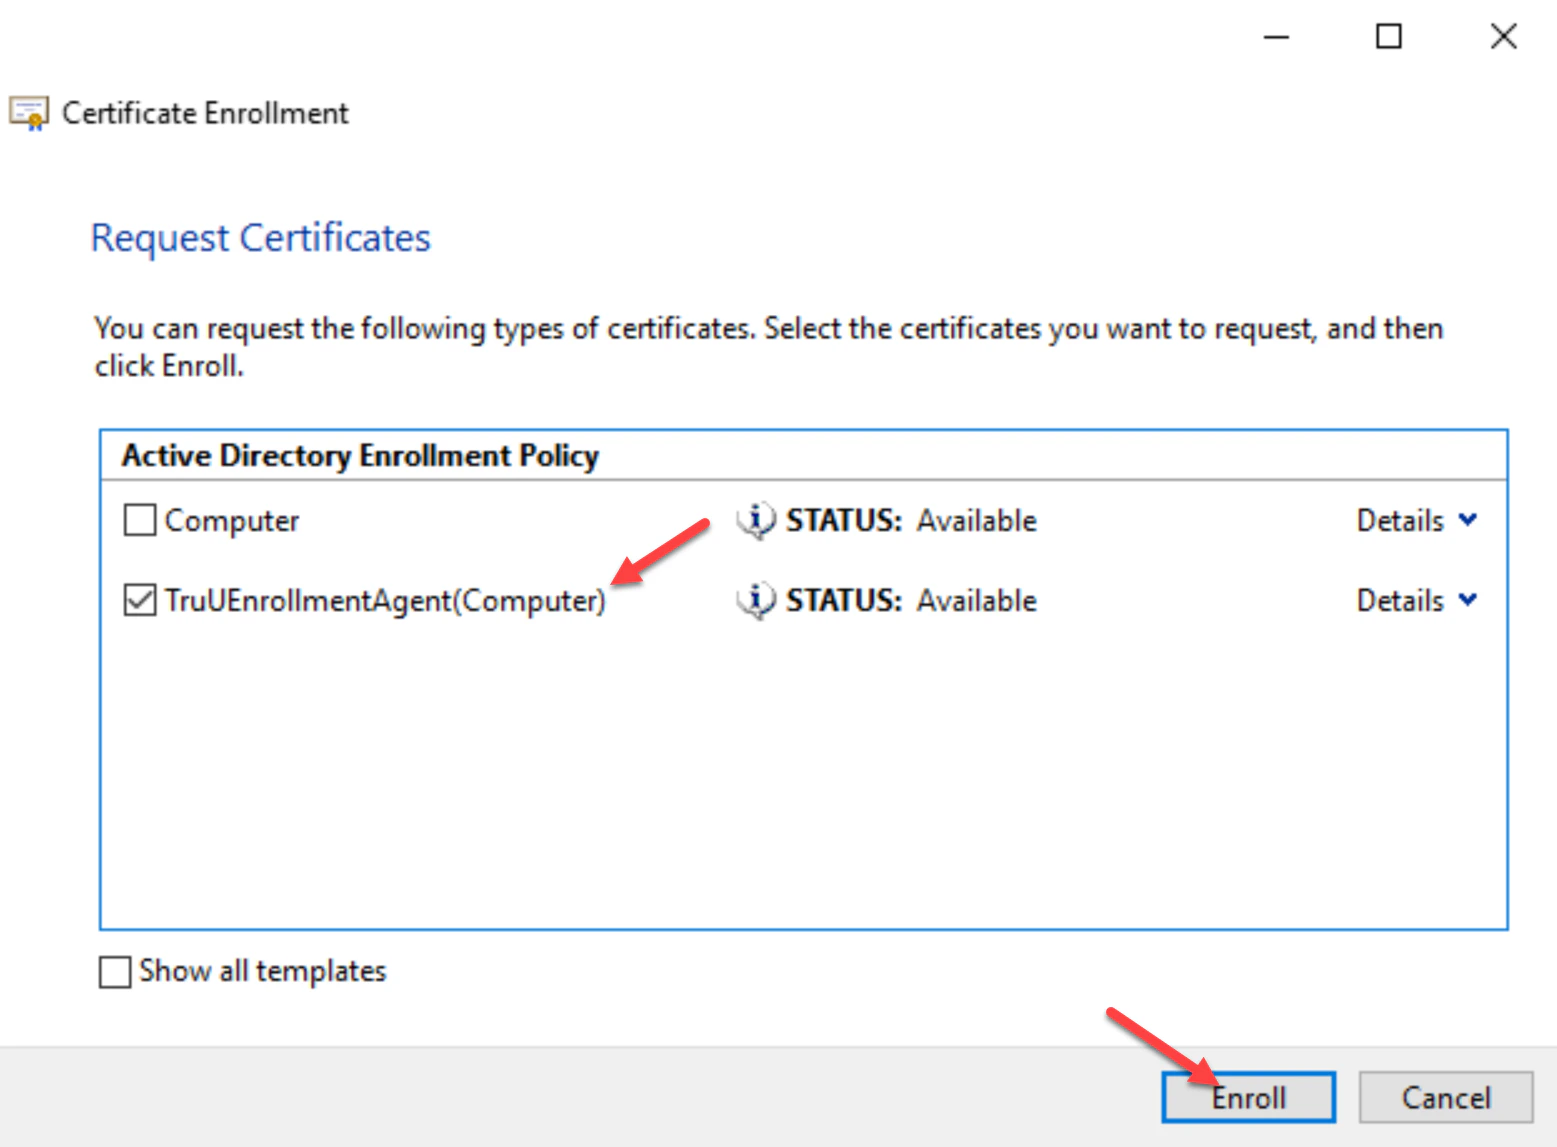
- Click Next, Next, and Select the TruUEnrollmentAgent(Computer) template you created, then click Enroll. This will install the Signer Certificate into the local personal store of the CA Adapter server. You can close all windows.
Create the Smartcard Logon Template Granting Service Account Permissions