

Creating TruU/JAMF Package
-
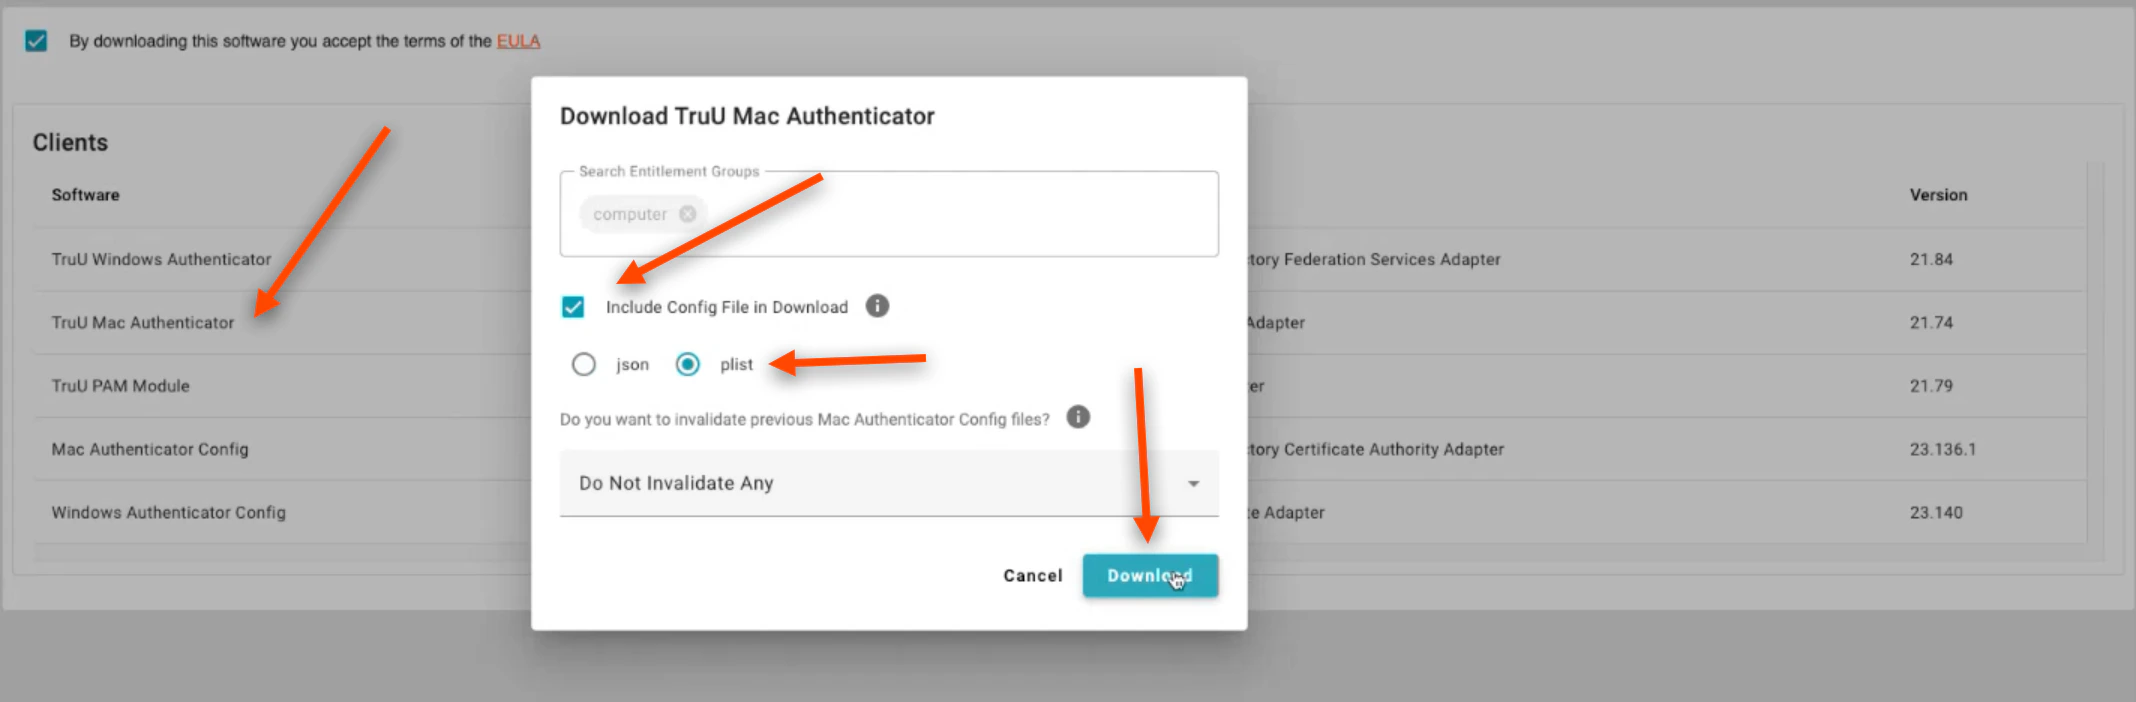
Download the TruU Mac Authenticator. Click the box to Include Config File in Download. Click plist, then click Download
-
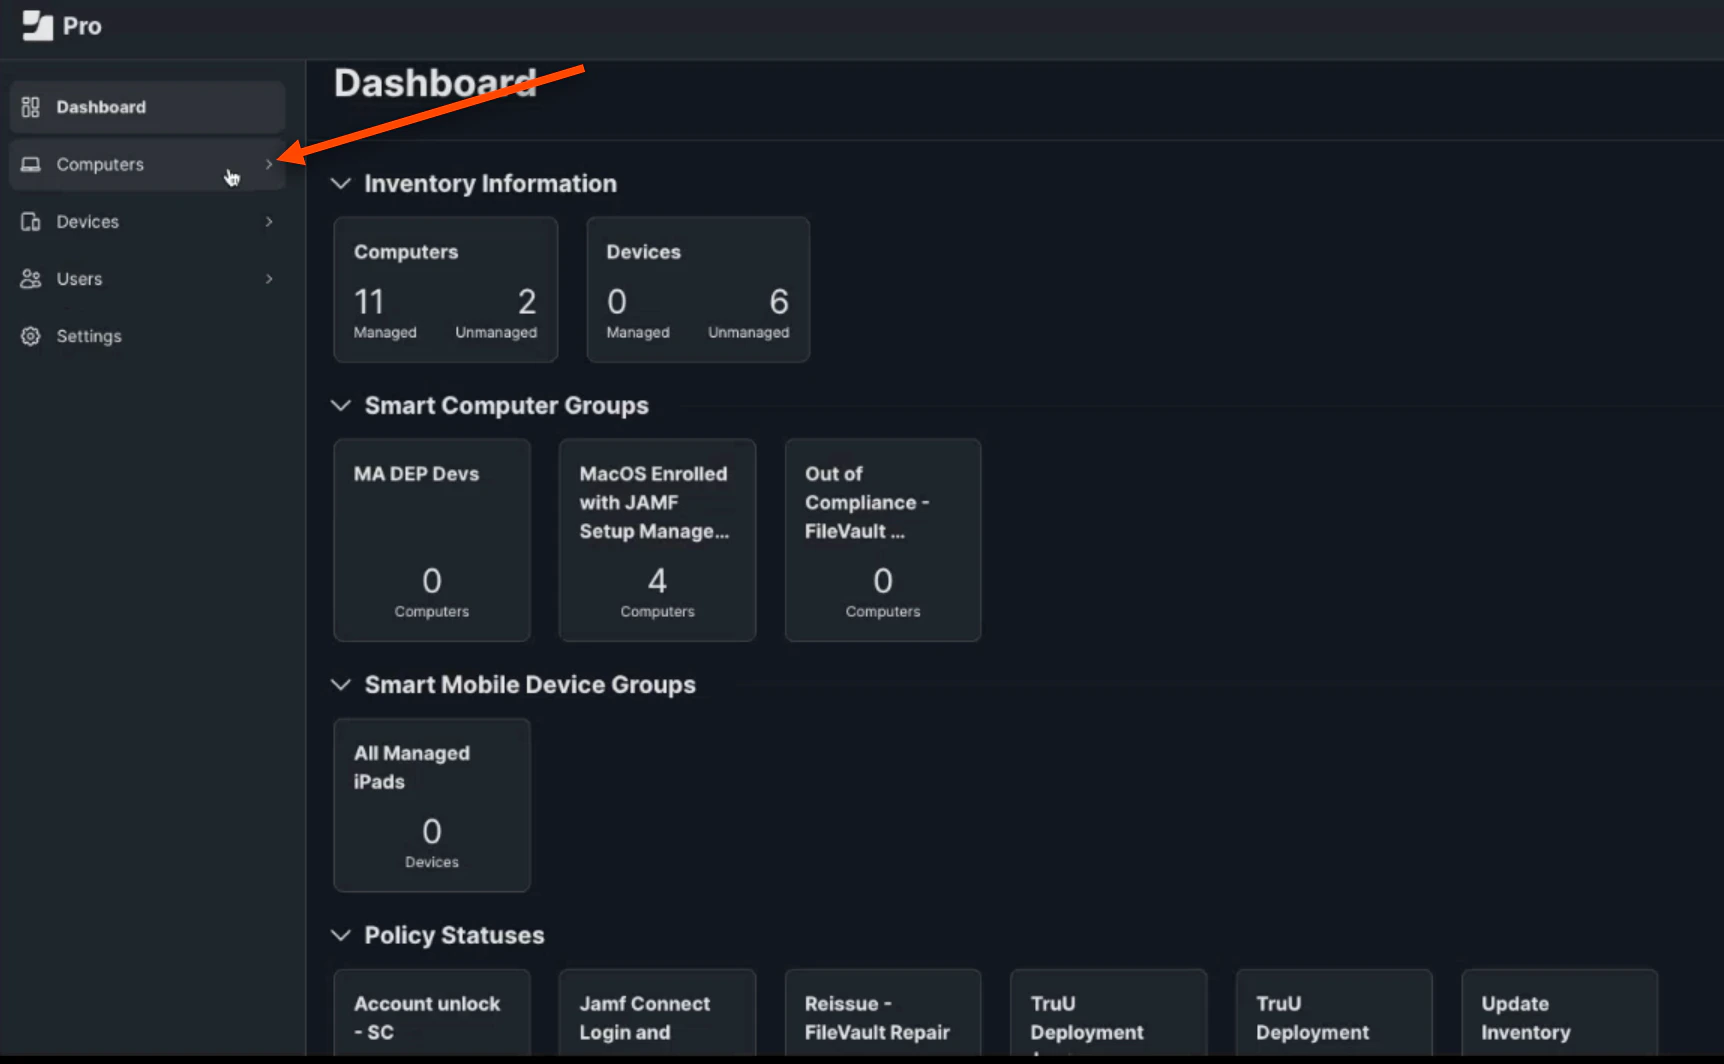
Login to your JAMF Admin Portal. This first step is creating a deployment profile. First, click Computers on the JAMF Dashboard
-
Next, Click Configuration Profiles. Then, Click (+) New

-
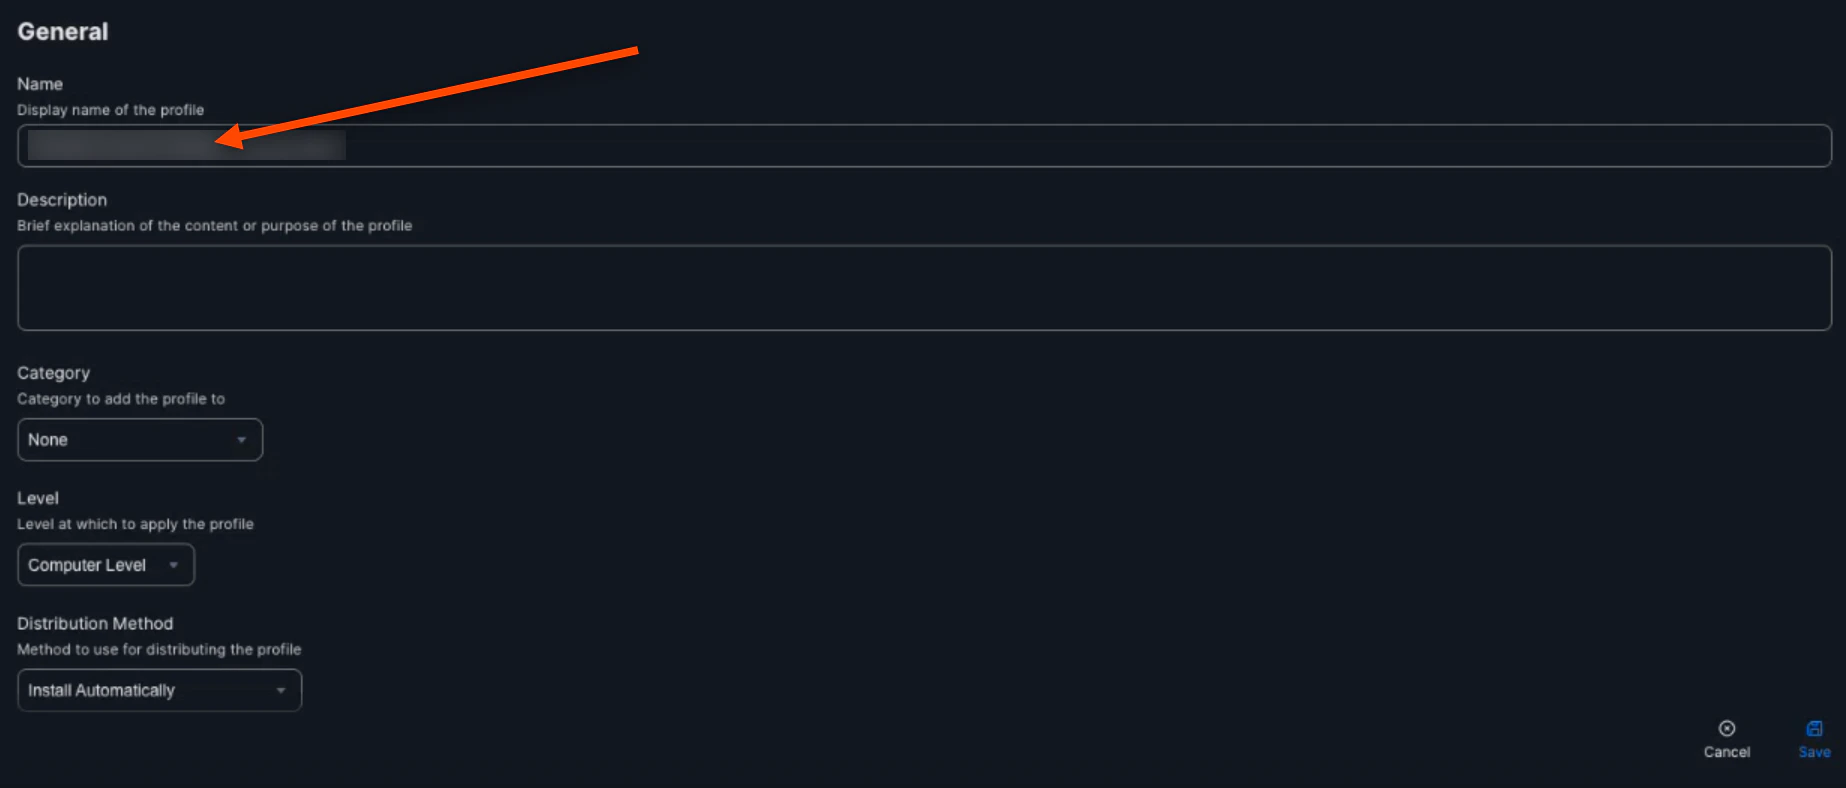
Name the Profile
-
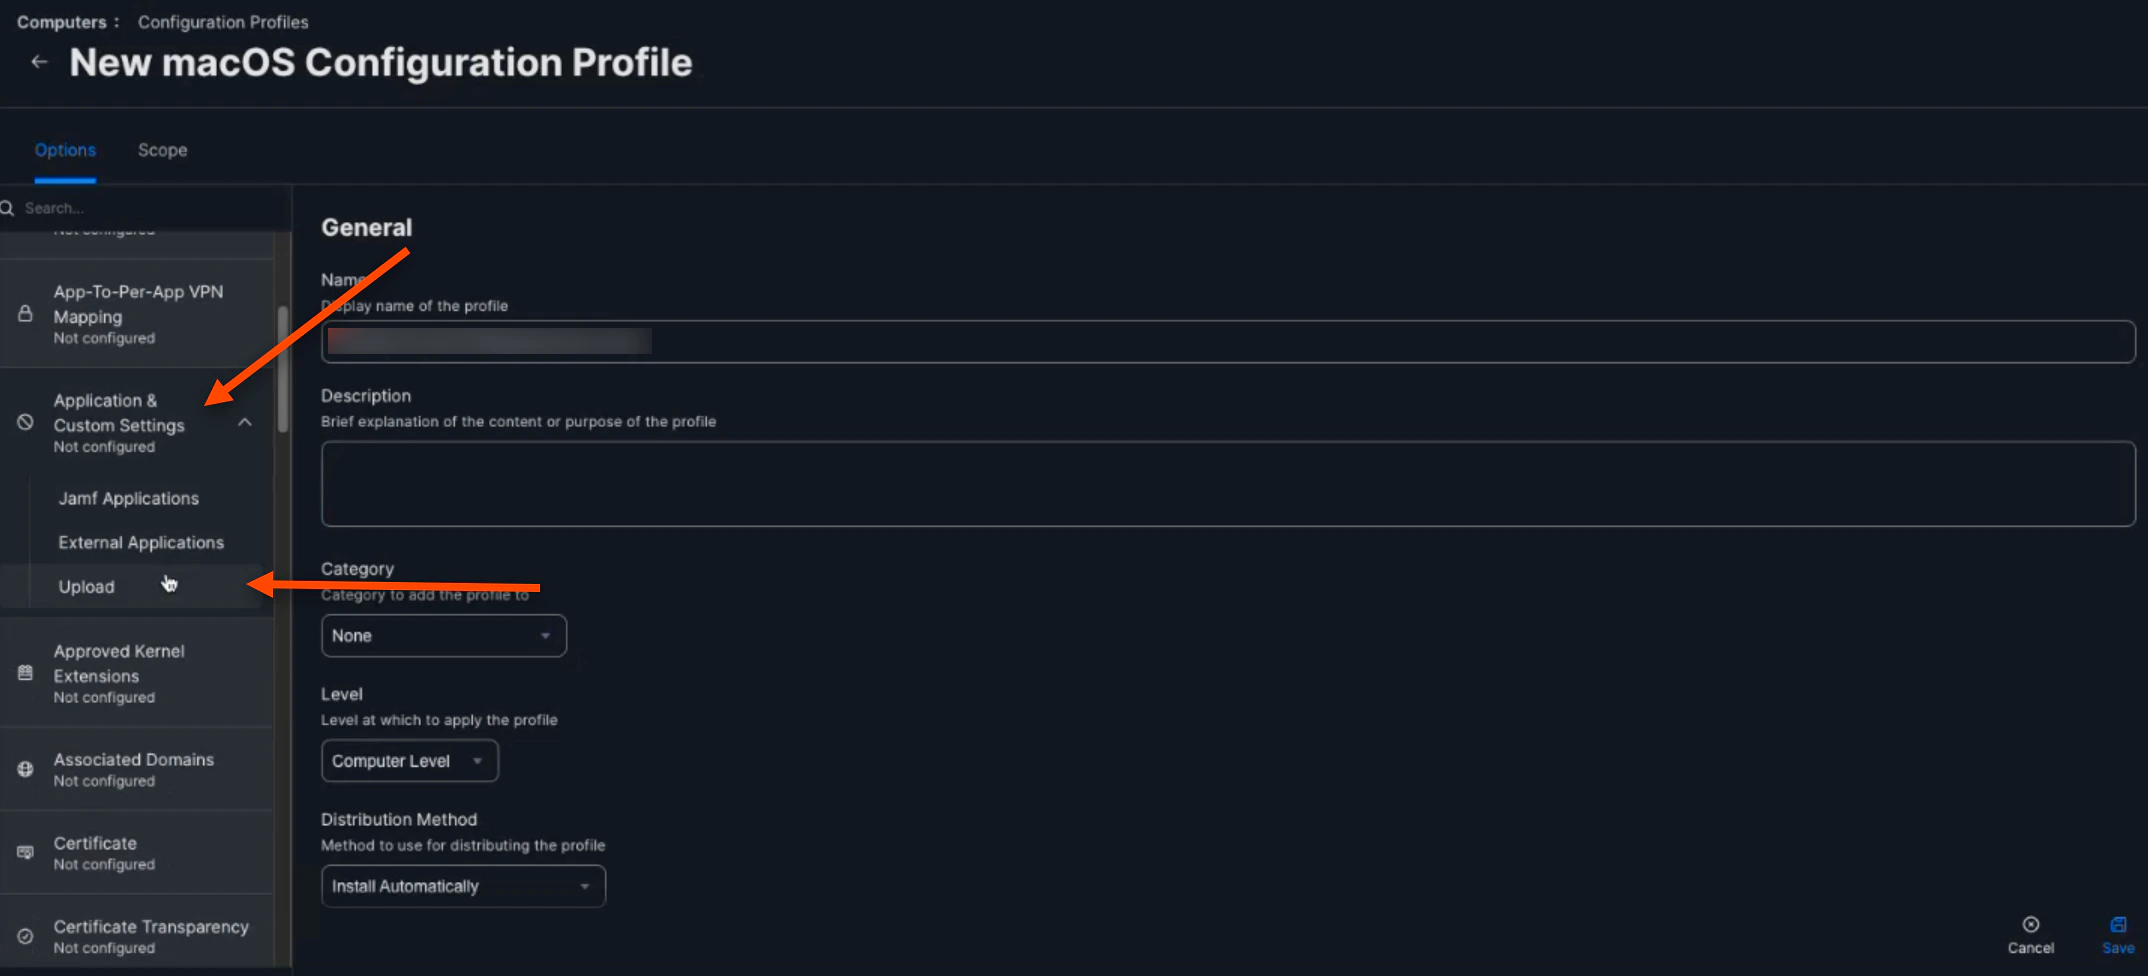
Next, scroll down and select Application & Custom Settings. Then, click Upload
-
Click (+) Add. Then, copy and paste your downloaded plist from the TruU Mac Authenticator into the Property List Box below
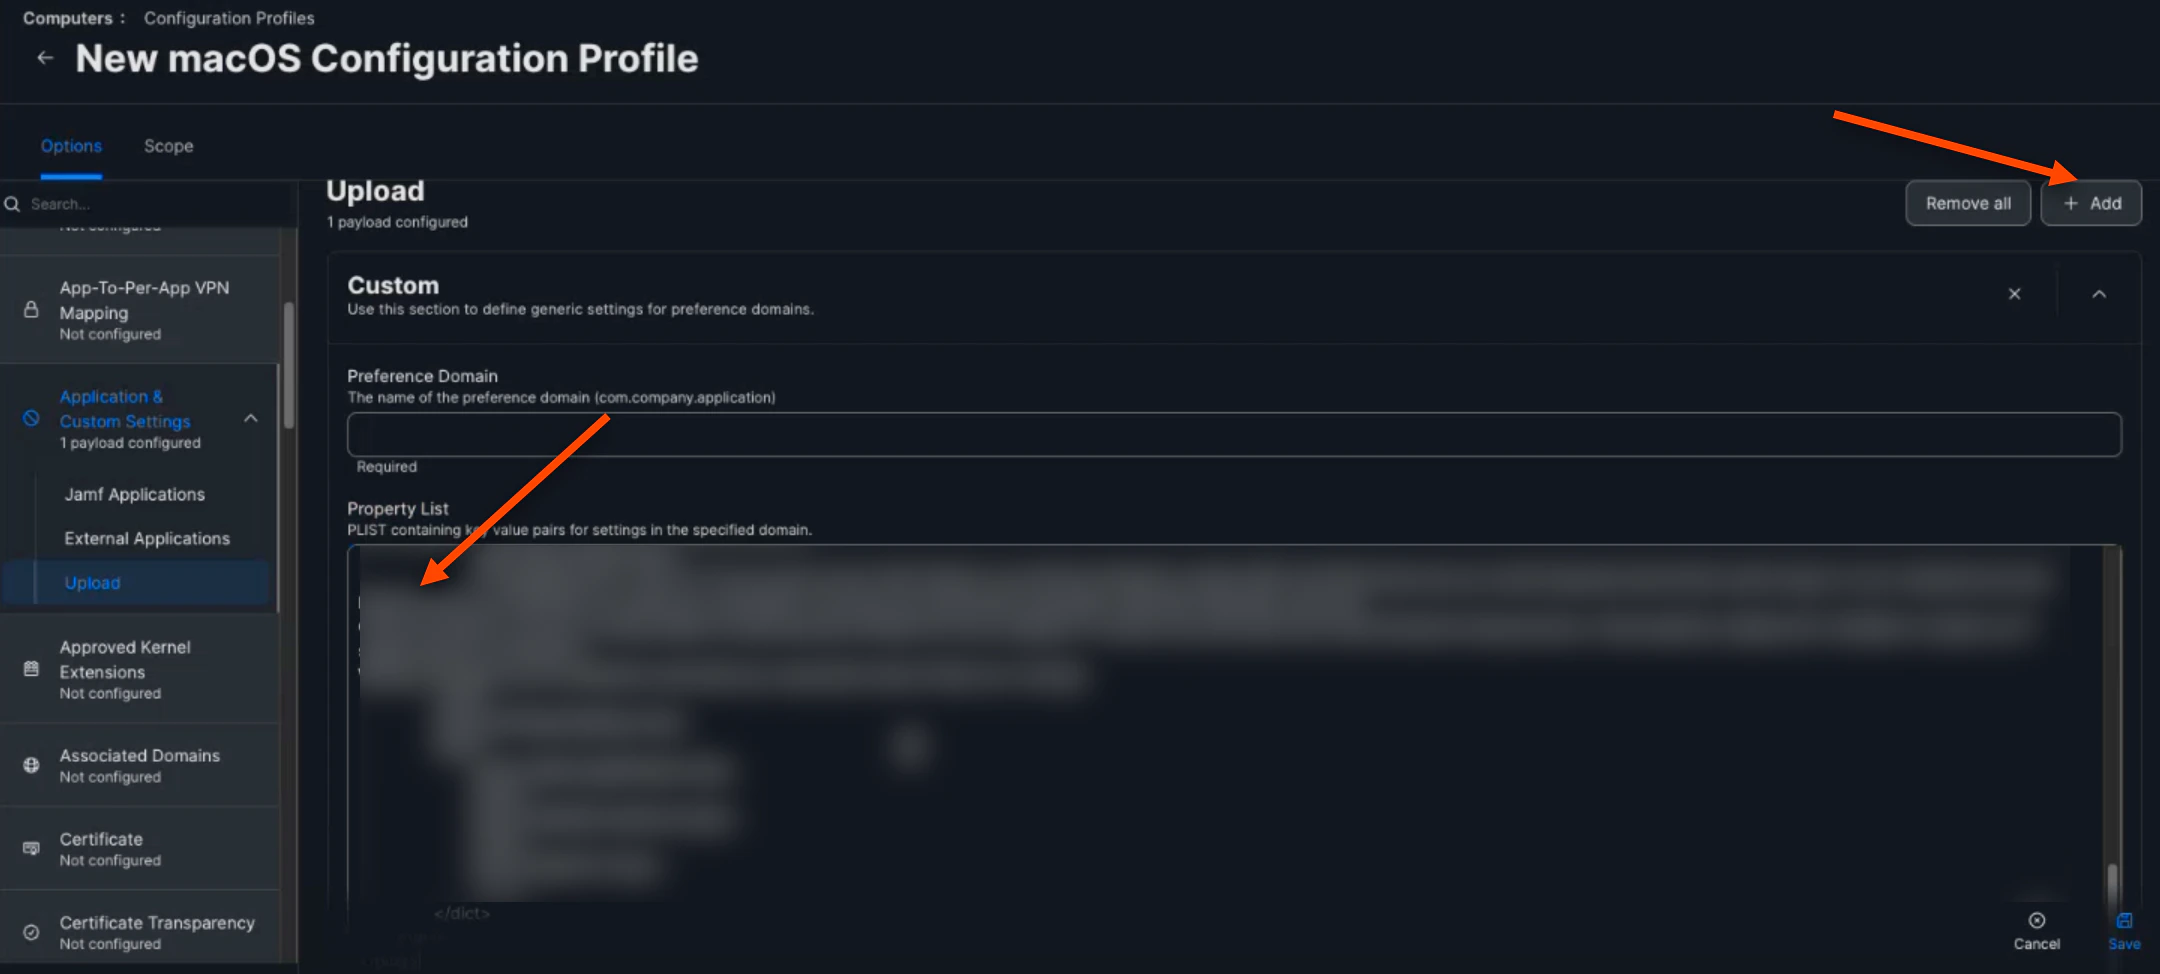
-
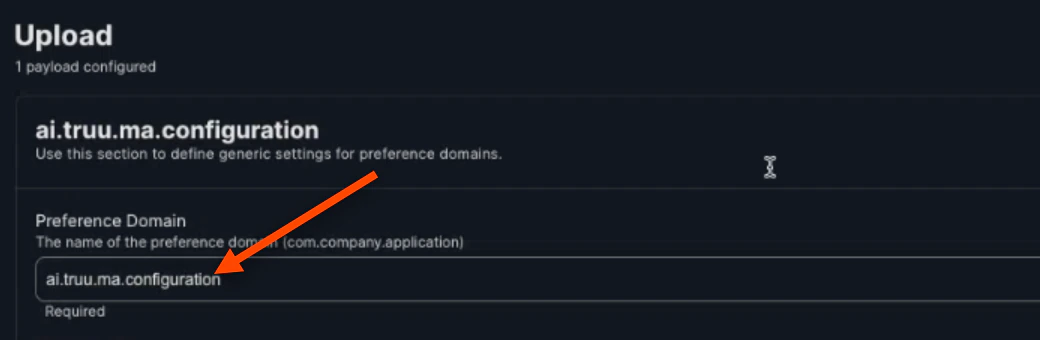
Then, the “Preference Domain” should be set to ai.truu.ma.configuration
-
Click Save

-
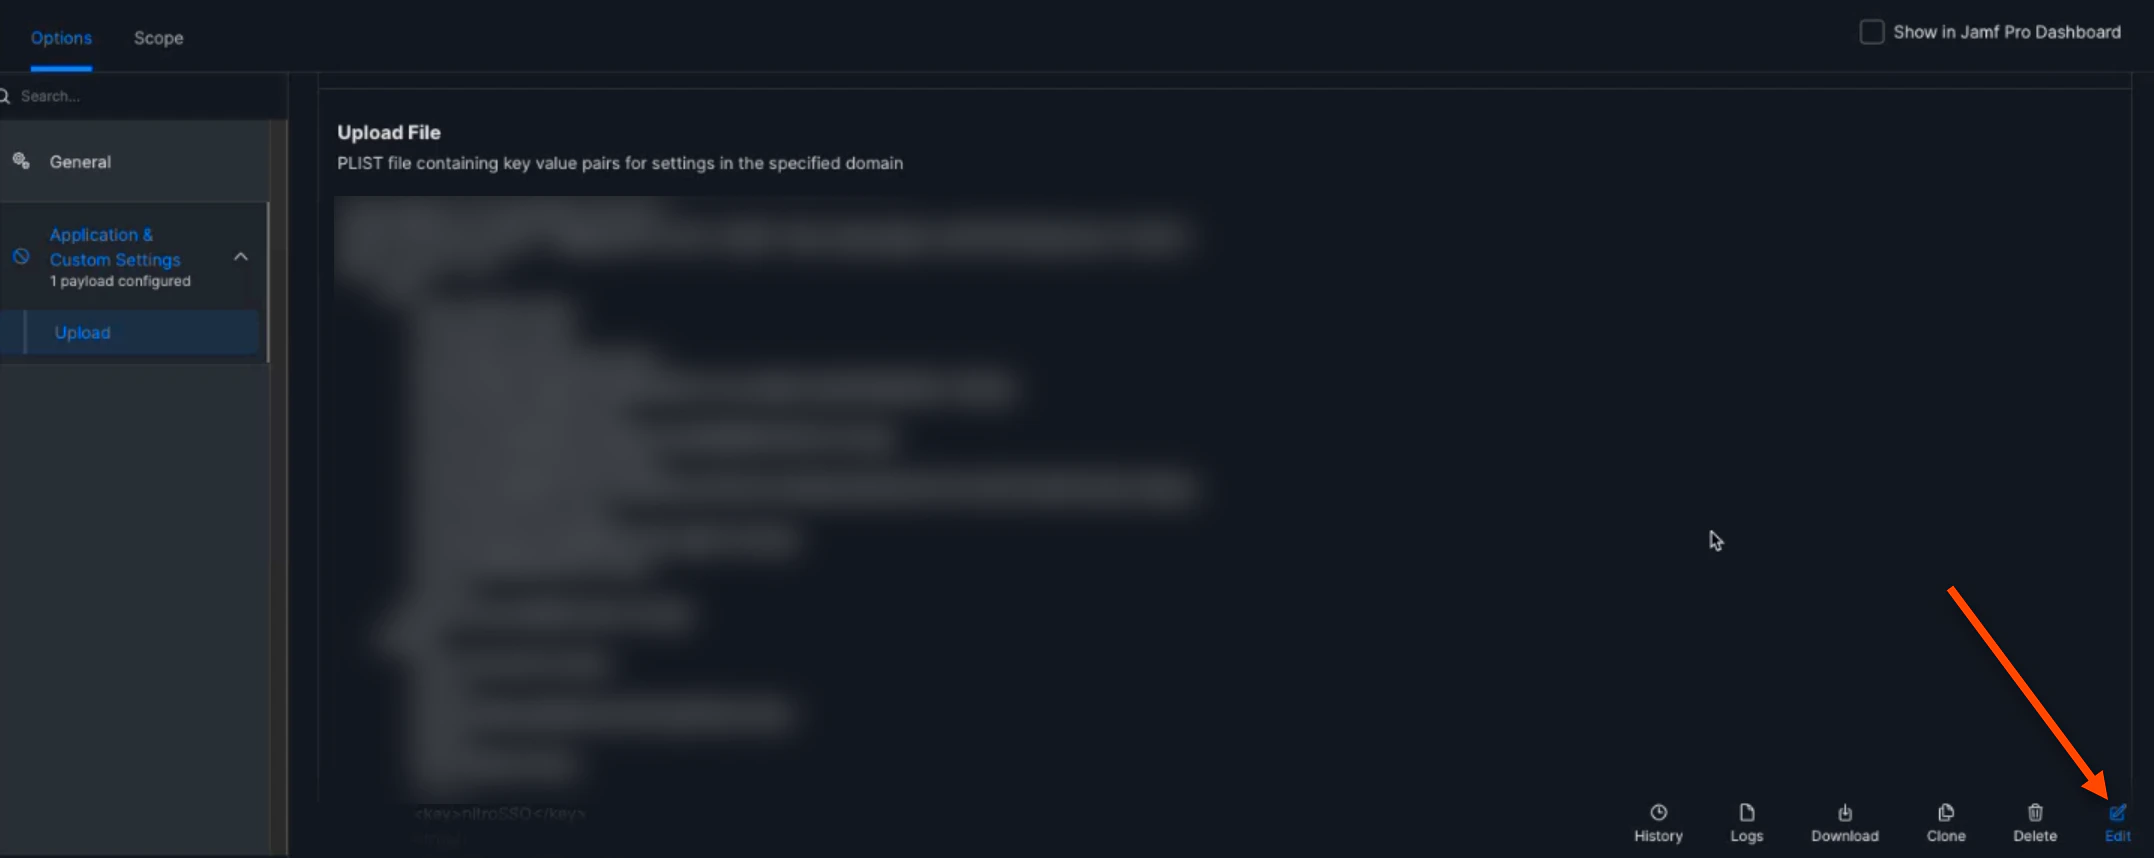
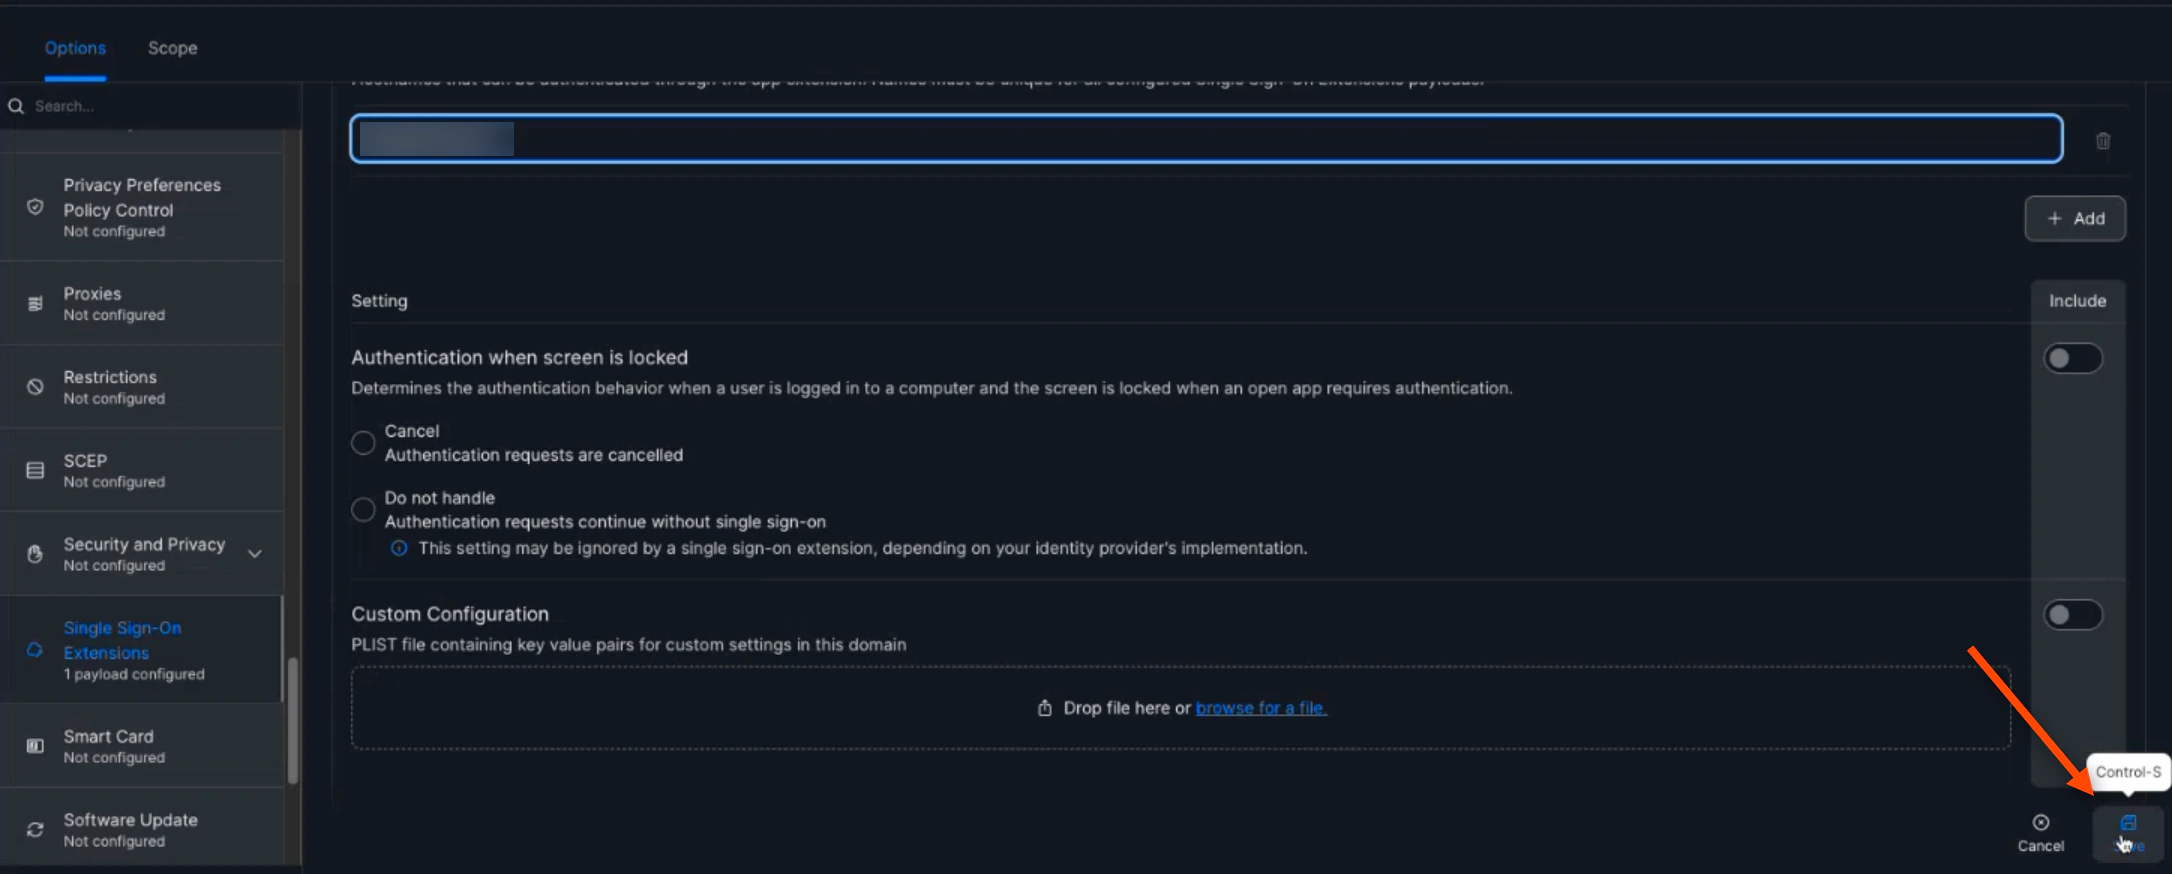
Next, click Edit
-
Then, scroll down and select Single Sign-On Extensions. Click (+) Add. Select SSO for the Payload Type. Then, enter com.truu.LoginHost.SSO for the “Extension Identifier”. Next, enter VGJPA2G633 for the “Team Identifier”. Then, ensure that the “Sign-On Type” is Credential

-
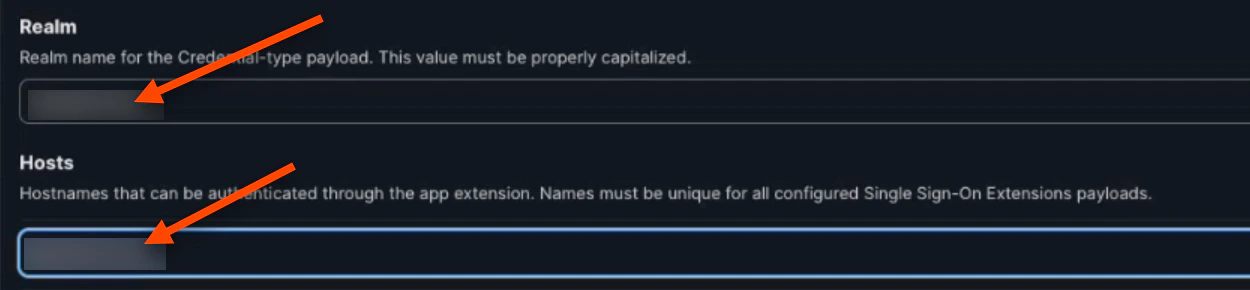
Enter your Kerberos Realm for both the “Realm” and “Hosts” values. They will be the same and you can find this name by contacting your Active Directory Admin
-
Click Save
-
Next, navigate back to the “Settings” tab and search Packages. Click on the Package

-
Click the (+) New button to create a new package

-
Name your new package
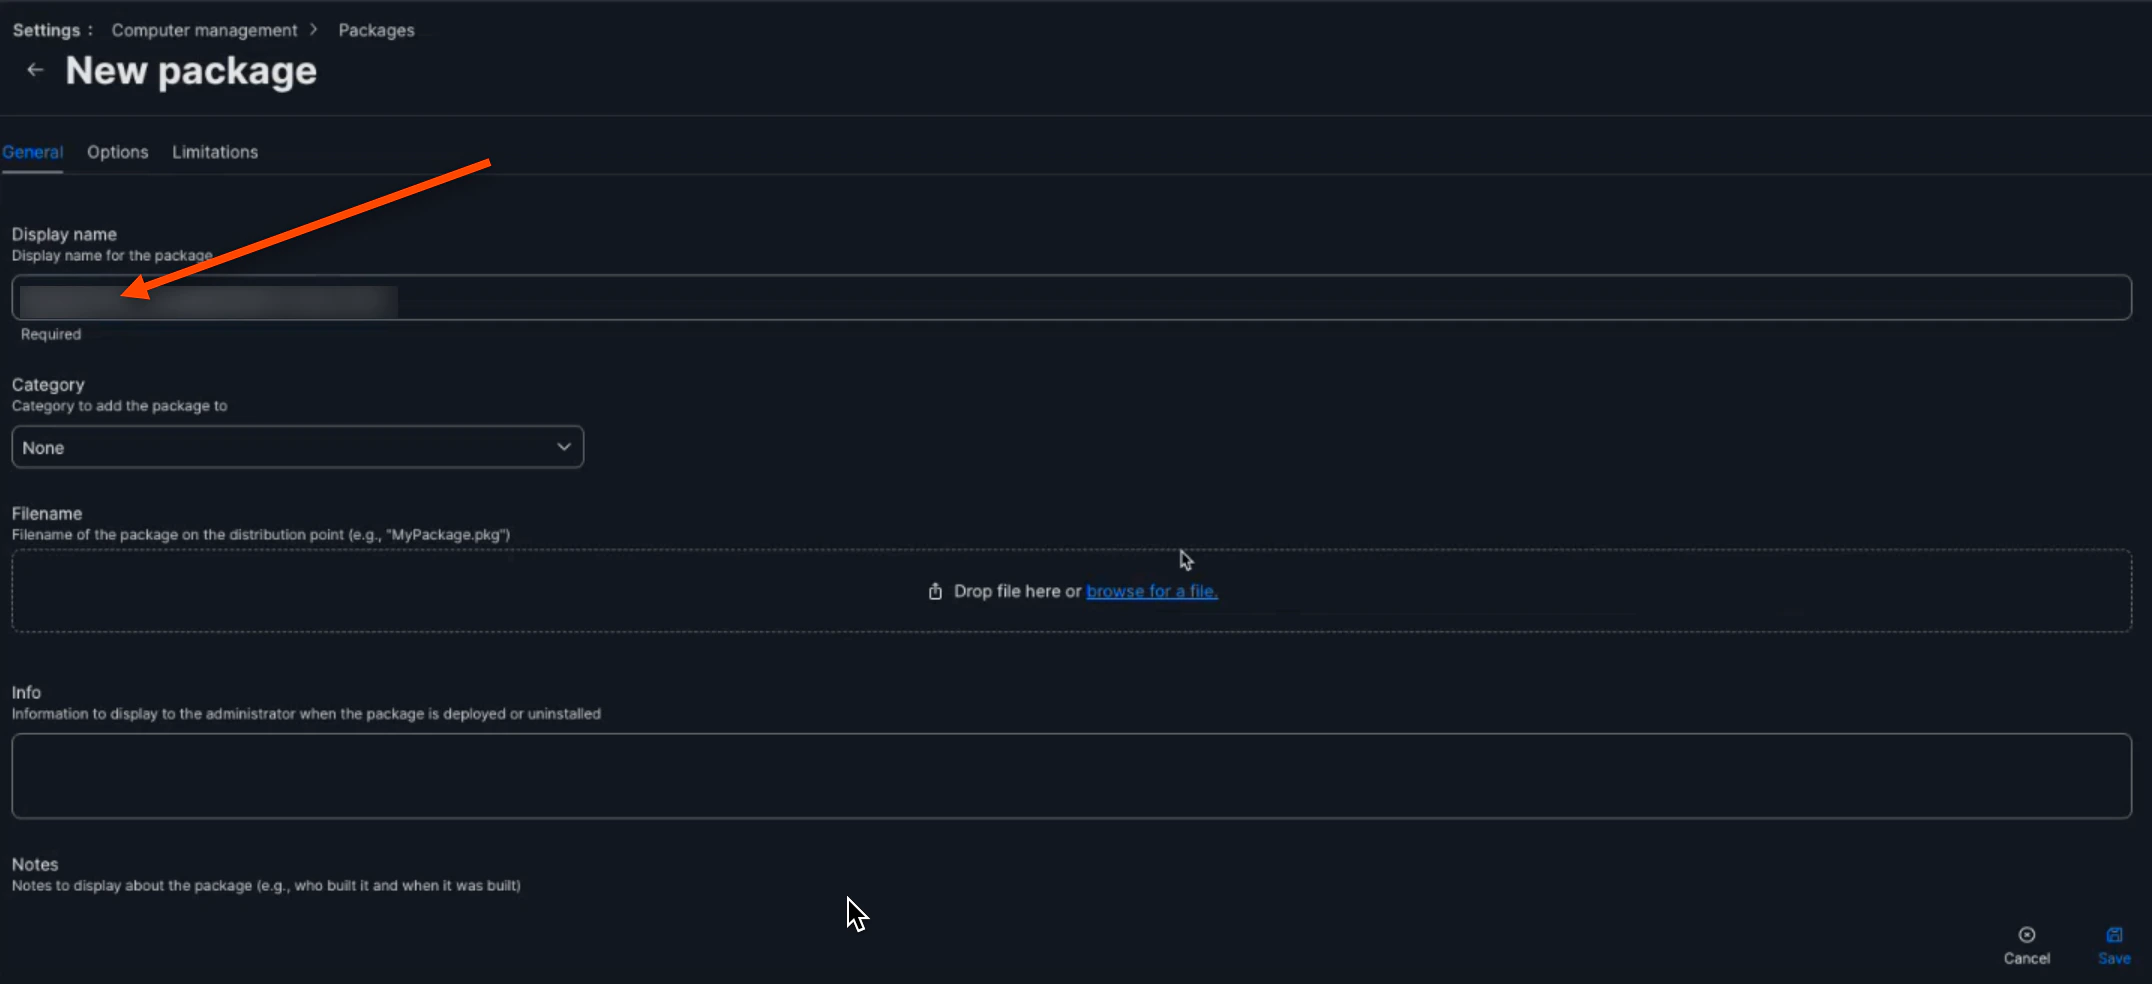
-
Then, click the browse for a file button

-
Select the downloaded TruU Mac Authenticator package
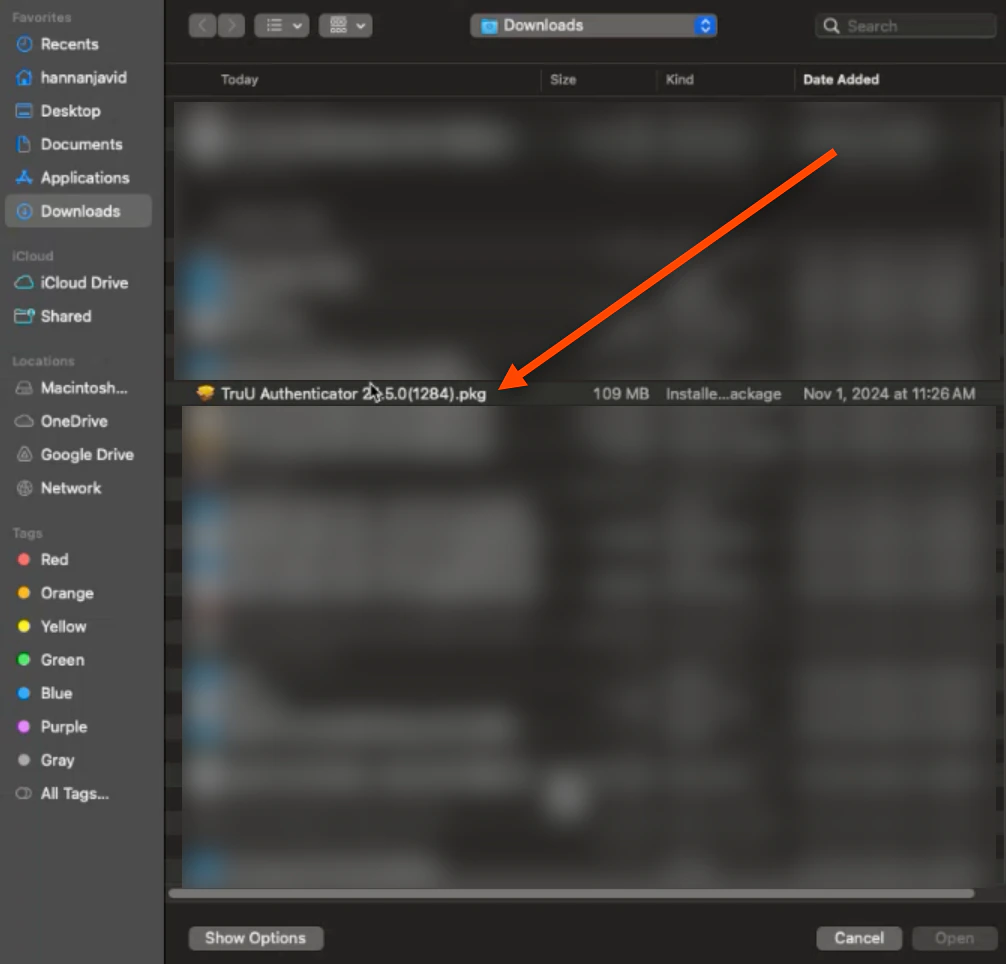
-
Click Save

Deploying TruU/JAMF Package
-
Navigate to the “Policies” tab and click (+) New
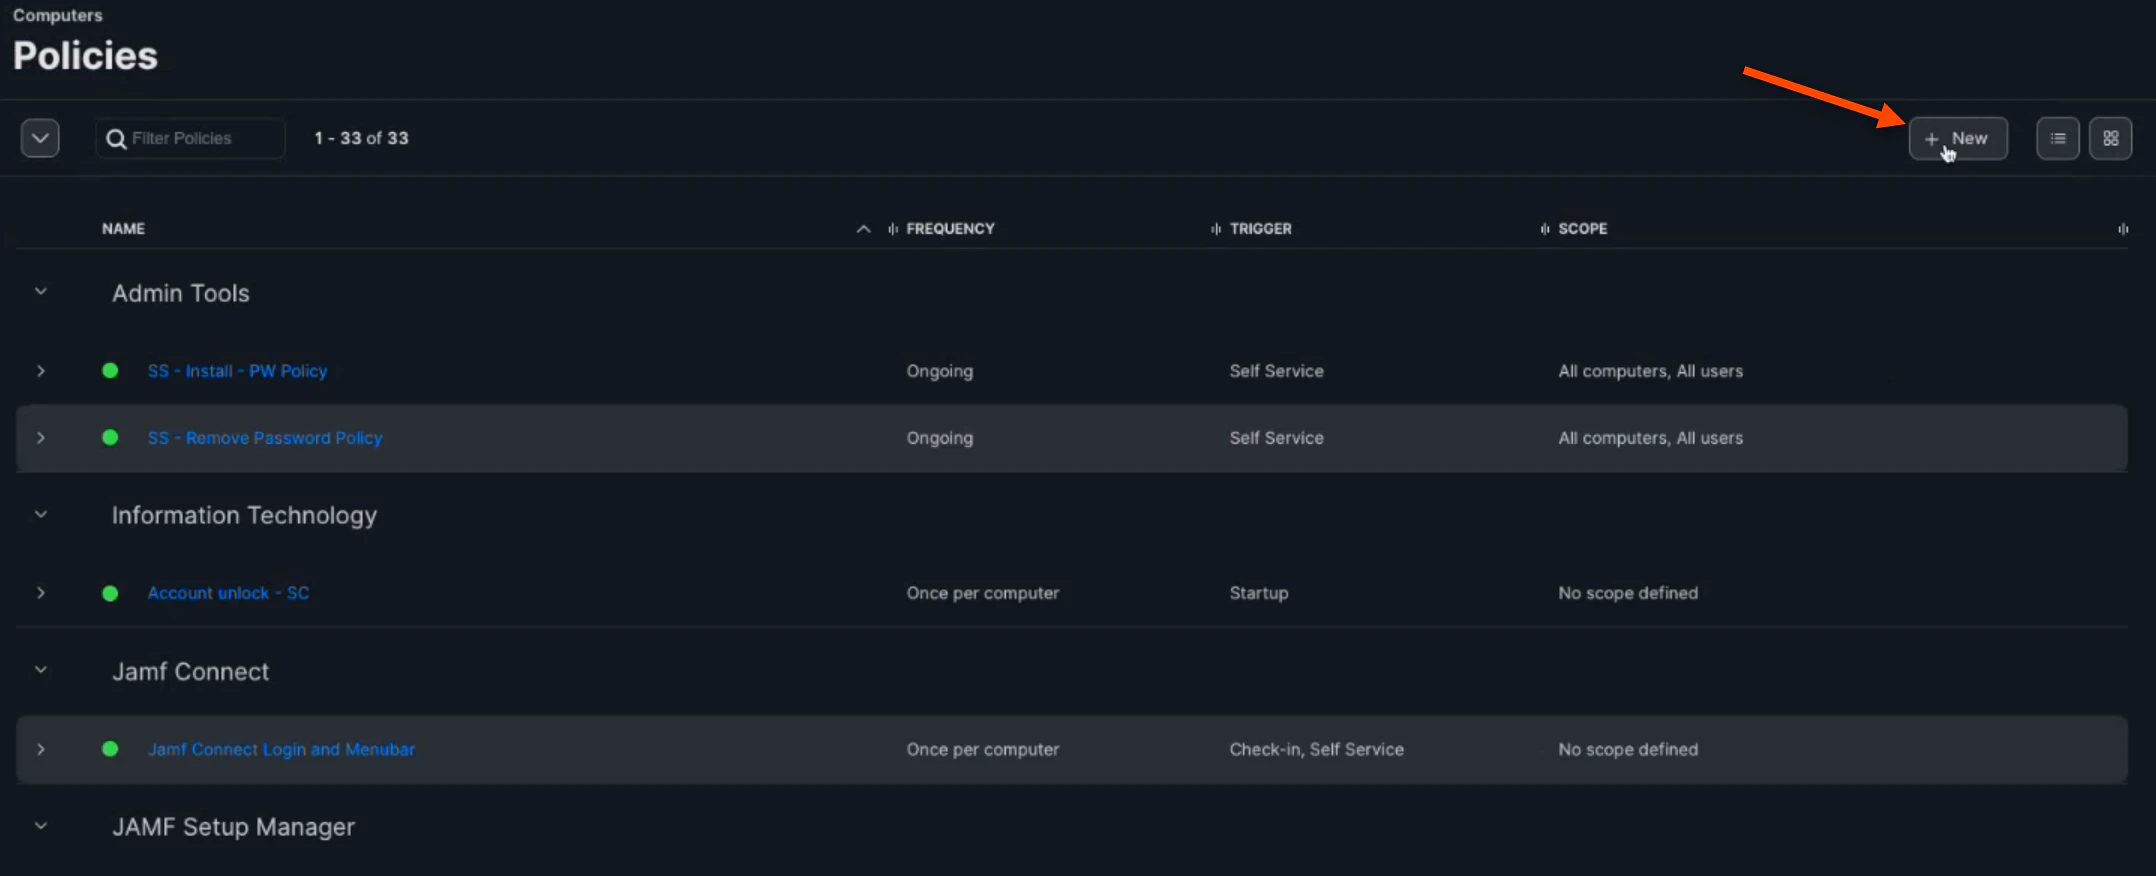
-
In “General”, name your policy
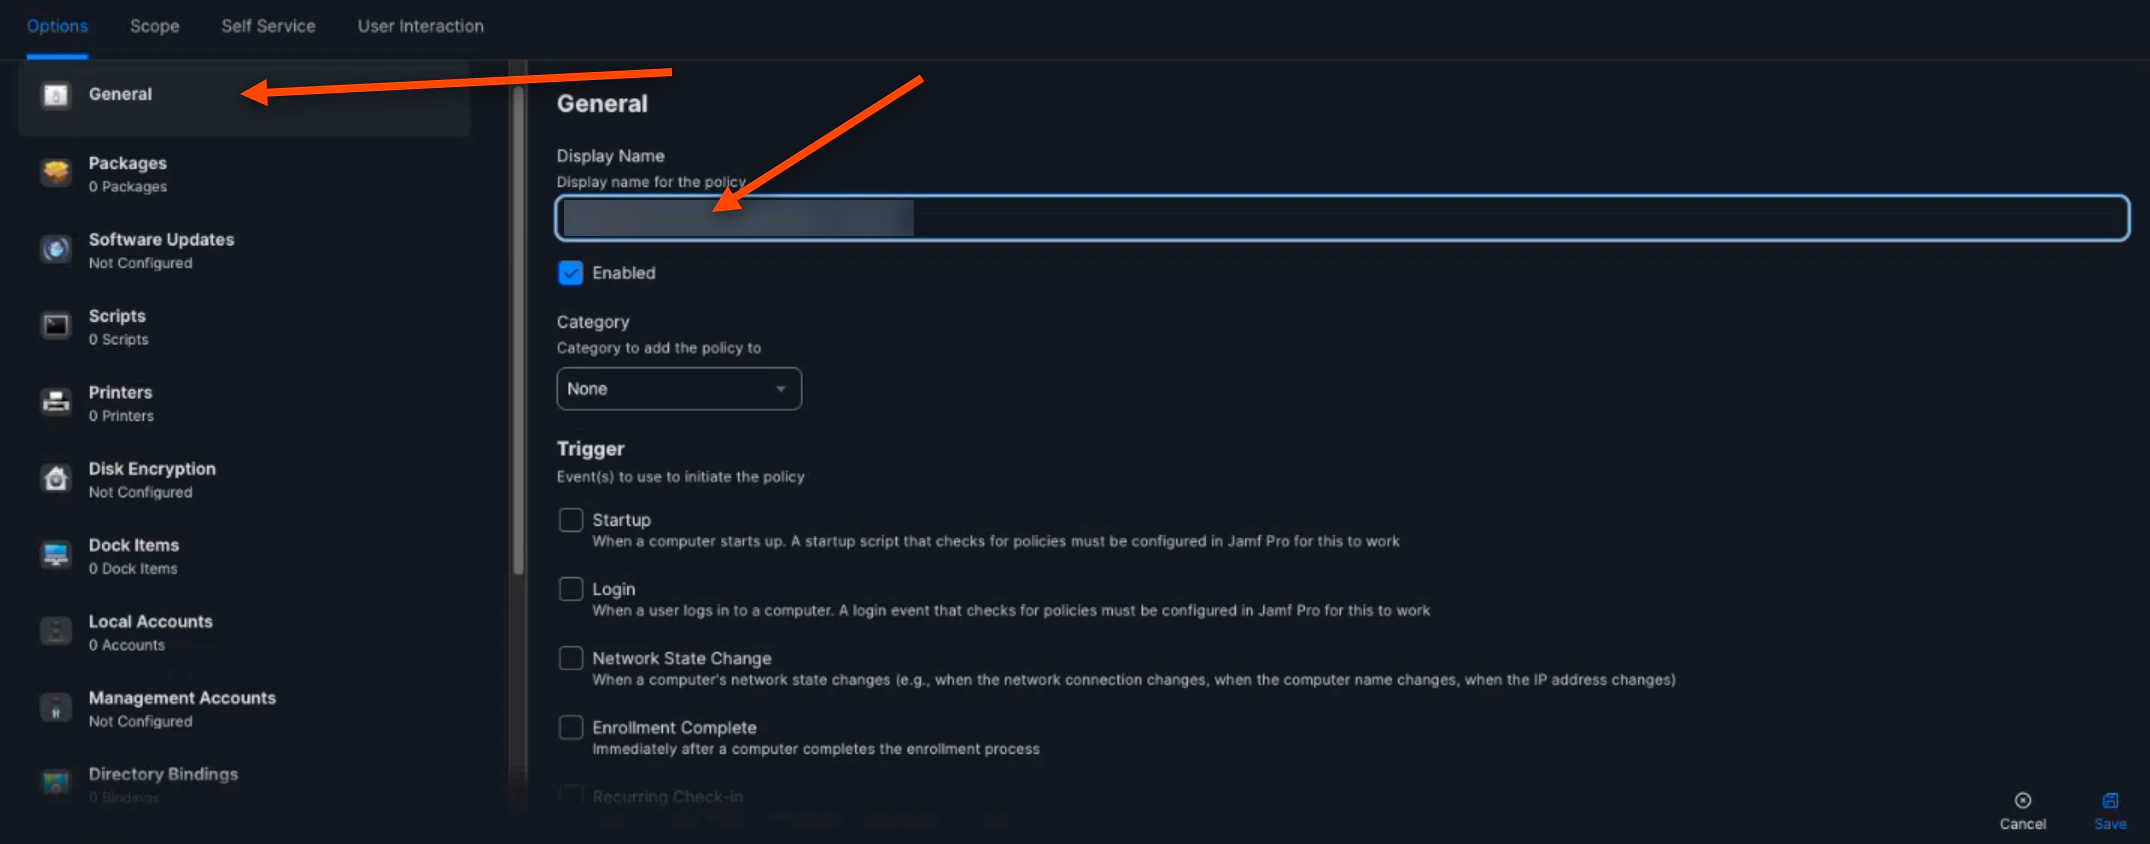
-
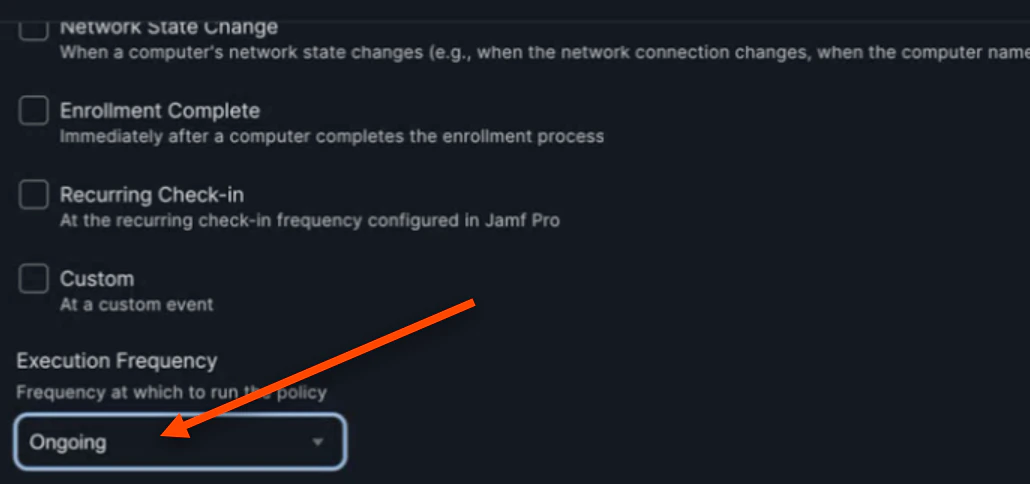
Set the “Execution Frequency” to Ongoing
-
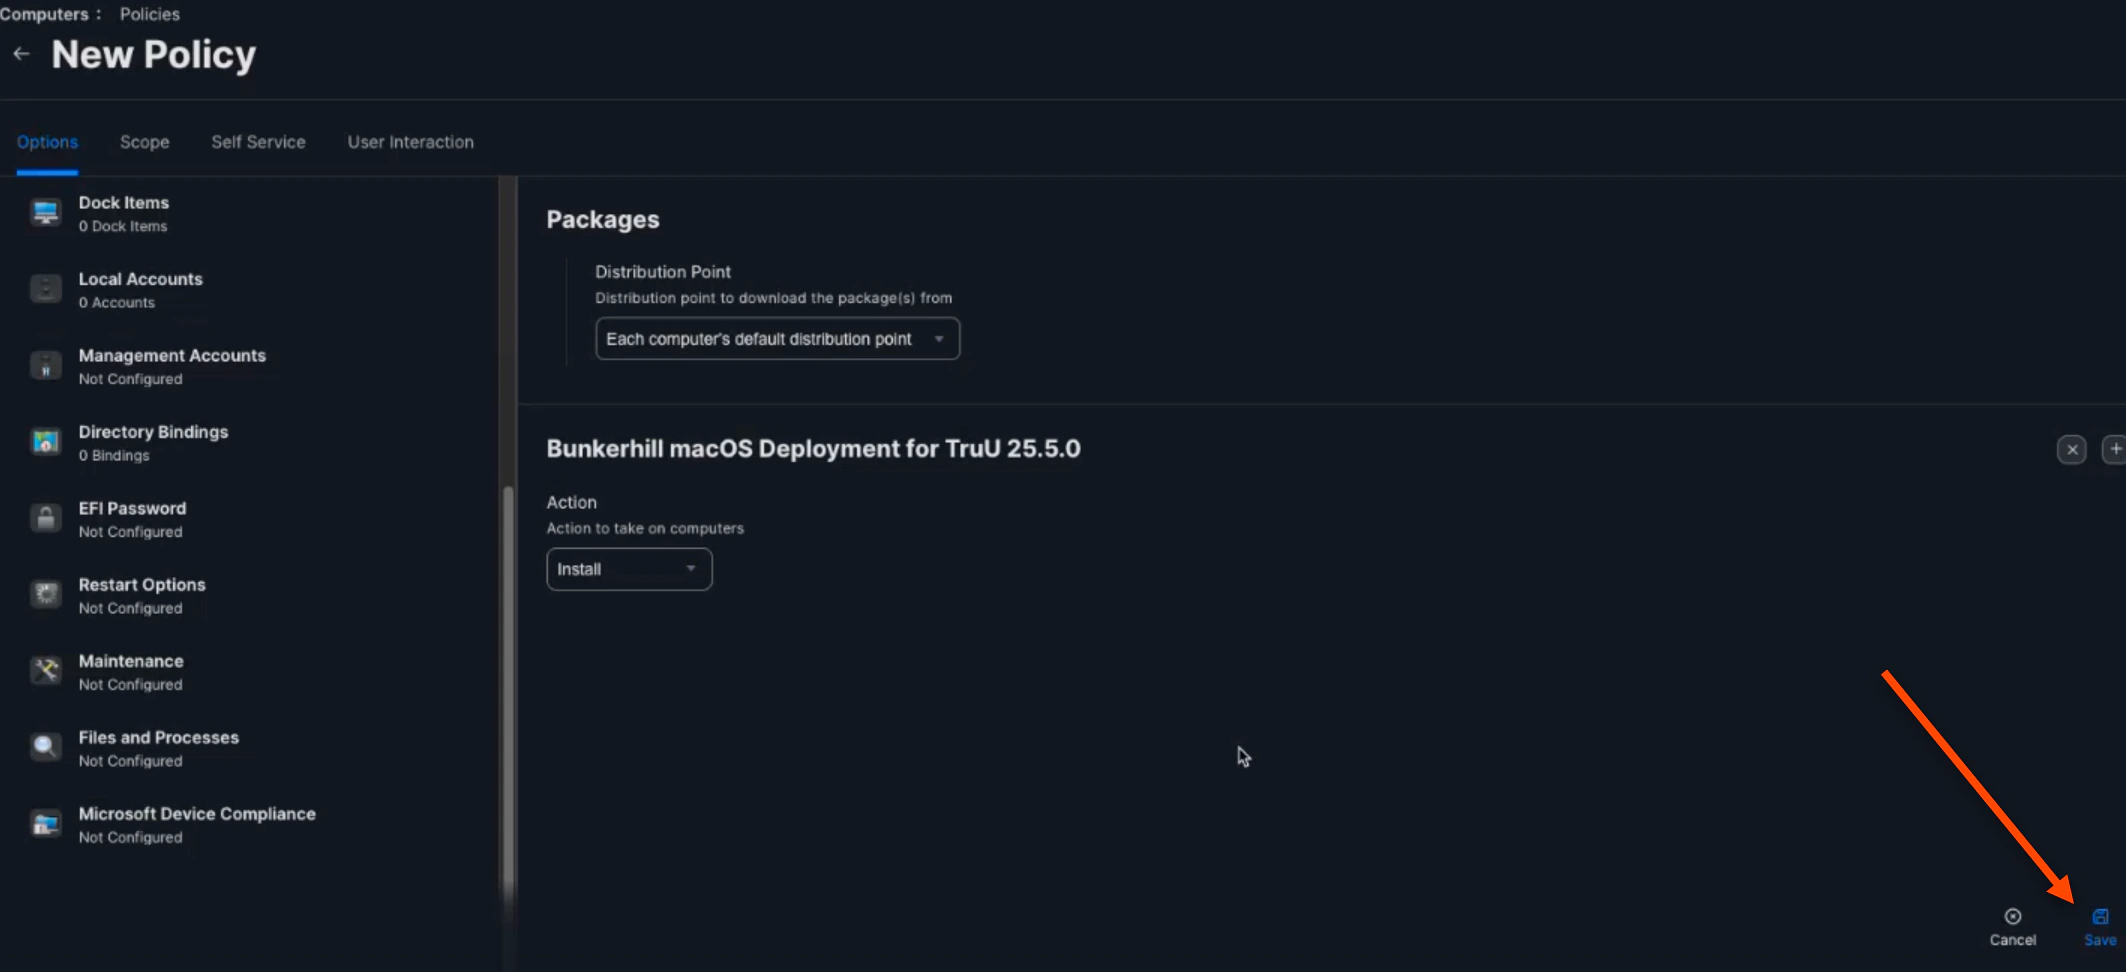
In “Packages”, click Configure
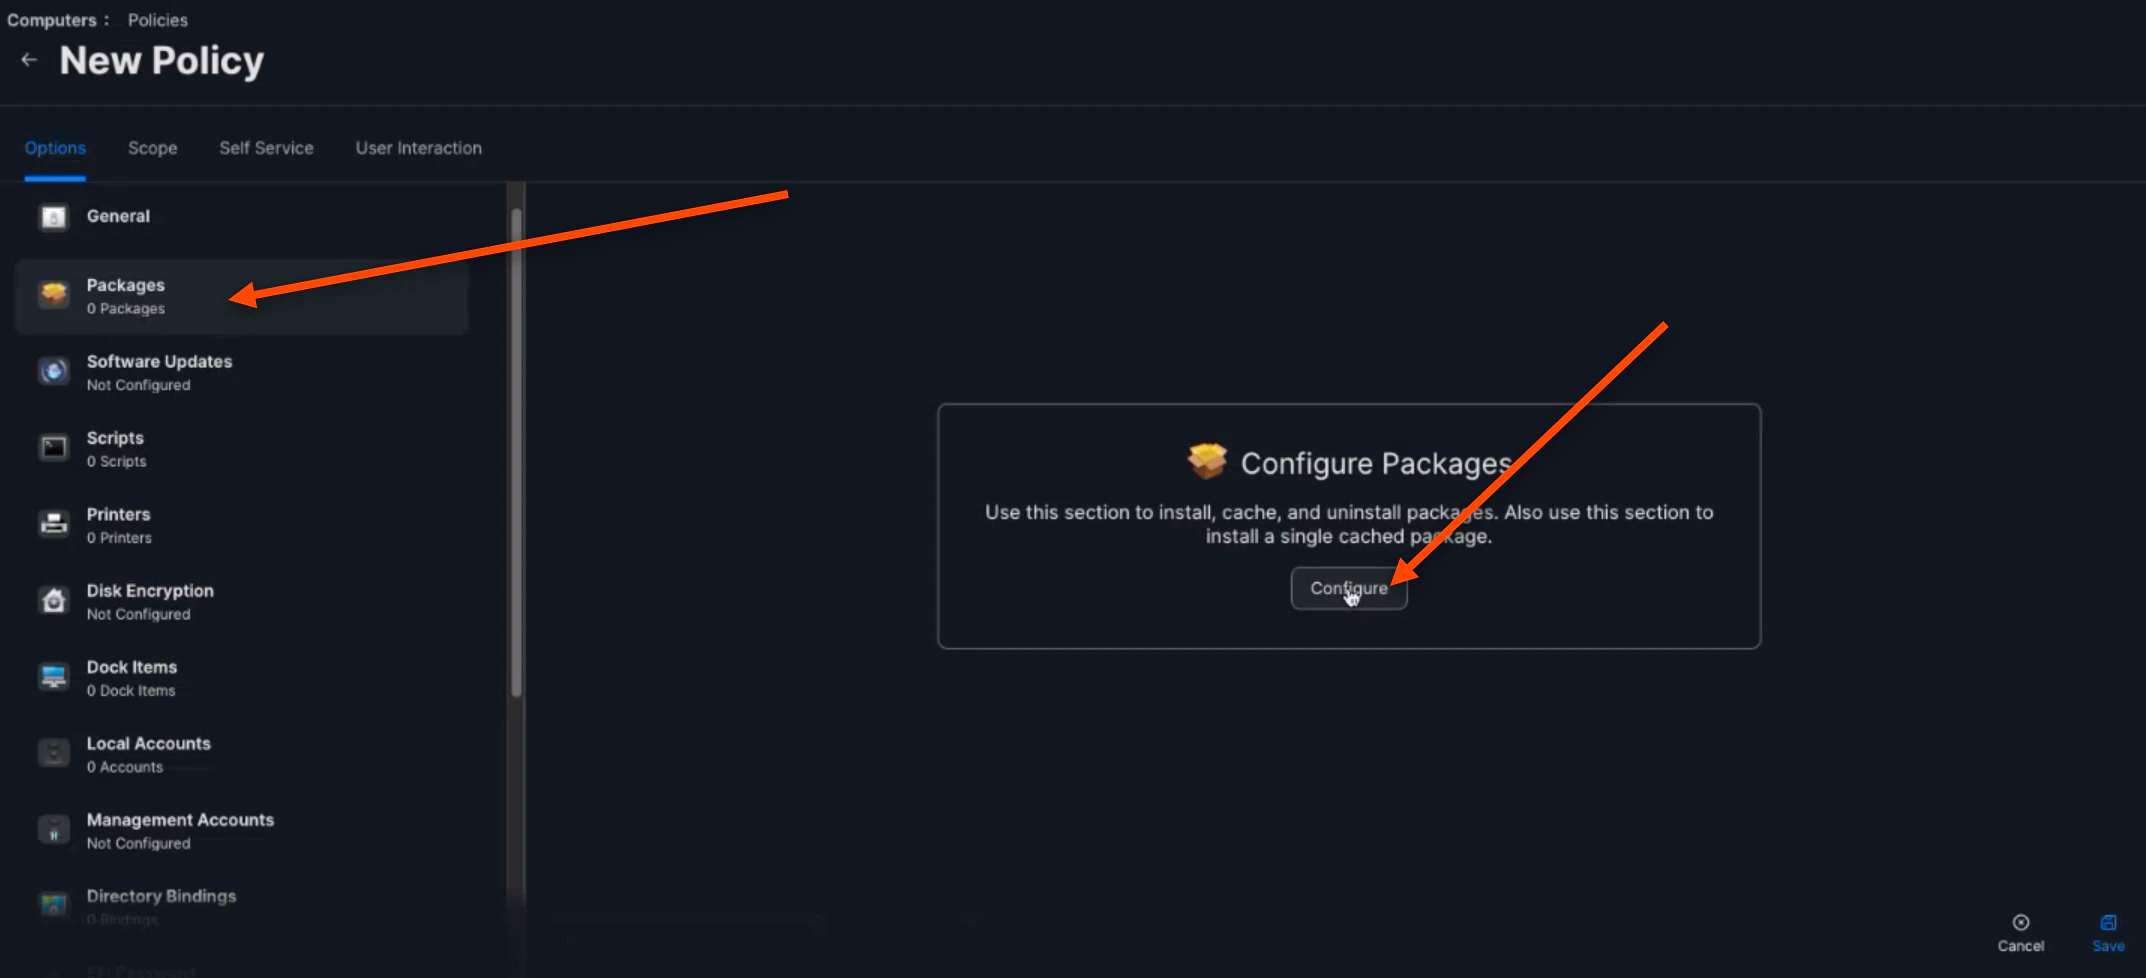
-
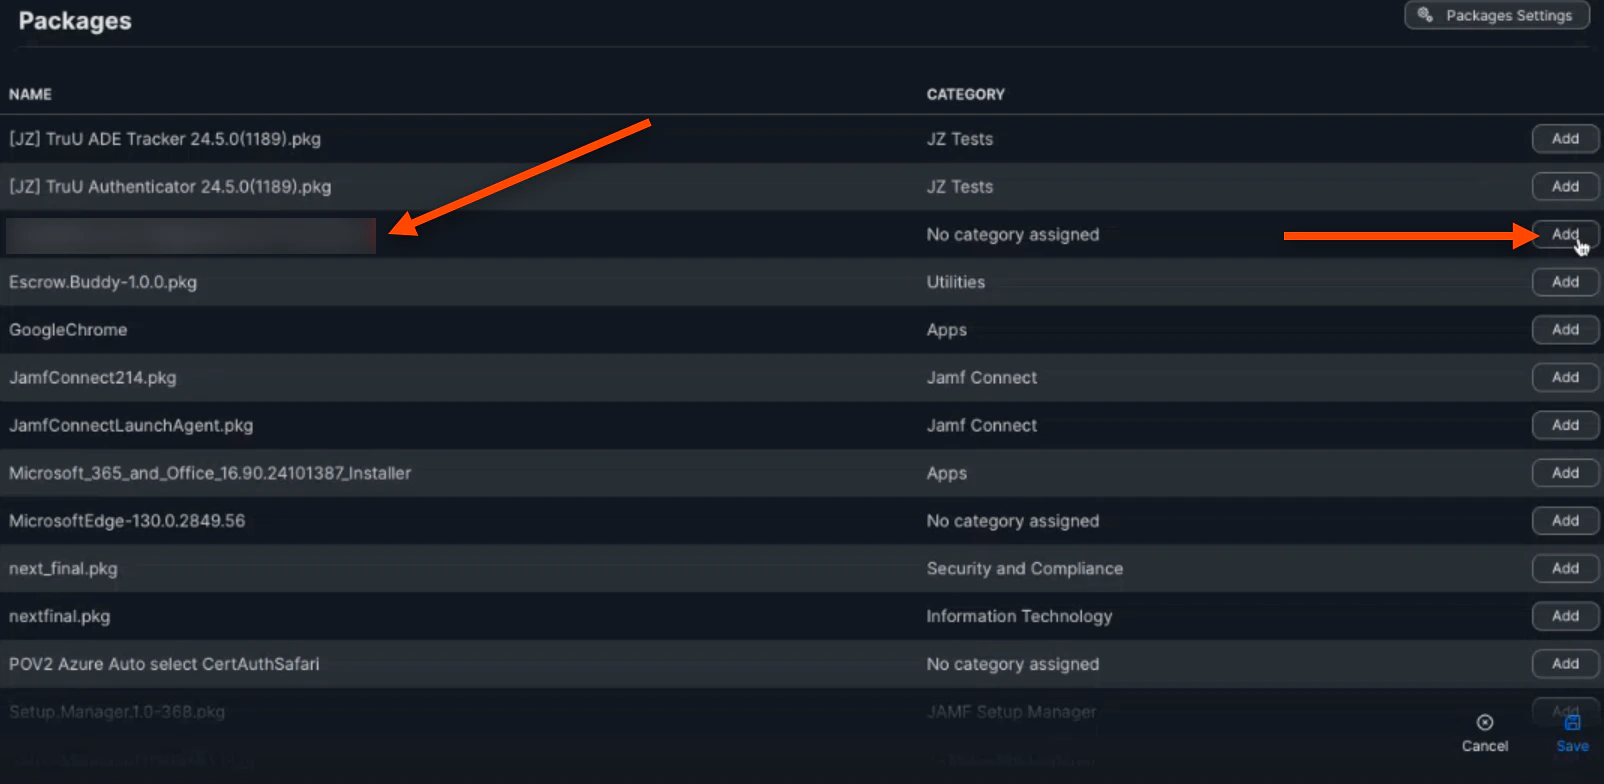
Click Add when you find your configured package
-
Click Save
-
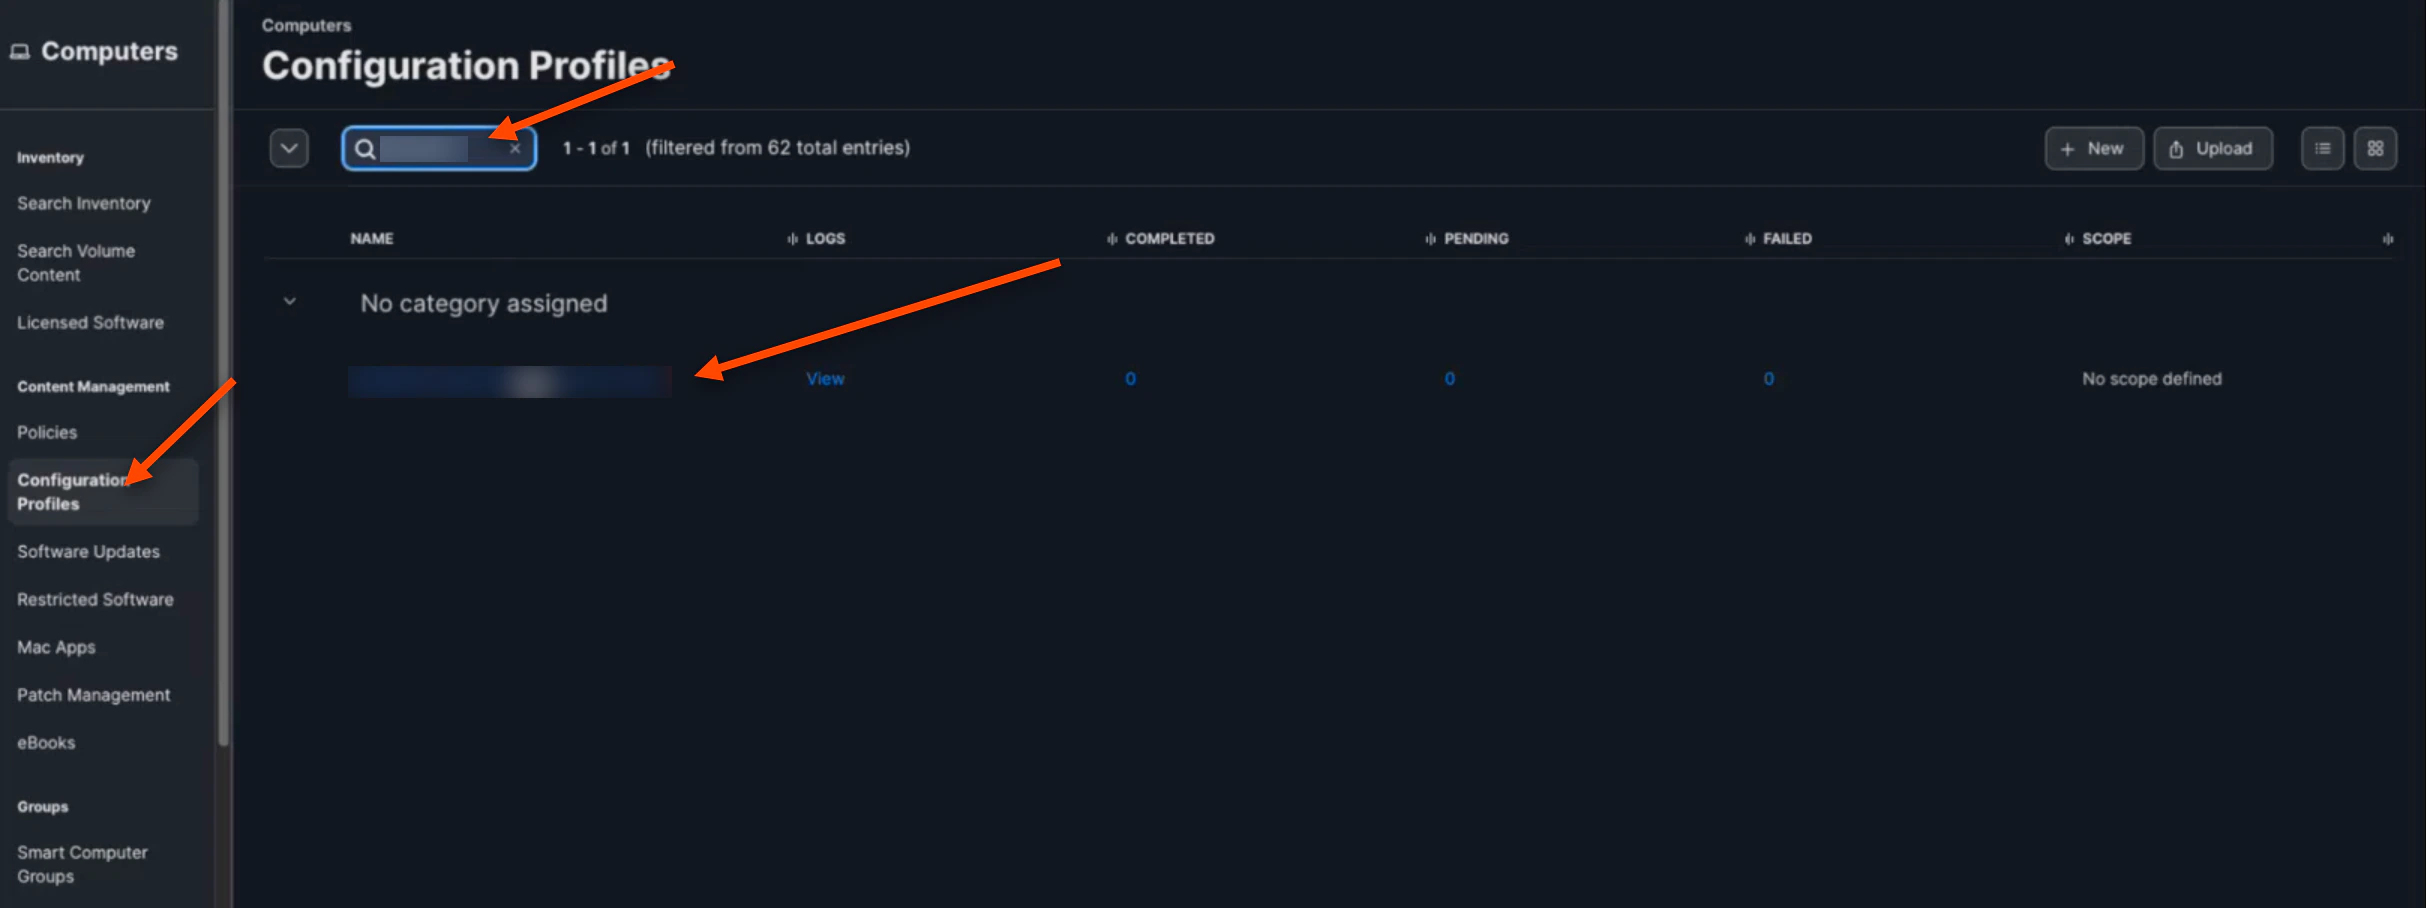
Navigate back to the “Configuration Profiles” tab. Search for your named profile and click on it
-
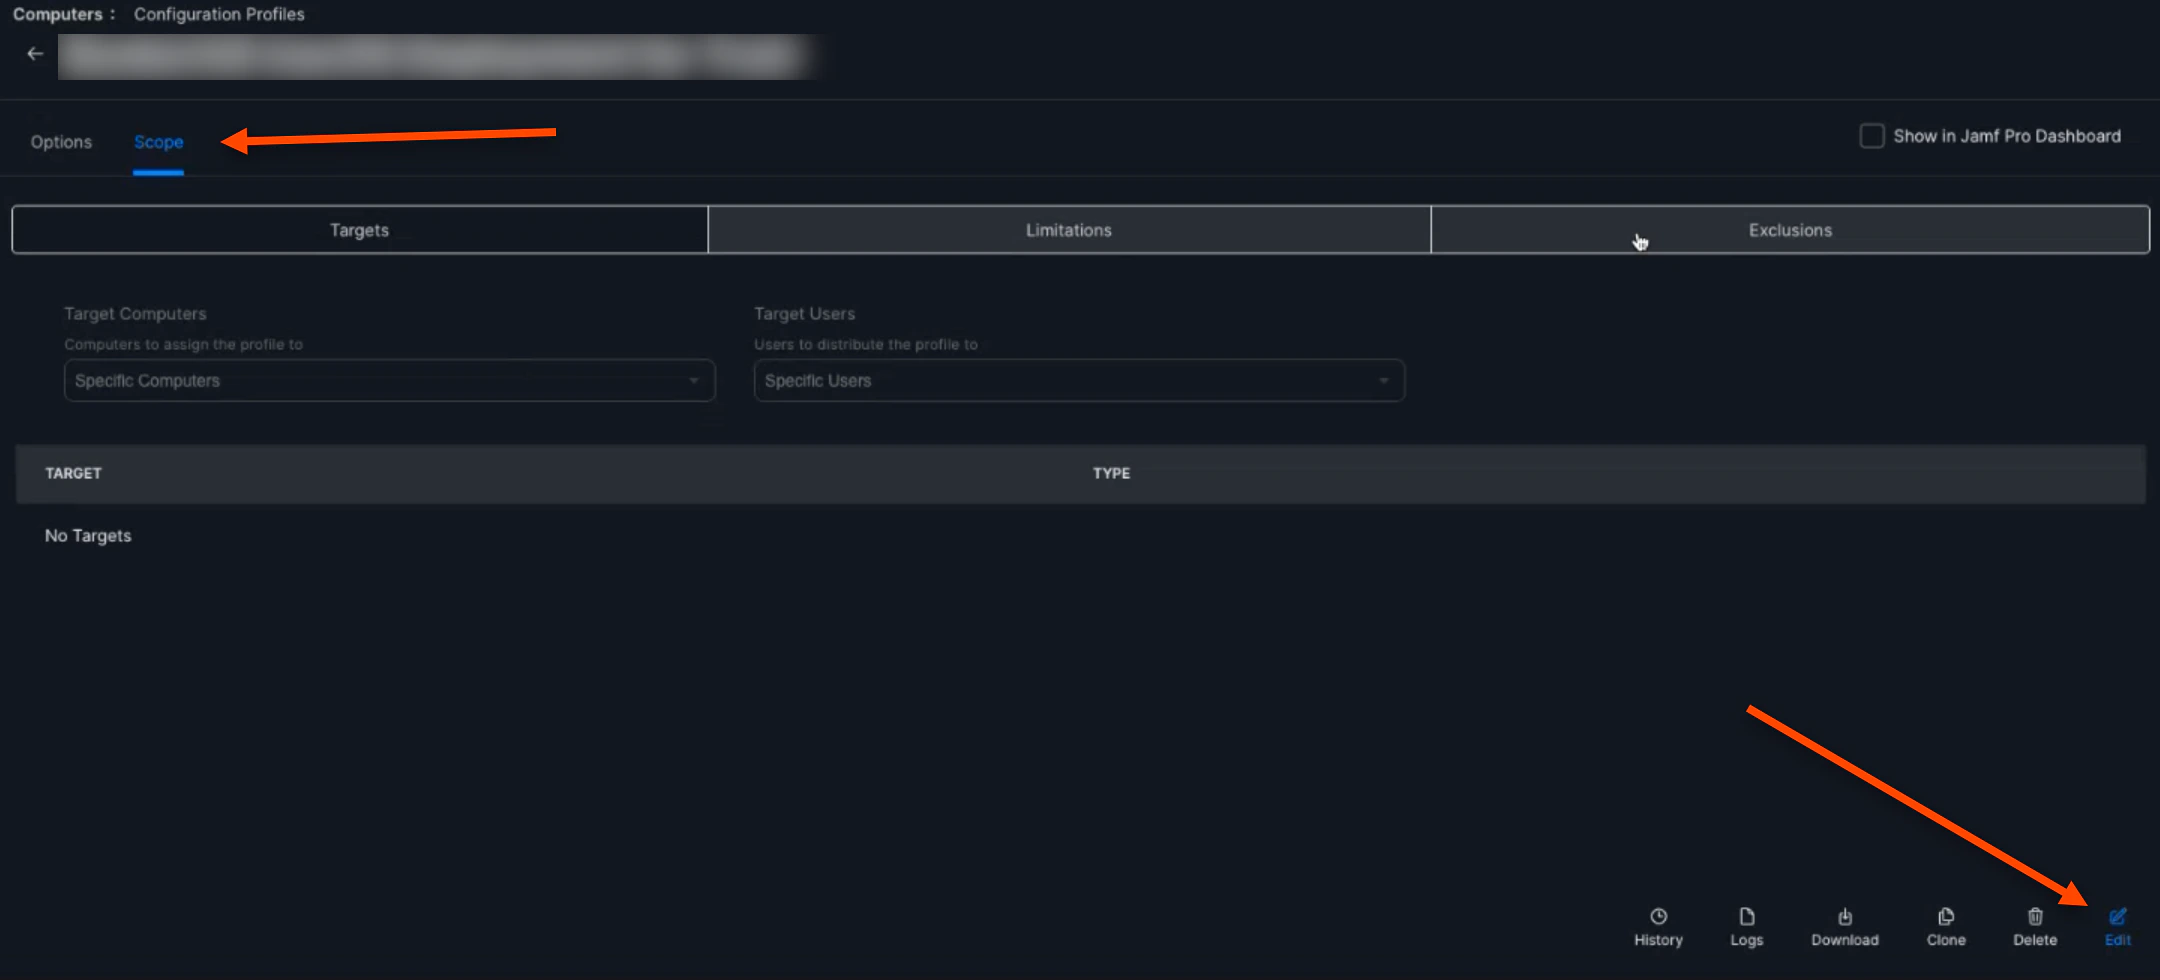
Click the Scope tab, then click Edit
-
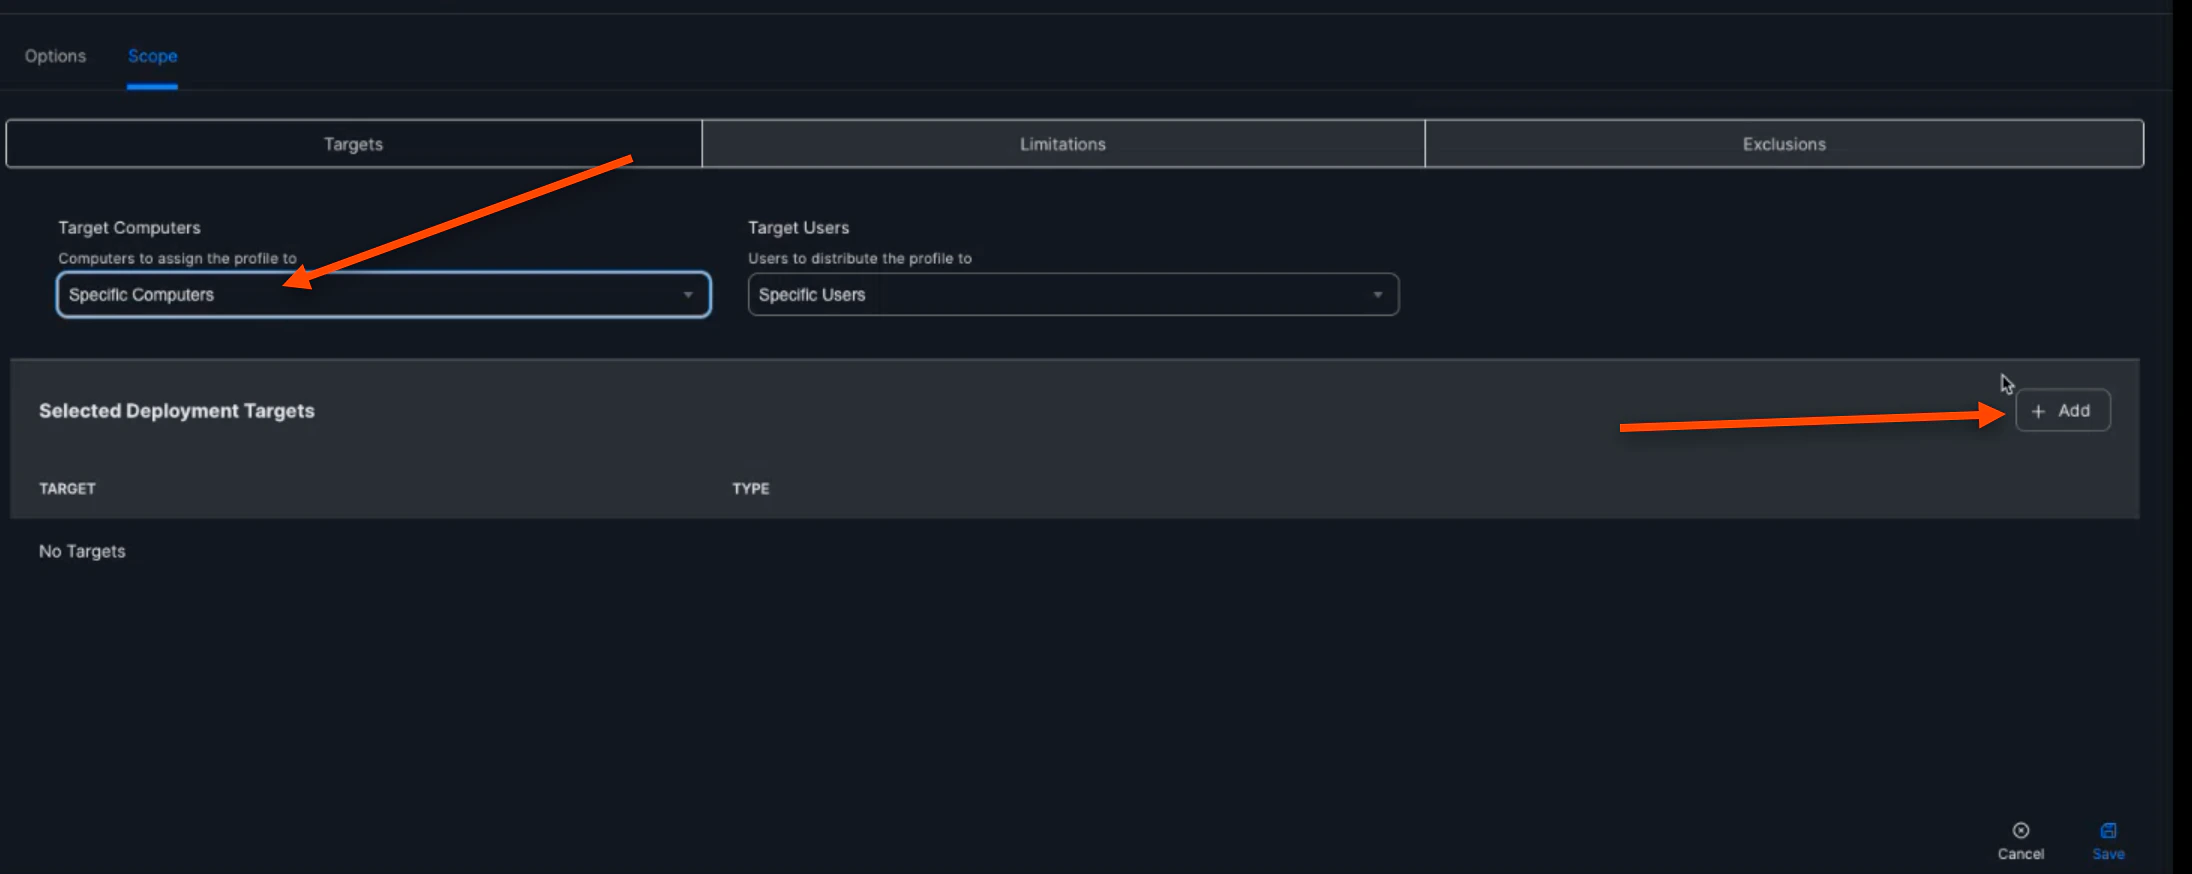
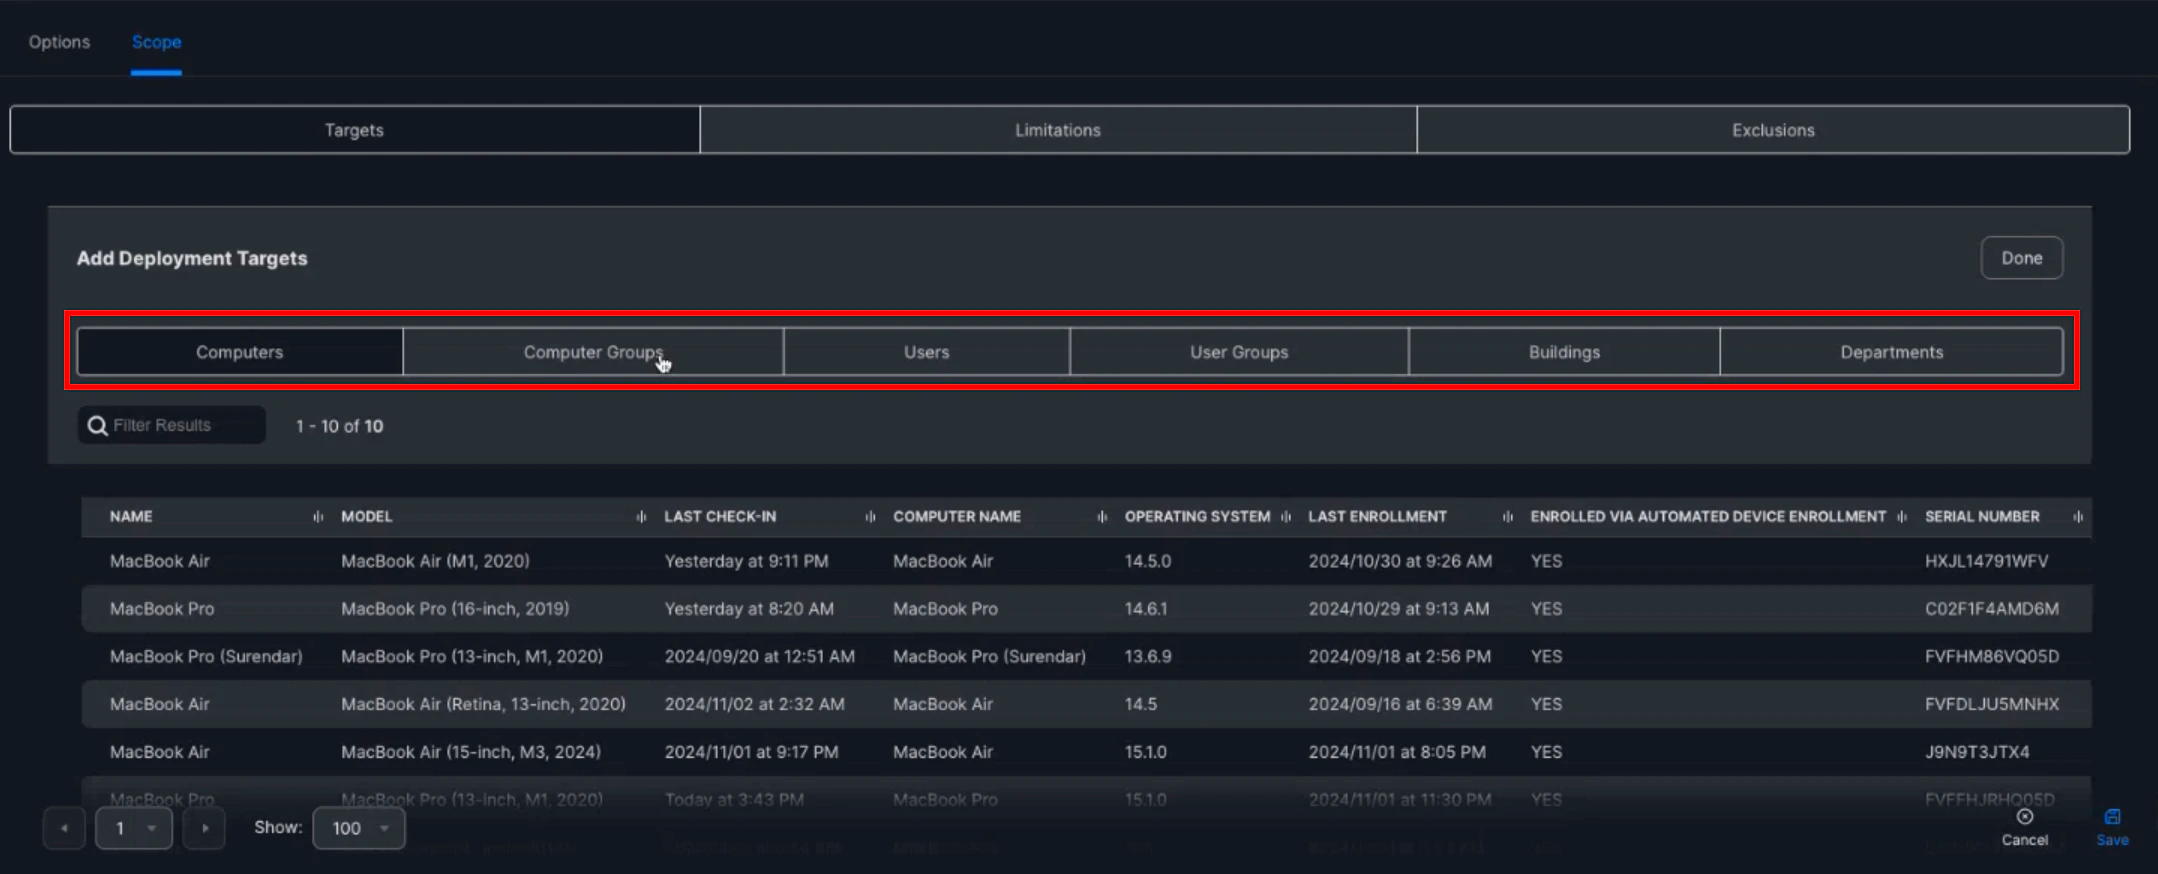
Select Specific Computers for the “Target Computers”, then click (+) Add
-
You are then able to scope on specific computers, specific computer groups, users, etc. to apply this policy to
-
Now, navigate back to the “Policy” tab and search your created policy. Click on your policy
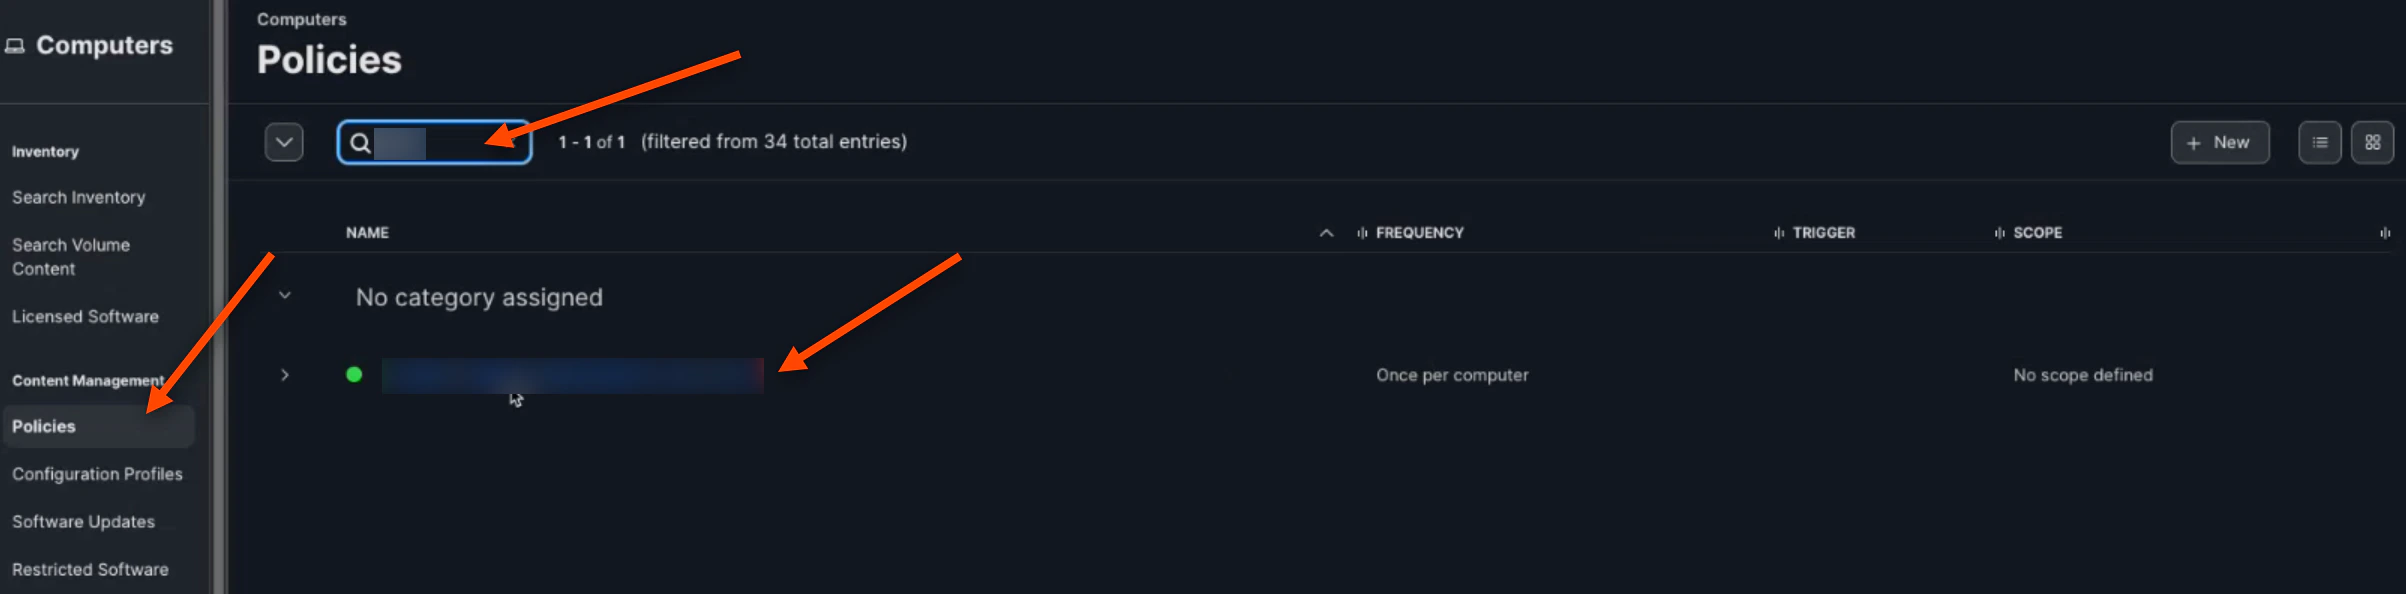
-
Click Edit
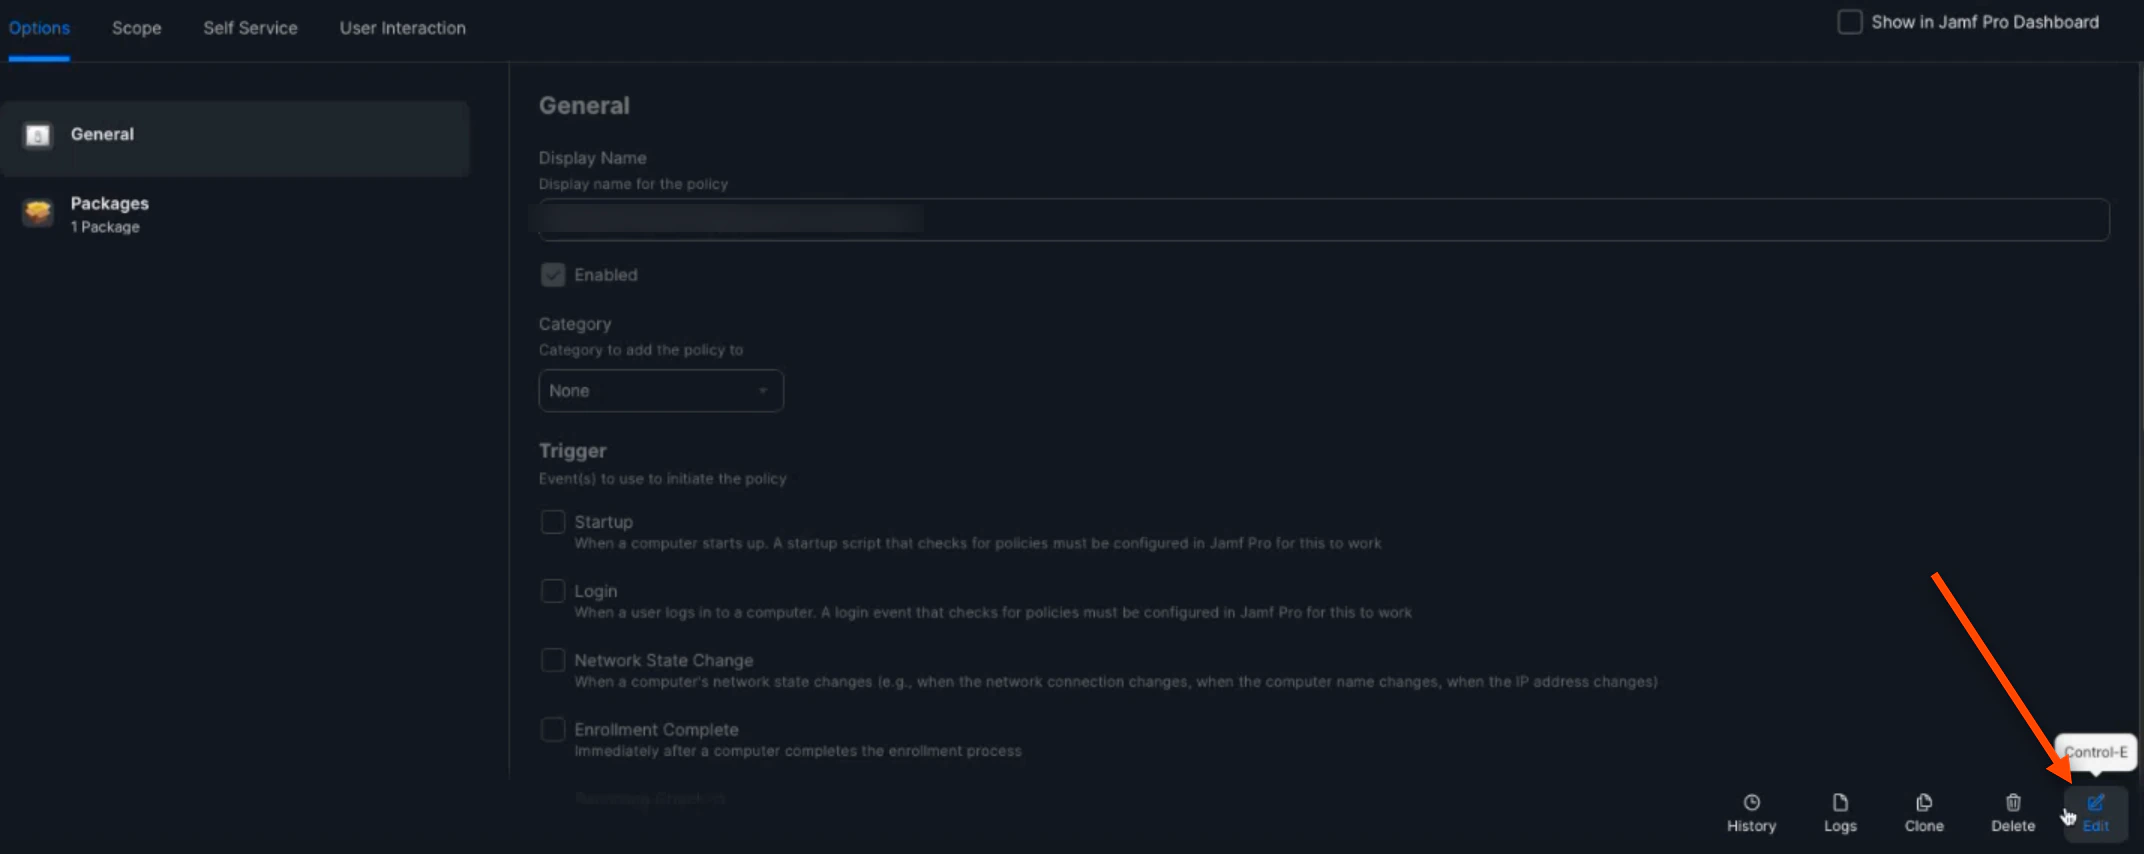
-
Click the Scope tab, select Specific Computers, then click (+) Add
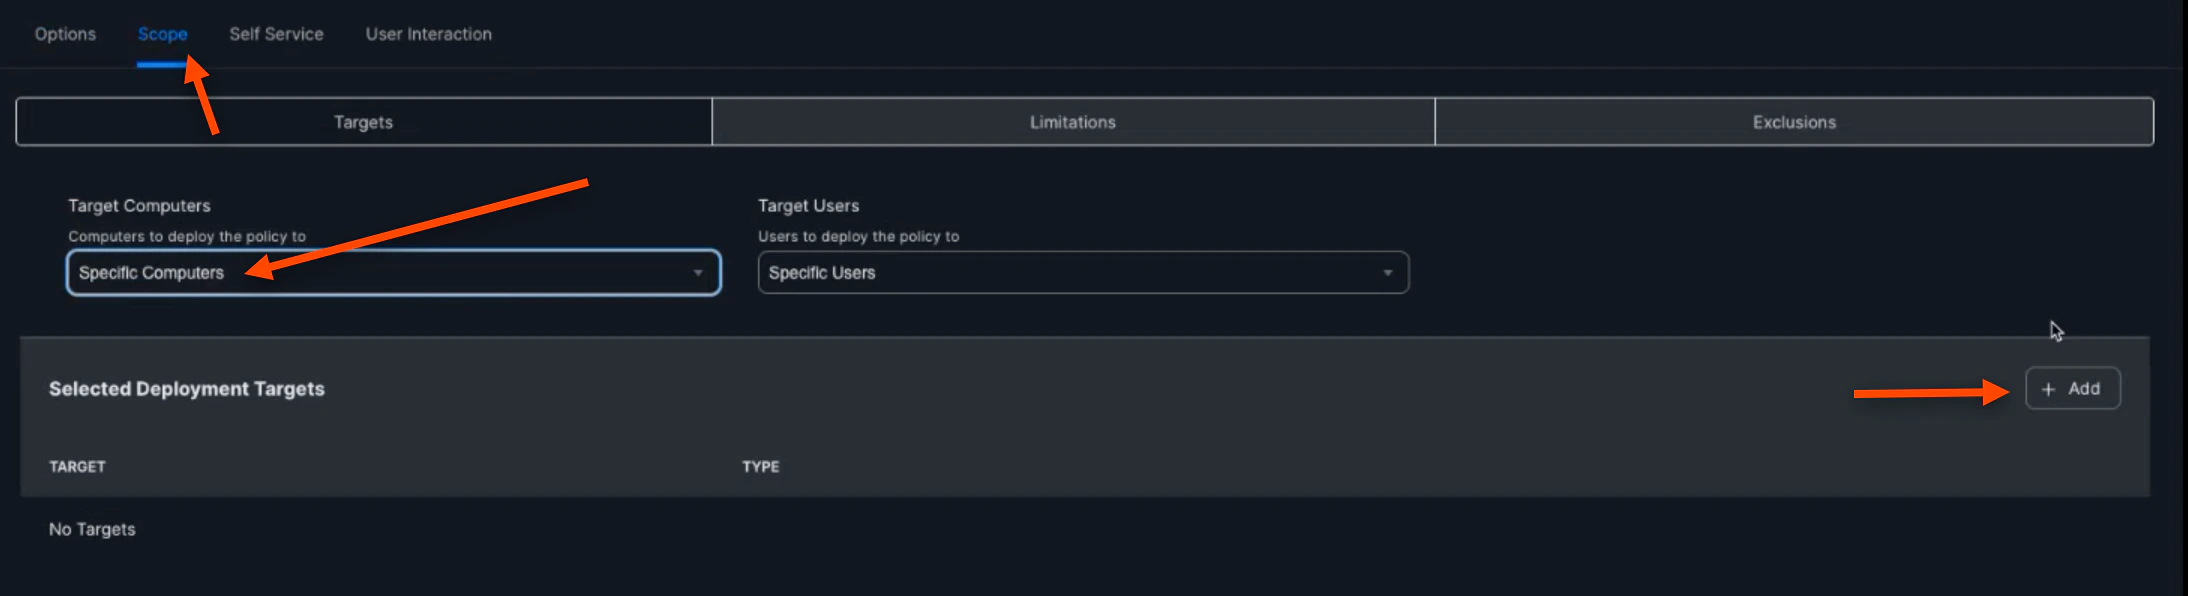
-
You are then able to scope on specific computers, specific computer groups, users, etc. to apply this policy to

-
Lastly, open your “Terminal” Application and enter this code to run the policy:
- Once run, you will be able to begin the enrollment process
Manually Adding a Device to Apple Business Manager Mac Authenticator Uninstallation